1. Įvadas
Welcome to your Rollei 4K WiFi Trail Camera. This device is designed for capturing high-resolution photos and 4K videos of wildlife and for property surveillance. It features a 48 MP camera, 4K video recording, precise motion detection, night vision, and WiFi/Bluetooth connectivity for smartphone control. The camera is built to be durable and weather-resistant with an IP65 rating, ensuring reliable operation in various outdoor conditions.
2. Produktas baigtasview
2.1 Pakuotės turinys
Patikrinkite pakuotę, ar joje yra šie daiktai:
- Rollei 4K WiFi Trail Camera
- Tvirtinimo dirželis
- Sienos laikiklis
- Sraigtai ir sieniniai kištukai
- 8 AA baterijos
- USB kabelis
- Vartotojo vadovas

Image 2.1: Rollei 4K WiFi Trail Camera and included accessories, such as the mounting strap, wall bracket, and batteries.
2.2 Kameros komponentai
Familiarize yourself with the main parts of your camera.
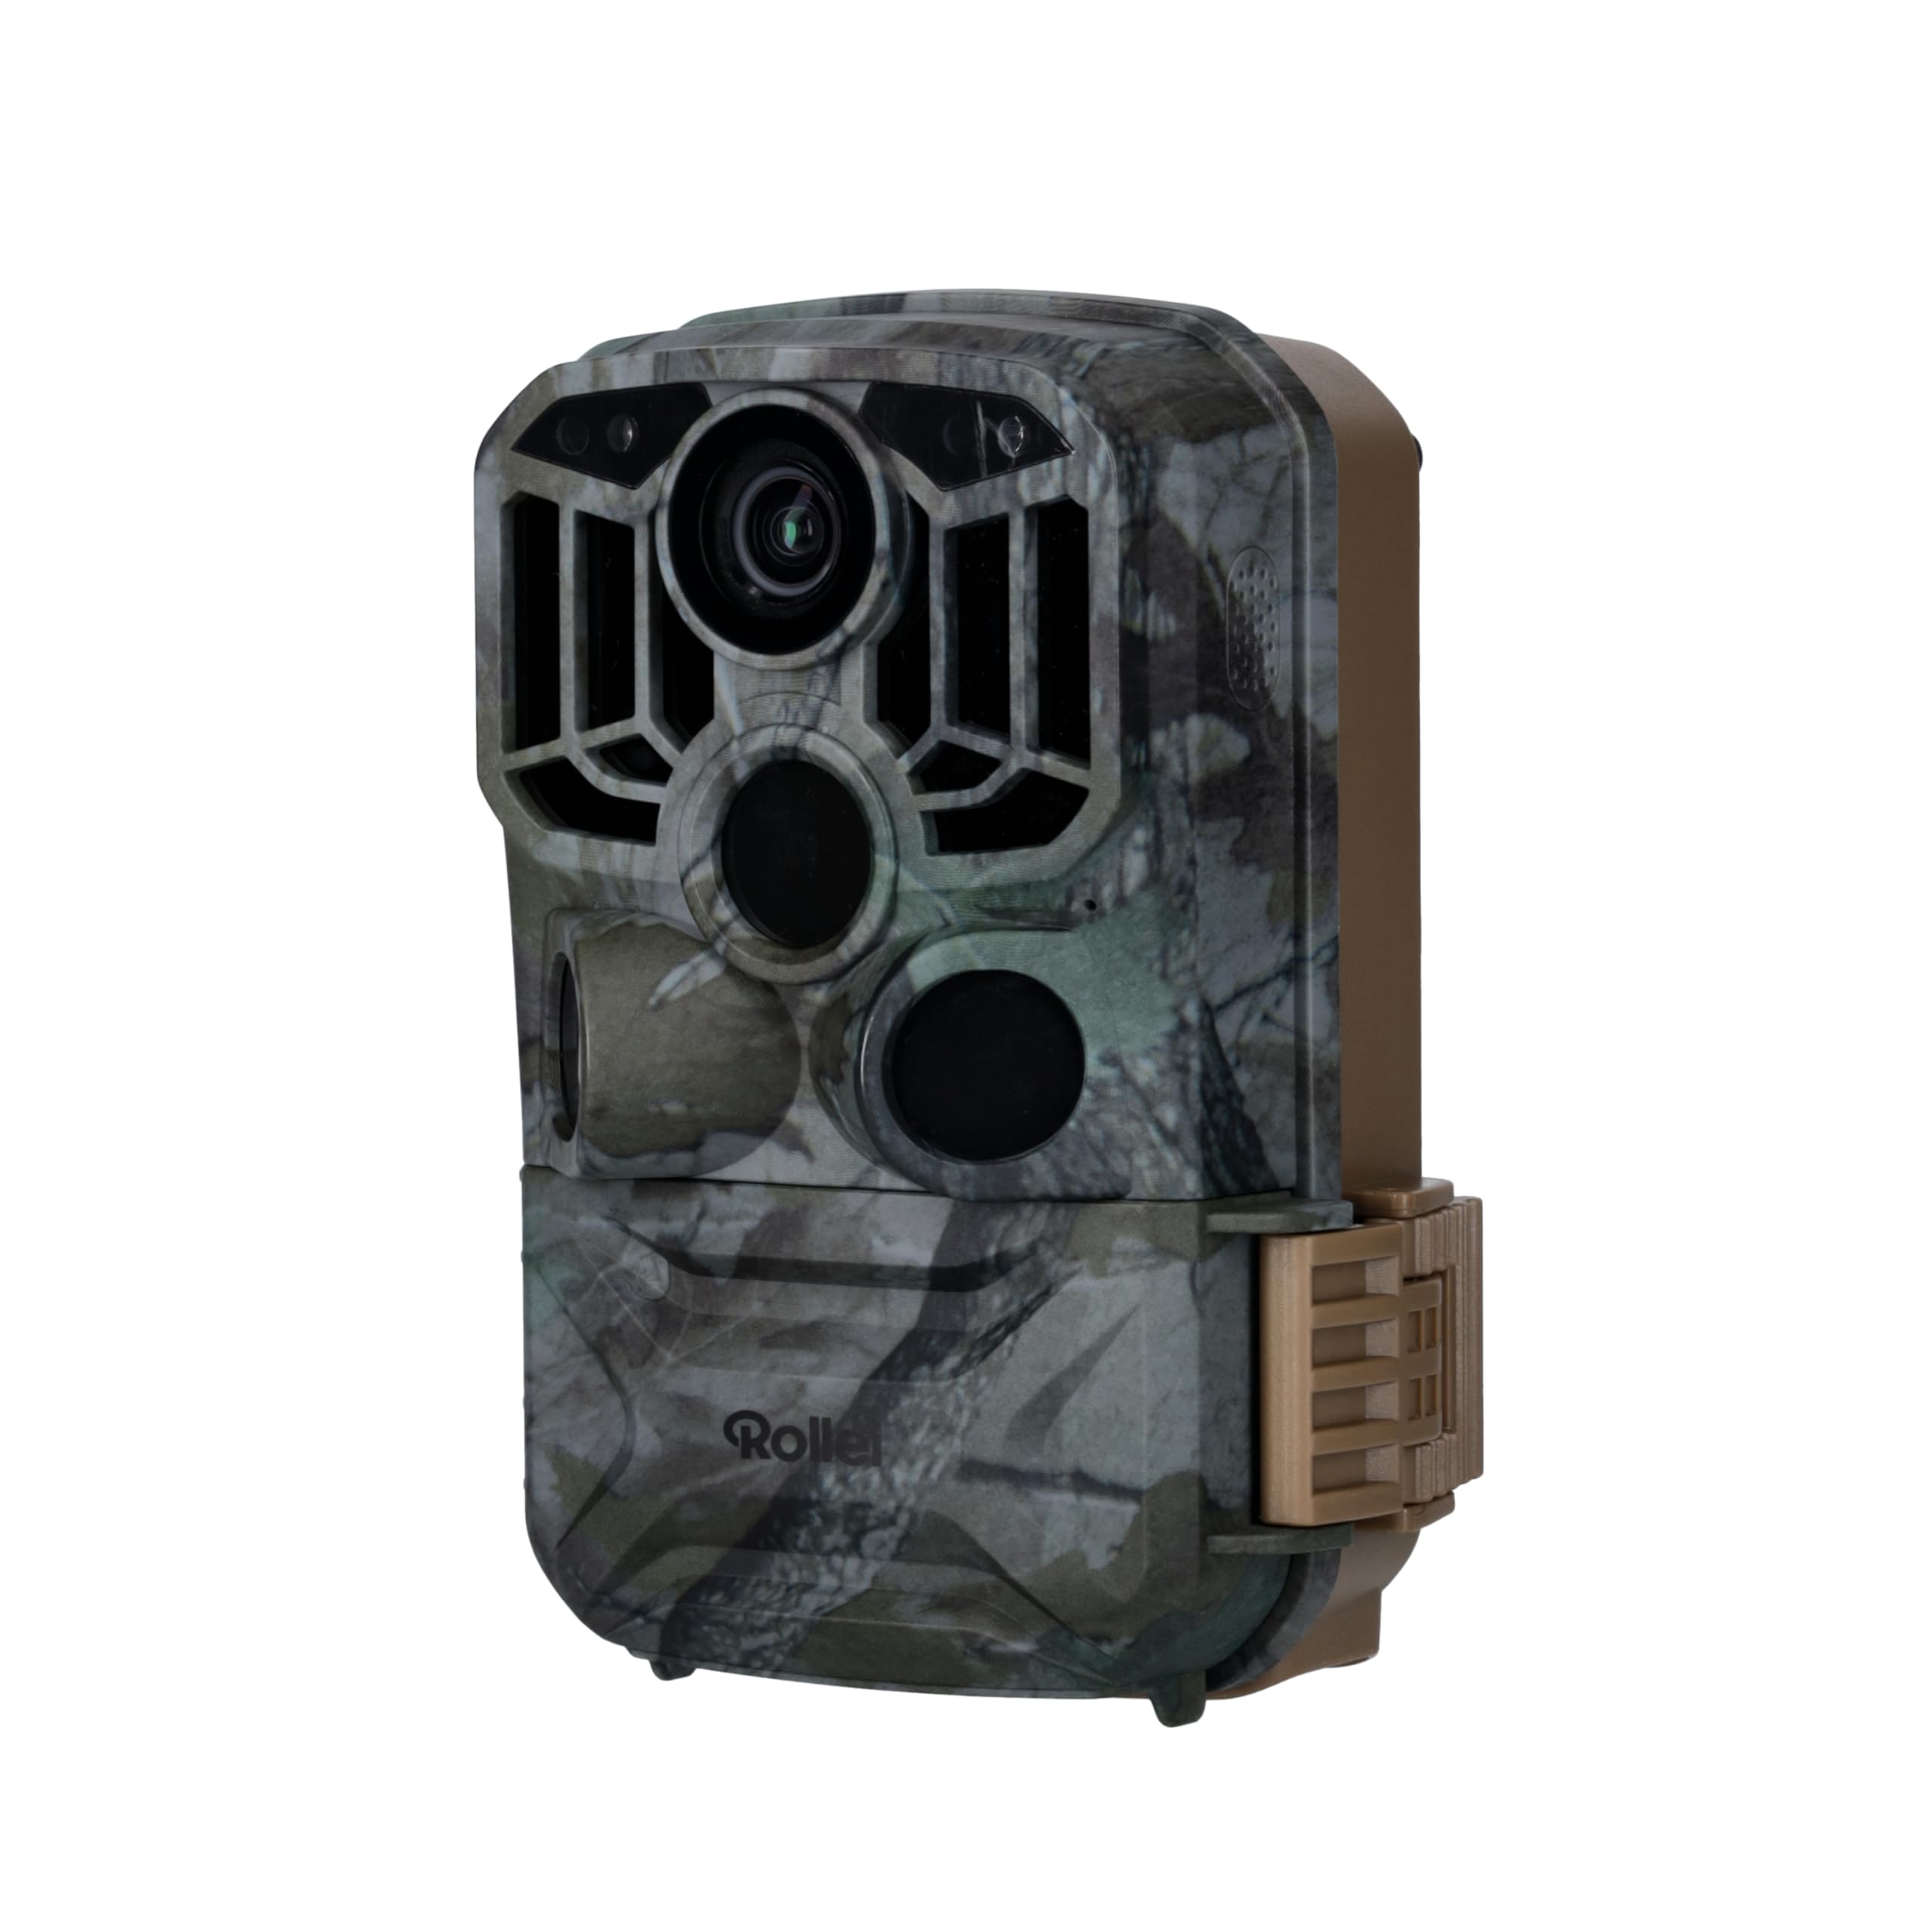
2.2 vaizdas: priekis view of the Rollei 4K WiFi Trail Camera, showing the main lens, three PIR sensors, and infrared LEDs for night vision.

2.3 pav.: Vidinis view of the camera, displaying the 2-inch TFT-LCD screen, control buttons (MODE, ON, SET, OFF, UP, OK, DOWN), and the Micro SD card slot.
- Pagrindinis objektyvas: Fotografuoja ir filmuoja.
- PIR jutikliai: Passive Infrared sensors for motion detection with a wide detection angle.
- Infraraudonųjų spindulių šviesos diodai: Provide illumination for night vision without disturbing wildlife.
- 2-inch TFT-LCD Screen: For menu navigation, previewing images/videos, and settings adjustment.
- Valdymo mygtukai: MODE, ON, SET, OFF, Up, OK, Down for camera operation and menu navigation.
- SD kortelės lizdas: For inserting a Micro SD card (up to 32GB, not included).
- Baterijų skyrius: Telpa 8 AA baterijos.
- USB prievadas: For connecting to a computer for data transfer or external power.
3. Sąranka
3.1 Baterijų įdėjimas
- Open the camera's latch and swing open the front cover to access the interior.
- Locate the battery compartment, typically at the bottom or back of the internal housing.
- Insert 8 AA alkaline batteries, ensuring correct polarity (+/-) as indicated inside the compartment.
- Tvirtai uždarykite baterijų skyriaus dangtelį, kad išlaikytumėte atsparumą vandeniui.
Note: The camera requires 8 AA batteries. Lithium batteries are recommended for extended cold weather performance and longer battery life.
3.2 Micro SD kortelės įdėjimas
- With the camera powered off, locate the Micro SD card slot, usually next to the control buttons.
- Insert a Micro SD card (Class 10 or higher, up to 32GB recommended) into the slot until it clicks into place.
- To remove the card, gently push it in again until it springs out, then pull it free.
Important: Format the Micro SD card in the camera's menu before first use to ensure compatibility and optimal performance.
3.3 Pradinis įjungimas ir pagrindiniai nustatymai
- Switch the camera to the "SET" position using the mode switch. The internal screen will turn on.
- Use the "Up" and "Down" buttons to navigate through the menu options.
- Press "OK" to select an option or enter a submenu.
- Press "MODE" to return to the previous menu or exit the current menu.
- Set the correct date, time, and preferred language for the camera.
- Format the Micro SD card through the menu system.
3.4 Fotoaparato montavimas
The camera offers flexible mounting options to suit various environments:

3.1 pav.: pvz.amples of mounting the camera using the included strap on a tree trunk and the wall mount bracket on a brick wall.
- Dirželio tvirtinimas: Thread the provided strap through the slots on the back of the camera and secure it tightly around a tree or pole.
- Montavimas ant sienos: Use the wall mount bracket and screws to attach the camera to a wall, fence, or other flat surface. Ensure the mounting surface is stable and secure.
Tip: Position the camera to avoid direct sunlight, which can cause overexposure, and ensure a clear, unobstructed view of the desired area for optimal motion detection.
4. Naudojimo instrukcijos
4.1 fotoaparato režimai
The camera has three main operating modes, selected via the mode switch:
- IŠJUNGTA: The camera is powered off. Use this mode when installing batteries or the SD card.
- NUSTATYTI: Configuration mode. Use this mode to adjust settings, view captured photos/videos, and connect to the smartphone application.
- ĮJUNGTA: Active mode. The camera will automatically detect motion and record photos or videos according to your configured settings.
4.2 Nuotraukų ir vaizdo įrašų įrašymas
In "SET" mode, you can configure various recording parameters:
- Nuotraukos raiška: Select from various resolutions, up to 48 MP, for detailed still images.
- Vaizdo įrašo raiška: Choose video quality, up to 4K, with audio recording capabilities.
- Nuotraukų serija: Set the number of photos (1-5) to be taken per trigger event.
- PIR intervalas: Define the time delay between consecutive motion detections to prevent excessive recordings.
- PIR jautrumas: Adjust the sensitivity of the PIR sensors (Low, Medium, High) based on the environment and desired detection range.
- Laiko tarpas: Configure the camera to take photos or videos at set intervals, useful for monitoring long-term events.
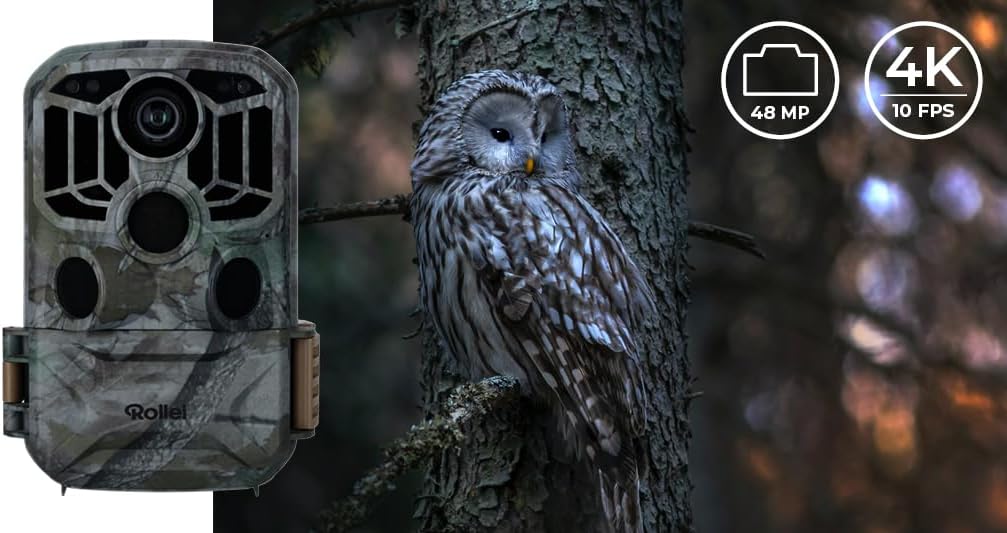
Image 4.1: The camera captures high-resolution images (48 MP) and 4K videos, suitable for detailed wildlife observation and surveillance.

Image 4.2: The camera features advanced night vision for clear black and white images in low light conditions, alongside vibrant daytime color captures.
4.3 WiFi and App Connectivity
The Rollei 4K WiFi Trail Camera can be controlled remotely via a smartphone application, allowing for convenient monitoring and management.
- Download the "Camera Trap Wireless" app from your smartphone's app store (available for iOS and Android).
- In "SET" mode on the camera, navigate to the WiFi/Bluetooth settings and activate the function.
- Open the app on your smartphone and follow the on-screen instructions to connect to the camera's WiFi network.
- Prisijungę galite view gyvas kvailystage, adjust camera settings, and download recordings directly to your phone without physically accessing the camera.

Image 4.3: Remote monitoring and control of the camera via the dedicated smartphone application, showing a live view of the camera's field.
The remote control range for WiFi/Bluetooth connectivity is up to 20 meters.
5. Priežiūra
5.1 Valymas
- Gently wipe the camera lens and PIR sensors with a soft, dry, lint-free cloth to remove dust, dirt, or moisture.
- Do not use abrasive cleaners, solvents, or harsh chemicals, as these can damage the camera's surfaces or coatings.
- Ensure the camera housing and all seals are free from debris to maintain its IP65 waterproof rating.
5.2 Akumuliatoriaus keitimas
Replace all 8 AA batteries when the low battery indicator appears on the screen or within the smartphone app. Always replace with a fresh set of high-quality alkaline or lithium batteries to ensure consistent performance and prevent power issues.
5.3 SD kortelės valdymas
- Regularly check the available storage space on your Micro SD card to prevent recording interruptions.
- Back up important recordings to a computer or other external storage device to avoid data loss.
- Format the Micro SD card periodically (e.g., monthly or after significant data transfer) through the camera's menu to ensure optimal performance and prevent potential data corruption.
6. Problemų sprendimas
| Problema | Galima priežastis | Sprendimas |
|---|---|---|
| Kamera neįsijungia. | Žemas arba išsikrovusios baterijos; neteisingas baterijų poliškumas. | Replace all batteries with new ones; ensure correct polarity according to the markings. |
| No photos/videos recorded. | SD card full or not formatted; camera in "SET" mode; PIR sensitivity too low; motion not detected. | Format SD card in camera; ensure camera is in "ON" mode; increase PIR sensitivity; check for obstructions. |
| Poor night vision images. | Obstruction in front of IR LEDs; object too close or too far from camera; low battery. | Clear obstructions; ensure objects are within optimal night vision range (approx. 20m); replace batteries. |
| Nepavyksta prisijungti prie „Wi-Fi“ / programėlės. | WiFi not activated on camera; smartphone out of range; app not installed correctly or outdated. | Activate WiFi in camera "SET" mode; move closer to camera (within 20m); reinstall or update the app. |
| Camera takes too many false triggers. | PIR sensitivity too high; camera pointed at moving branches or heat sources. | Decrease PIR sensitivity; reposition camera to avoid environmental triggers. |
7. Specifikacijos
| Funkcija | Detalė |
|---|---|
| Modelio pavadinimas | Wildkamera 4K WiFi |
| Modelio numeris | 20196 |
| Nuotraukų raiška | Iki 48 MP |
| Vaizdo raiška | 4K |
| Ekranas | 2-inch TFT-LCD Screen |
| Judesio aptikimas | 3 PIR Sensors, >120° detection angle |
| Trigerio greitis | 0.4 sekundžių |
| Naktinio matymo diapazonas | Iki 20 metrų |
| Ryšys | Wi-Fi, Bluetooth |
| Sandėliavimas | „Micro SD“ kortelė (iki 32 GB) |
| Maitinimo šaltinis | 8 AA baterijos (pridedamos) |
| Baterijos veikimo laikas | Approximately 8 months (depending on usage and settings) |
| Atsparumas vandeniui | IP65 |
| Matmenys (I x P x A) | 13.8 x 8.3 x 6.2 cm |
| Svoris | 500 gramų |
| Darbinė temperatūra | -20°C iki 60°C |
8. Garantija ir palaikymas
Rollei products are designed for reliability and performance. We are committed to providing excellent customer service.
- Garantija: This product comes with a standard manufacturer's warranty. Please refer to the warranty card included in your package or visit the official Rollei websvetainėje rasite išsamias sąlygas, susijusias su draudimo apsauga ir jos trukme.
- Atsarginių dalių prieinamumas: Spare parts for this model are available for approximately 2 years from the date of purchase. Please contact customer support for inquiries about spare parts.
- Klientų aptarnavimas: For technical assistance, troubleshooting, or warranty claims, please contact Rollei customer support. Contact information can be found on the official Rollei websvetainė (www.rollei.com) or in your product documentation.