
1. Įvadas
Thank you for choosing the HITRENDS Outdoor Digital Timer TE-HD01. This manual provides detailed instructions for the safe operation, setup, programming, and maintenance of your new timer. Please read this manual thoroughly before use to ensure proper functionality and to prevent damage.

Image 1.1: HITRENDS Outdoor Digital Timer TE-HD01. This image displays the main unit of the digital timer, featuring its LCD screen, control buttons, two grounded outlets, and a flexible power cord with a three-prong plug.
2. Svarbios saugos instrukcijos
Kad sumažintumėte elektros smūgio, gaisro ar sužalojimo riziką, visada laikykitės šių pagrindinių saugos priemonių:
- Perskaitykite visas instrukcijas: Familiarize yourself with the product before operation.
- Tik lauke: This timer is designed for outdoor use. Ensure it is installed in a location protected from direct heavy rain or standing water.
- Įžeminti lizdai: Always plug the timer into a grounded 3-prong outlet. Do not remove the grounding prong.
- Elektrinis įvertinimas: Do not exceed the electrical rating of 15A, 1875W, 1/2 HP. Overloading can cause overheating and fire.
- Saugus montavimas: Mount the timer securely using the integrated mounting hole to prevent it from falling or being submerged.
- Saugokite vaikus: Tai ne žaislas. Saugoti nuo vaikų.
- Atjunkite maitinimą: Always unplug the timer from the power source before cleaning or performing any maintenance.
- Venkite žalos: Do not use if the timer, cord, or plug is damaged. Contact customer support for assistance.
3. Produktas baigtasview
The HITRENDS Outdoor Digital Timer TE-HD01 features a clear LCD display and intuitive buttons for easy programming. It includes two grounded outlets for connecting your devices.
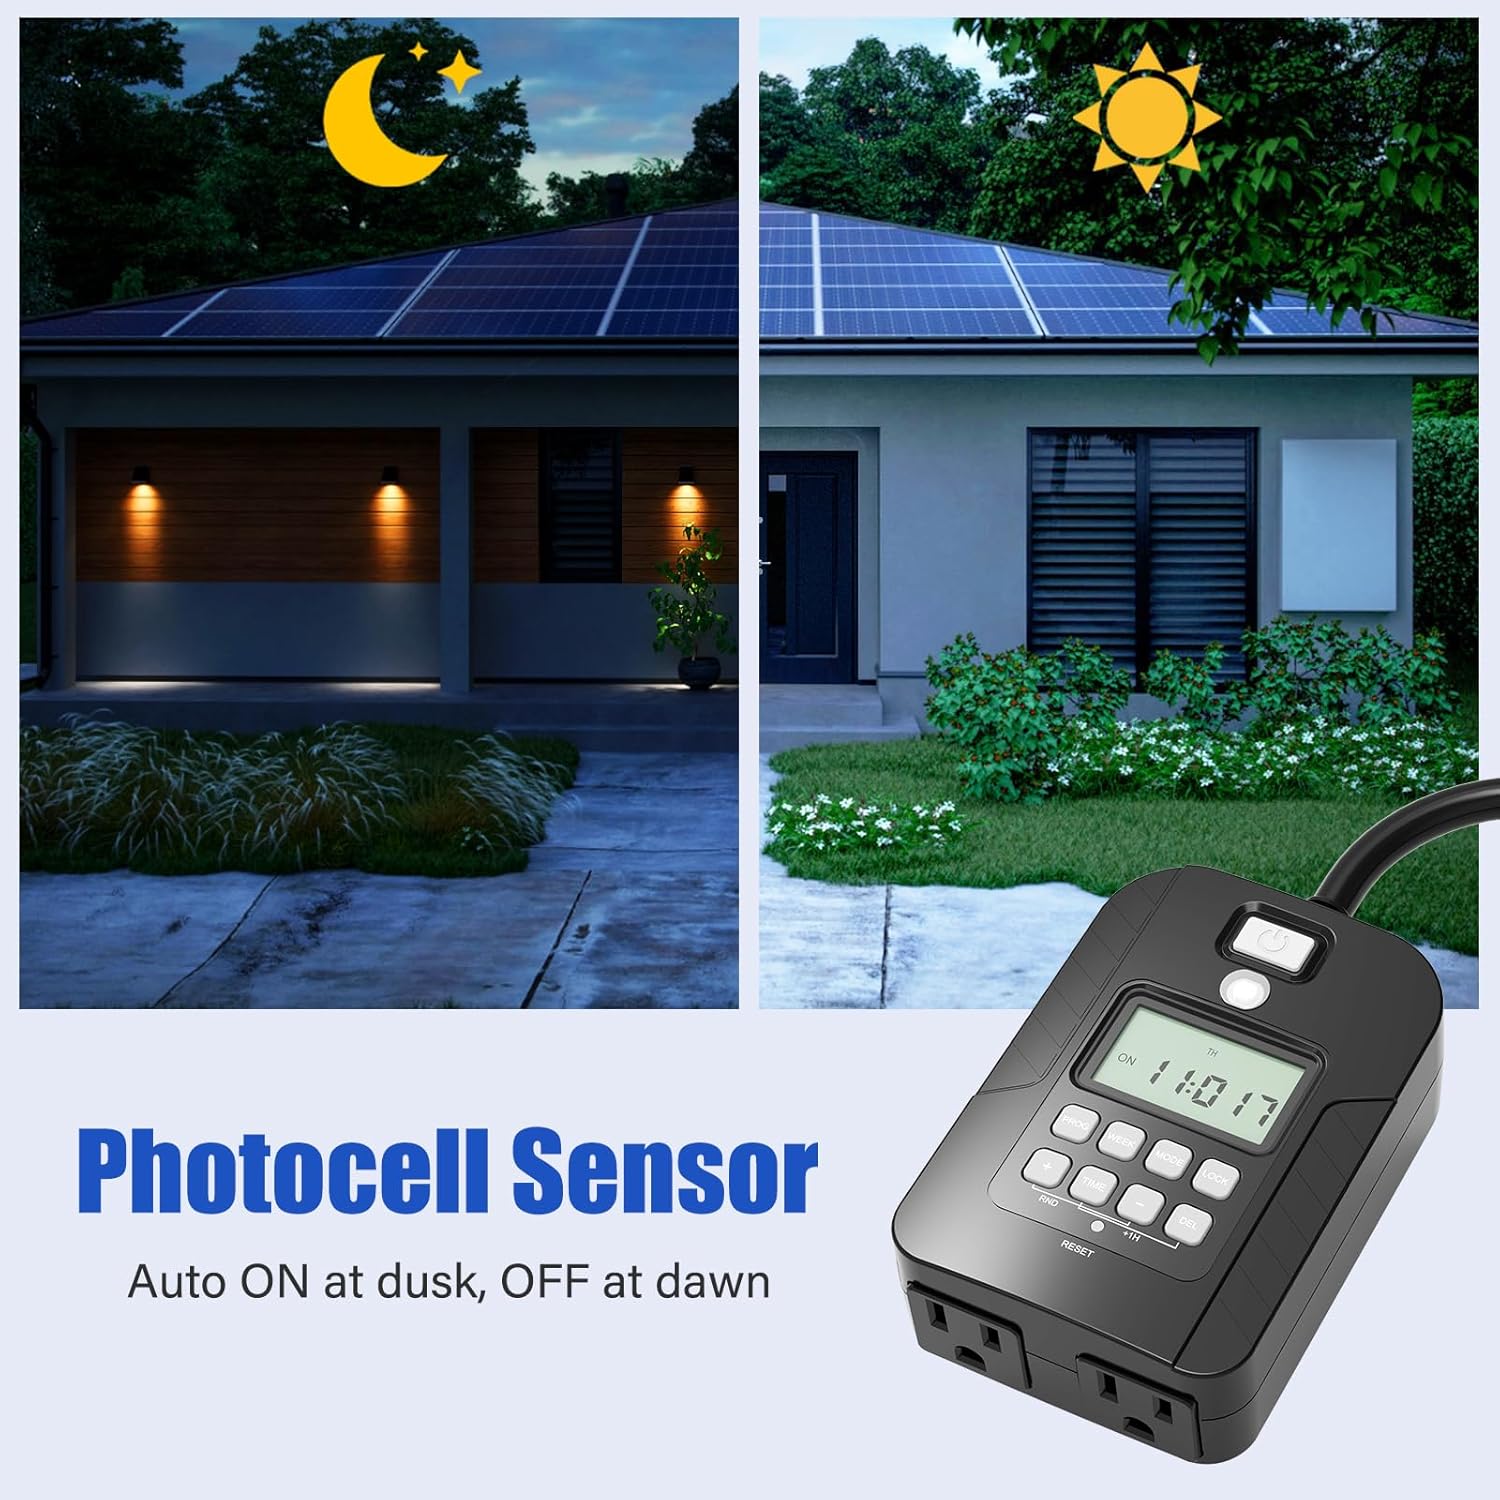
Image 3.1: Product Buttons Overview. This image highlights the various buttons and their labels on the digital timer's control panel, along with the light sensor and power button.
Mygtukai ir funkcijos:
- Maitinimo mygtukas: Press and hold for 3 seconds to switch between Auto, Always ON, and Always OFF modes.
- Šviesos jutiklis: Automatically detects changes in ambient light levels to adjust the timer's operation accordingly (for Dusk to Dawn features).
- PROG (Programa): Press to enter the setting mode for programming schedules or to review existing schedules.
- SAVAITĖ: Use to select specific days of the week (MO, TU, WE, TH, FR, SA, SU) for the timer's operation.
- MODE: Press to switch between different operating modes (Timed Mode, Photocell + Countdown Mode, Photocell + Timed Mode).
- UŽRAKTAS: Press and hold for 10 seconds to lock the current settings, and press again for 10 seconds to unlock.
- LAIKAS: Press to adjust time settings; use in combination with the [+/-] buttons to set the hour and minutes.
- +/- mygtukai: Adjusts hours or minutes when configuring time settings.
- DEL (Delete): Norėdami iš naujoview a schedule, press PROG, then use the DEL button to delete the selected schedule.
- RND (Random): Įjungia arba išjungia atsitiktinio įjungimo/išjungimo funkciją.
- RESET (Recessed): A small, recessed button typically requiring a pointed object (like a pen tip) to press. Resets all settings to factory defaults.
4. Savybės
The HITRENDS Outdoor Digital Timer TE-HD01 offers a range of features designed for convenience and energy efficiency:
- 8 įjungimo/išjungimo programų: Set up to 8 distinct ON/OFF schedules daily or weekly.
- 7 dienų programuojamas: Customize schedules for individual days or groups of days.
- Sutemų iki aušros jutiklis: Automatic operation based on ambient light levels.
- Atsitiktinis režimas: Turns lights ON/OFF randomly to simulate occupancy for security.
- 2 įžeminti lizdai: Connect two devices simultaneously.
- Neperšlampamas dizainas: Patvari konstrukcija, tinkama lauko aplinkai.
- Į UL sąrašą įtraukta: Sertifikuota pagal saugos ir kokybės standartus.
- Didelis LCD ekranas: Easy-to-read screen for setting and monitoring.
- Atsarginė baterija: Išsaugo nustatymus išjungus maitinimątages.

Image 4.1: Key Features. This image illustrates the timer's waterproof rating, the presence of two grounded outlets, and its ETL Listed certification, indicating compliance with safety standards.

Image 4.2: Programmable Capabilities. This image highlights the timer's ability to handle 7 days and 16 groups of programmable settings, along with icons for countdown timer, waterproof, 15A/1875W capacity, and UL listing.
5. Pradinė sąranka
5.1. Dabartinio laiko ir dienos nustatymas
Before programming, ensure the timer's internal clock is set correctly.
- Plug the timer into a grounded outlet. The display will illuminate.
- Paspauskite ir palaikykite LAIKAS mygtuką 3 sekundes, kol pradės mirksėti valandų skaitmenys.
- Naudokite +/- mygtukais nustatykite valandas. Atkreipkite dėmesį į AM/PM indikatorius.
- Paspauskite LAIKAS button again to move to minutes. Use the +/- mygtukai minutėms reguliuoti.
- Paspauskite LAIKAS button again to move to the day of the week. Use the SAVAITĖ button to select the current day (MO, TU, WE, TH, FR, SA, SU).
- Paspauskite LAIKAS button once more to confirm and exit the time setting mode.
5.2. Laikmačio nustatymas iš naujo
If you encounter issues or wish to clear all previous settings, use the recessed RESET button. Insert a small, pointed object (like a paperclip or pen tip) into the RESET hole and press firmly. The display will reset, and you will need to set the current time and day again.
6. Veikimo režimai
The timer offers multiple operating modes to suit various needs. Press the REŽIMAS mygtuką, kad galėtumėte juos peržiūrėti.

Image 6.1: Display Mode Explanation. This image provides a table explaining the different display icons and their corresponding operating modes: Digital Timer, Photocell Countdown Timer, and Digital Timer + Photocell.
| Ekrano piktograma | Režimas | Paaiškinimas |
|---|---|---|
| Laikrodžio piktograma | Skaitmeninis laikmatis | Turns ON/OFF at your exact programmed times. |
| Sun/Moon icon | Fotoelementų atgalinės atskaitos laikmatis | Turns ON at Dusk or ON immediately, then OFF after a set duration (1-12 hours). |
| Clock + Sun/Moon icon | Digital Timer + Photocell | Turns ON at Dusk, then OFF at your exact programmed times. |
6.1. Dusk to Dawn Functionality
The integrated photocell sensor allows the timer to automatically activate at dusk and deactivate at dawn, or to combine this with programmed schedules.

Image 6.2: Photocell Sensor. This image shows the timer unit with an overlay indicating its photocell sensor functionality, allowing automatic operation based on light conditions (dusk to dawn).

Image 6.3: Dusk to Dawn Operation. This image visually represents the timer's dusk to dawn sensor, showing how it automatically turns lights on when it gets dark and off when it gets light.
6.2. Atsitiktinis režimas
Activate Random Mode (RND) to turn connected devices ON and OFF at irregular intervals, creating the impression that someone is home. This feature enhances security when you are away.
7. Programavimo instrukcijos
Laikmatis leidžia nustatyti iki 8 įjungimo/išjungimo programų. Kiekvieną programą galima nustatyti konkrečioms dienoms arba dienų grupėms.
7.1. Creating a New Program
- Paspauskite PROG button once. The display will show "1 ON" and the time will flash. This is your first ON program.
- Naudokite +/- buttons to set the desired ON hour.
- Paspauskite PROG again to set the minutes for the ON time. Use the +/- mygtukai.
- Paspauskite PROG again. The display will show the days of the week. Use the SAVAITĖ button to cycle through day options:
- PIR ANT TRE KET PEN ŠEŠ SEK (Kasdien)
- PIR ANT TRE KET PEN (Darbo dienomis)
- ŠEŠ SEK (savaitgaliai)
- MO MES FR
- TU TH SA
- MO TU WE TH FR SA
- Atskiros dienos (P, ANT, T, K, Pn, Š, S)
- Once the desired days are selected, press PROG. The display will now show "1 OFF" and the time will flash. This is your first OFF program.
- Repeat steps 2-4 to set the desired OFF time and days for this program.
- After setting the OFF time and days for Program 1, press PROG again to move to "2 ON" (Program 2 ON time).
- Repeat the process for up to 8 ON/OFF programs.
- Nustatę visas norimas programas, paspauskite LAIKAS mygtuką, kad išeitumėte iš programavimo režimo ir grįžtumėte į dabartinio laiko rodymą.
7.2. Reviewing and Deleting Programs
- Review: Paspauskite PROG button repeatedly to cycle through all set ON/OFF programs.
- Ištrinti: Nors viewing the specific ON or OFF program you wish to delete, press the DEL button. The program will be cleared.
8. Priežiūra
To ensure the longevity and proper functioning of your HITRENDS Outdoor Digital Timer TE-HD01, follow these maintenance guidelines:
- Valymas: Prieš valydami atjunkite laikmatį nuo maitinimo šaltinio. Nuvalykite išorę minkšta,amp audinys. Nenaudokite stiprių cheminių medžiagų ar abrazyvinių valiklių.
- Saugykla: If not in use for an extended period, store the timer in a cool, dry place away from direct sunlight and extreme temperatures.
- Patikra: Reguliariai tikrinkite maitinimo laidą ir kištuką, ar nėra kokių nors pažeidimų. Jei pastebėjote pažeidimų, nutraukite naudojimą ir susisiekite su klientų aptarnavimo tarnyba.
9. Problemų sprendimas
If you experience issues with your timer, refer to the following table for common problems and solutions.
| Problema | Galima priežastis | Sprendimas |
|---|---|---|
| Ekranas tuščias arba nereaguoja. | No power; internal battery depleted. | Ensure the timer is plugged into a live, grounded outlet. Allow it to charge for a few minutes. If still blank, perform a RESET. |
| Timer not turning ON/OFF at programmed times. | Incorrect current time/day; timer is not in AUTO mode; programs not set correctly; LOCK function active. | Verify current time and day are accurate. Press the Power button until "AUTO" is displayed. Review programs using the PROG button. Check if the LOCK function is active (press and hold LOCK for 10 seconds to unlock). |
| Settings are lost after a power outage. | Vidinė atsarginė baterija išsikrovusi arba jos įkrova maža. | The timer has a built-in backup battery. If settings are lost, the battery may need to charge. Keep the timer plugged in for several hours to fully charge the battery. |
| Dusk to Dawn feature not working. | Timer not in appropriate Photocell mode; light sensor obstructed. | Press MODE until a Photocell icon is displayed. Ensure the light sensor on the timer is not covered and is exposed to ambient light. |
| Cannot set or change programs. | LOCK function is active. | Paspauskite ir palaikykite UŽRAKTAS button for 10 seconds to unlock the timer. |
10. Specifikacijos
| Specifikacija | Detalė |
|---|---|
| Prekės ženklas | HITRENDS |
| Modelio numeris | TE-HD01 |
| Medžiaga | Plastikiniai |
| Gaminio matmenys | 2 "D x 5.7" P x 7" A |
| Nustatymų skaičius | 18 (8 ON/OFF programs, plus other modes) |
| Prekės svoris | 12 uncijos |
| Elektrinis įvertinimas | 15A, 1875W, 1/2 HP |
| Išparduotuvės | 2 įžeminti lizdai |
| Savybės | 7-Day Programmable, Dusk to Dawn Sensor, Random Mode, Waterproof, UL Listed |
11. Garantija ir klientų aptarnavimas
HITRENDS products are manufactured with quality and reliability in mind. This product comes with a standard manufacturer's warranty. For specific warranty details, technical assistance, or customer support, please refer to the contact information provided with your purchase or visit the official HITRENDS websvetainę.