
Įvadas
This manual provides detailed instructions for the installation, operation, and maintenance of your Aigo Q2507 Mini-Tower PC Case. Please read this manual thoroughly before beginning any installation to ensure proper assembly and safe usage. This PC case is designed to house standard desktop components, supporting M-ATX and ITX motherboards.
Saugos informacija
- Prieš montuodami arba išimdami bet kokius komponentus, visada atjunkite maitinimo šaltinį nuo sieninio lizdo, kad išvengtumėte elektros smūgio.
- Dėvėkite antistatinį riešo dirželį, kad išvengtumėte elektrostatinės iškrovos (ESD) žalos jautriems komponentams.
- Atsargiai elkitės su komponentais. Venkite tiesiogiai liesti kontaktų ar plokščių.
- Ensure all cables are routed properly and do not obstruct airflow or moving parts.
- Keep the case away from sources of heat, direct sunlight, and moisture.
- Do not attempt to modify the case structure, as this may void your warranty and pose safety risks.
Pakuotės turinys
Prašome patikrinti, ar pakuotėje yra visi reikalingi daiktai:
- Aigo Q2507 Mini-Tower PC Case
- Accessory kit (screws, standoffs, cable ties)
- Vartotojo vadovas (šis dokumentas)
Sąranka
1. Bylos rengimas
Before installation, remove both side panels of the case. Typically, these are secured with thumbscrews at the rear of the case.

Vaizdas: kampuotas view of the Aigo Q2507 Mini-Tower PC Case, showing the front panel and the side panel removed, revealing the internal structure.
2. Pagrindinės plokštės montavimas
- Install the necessary motherboard standoffs onto the motherboard tray. The Q2507 supports M-ATX and ITX motherboards.
- Atsargiai uždėkite pagrindinę plokštę ant atramų, sulygiuodami varžtų skyles.
- Pritvirtinkite pagrindinę plokštę pridėtais varžtais. Neperveržkite.

Vaizdas: vidinis view of the Aigo Q2507 PC Case, highlighting the motherboard tray area with pre-drilled holes for standoffs.
3. Atminties disko diegimas
The case supports 1 x SSD and 1 x HDD.
- Locate the drive bays. SSDs typically mount on the motherboard tray or dedicated brackets, while HDDs use a cage.
- Secure your SSD(s) and HDD(s) using the appropriate screws from the accessory kit.

Vaizdas: vidinis view of the Aigo Q2507 PC Case, showing the designated areas for installing storage drives (SSD and HDD).
4. Expansion Card Installation (VGA)
The case features 4 expansion slots.
- Remove the necessary slot covers from the rear of the case.
- Insert your graphics card (VGA) or other expansion cards into the corresponding PCIe slots on your motherboard.
- Secure the card(s) with screws. The maximum VGA length supported is 250 mm.

Image: Rear internal view of the Aigo Q2507 PC Case, showing the four expansion slots and the rear fan mount.
5. Aušinimo ventiliatoriaus montavimas
The case supports one 120 mm fan on the side and one 80 mm fan on the rear.
- Mount the fans to their designated positions using fan screws.
- Prijunkite ventiliatoriaus maitinimo laidus prie pagrindinės plokštės arba maitinimo šaltinio.

Image: Angled front-side view of the Aigo Q2507 PC Case, with an internal fan visible through the side panel vent.
6. Priekinio skydelio jungtys
Connect the front panel cables (USB 2.0, Audio, Microphone, Power button, Reset button, Power LED, HDD LED) to the corresponding headers on your motherboard. Refer to your motherboard manual for header locations.
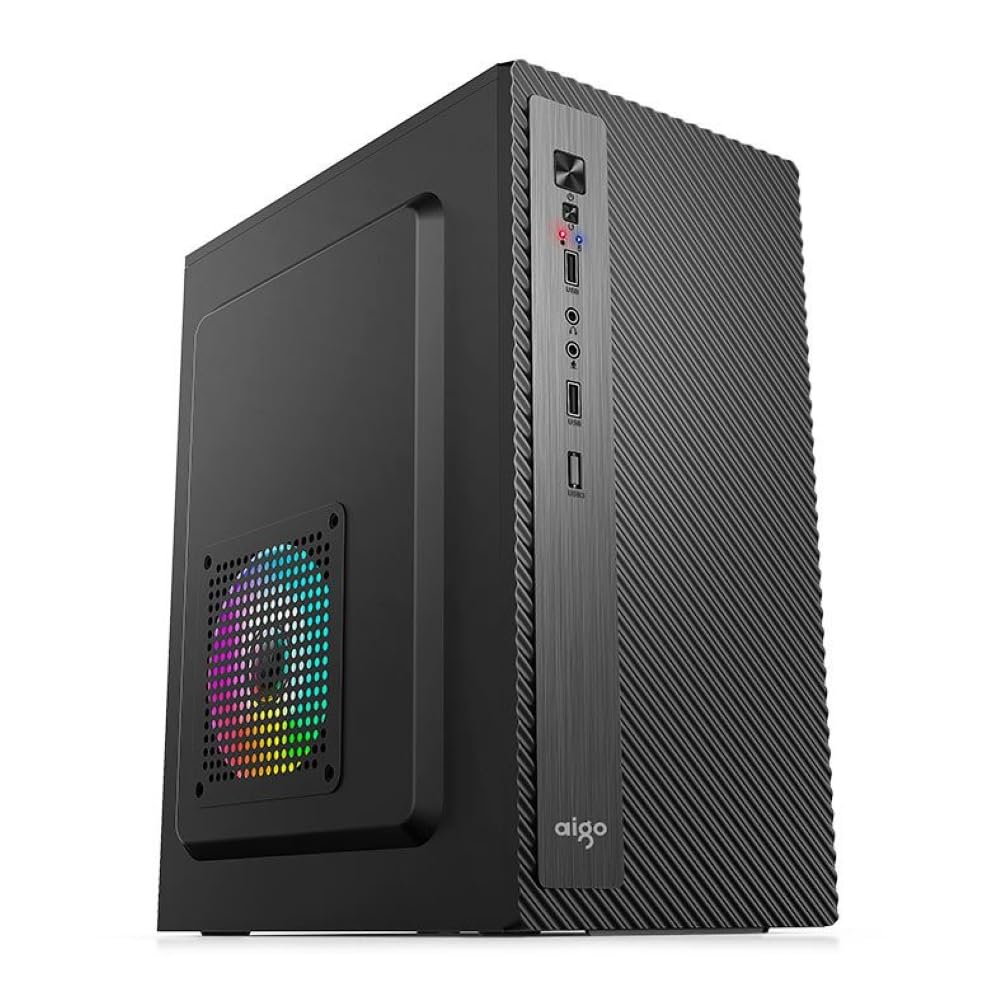
Vaizdas: Priekinis stambus planas view of the Aigo Q2507 PC Case, showing the front I/O panel with USB 2.0 ports, audio jacks, and power/reset buttons.
7. Kabelių valdymas
Route all cables neatly behind the motherboard tray or through designated cutouts to improve airflow and aesthetics. Use cable ties if necessary.
8. Bylos užbaigimas
Once all components are installed and cables are managed, reattach the side panels and secure them with the thumbscrews.
Veikiantis
After completing the setup, connect your monitor, keyboard, mouse, and power cable to your assembled PC. Press the power button on the front panel to start your system. Ensure all peripherals are functioning correctly.
Priežiūra
- Valymas: Regularly clean dust from the case interior and fan filters using compressed air or a soft brush. Dust buildup can impede airflow and lead to overheating.
- Oro srautas: Ensure the case has adequate ventilation. Do not block the air intake or exhaust vents.
- Kabelių valdymas: Periodically check cable routing to ensure no cables are interfering with fans or obstructing airflow.
Trikčių šalinimas
- Sistema neįsijungia: Check all power connections, including the power supply to the wall, motherboard 24-pin, and CPU 8-pin connectors. Ensure front panel power switch cable is correctly connected to the motherboard.
- Perkaitimas: Verify that all fans are spinning correctly and are not obstructed. Clean any dust buildup. Ensure proper thermal paste application on the CPU cooler.
- Nėra ekrano: Confirm that your graphics card is properly seated in its PCIe slot and that the monitor cable is securely connected to the graphics card.
- USB prievadai neveikia: Check the front panel USB cable connection to the motherboard header.
Specifikacijos

Image: Diagram illustrating the dimensions of the Aigo Q2507 Mini-Tower PC Case: 26.5 cm (depth) x 16.5 cm (width) x 34 cm (height).
| Funkcija | Specifikacija |
|---|---|
| Prekės ženklas | Aigo |
| Modelio pavadinimas | Q2507 |
| Atvejo tipas | Mini bokštas |
| Spalva | Juoda |
| Medžiaga | Steel Alloy, Tempered Glass (0.4mm SPCC) |
| Pagrindinės plokštės suderinamumas | M-ATX, Mini ITX |
| Vidinės pavaros skyriai | 1 x SSD, 1 x HDD (Total 2) |
| Išplėtimo lizdai | 4 |
| Priekinės įvesties / išvesties prievadai | 1 x USB 2.0, Microphone, Audio |
| Aušinimo būdas | Oras |
| Palaikomi gerbėjai | Side: 1 x 120 mm, Rear: 1 x 80 mm (Total 2) |
| Maksimalus procesoriaus aušintuvo aukštis | 150 mm |
| Maksimalus VGA ilgis | 250 mm |
| Matmenys (I x P x A) | 26.5 cm x 16.5 cm x 34 cm |
| Suderinami įrenginiai | Standard Desktop Components |
Garantija
This Aigo Q2507 Mini-Tower PC Case comes with a 12 mėnesių garantija from the date of purchase. This warranty covers manufacturing defects and material faults under normal use. It does not cover damage caused by misuse, accidents, unauthorized modifications, or improper installation. Please retain your proof of purchase for warranty claims.
Palaikymas
For technical assistance, warranty claims, or further inquiries, please contact your retailer or visit the official Aigo website for support resources. When contacting support, please have your product model (Q2507) and proof of purchase readily available.
Internetiniai ištekliai: www.aigo.com (Pvzampnuoroda, prašome patikrinti oficialią websvetainė)