
1. Produktas baigtasview
The Fuers H.265+ 8-Channel Security DVR Recorder (Model A1008CH) is a versatile surveillance solution designed for home and business security. This DVR supports various camera types including HD-CVBS, TVI, CVI, XVI, AHD, and IP analog cameras, allowing for flexible system expansion. It features H.265+ video compression for efficient storage and comes with a pre-installed 1TB hard drive for 24/7 recording.
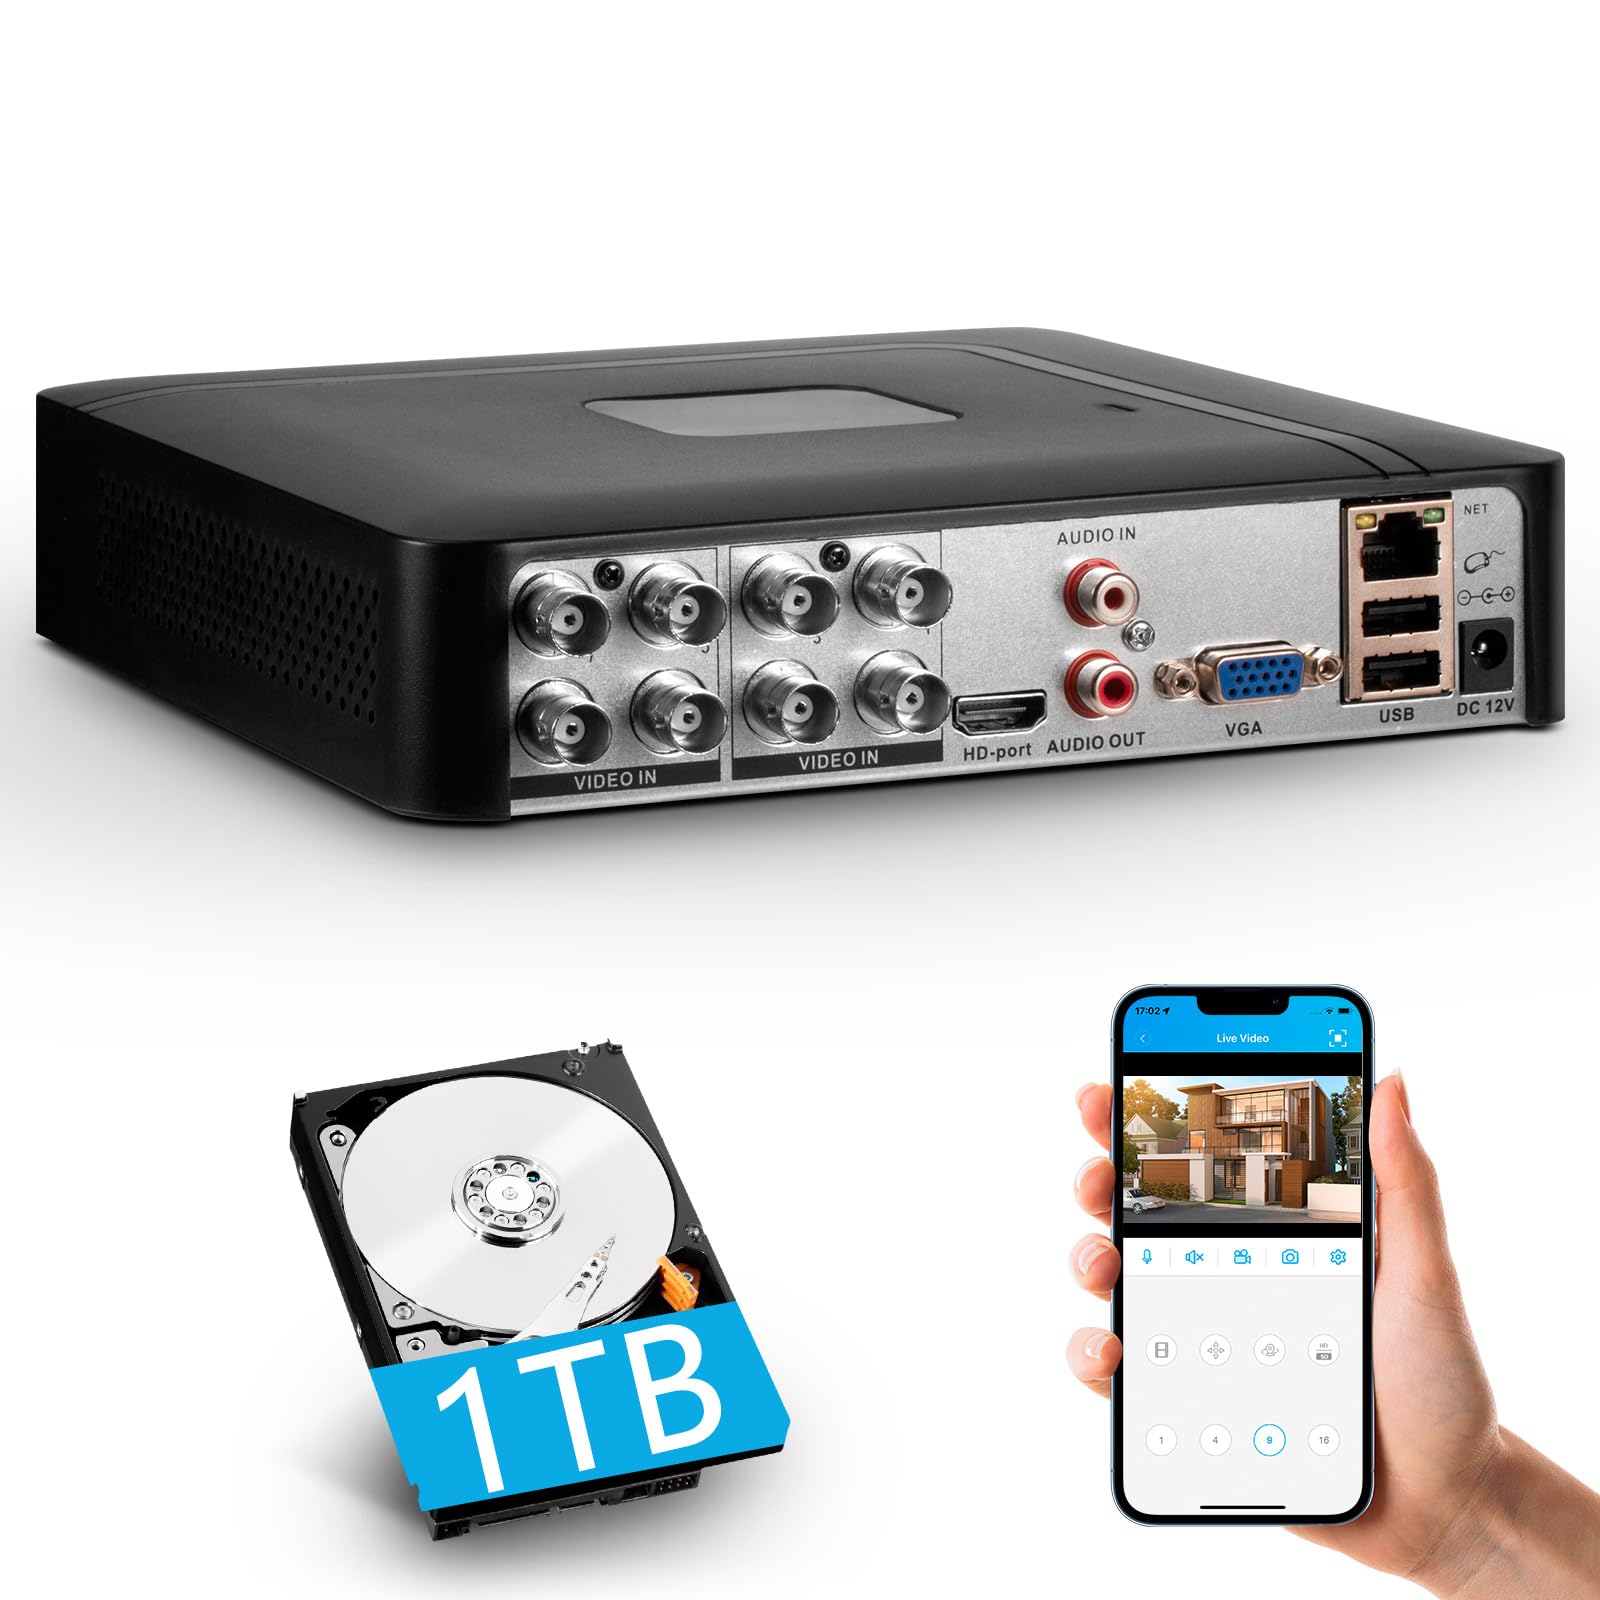
Image 1.1: Fuers H.265+ 8-Channel Security DVR Recorder.
Pagrindinės funkcijos:
- 8 kanalų sistema: Supports up to 8 cameras simultaneously, compatible with HD-TVI, CVBS, CVI, XVI, AHD, and IP cameras.
- H.265+ vaizdo glaudinimas: Offers extended recording time and saves up to 50% storage space compared to H.265 systems.
- Pre-installed 1TB HDD: Security-grade hard drive for continuous surveillance recording. Expandable up to 14TB via SATA port.
- Nuotolinė prieiga: View and manage your system remotely using the free iCSee App (iOS/Android) or VMS Client (Windows/Mac).
- Išmanusis judesio aptikimas: Receive mobile push notifications for detected motion types, including person and face detection.
- „Plug & Play“ sąranka: Easy connection with simultaneous VGA/HDMI output.
2. Sąranka ir diegimas
2.1 Kas yra dėžutėje
Prieš pradėdami, įsitikinkite, kad yra visi komponentai:
- 1x A1008 8 kanalų vaizdo registratorius
- 1x 1TB HDD (Pre-installed on DVR)
- 1x DVR Power Adapter
- 1x USB pelė
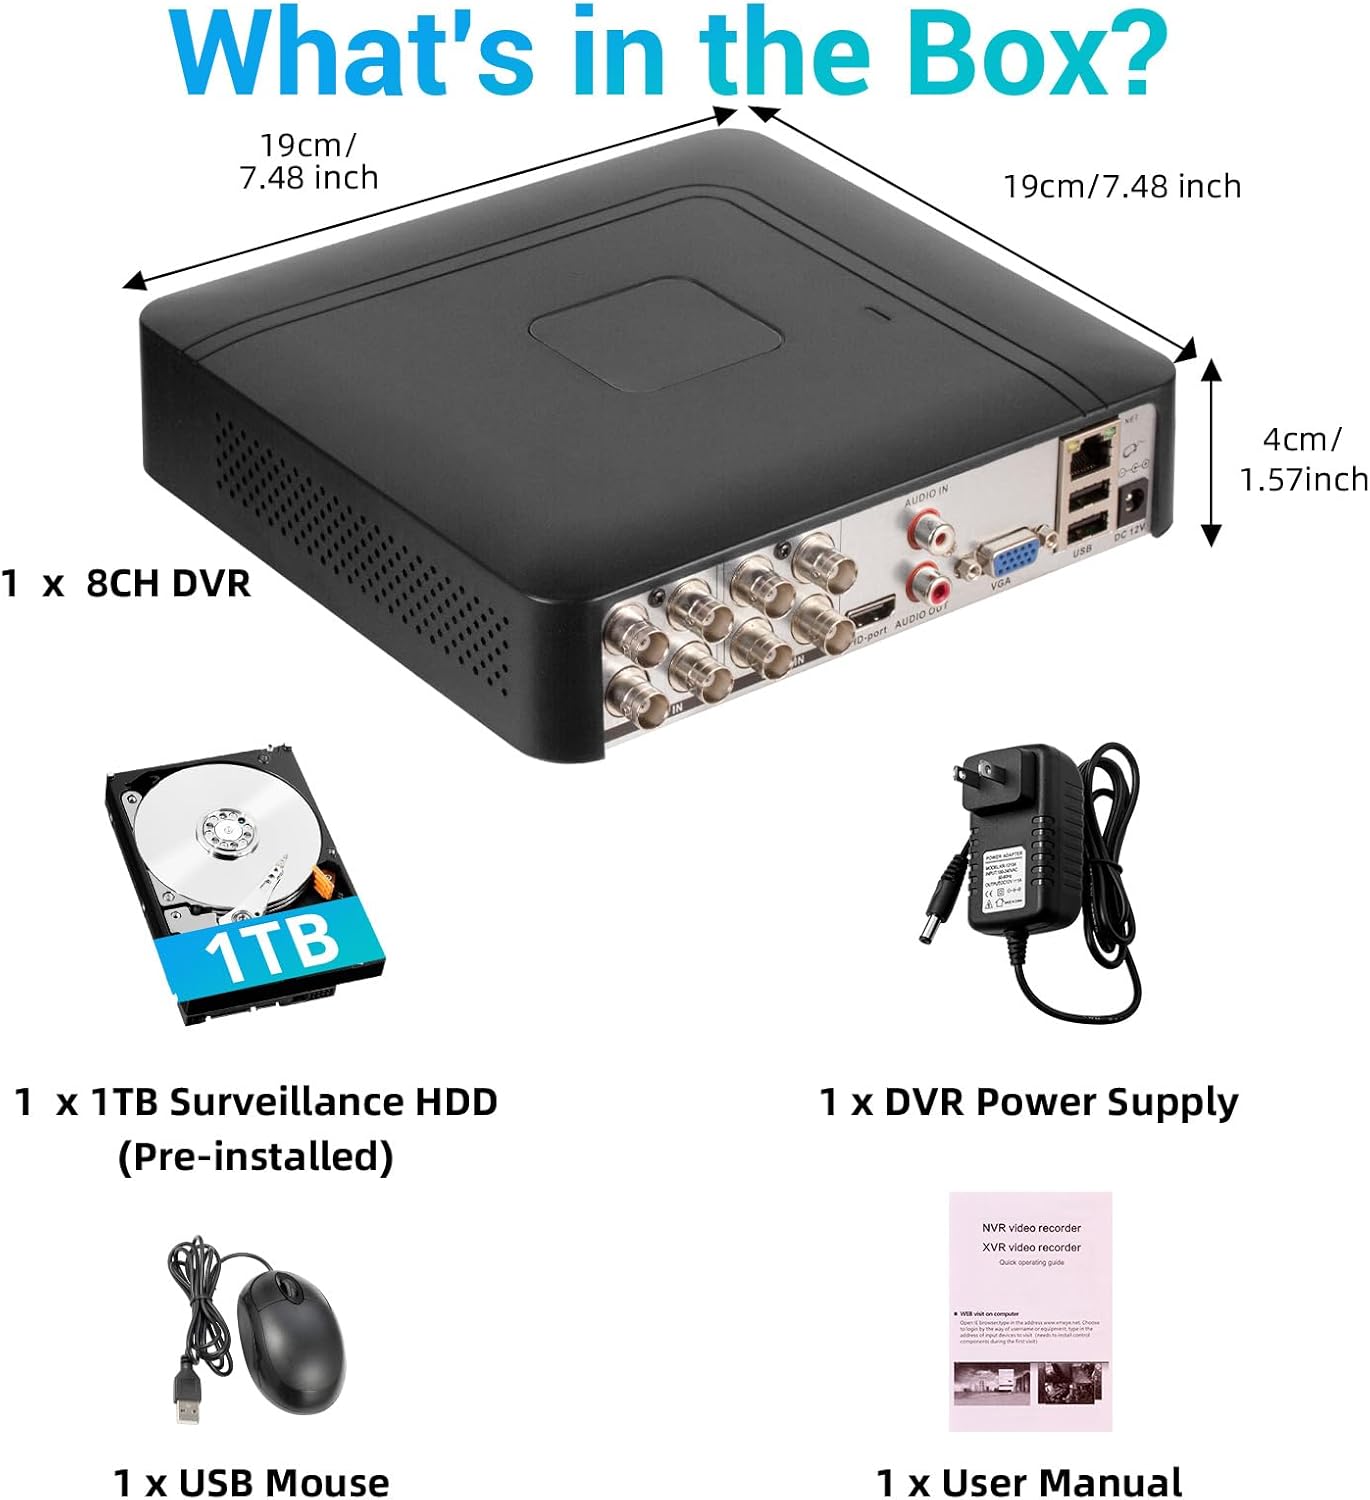
2.1 pav.: Produkto pakuotės turinys.
2.2 Hard Drive Installation (if not pre-installed or for upgrade)
The DVR comes with a pre-installed 1TB HDD. If you need to replace or upgrade the hard drive (up to 14TB), follow these steps:
- Unscrew the bottom cover of the DVR unit.
- Atsargiai atidarykite c.asing.
- Connect the SATA data cable and power cable from the DVR to the new hard drive.
- Secure the hard drive within the casing using the provided screws.
- Uždarykite DVR casing ir pritvirtinkite varžtais.

Image 2.2: Hard drive installation and expansion options.
2.3 Connecting the DVR System
Norėdami prijungti DVR sistemą, atlikite šiuos veiksmus:
- Prijungti kameras: Connect your security cameras to the 'VIDEO IN' ports on the back of the DVR using BNC cables.
- Prijungti monitorių: Connect a monitor to the DVR using either the HDMI or VGA port.
- Prijunkite USB pelę: Prijunkite pridedamą USB pelę prie vieno iš DVR USB prievadų.
- Connect Network (Optional for Remote Access): Nuotoliniam viewing and notifications, connect an Ethernet cable from your router to the 'NET' port on the DVR.
- Maitinimas: Connect the DVR power adapter to the 'DC 12V' port and then plug it into a power outlet.

Image 2.3: Connecting cameras and network to the DVR.
2.4 Initial Setup and Channel Type Selection
Upon first power-on, the system may prompt for initial setup. You may need to select the appropriate channel type for your cameras.
- Right-click on the screen to access the Main Menu.
- Eikite į Sistema > Skaitmeninis > Kanalo tipas.
- Select the configuration that matches your camera setup:
- First row: Supports 8 XVI, CVBS, AHD, TVI, CVI coaxial cameras.
- Second row: Supports 8 XVI, CVBS, AHD, TVI, CVI coaxial + 4 IP cameras.
- Third row: Supports 16 1080P IP cameras.
- Fourth row: Supports 16 5MP IP cameras.
- Spustelėkite OK to apply changes. The system may restart.

Image 2.4: DVR Channel Type selection screen.
3. Naudojimo instrukcijos
3.1 Tiesiogiai View ir Įrašymas
Once the DVR is powered on and cameras are connected, you should see the live feed on your connected monitor. The system is configured for 24/7 recording to the pre-installed 1TB hard drive.

3.1 paveikslas: Tiesioginis vaizdas view of multiple camera feeds.
3.2 Remote Access via Mobile App
To access your DVR remotely, download the free iCSee App (for iOS/Android) or VMS Client (for Windows/Mac).
- Download the iCSee App from your device's app store.
- Atidarykite programėlę ir užregistruokite paskyrą, jei jos dar neturite.
- In the DVR's main menu, navigate to Informacija > Versija to find the DVR's QR code.
- Use the iCSee app to scan the QR code to add your device.
- Pridėjus, galite view live feeds, playback recordings, and receive alerts from anywhere with an internet connection.

Image 3.2: Steps for remote access via mobile app.
3.3 Playback Recorded Footage
Norėdami iš naujoview įrašytas vaizdo įrašas:
- Right-click on the screen to access the Main Menu.
- Pasirinkite Įrašas > Atkūrimas.
- Choose the desired channel(s) and date/time range for playback.
- Spustelėkite Pradėti atkūrimą į view kvailystage.

Image 3.3: Playback interface with timeline.
3.4 Motion Detection Alerts
The DVR supports intelligent motion detection, including person and face detection. When motion is detected, you can receive instant mobile push notifications.
- Configure motion detection settings in the DVR's Signalizacija meniu.
- Ensure your mobile app is properly linked and notifications are enabled.

Image 3.4: Human and face detection in action.
4. Priežiūra
4.1 Kietojo disko valdymas
Iš anksto įdiegtas 1 TB kietasis diskas suteikia ample storage. Due to H.265+ compression, storage is optimized. If more storage is needed, you can replace the internal HDD with a larger one (up to 14TB). Regularly check the hard drive status in the DVR's system settings to ensure optimal performance.
4.2 Bendroji priežiūra
- Keep the DVR in a cool, dry, and well-ventilated area.
- Avoid exposing the unit to direct sunlight, extreme temperatures, or moisture.
- Clean the exterior of the DVR with a soft, dry cloth. Do not use liquid cleaners.
- Įsitikinkite, kad visos kabelių jungtys yra saugios.
5. Problemų sprendimas
5.1 No Video Output on Monitor
- Check if the DVR is powered on and the power adapter is securely connected.
- Verify the HDMI or VGA cable connection between the DVR and the monitor.
- Ensure the monitor is set to the correct input source (HDMI/VGA).
5.2 Nerodomi kamerų vaizdai
- Check all camera power and video cable connections.
- Verify that the camera type (AHD, TVI, CVI, etc.) is compatible with the DVR.
- Ensure the correct channel type is selected in the DVR settings (refer to Section 2.4).
- Test cameras individually if possible to isolate the issue.
5.3 Nuotolinė prieiga neveikia
- Confirm the DVR is connected to the internet via an Ethernet cable.
- Patikrinkite maršrutizatoriaus interneto ryšį.
- Ensure the iCSee app is updated to the latest version.
- Verify that the DVR was added correctly to the app by scanning the QR code.
- For some networks, you might need to adjust router settings (e.g., port forwarding), consult your network administrator or ISP.
6. Specifikacijos
| Funkcija | Detalė |
|---|---|
| Prekės ženklas | „Fuers“ |
| Modelio numeris | A1008CH |
| Kanalų skaičius | 8 |
| Ryšio technologija | HDMI, USB, VGA |
| Suderinami įrenginiai | Stalinis kompiuteris, planšetinis kompiuteris, fotoaparatas, išmanusis telefonas |
| Gaminio matmenys | 7.48 colio ilgio x 7.48 colių pločio x 1.57 colio aukščio |
| Atminties talpa | 1 TB (iš anksto įdiegta) |
| Hard-Drive Size | 1 TB (Expandable up to 14 TB) |
| Media Format Digital Video | H.265 + |
| Vaizdo įvestis | AHD, CVI, HDMI, HDTVI, IP Input, VGA |
| UPC | 765142240850 |
7. Garantija ir palaikymas
7.1 Gaminio garantija
This Fuers DVR Recorder is covered by a standard manufacturer's warranty. Please refer to the warranty card included with your product or visit the official Fuers webIšsamias garantijos sąlygas ir nuostatas rasite svetainėje. Išsaugokite pirkimo kvitą kaip pirkimo įrodymą garantijos pretenzijoms.
7.2 Techninė pagalba
For technical assistance, troubleshooting, or any questions regarding your Fuers DVR, please contact Fuers customer support. Contact information can typically be found on the product packaging, the official Fuers websvetainėje arba per savo mažmenininką.
Internetiniai ištekliai:
- Aplankykite „Fuers“ parduotuvė „Amazon“ platformoje dėl produkto informacijos ir atnaujinimų.