KEENSTAR ST-265TC
KEENSTAR ST-265TC Touch Screen 2-Slice Toaster
Model: ST-265TC
1. Svarbios apsaugos priemonės
Naudojant elektros prietaisus, visada reikia laikytis pagrindinių saugos priemonių, įskaitant:
- Prieš naudodami skrudintuvą, perskaitykite visas instrukcijas.
- Nelieskite karštų paviršių. Naudokite rankenas arba rankenėles.
- Kad apsisaugotumėte nuo elektros smūgio, nemerkite laido, kištuko ar skrudintuvo į vandenį ar kitą skystį.
- Atidžiai prižiūrėti būtina, kai bet kurį prietaisą naudoja vaikai arba jį naudoja šalia vaikų.
- Ištraukite kištuką iš elektros lizdo, kai nenaudojate ir prieš valydami. Prieš uždėdami arba nuimdami dalis, leiskite atvėsti.
- Nenaudokite prietaiso, kurio laidas ar kištukas pažeistas, arba po to, kai prietaisas neveikia arba buvo kaip nors sugadintas.
- Neleiskite laidui kaboti virš stalo ar prekystalio krašto ir neliesti karštų paviršių.
- Nedėkite ant įkaitusios dujinės ar elektrinės viryklės ar šalia jos, taip pat į įkaitintą orkaitę.
- Nenaudokite skrudintuvo ne pagal paskirtį.
- Į skrudintuvą negalima dėti didelių maisto produktų, metalinės folijos pakuočių ar stalo įrankių, nes jie gali sukelti gaisrą ar elektros smūgį.
- Gaisras gali kilti, jei skrudintuvai yra uždengti arba liečiasi su degiomis medžiagomis, įskaitant užuolaidas, užuolaidas, sienas ir panašius dalykus.
- Nemėginkite išjudinti maisto, kai skrudintuvas įjungtas.
- Šis prietaisas skirtas tik buitiniam naudojimui.
2. Produktas baigtasview
The KEENSTAR ST-265TC is a modern 2-slice toaster featuring a touch screen interface for precise control over your toasting preferences. It includes wide slots to accommodate various bread types and a removable crumb tray for easy cleaning.
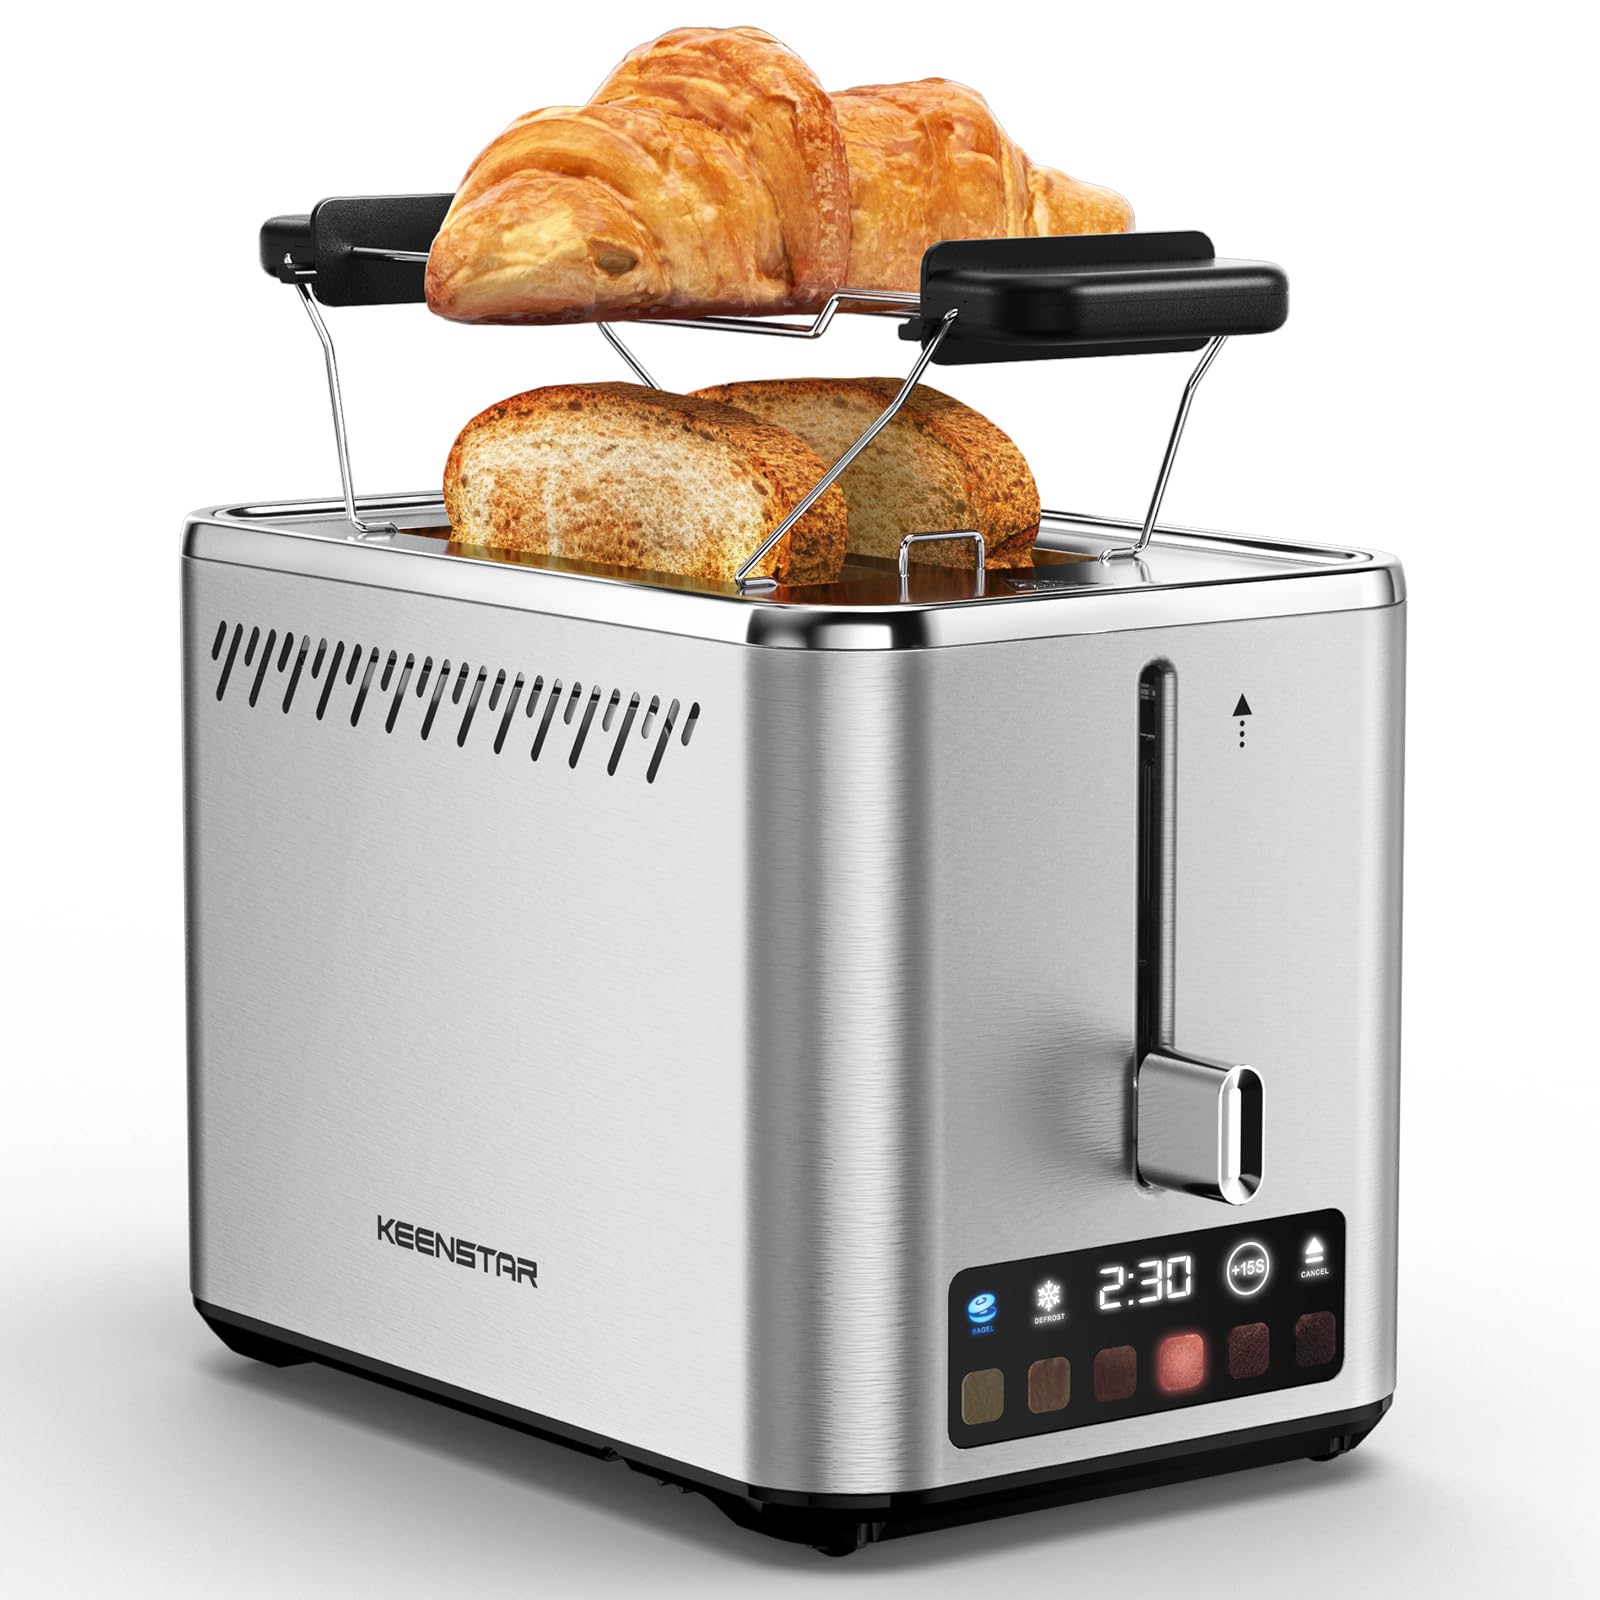
Image: KEENSTAR ST-265TC 2-Slice Toaster in silver stainless steel.
3. Sąranka
Išpakavimas
Carefully remove the toaster and all packaging materials from the box. Ensure all accessories, including the warming rack, are present.
Įdėjimas
Skrudintuvą pastatykite ant stabilaus, lygaus, karščiui atsparaus paviršiaus, atokiau nuo degių medžiagų, tokių kaip užuolaidos ar sienos. Užtikrinkite tinkamą vėdinimą aplink prietaisą.
Pirmas naudojimas
Before toasting food for the first time, operate the toaster without bread on the highest browning setting (level 6) to burn off any manufacturing residues. A slight odor or smoke may be present; this is normal and will dissipate.
4. Naudojimo instrukcijos
Valdymo skydas baigtasview

Image: The toaster's smart touch control display showing 6 browning levels and extra functions like Bagel, Defrost, +15S, and Cancel.
Pagrindinis skrudinimas
- Insert up to two slices of bread into the wide 1.5-inch slots.
- Select your desired browning level (1-6) by touching the corresponding icon on the display. Level 1 is the lightest, and Level 6 is the darkest.
- Press the lever down until it locks into place. The digital display will show a countdown timer.
- The toast will automatically pop up when the cycle is complete.

Image: Visual guide showing the steps for easy toaster operation: 1. Put bread in slots, 2. Select browning level and function, 3. Press the lever down, 4. Enjoy delicious bread.
Bagelio funkcija
This function is designed to toast the cut side of bagels while gently warming the outer side.
- Insert bagel halves into the slots with the cut side facing outwards.
- Pasirinkite norimą apskrudimo lygį.
- Palieskite BAGELIS button on the display. It will illuminate.
- Press the lever down until it locks.

Image: The toaster's display showing the illuminated BAGEL mode. BAGEL mode toasts one side only; place the cut side facing outward.
Atitirpinimo funkcija
Use this function to toast frozen bread without pre-thawing.
- Įdėkite šaldytą duoną į angas.
- Pasirinkite norimą apskrudimo lygį.
- Palieskite ATSILIEPUSI button on the display. It will illuminate.
- Press the lever down until it locks.

Image: The toaster's display showing the illuminated DEFROST mode. This mode allows you to cook frozen breads easily without guesswork.
+15S Function
If your toast is not quite browned enough after a cycle, you can add an additional 15 seconds of toasting time.
- After a toasting cycle, if more browning is desired, touch the +15S mygtuką.
- The toaster will initiate a 15-second toasting cycle.
Atšaukti funkciją
To stop the toasting cycle at any time, simply touch the ATŠAUKTI button. The lever will automatically raise, and the heating elements will turn off.

Image: The toaster's display highlighting the +15S button to increase baking time by 15 seconds, and the Cancel button to stop heating.
Šiltas stovas
The included warming rack can be used to warm pastries, croissants, or other items that cannot be placed directly into the toaster slots.
- Place the warming rack securely on top of the toaster, aligning it over the slots.
- Place the item to be warmed on the rack.
- Start a toasting cycle (without bread in the slots) to generate heat. The heat rising from the toaster will warm the item on the rack.
- Monitor the item closely to prevent over-warming or burning.

Image: The removable warming rack attached to the toaster, with a croissant placed on it for warming.
Produktų vaizdo įrašai
Video: Demonstrates the touchscreen and warming tray features of the KEENSTAR toaster.
Vaizdo įrašas: išsamus aprašymasview of the KEENSTAR Smart 2-Slice Toaster, highlighting its touch screen and various functions.
Video: Explores the key features and functionalities of the KEENSTAR toaster.
5. Priežiūra ir valymas
Bendras valymas
Always unplug the toaster from the power outlet and allow it to cool completely before cleaning. Wipe the exterior with a soft, damp šluoste. Nenaudokite abrazyvinių valiklių ar metalinių šiurkščių kempinių, nes jos gali subraižyti nerūdijančio plieno paviršių.
Trupinių dėklas
The removable crumb tray collects crumbs during toasting and should be emptied regularly to prevent fire hazards.
- Įsitikinkite, kad skrudintuvas yra atjungtas nuo elektros tinklo ir visiškai atvėsęs.
- Pull out the crumb tray located at the bottom rear of the toaster.
- Išmeskite trupinius ir nuvalykite padėklą skelbimųamp audinys.
- Įstumkite trupinių padėklą atgal į vietą, kol jis tvirtai spragtelės.

Image: The toaster's convenient design showing the removable crumb tray being pulled out and the cord storage area on the bottom.
Laido saugykla
For neat storage, the power cord can be wrapped around the designated area on the underside of the toaster.
6. Problemų sprendimas
- Skrudintuvas neįsijungia: Ensure the power cord is securely plugged into a working electrical outlet. Make sure the toast lever is fully pressed down.
- Netolygus skrudinimas: Ensure bread slices are centered in the slots. Try adjusting the browning level. Different types of bread may require different settings.
- Bread stuck in slots: Unplug the toaster immediately and allow it to cool. Gently remove the bread using non-metallic tongs. Never use metal utensils.
- Iš skrudintuvo sklinda dūmai: Unplug the toaster immediately. Remove any food particles or crumbs that may be lodged inside the slots or on the heating elements. Ensure the crumb tray is clean.
7. Specifikacijos
| Prekės ženklas | KEENSTAR |
| Modelis | ST-265TC |
| Galia | 900 vatų |
| ttage | 120 voltai (kintamoji srovė) |
| Skilčių skaičius | 2 |
| Medžiaga | Nerūdijantis plienas |
| Gaminio matmenys (D x P x A) | 10.39" x 7.1" x 6.1" |
| Lizdų plotis | 1.5 colių |
| Ypatingos savybės | Cancel Function, LED Indicator, Removable Crumb Tray, Touchscreen, Warming Rack |

Image: Diagram showing the dimensions of the KEENSTAR ST-265TC toaster: 9.4 inches (24cm) length, 6.1 inches (15.6cm) width, 7 inches (18cm) height, and 1.5 inch (3.8cm) wide slots.
8. Garantija ir palaikymas
Garantija
This KEENSTAR toaster comes with a 2-year warranty. Please refer to the warranty card included in the product packaging for detailed terms and conditions.
Pagalba klientams
For any questions, technical assistance, or warranty claims, please contact KEENSTAR customer support. Contact information can typically be found on the warranty card or the official KEENSTAR websvetainę.
Ask a question about this manual
Ask about setup, troubleshooting, compatibility, parts, safety, or missing instructions. Manuals+ will review the question and use this page’s manual context to help answer it.