
1. Įvadas
Thank you for choosing the Inskam 451 Handheld Endoscope. This device is designed for visual inspection in hard-to-reach areas, offering clear imaging and ease of use. Please read this manual carefully before operating the device to ensure proper usage and to maximize its lifespan.
Pagrindinės funkcijos:
- 4.5 colių IPS ekranas: Provides instant, high-definition viewing of images and videos.
- 720p Camera: Captures clear visuals for detailed inspection.
- 5-meter Rigid Cable: Allows access to deep or distant areas.
- IP67 vandeniui atspari kamera: Suitable for use in wet or submerged environments.
- 6 reguliuojami LED žibintai: Illuminates dark inspection areas.
- 2000 mAh baterija: Offers extended operating time.
- Integruotas stovas: Frees your hands for easier operation.
2. Produktas baigtasview ir pakuotės turinį
Familiarize yourself with the components of your Inskam 451 Endoscope.

2.1 paveikslas: The Inskam 451 Handheld Endoscope, showing the main display unit and the attached flexible camera cable with its LED-equipped lens.
Pakuotės turinys:
- 1 x Inskam 451 Handheld Endoscope Unit
- 1 x Lens Cable (5-meter rigid cable)
- 1 x USB Type-C įkrovimo laidas
3. Sąranka
3.1 Įrenginio įkrovimas
Before first use, fully charge the endoscope. Connect the provided USB Type-C charging cable to the device's charging port and a suitable USB power adapter (not included).

3.1 paveikslas: The endoscope features a 2000mAh battery, providing approximately 3 hours of use on a full charge, with a charging time of about 2 hours.
3.2 Inserting TF Card (Optional)
To save images and videos, insert a Micro SD (TF) card (up to 32GB, not included) into the designated TF card slot on the side of the device. Ensure the device is powered off before inserting or removing the card.

3.2 paveikslas: Detail showing the USB Type-C charging port and the hidden TF card slot, covered by a silicone flap for protection.
3.3 Attaching the Lens Cable
Connect the rigid lens cable to the main unit. Ensure it clicks securely into place. The cable is detachable for easy storage and replacement.
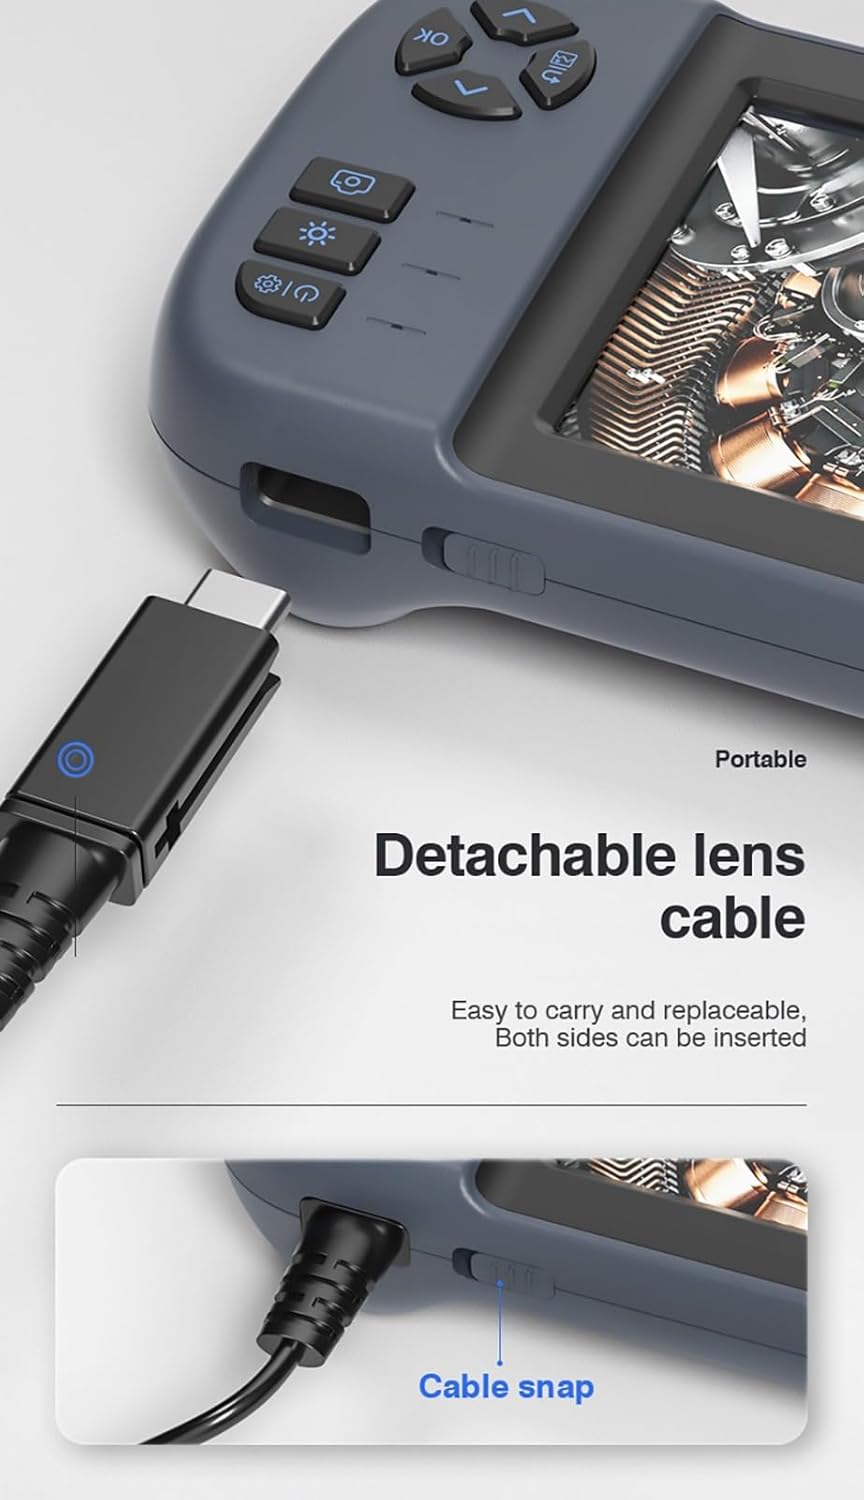
3.3 paveikslas: The detachable lens cable, designed for easy connection and removal. Both sides of the connector can be inserted.
3.4 Integruoto stovo naudojimas
The Inskam 451 features a built-in bracket on the back, allowing it to stand upright on a flat surface. This frees your hands during inspection tasks.

3.4 paveikslas: The integrated bracket on the back of the device, which can be extended to allow the endoscope to stand on a desktop.
4. Naudojimo instrukcijos
4.1 Įjungimas / išjungimas
Press and hold the power button (usually marked with ⑂) to turn the device on or off. The IPS screen will illuminate upon startup.

4.1 paveikslas: The 4.5-inch IPS HD screen provides vivid colors and a wide viewing angle for clear inspection.
4.2 LED ryškumo reguliavimas
The camera head is equipped with 6 adjustable LED lights. Use the dedicated brightness control button (often marked with an asterisk or light icon) to cycle through different brightness levels or turn the lights off.

4.2 paveikslas: The IP67 waterproof camera head with 6 adjustable LED lights, suitable for harsh environments including submerged conditions.
4.3 Capturing Images and Recording Videos
Once the device is powered on and the camera is positioned, use the dedicated buttons to capture still images or start/stop video recording. Refer to the on-screen icons for current mode (photo/video).
4.4 Viewžiniasklaidą
Naudodami meniu mygtukus, pereikite į atkūrimo režimą, kadview captured images and videos stored on the TF card. You can scroll through files and play videos directly on the screen.
5. Priežiūra
5.1 Cleaning the Lens and Screen
Gently wipe the camera lens and the IPS screen with a soft, lint-free cloth. For stubborn smudges, a small amount of lens cleaning solution can be applied to the cloth (not directly to the lens/screen).
5.2 Akumuliatoriaus priežiūra
Norėdami pailginti baterijos veikimo laiką, venkite dažnai jos visiškai iškrauti. Reguliariai įkraukite įrenginį, net jei jo nenaudojate ilgą laiką (pvz., kartą per 3 mėnesius).
5.3 Saugykla
Store the endoscope in a cool, dry place, away from direct sunlight and extreme temperatures. Ensure the lens cable is neatly coiled without sharp bends.
5.4 Atsargumas dėl atsparumo vandeniui
While the camera head is IP67 waterproof, the main unit is not. Do not submerge the main unit in water or expose it to heavy rain. Ensure the USB and TF card ports are properly sealed with their silicone covers when not in use, especially in damp aplinkos.
6. Problemų sprendimas
| Problema | Galima priežastis | Sprendimas |
|---|---|---|
| Įrenginys neįsijungia | Išsikrovęs akumuliatorius; Maitinimo mygtukas nepakankamai ilgai nuspaustas | Įkraukite įrenginį; paspauskite ir palaikykite maitinimo mygtuką 3–5 sekundes |
| Ekrane nėra vaizdo | Lens cable not connected properly; Camera lens obstructed | Ensure lens cable is securely connected; Clean the camera lens |
| Cannot save images/videos | No TF card inserted; TF card full or corrupted; TF card not supported | Insert a TF card; Delete old files or use a new card; Use a TF card up to 32GB, formatted to FAT32 |
| LED lemputės neveikia | Brightness set to minimum; Malfunction | Press the LED brightness button to increase illumination; Contact support if issue persists |
7. Specifikacijos
| Funkcija | Specifikacija |
|---|---|
| Modelis | 451 |
| Ekrano dydis | 4.5 colio IPS |
| Ekrano raiška | 480 x 854 pikselių |
| Vaizdo raiška | 1920 x 1080 (JPG) |
| Vaizdo įrašymo raiška | 1280 x 720 (AVI) |
| Kameros atsparumo vandeniui įvertinimas | IP67 |
| Kabelio ilgis | 5 meters (Rigid) |
| Lauko gylis | 4-10 cm |
| Viewing kampas | 70 laipsnių |
| Šviesos šaltinis | 6 reguliuojami LED žibintai |
| Baterijos talpa | 2000 mAh |
| Darbinė temperatūra | -10 ℃ iki 50 ℃ |
| Ryšys | C tipo USB |
| Saugojimo palaikymas | TF kortelė (iki 32 GB) |
| Sertifikatai | CE/RoHS/ISO9001 |
| Produkto svoris | 488 gramų |
| Gaminio matmenys (I x P x A) | 18 x 11 x 7 cm |
8. Garantija ir palaikymas
The Inskam 451 Handheld Endoscope comes with a standard manufacturer's warranty. Please refer to your purchase documentation for specific warranty terms and duration. For technical support, troubleshooting assistance, or warranty claims, please contact the retailer or manufacturer directly.
Gamintojas: Inskam
ASIN: B0DNFSDNXC
For further assistance, please visit the official Inskam websvetainėje arba susisiekite su jų klientų aptarnavimo tarnyba.