MONTAVIMAS MU2101
MOUNTUP Lockable RV TV Mount User Manual
Modelis: MU2101
1. Produktas baigtasview
The MOUNTUP Lockable RV TV Mount MU2101 is designed for secure and flexible TV mounting in recreational vehicles, campers, travel trailers, motorhomes, and trucks. It features a full-motion design allowing for tilt, swivel, and extension, along with a patented pull-cord locking mechanism to secure the TV during travel.

Figure 1: MOUNTUP Lockable RV TV Mount MU2101
2. Saugos priemonės
- Ensure the mounting surface in your vehicle is a wooden board at least 1/2 inch thick to provide adequate support.
- Neviršykite maksimalaus svorio pajėgumo – 33 kg (15 svarų).
- Verify that your TV's VESA pattern is compatible with the mount (75x75mm to 200x200mm).
- Always engage the pull-cord locking mechanism before moving the vehicle to prevent TV movement.
- Perform a stability check after installation and periodically thereafter.
- Keep children and pets away from the TV and mount during installation and adjustment.

Figure 2: Wall thickness requirement for secure installation.
3. Pakuotės turinys
Prieš pradėdami montuoti, patikrinkite, ar yra visi komponentai:
- Sieninės plokštės surinkimas
- Televizoriaus laikiklio laikikliai (4 vnt.)
- Tvirtinimo detalių rinkinys (įvairūs varžtai, poveržlės, tarpikliai, inkarai)
- Montavimo vadovas
4. Gaminio specifikacijos
| Funkcija | Specifikacija |
|---|---|
| TV dydžio suderinamumas | 13–43 colių |
| Svorio talpa | Maks. 33 svarai (15 kg) |
| VESA suderinamumas | 75x75mm, 100x100mm, 100x200mm, 200x100mm, 200x200mm |
| Pakreipimo kampas | +5° / -15° |
| Pasukimo kampas | ±90° |
| Pratęsimas nuo sienos | 2.7 colio (sutrauktas) iki 14 colio (išskleistas) |
| Išlyginimas po montavimo | ±3° |
| Medžiaga | Legiruotasis plienas |

Figure 3: Visual representation of TV size, max load, and VESA compatibility.

Figure 4: Detailed VESA pattern compatibility chart.
5. Diegimo vadovas
Follow these steps carefully for a secure installation. It is recommended to have a second person assist during certain steps.
5.1 Patikrinimai prieš montavimą
- Įsitikinkite, kad jūsų televizoriaus svoris ir VESA laikiklis atitinka laikiklio specifikacijas.
- Identify the exact mounting location on your RV wall. Ensure the wooden board is at least 1/2 inch thick.
- Gather necessary tools (e.g., drill, screwdriver, level, stud finder).
5.2 Step 1: Attach Brackets to TV
Carefully place your TV face down on a soft, clean surface. Attach the TV bracket arms to the back of your TV using the appropriate screws, washers, and spacers from the hardware kit. Ensure the brackets are centered and securely fastened.
5.3 Step 2: Mount Wall Plate
Position the wall plate on your desired mounting location. Mark the drill holes. Drill pilot holes into the wooden wall. Secure the wall plate to the wall using the provided lag screws. Ensure the wall plate is level before tightening all screws.
5.4 Step 3: Hang and Secure TV
With assistance, carefully lift the TV with the attached brackets and hook them onto the wall plate. Ensure the TV is properly seated. The mount features a patented dual latch design for secure attachment. Once the TV is hung, engage the pull-cord lock to secure it in place.

Figure 5: Close-up of the patented dual latch design, showing locked and unlocked positions.
5.5 Post-Installation Adjustment
After installation, you can make minor leveling adjustments of up to ±3° to ensure the TV is perfectly horizontal. This feature allows for fine-tuning even after the mount is secured to the wall.
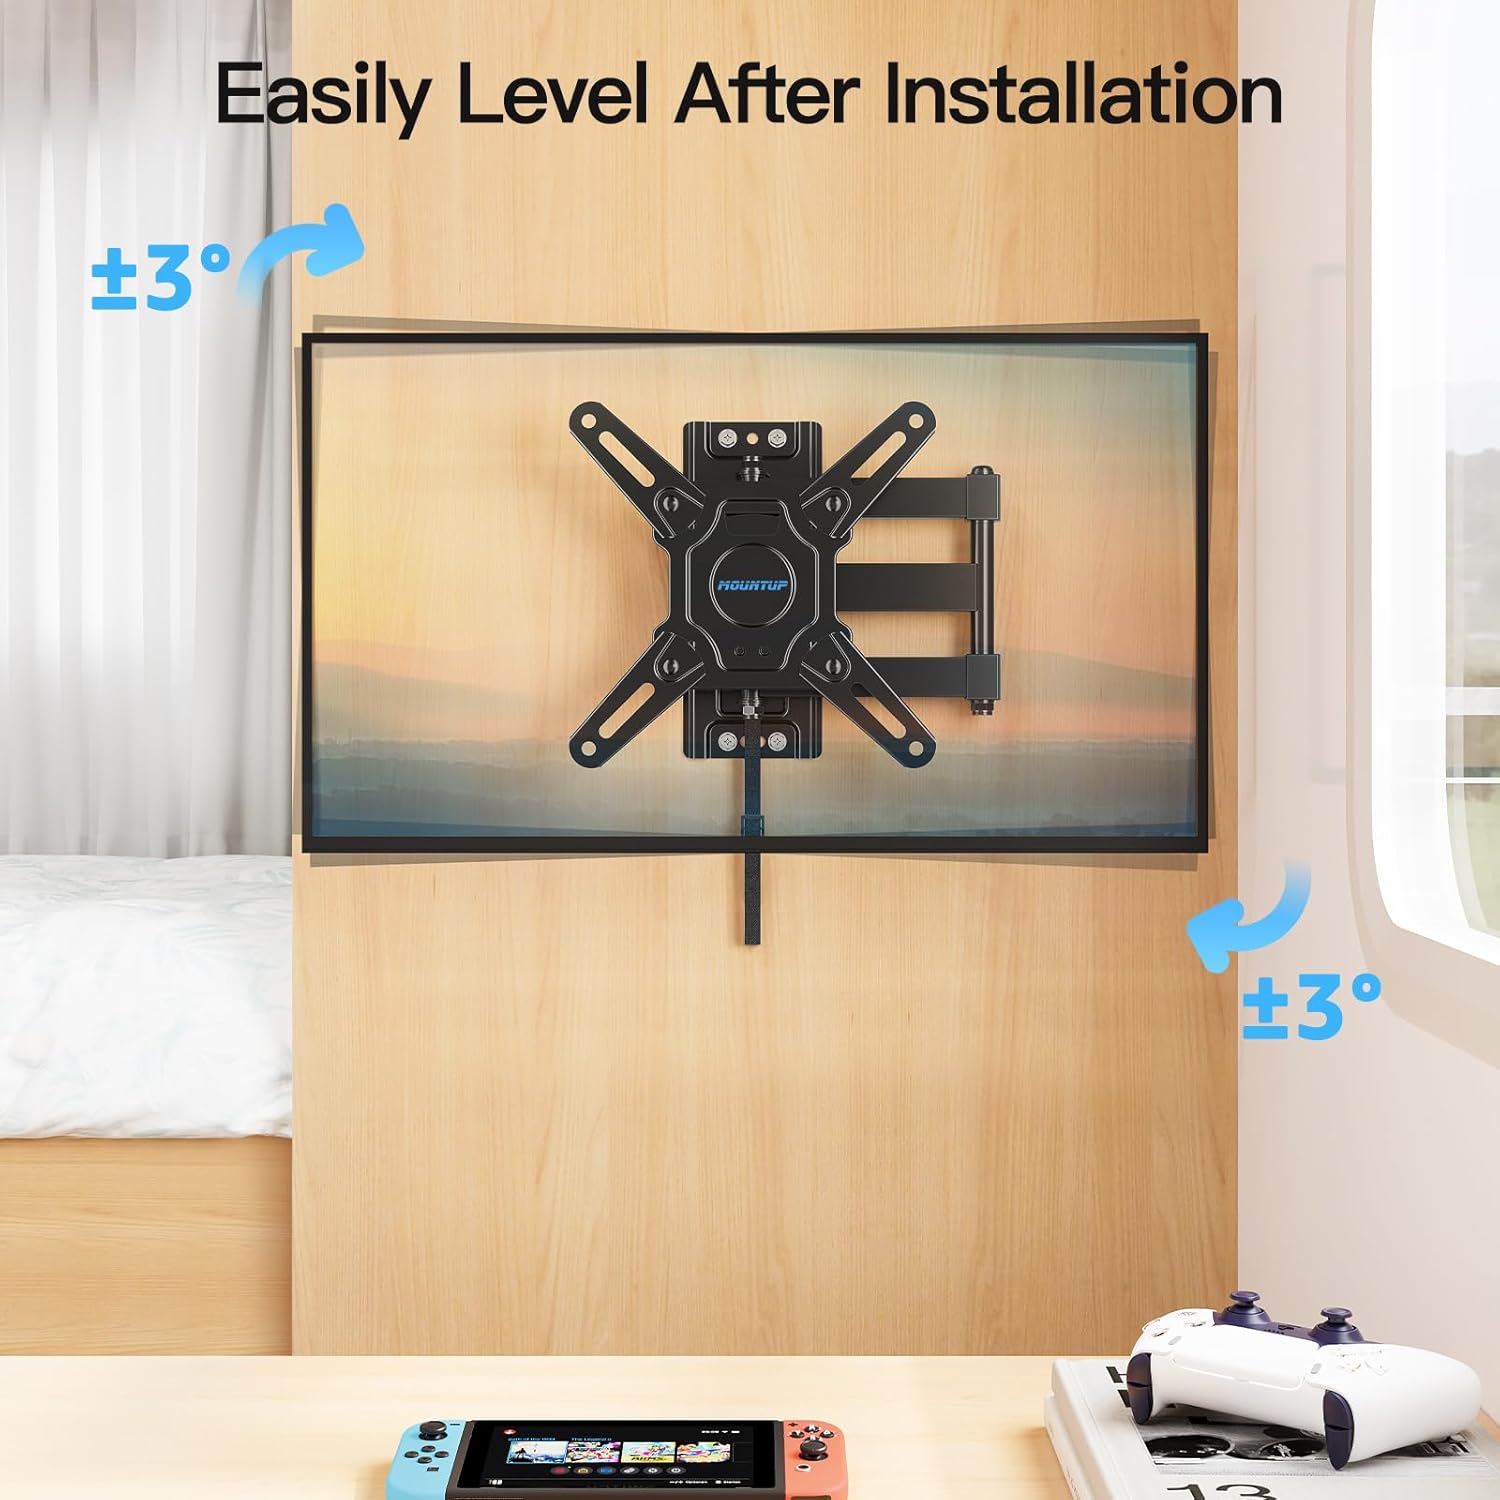
Figure 6: Adjusting the TV level after installation.
6. Naudojimo instrukcijos
The MOUNTUP RV TV Mount offers various adjustments for optimal viewing and secure travel.
6.1 Pakreipimo reguliavimas
The mount allows for a tilt range of +5° (upward) to -15° (downward). This helps reduce glare and provides a comfortable viewing angle from different positions within your RV.

Figure 7: Illustrates the tilt and extension capabilities of the mount.
6.2 Pasukimo reguliavimas
The mount can swivel up to ±90° (left or right), allowing you to position the TV for viewing from various angles in your living space.

Figure 8: Demonstrates the swivel range of the mount.
6.3 Išskleidimas ir sutraukimas
The mount extends up to 14 inches from the wall and retracts back to a slim 2.7 inches, providing flexible positioning and space-saving when not in use.
6.4 Using the Lockable Design
The mount features a pull-cord locking mechanism to secure the TV in its retracted position during travel. To lock, push the TV fully back against the wall until it clicks into place. To unlock, simply pull the cord, and the spring lock will release, allowing you to extend the TV.
Video 1: Demonstration of the MOUNTUP Lockable RV TV Mount's features, including the locking mechanism, extension, swivel, and tilt.
7. Priežiūra
- Periodiškai patikrinkite visus varžtus ir veržles, kad jie būtų tvirtai priveržti. Jei reikia, priveržkite.
- Inspect the mount for any signs of wear or damage, especially after long periods of travel.
- Laikiklį valykite minkštu, sausu skudurėliu. Venkite abrazyvinių valiklių ar tirpiklių.
8. Problemų sprendimas
| Problema | Galima priežastis | Sprendimas |
|---|---|---|
| Televizorius nėra lygus po įrengimo. | Minor misalignment during wall plate installation. | Use the post-installation leveling feature to adjust the TV up to ±3°. |
| Laikiklis nestabilus arba nestabilus. | Screws are loose; TV weight exceeds capacity; improper wall material. | Ensure all screws are tightened. Verify TV weight and VESA compatibility. Confirm wall is a solid wooden board at least 1/2 inch thick. |
| Pull-cord lock is difficult to engage/disengage. | TV not fully retracted; mechanism obstruction. | Ensure the TV is pushed completely back against the wall. Check for any obstructions around the locking mechanism. |
9. Garantija ir klientų aptarnavimas
MOUNTUP is committed to providing quality products and excellent customer service. If you have any questions regarding your MOUNTUP RV TV Mount MU2101, including pre-purchase inquiries or installation assistance, please contact the MOUNTUP professional support team. They are available to provide comprehensive and advanced technology solutions.
For support, please refer to the contact information provided with your product packaging or visit the official MOUNTUP websvetainę.
Ask a question about this manual
Ask about setup, troubleshooting, compatibility, parts, safety, or missing instructions. Manuals+ will review the question and use this page’s manual context to help answer it.