
1. Įvadas
This manual provides detailed instructions for the setup, operation, and maintenance of your Itari M102 Label Maker Machine. Please read this manual thoroughly before using the device to ensure proper function and longevity.
2. Pakuotės turinys
Patikrinkite, ar pakuotėje yra visi reikalingi daiktai:
- Itari M102 Label Maker Machine
- 3 Rolls of Thermal Labels (1.57" x 1.18" / 40mm x 30mm)
- C tipo USB įkrovimo laidas
- Vartotojo vadovas (šis dokumentas)

Image 2.1: The Itari M102 Label Maker Machine shown with the included label rolls.
3. Produktas baigtasview
Familiarize yourself with the components of your label maker.
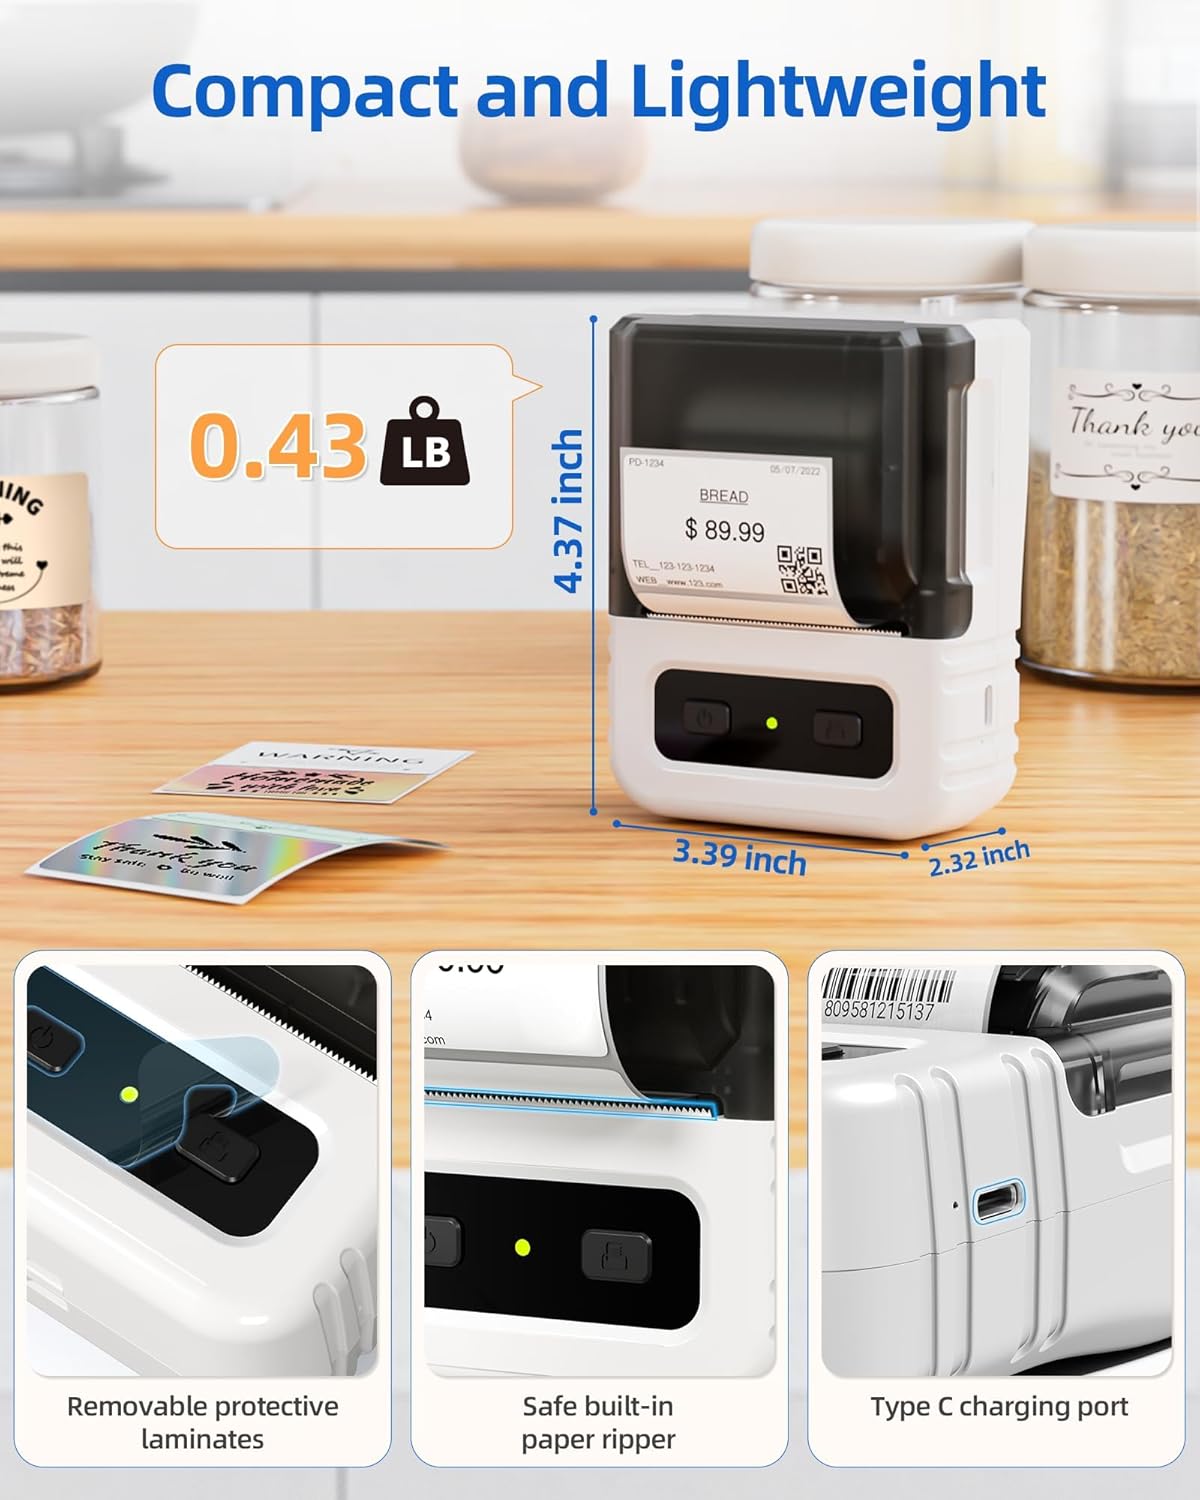
3.1 pav.: Išsamus view highlighting the dimensions, safe built-in paper ripper, removable protective laminates, and Type-C charging port.
Pagrindinės funkcijos:
- Maitinimo mygtukas: Naudojamas įrenginiui įjungti/išjungti.
- Etikečių skyrius: Holds the label roll.
- Adjustable Guide: Ensures proper alignment for various label widths (supports 20-50mm wide labels).
- Paper Exit Slot: Kur atsiranda spausdintos etiketės.
- Built-in Paper Ripper: For cleanly detaching printed labels.
- C tipo įkrovimo prievadas: Skirta vidinei baterijai įkrauti.
4. Sąranka
4.1. Įrenginio įkrovimas
Before first use, fully charge the label maker. Connect the provided USB Type-C cable to the charging port on the device and a compatible USB power adapter (not included). A full charge takes approximately 2 hours and provides up to 1 month of typical usage.
4.2. Etikečių įkėlimas
- Atidarykite etikečių skyriaus dangtelį.
- Insert a roll of thermal labels into the compartment, ensuring the labels feed from the bottom and the printing side faces upwards.
- Adjust the label guides to fit the width of your label roll snugly. The device supports labels from 20mm to 50mm wide.
- Pull a small portion of the label paper out through the paper exit slot.
- Tvirtai uždarykite etikečių skyriaus dangtelį.

Image 4.1: The label compartment open, illustrating how to insert a label roll and adjust the width guides.
4.3. App Installation and Connectivity
The Itari M102 Label Maker connects wirelessly via Bluetooth to your smartphone or tablet, and via USB to computers. Download the dedicated label editing application from your device's app store (e.g., Apple App Store for iOS, Google Play Store for Android).
- „Bluetooth“ ryšiui:
- Turn on the label maker.
- Įjunkite „Bluetooth“ savo mobiliajame įrenginyje.
- Open the Itari label app and follow the in-app instructions to search for and pair with your M102 device. Pairing typically takes less than 2 seconds.
- USB prijungimui:
- Connect the label maker to your computer using the USB Type-C cable.
- Install the necessary drivers or software for your operating system (Windows, macOS, Chrome OS, Linux) as prompted or available on the Itari support websvetainę.

Image 4.2: Illustrates wireless Bluetooth connectivity for iOS and Android, and USB connectivity for Chrome OS, Windows, Mac OS, and Linux.
5. Naudojimo instrukcijos
5.1. Creating and Customizing Labels
The Itari label app provides extensive customization options:
- Šablonai: Access over 300 free label templates for various uses (address, price, food, clothing, cable, jewelry, folder labels, etc.).
- Fonts & Symbols: Choose from over 100 fonts and 1000 symbols to personalize your labels.
- Vaizdai: Embed images into your label designs.
- Teksto redagavimas: Adjust text size, style, alignment, and add multiple lines.
- Brūkšniniai ir QR kodai: Generate and print various types of barcodes and QR codes.
5.2. Etikečių spausdinimas
- Ensure the label maker is powered on and connected to your device (Bluetooth or USB).
- Open the Itari label app and create or select your desired label design.
- Confirm the label size in the app matches the loaded label roll.
- Tap the 'Print' button in the app.
- The label maker will print the label. Use the built-in paper ripper to cleanly detach the label from the roll.
6. Priežiūra
6.1. Valymas
To maintain print quality and device longevity:
- Turn off the label maker before cleaning.
- Gently wipe the print head with a soft, lint-free cloth moistened with isopropyl alcohol. Allow it to dry completely before use.
- Prietaiso išorę valykite minkšta, sausa šluoste. Nenaudokite stiprių cheminių medžiagų ar abrazyvinių valiklių.
6.2. Etikečių saugojimas
Store thermal labels in a cool, dry place away from direct sunlight and heat to prevent premature fading or damage to the thermal coating.
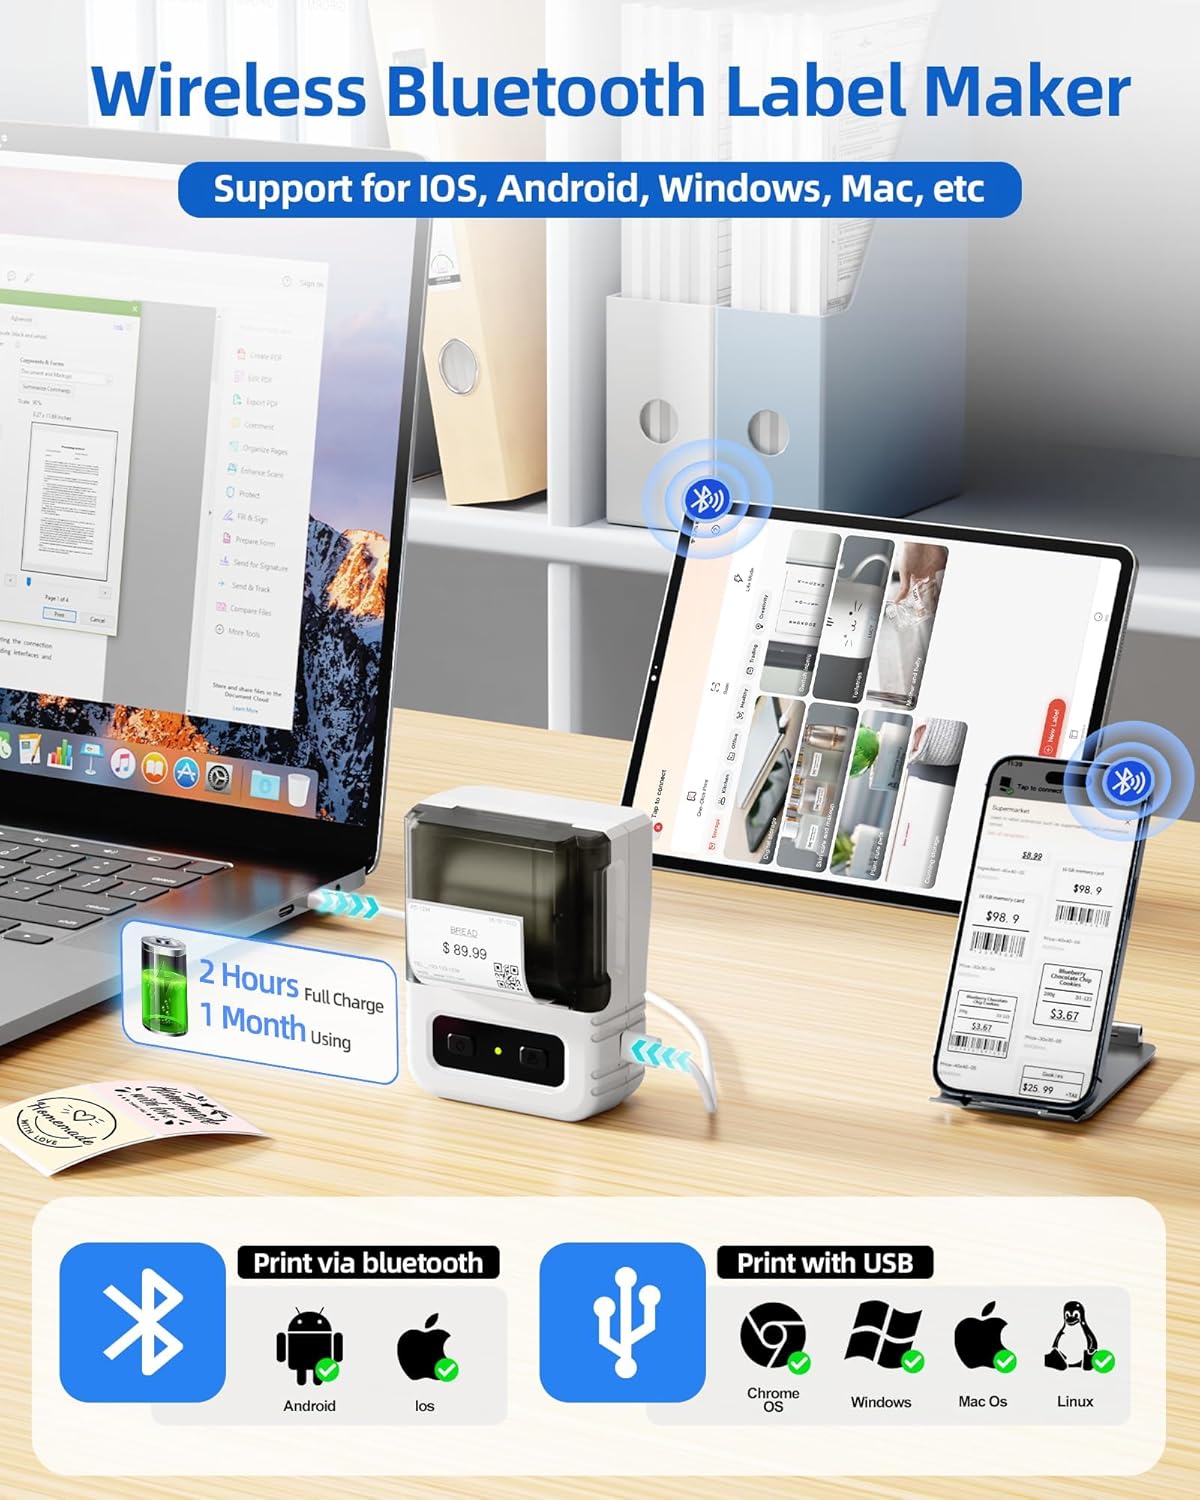
Image 6.1: Itari thermal label rolls, highlighting the 1.57" x 1.18" (40mm x 30mm) size, 230 sheets per roll, and high-quality thermal paper.
7. Problemų sprendimas
If you encounter issues with your Itari M102 Label Maker, refer to the following common problems and solutions:
| Problema | Galima priežastis | Sprendimas |
|---|---|---|
| Įrenginys neįsijungia | Senka baterija | Įkraukite įrenginį naudodami pridedamą USB C tipo laidą. |
| Nėra spaudinio arba spaudinys yra neryškus |
|
|
| „Bluetooth“ ryšio sutrikimas |
|
|
| Labels jam |
|
|
8. Specifikacijos
- Modelis: M102
- Spausdinimo technologija: Terminis (be rašalo)
- Supported Label Width: 20 mm - 50 mm
- Included Label Size: 1.57 colio x 1.18 colio (40 mm x 30 mm)
- Ryšys: Bluetooth, USB Type-C
- Baterijos veikimo laikas: Up to 1 month of typical use (2 hours full charge)
- Matmenys: Approximately 4.37" (H) x 3.39" (W) x 2.32" (D)
- Svoris: Maždaug 0.43 svaro (0.195 kg)
9. Garantija ir palaikymas
For warranty information and technical support, please refer to the contact details provided with your purchase or visit the official Itari websvetainėje. Išsaugokite pirkimo kvitą kaip pirkimo įrodymą garantiniams reikalavimams.