Įvadas
This manual provides detailed instructions for the installation and operation of the Generic Canbus Box Wire Adapter. This device is designed to integrate an aftermarket Android car radio with the existing electrical system of specific Nissan Fuga (2005-2010) and Infiniti M35 (2003) vehicles, enabling communication for functions such as steering wheel controls and vehicle data display.
Saugos informacija
- Always disconnect the vehicle's battery before beginning any electrical installation to prevent short circuits and damage.
- Įsitikinkite, kad visos jungtys yra tvirtos ir tinkamai izoliuotos, kad išvengtumėte elektros pavojų.
- Jei abejojate dėl kurio nors žingsnio, kreipkitės į kvalifikuotą automobilių techniką.
- Do not modify the wiring harness or Canbus box. Unauthorized modifications may void the warranty and cause damage.
Pakuotės turinys
Prieš pradėdami diegimą, patikrinkite, ar yra visi komponentai:
- Canbus Decoder Box(es)
- Vehicle-specific Wiring Harness
- RCA/Auxiliary Input Cables (if included)

1 vaizdas: Baigtaview of the Canbus box and associated wiring harness. This image displays the main Canbus decoder box(es) and the various connectors and wires that form the adapter harness.
Sąranka ir diegimas
This section outlines the general steps for installing the Canbus Box Wire Adapter. Specific vehicle disassembly and reassembly procedures are not covered and should be referenced from your vehicle's service manual or an appropriate online resource.
- Paruoškite transporto priemonę:
- Pastatykite transporto priemonę ant lygaus paviršiaus ir įjunkite stovėjimo stabdį.
- Išjunkite degimą ir ištraukite raktelį.
- Atjunkite neigiamą automobilio akumuliatoriaus gnybtą.
- Carefully remove the factory car radio and any associated trim panels to access the wiring harness.
- Transporto priemonės jungčių identifikavimas:
Locate the factory wiring harness connectors that were previously connected to your original car radio. These will be the primary connection points for the new adapter.

2 pav.: Išsamus view of the wiring harness, showing various connectors and the Canbus decoder boxes. This image highlights the complexity of the harness and the different types of plugs designed to interface with the vehicle and the aftermarket head unit.
- Connect the Main Wiring Harness:
- Connect the vehicle-specific end of the supplied wiring harness to the corresponding factory connectors in your vehicle. These connections are typically plug-and-play.
- Ensure all connections are firmly seated.
- Connect the Canbus Decoder Box:
Plug the Canbus decoder box(es) into the designated connectors on the wiring harness. The connectors are usually keyed to prevent incorrect installation.
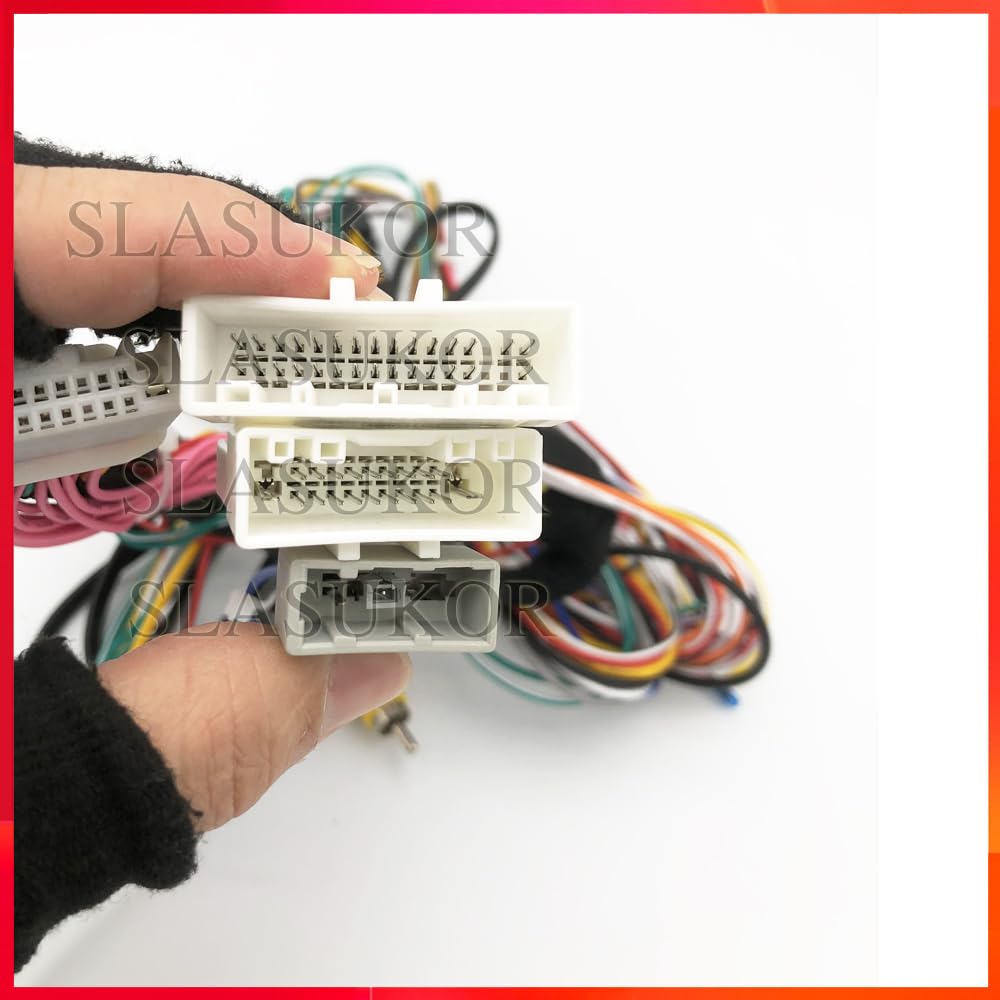
Image 3: Close-up of several white multi-pin connectors from the wiring harness. This image emphasizes the precise design of the connectors for proper fitment.

Image 4: Another perspective of the multi-pin connectors, showing different sizes and configurations. This helps in identifying the correct mating connectors during installation.
- Connect to the Android Car Radio:
- Connect the other end of the wiring harness (typically ISO or specific Android head unit connectors) to your aftermarket Android car radio.
- Connect any auxiliary cables (e.g., RCA for audio/video, USB, antenna adapter) as required by your head unit and vehicle.
- Bandymo funkcionalumas:
- Before fully reassembling the dashboard, temporarily reconnect the vehicle's battery.
- Turn on the ignition and power on the Android car radio.
- Verify that the radio powers on, audio works, and all integrated functions (e.g., steering wheel controls, reverse camera input, vehicle information display) are operating correctly.
- If any functions are not working, refer to the Troubleshooting section.
- Galutinė asamblėja:
- Once all functions are confirmed, disconnect the battery again.
- Carefully route all wires to prevent pinching or interference.
- Secure the Canbus box and excess wiring in a safe location behind the dashboard.
- Reinstall all trim panels and the car radio.
- Vėl prijunkite akumuliatorių.
Naudojimo instrukcijos
The Canbus Box Wire Adapter operates automatically once installed. Its primary function is to translate vehicle data from the car's Canbus system into a format that your aftermarket Android car radio can understand. This typically enables:
- Steering Wheel Control Integration: Allows the use of factory steering wheel buttons to control the Android head unit (e.g., volume, track skip, mode).
- Vehicle Information Display: May provide data such as climate control settings, door status, or parking sensor information on the head unit screen, depending on the vehicle and head unit capabilities.
- Ignition and Illumination Signals: Provides correct ignition (ACC) and illumination signals to the head unit, ensuring it powers on/off with the vehicle and dims with the headlights.
Specific functions and their availability depend on your vehicle's original features and the capabilities of your Android car radio. Refer to your Android head unit's manual for configuration of steering wheel controls or other Canbus-related settings.
Priežiūra
The Canbus Box Wire Adapter is a sealed electronic component and requires no routine maintenance. Ensure that all connections remain secure and free from moisture or physical damage. If the unit is exposed to water or extreme temperatures, it may be damaged.
Trikčių šalinimas
| Problema | Galima priežastis | Sprendimas |
|---|---|---|
| „Android“ radijas neįsijungia. |
|
|
| Vairo valdikliai neveikia. |
|
|
| No vehicle information displayed on radio. |
|
|
Specifikacijos
- Modelio numeris: HUNTF76AA922F2A354AE6A1BF05C9DD34681
- Prekinis ženklas: Bendras
- Prekės tipas: Kabeliai, adapteriai ir lizdai
- Kilmė: Žemyninė Kinija
- Suderinamumas: Nissan Fuga 2005-2010, Infiniti M35 2003
- Gamintojas: HUNTAN
Garantija ir palaikymas
For warranty information or technical support, please contact the seller or manufacturer directly. Keep your purchase receipt as proof of purchase. Do not attempt to repair the Canbus box yourself, as this may void any applicable warranty.