
1. Įvadas
This manual provides detailed instructions for the installation, operation, and maintenance of your ANNKE AU-DT81DX200-V1 4K 8-Channel Digital Video Recorder (DVR). This DVR is designed for security surveillance systems, offering 4K (8MP) high-definition live viewing and recording capabilities. It features advanced H.265+ video compression, AI human/vehicle detection, and supports various camera types for flexible integration.

Image 1.1: The ANNKE 4K 8CH DVR connected to a display, illustrating its 4K Ultra HD video capability.
2. Pakuotės turinys
Verify that all items listed below are included in your package. If any items are missing or damaged, contact ANNKE customer support.
- 1x ANNKE 4K 8CH DVR with 2TB Hard Drive
- 1 x 5.9 pėdų / 1.8 m HDMI kabelis
- 1x 3.2 ft/1 m Ethernet Cable
- 1x maitinimo adapteris
- 1x USB pelė
- 1x Naudotojo vadovas (šis dokumentas)
- 1x sienos lipdukas

Image 2.1: Visual representation of all components included in the ANNKE 4K 8CH DVR package.
3. Sistema baigtaview
The ANNKE AU-DT81DX200-V1 DVR is a hybrid 5-in-1 system, supporting various camera technologies. It can operate in two primary modes:
- DVR režimas: Supports up to 8 BNC (TVI/AHD/CVI/CVBS) cameras and an additional 4 IP cameras.
- NVR Mode: Can be configured to support up to 12 IP cameras exclusively.
This flexibility allows for integration with existing analog systems while providing options for future IP camera expansion.
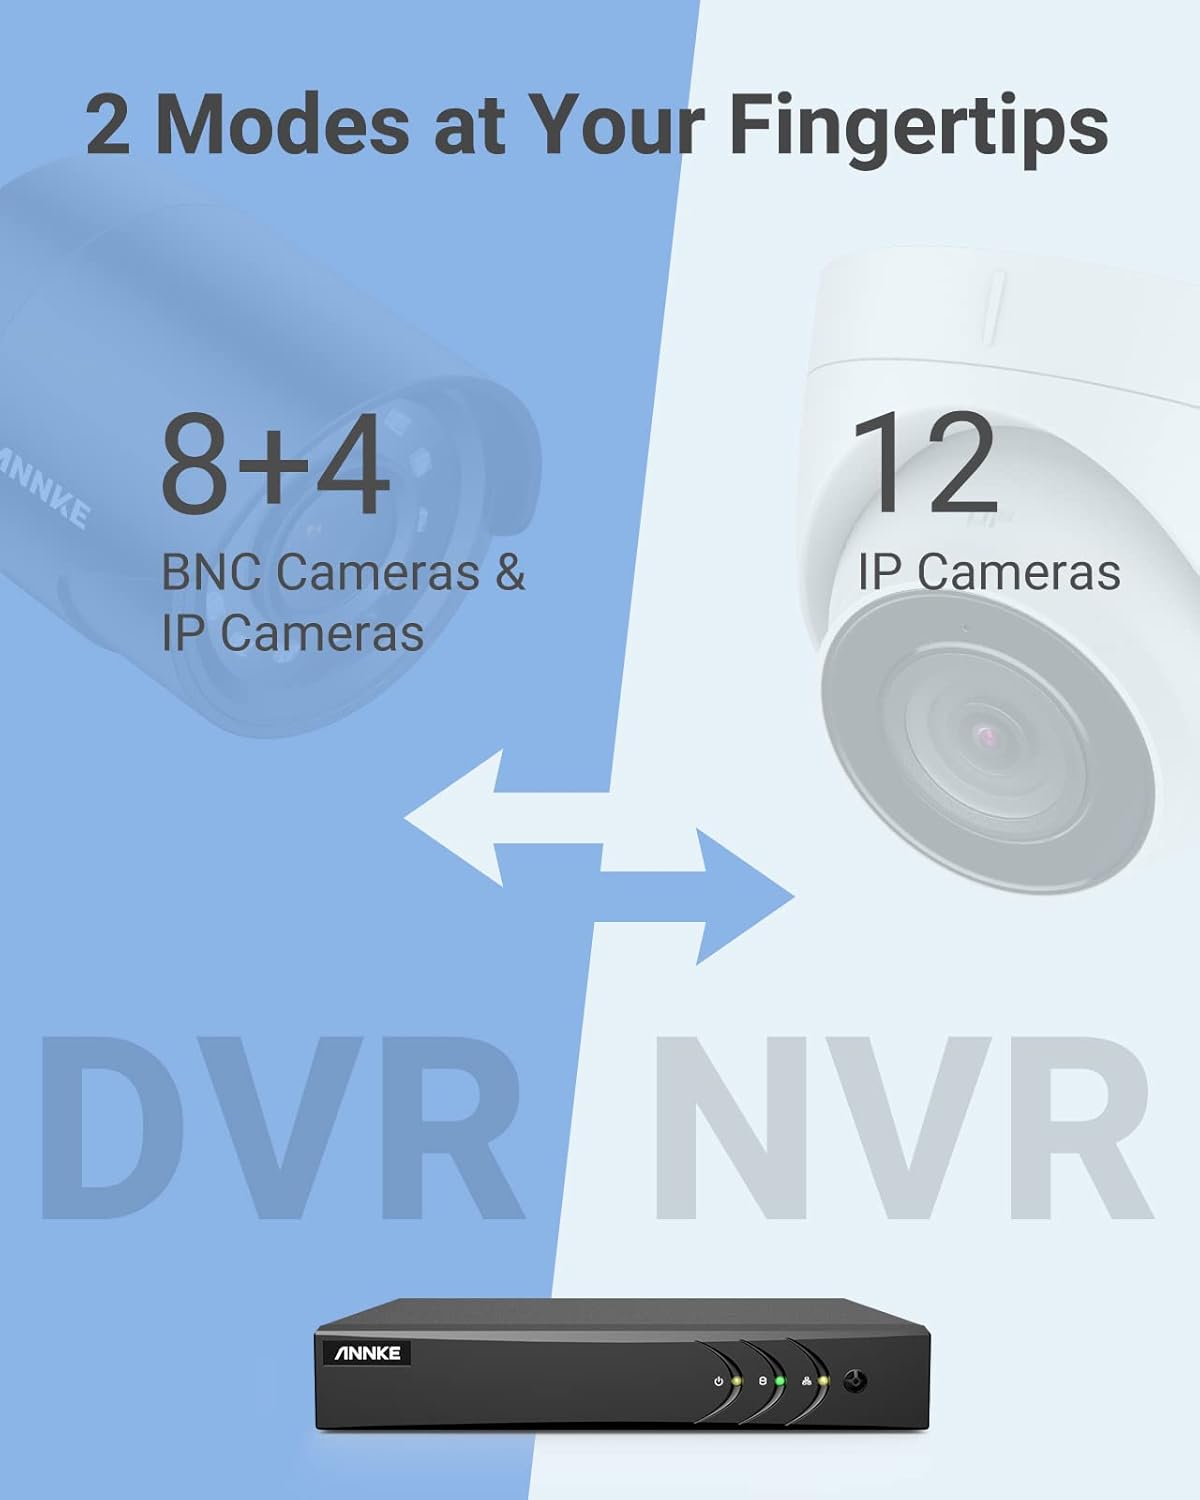
Image 3.1: Illustration of the DVR's dual operational modes, supporting both BNC and IP cameras or IP cameras exclusively.
4. Diegimo vadovas
4.1 Fizinė konfigūracija
- Prijungti kameras: Connect your security cameras to the BNC video input ports on the back of the DVR. For IP cameras, connect them to your network switch/router, and ensure the DVR is also connected to the same network via the Ethernet cable.
- Prijungti monitorių: Connect a monitor to the DVR's HDMI or VGA output port using the provided HDMI cable or a VGA cable (not included).
- Prijunkite USB pelę: Prijunkite USB pelę prie vieno iš DVR USB prievadų.
- Prijunkite maitinimą: Connect the power adapter to the DVR's power input and then plug it into a power outlet. The DVR will power on automatically.
4.2 Pradinė konfigūracija
Upon first boot, the DVR will guide you through an initial setup wizard. Follow the on-screen prompts to:
- Set up a strong password for the administrator account.
- Configure network settings (DHCP is recommended for most users).
- Nustatykite datą ir laiką.
- Scan and add IP cameras if applicable.
5. DVR valdymas
5.1 Tiesiogiai View
Po pradinio nustatymo DVR rodys tiesioginį vaizdą view from connected cameras. Use the USB mouse to navigate the interface. Right-click to access the main menu.
5.2 Įrašymas
The DVR is pre-configured for continuous recording. You can customize recording schedules, motion-triggered recording, or alarm-triggered recording via the main menu under Record > Schedule.
5.3 Atkūrimas
Norėdami iš naujoview įrašytas footage:
- Iš tiesioginio view, spustelėkite dešiniuoju pelės mygtuku ir pasirinkite Atkūrimas.
- Select the desired camera(s) and date.
- Use the timeline to navigate through recordings. Events (like motion detection) are often marked on the timeline for quick access.

Image 5.1: The DVR's playback interface, demonstrating how to locate and review recorded events on a timeline.
6. Išplėstinės funkcijos
6.1 AI Human/Vehicle Detection
The DVR incorporates deep learning-based motion detection 2.0, which can differentiate between human and vehicle movements. This significantly reduces false alarms caused by environmental factors such as leaves or light changes.
- Konfigūracija: Enable and configure AI detection for each analog channel via the main menu under AI > Motion Detection 2.0.
- Smart Events: Supports line crossing and intrusion detection for specific areas.
- Įspėjimai: Configure the DVR to send app push notifications, email alerts, or trigger a buzzer when human or vehicle motion is detected.
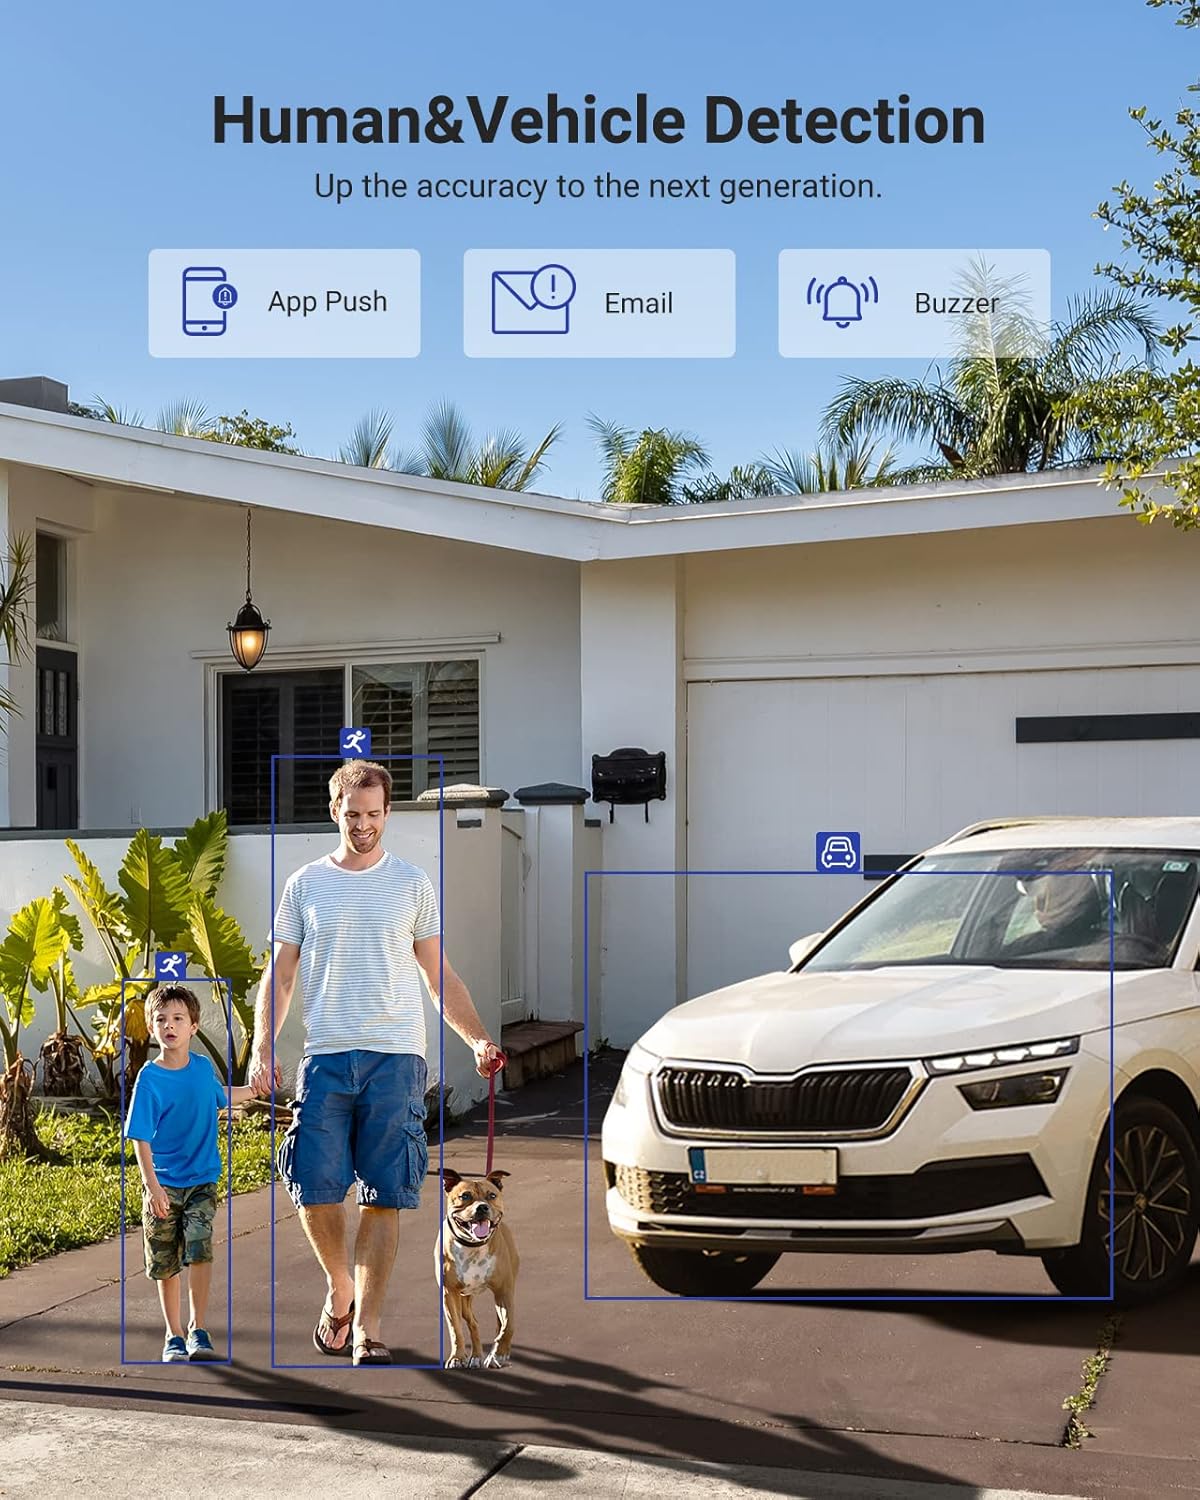
Image 6.1: Visual demonstration of the AI human and vehicle detection capability, showing how the system identifies and distinguishes between people and vehicles.
6.2 Nuotolinė prieiga
Access your DVR remotely from anywhere using the ANNKE Vision App or a web naršyklė.
- ANNKE Vision programėlė: Download the app from the App Store (iOS) or Google Play Store (Android). Register an account and add your DVR by scanning the QR code or entering its serial number.
- Web Naršyklė: Access the DVR's web sąsają įvesdami savo IP adresą į a web naršyklę savo kompiuteryje.
- Suderinamumas: The system is compatible with various devices including smartphones, tablets, laptops, and personal computers. It also supports integration with Alexa for voice control.

Image 6.2: Remote access via the ANNKE Vision App, showing compatibility with mobile devices and Alexa.
7. Video Management
7.1 H.265+ vaizdo glaudinimas
The DVR utilizes advanced H.265+ video compression technology. This technology significantly reduces file sizes, saving up to 80% of storage space compared to H.264 compression, while maintaining video quality. This allows for longer recording durations on the same 2TB hard drive.

Image 7.1: Comparison illustrating the storage efficiency of H.265+ compression versus H.264.
8. Suderinamumas
The ANNKE AU-DT81DX200-V1 is a versatile 5-in-1 hybrid DVR, designed to be compatible with a wide range of security cameras:
- HD TVI Input: Supports 8 MP@15 fps, 5 MP@20 fps, 3K@20 fps, 4 MP@30 fps.
- AHD Input: Supports 5 MP@20 fps, 4 MP@30 fps, 1080p@25 fps, 1080p@30 fps.
- HD CVI Input: Supports 4 MP@30 fps, 4 MP@25 fps, 1080p@25 fps, 1080p@30 fps.
- CVBS įvestis: Supports PAL/NTSC standards.
- IPC Input: Supports up to 8MP IP cameras.
This broad compatibility ensures that the DVR can integrate with both older analog cameras and modern IP cameras, providing a flexible upgrade path for existing surveillance systems.

Image 8.1: The DVR's compatibility with various camera technologies, including TVI, CVI, AHD, and IP cameras.
9. Specifikacijos
| Funkcija | Specifikacija |
|---|---|
| Prekės ženklas | ANNKE |
| Modelio numeris | AU-DT81DX200-V1 |
| Ryšio technologija | Laidinis |
| Vaizdo įrašymo raiška | 4K (8MP) |
| Kanalų skaičius | 8 (Analog) + 4 (IP) or 12 (IP) |
| Vaizdo įrašų suspaudimas | H.265 Pro+/H.265 Pro/H.265/H.264+/H.264 |
| Palaikomi fotoaparatų tipai | TVI, AHD, CVI, CVBS, IPC |
| AI funkcijos | Human Detection, Vehicle Detection, Line Crossing, Intrusion Detection |
| Atminties talpa | 2 TB HDD (Up to 10 TB supported) |
| Nuotolinė prieiga | ANNKE Vision App, Web Naršyklė |
| Suderinami įrenginiai | Fotoaparatai, nešiojamieji kompiuteriai, asmeniniai kompiuteriai, išmanieji telefonai, planšetiniai kompiuteriai |
| Maitinimo šaltinis | Su laidu elektra |
| Spalva | Juoda |
| Prekės matmenys | 17.13 x 12.4 x 3.86 colio |
10. Priežiūra
Reguliarus DVR sistemos aptarnavimas užtikrina optimalų veikimą ir ilgaamžiškumą.
- Valymas: Keep the DVR free from dust. Use a soft, dry cloth to clean the exterior. Do not use liquid cleaners.
- Vėdinimas: Įsitikinkite, kad vaizdo registratorius yra gerai vėdinamoje vietoje, kad neperkaistų. Neužblokuokite ventiliacijos angų.
- Firmware atnaujinimai: Reguliariai tikrinkite ANNKE oficialų website for firmware updates. Keeping your DVR's firmware updated can improve performance, add new features, and enhance security.
- Duomenų atsarginė kopija: Reguliariai kurkite svarbių vaizdo įrašų atsargines kopijastagį išorinį atminties įrenginį.
- Kietojo disko sveikata: The DVR's menu may offer options to check the health status of the installed hard drive. Monitor this periodically.
11. Problemų sprendimas
Šiame skyriuje aptariamos dažniausiai pasitaikančios problemos, su kuriomis galite susidurti naudodami savo vaizdo registratorių.
- Nėra vaizdo išvesties:
- Check HDMI/VGA cable connections to both the DVR and the monitor.
- Įsitikinkite, kad monitorius nustatytas į tinkamą įvesties šaltinį.
- Verify the DVR is powered on (power indicator light should be active).
- Nėra kameros ekrano:
- Check camera power supply and video cable connections.
- For IP cameras, ensure they are on the same network as the DVR and properly added in the DVR's camera management settings.
- Verify camera compatibility with the DVR (refer to Section 8).
- Nuotolinė prieiga neveikia:
- Ensure the DVR is connected to the internet.
- Check network settings on the DVR (e.g., DHCP enabled, correct IP address).
- Verify the ANNKE Vision App is updated to the latest version.
- Ensure the DVR is properly added to your ANNKE Vision account.
- Klaidingi judesio aliarmai:
- Adjust the sensitivity of motion detection in the DVR settings.
- Utilize the AI Human/Vehicle Detection feature (Section 6.1) to filter out irrelevant movements.
- Define specific detection zones to exclude areas with frequent non-threatening movement.
If you continue to experience issues, please contact ANNKE customer support.
12. Garantija ir palaikymas
ANNKE products typically come with a limited warranty. Please refer to the warranty card included in your package or visit the official ANNKE websvetainėje, kurioje rasite išsamias garantijos sąlygas, taikomas jūsų regionui.
For technical support, product inquiries, or warranty claims, please contact ANNKE customer service through their official website or the contact information provided in your product documentation. Have your model number (AU-DT81DX200-V1) and purchase details ready when contacting support.
ANNKE oficiali Websvetainė: www.annke.com