
CUSHYBITE PSK106SB-PCL500B
CUSHYBITE PSK106SB-PCL500B 18V Lithium-Ion Kit: 5-1/2 inch Cordless Circular Saw User Manual
Model: PSK106SB-PCL500B
1. Įvadas
This manual provides essential information for the safe operation, maintenance, and troubleshooting of your CUSHYBITE PSK106SB-PCL500B 18V Lithium-Ion Kit. This kit includes a 5-1/2 inch cordless circular saw, 2.0 Ah and 4.0 Ah lithium-ion batteries, and a charger. Please read this manual thoroughly before using the product to ensure proper function and to prevent injury.
The 5-1/2 inch circular saw operates at 4,700 RPM, designed for precise cuts. It offers a 1-11/16 inch depth of cut for 2-by material and a 0-50° bevel capacity for versatile cutting angles. The lightweight and compact design aims to minimize user fatigue, and the quick-release latches facilitate easy battery changes. An integrated fuel gauge helps monitor battery life. The batteries provide extended runtime, up to 3X more than standard lithium options, enhancing productivity.
2. Bendra saugos informacija
ĮSPĖJIMAS: perskaitykite visus su šiuo elektriniu įrankiu pateiktus saugos įspėjimus, instrukcijas, iliustracijas ir specifikacijas. Jei nesilaikysite visų toliau išvardytų nurodymų, galite gauti elektros smūgį, gaisrą ir (arba) rimtus sužalojimus.
2.1 Darbo zonos sauga
- Laikykite darbo vietą švarią ir gerai apšviestą. Netvarkingos arba tamsios vietos sukelia nelaimingus atsitikimus.
- Nenaudokite elektrinių įrankių sprogioje aplinkoje, pvz., ten, kur yra degių skysčių, dujų ar dulkių. Elektriniai įrankiai sukuria kibirkštis, kurios gali uždegti dulkes arba dūmus.
- Dirbdami su elektriniu įrankiu saugokite vaikus ir pašalinius asmenis. Dėl išsiblaškymo galite prarasti kontrolę.
2.2 Elektros sauga
- Elektrinio įrankio kištukai turi atitikti lizdą. Niekada jokiu būdu nemodifikuokite kištuko. Nenaudokite adapterių kištukų su įžemintais (įžemintais) elektriniais įrankiais. Nepakeisti kištukai ir atitinkami lizdai sumažins elektros smūgio riziką.
- Venkite kūno kontakto su įžemintais paviršiais, tokiais kaip vamzdžiai, radiatoriai, viryklės ir šaldytuvai. Jei jūsų kūnas yra įžemintas arba įžemintas, padidėja elektros smūgio rizika.
- Saugokite elektrinius įrankius nuo lietaus ar drėgnų sąlygų. Į elektrinį įrankį patekęs vanduo padidins elektros smūgio riziką.
2.3 Asmens sauga
- Visada dėvėkite akių apsaugos priemones. Naudokite apsauginius akinius arba akinius su apsauginiais akiniais.
- Apsirenkite tinkamai. Nedėvėkite laisvų drabužių ar papuošalų. Laikykite plaukus ir drabužius toliau nuo judančių dalių.
- Būkite budrūs, stebėkite, ką darote, ir vadovaukitės sveiku protu, kai naudojate elektrinį įrankį.
2.4 Diskinių pjūklų saugos reikalavimai
- PAVOJUS: Laikykite rankas atokiau nuo pjovimo zonos ir disko. Kitą ranką laikykite ant pagalbinės rankenos arba variklio korpuso. Jei pjūklą laikote abiem rankomis, diskas jų neįpjautų.
- Nelieskite po ruošiniu. Apsauga negali apsaugoti jūsų nuo ašmenų žemiau ruošinio.
- Sureguliuokite pjovimo gylį pagal ruošinio storį. Po ruošiniu turėtų matytis mažiau nei pilnas ašmenų dantis.
- Never hold the workpiece in your hands or across your leg while cutting. Secure the workpiece to a stable platform. It is important to support the workpiece properly to minimize body exposure, blade binding, or loss of control.
- Atlikdami operaciją, kai pjovimo priedas gali liestis su paslėptais laidais, laikykite elektrinį įrankį už izoliuotų griebimo paviršių.
3. Pakuotės turinys
Verify that all items listed below are included in your package. If any items are missing or damaged, please contact CUSHYBITE customer service.
- 18V Cordless 5-1/2 inch Circular Saw
- 18 V 2.0 Ah ličio jonų akumuliatorius
- 18 V 4.0 Ah ličio jonų akumuliatorius
- 18 V akumuliatorių įkroviklis
- Circular Saw Blade (pre-installed or separate)
- Naudotojo vadovas (šis dokumentas)
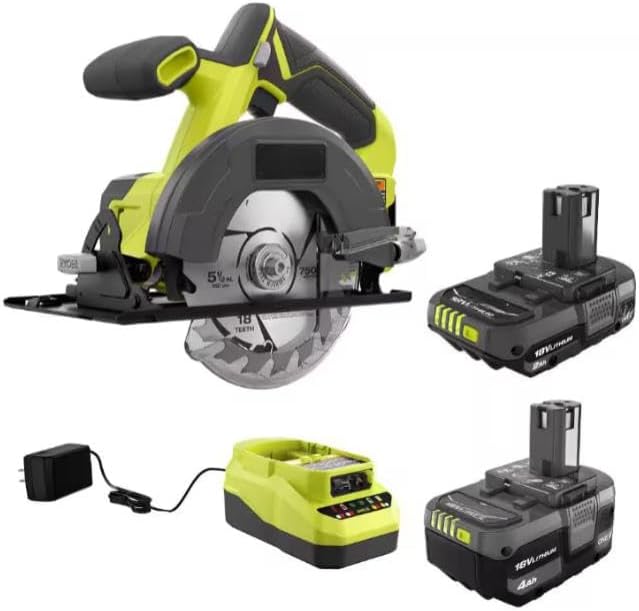
1 pav. Baigtaview of the CUSHYBITE 18V Lithium-Ion Kit, showing the circular saw, two batteries (2.0 Ah and 4.0 Ah), and the battery charger.
4. Komponentai baigtiview
Familiarize yourself with the various parts of your circular saw, batteries, and charger before operation.
4.1 Circular Saw Features
- Ašmenų apsauga: Retracts during cutting to expose the blade.
- Gylio reguliavimo svirtis: Pjovimo gylio nustatymui.
- Nuožulnumo reguliavimo svirtis: For setting the cutting angle (0-50°).
- Rankena: Main handle for control.
- Pagalbinė rankena: For two-hand operation and improved control.
- Trigerio jungiklis: Įjungia pjūklą.
- Fiksavimo mygtukas: Apsaugo nuo atsitiktinio užvedimo.
- Veleno užrakinimo mygtukas: For blade changes.
- Base Plate/Shoe: Laiko pjūklą ant ruošinio.
4.2 Battery and Charger Features
- Baterija: 18V Lithium-Ion (2.0 Ah and 4.0 Ah).
- Kuro matuoklis: LED indicators on the battery to show charge level.
- Akumuliatoriaus atleidimo skląsčiai: For removing the battery from the tool or charger.
- Įkroviklis: For recharging 18V Lithium-Ion batteries.
- Charger Indicator Lights: Show charging status (charging, charged, error).
5. Sąranka
5.1 Akumuliatoriaus įkrovimas
- Connect the charger to a standard 120V AC outlet. The charger indicator light may illuminate.
- Užmaukite akumuliatorių bloką ant įkroviklio, įsitikindami, kad jis spragtelėdamas užsifiksavo vietoje.
- The charger indicator light will show the charging status. Refer to the charger's specific instructions for light patterns (e.g., solid red for charging, solid green for charged).
- Once fully charged, remove the battery from the charger. Unplug the charger from the outlet when not in use.
5.2 Akumuliatoriaus įdėjimas ir išėmimas
- Norėdami įdiegti: Align the battery pack with the battery port on the circular saw. Slide the battery into the tool until it clicks securely into place. Ensure the battery is fully seated.
- Norėdami pašalinti: Press the battery release latches on the sides of the battery pack. Pull the battery pack out of the tool.
5.3 Installing and Removing the Saw Blade
WARNING: Always disconnect the battery pack before installing or removing the saw blade to prevent accidental starting and serious injury.
- Išimkite akumuliatorių iš pjūklo.
- Paspauskite ir palaikykite veleno fiksavimo mygtuką.
- Naudodami pateiktą peilio veržliaraktį, atlaisvinkite peilio varžtą, sukdami jį prieš laikrodžio rodyklę.
- Lift the lower blade guard and remove the blade bolt, outer washer, and the old blade.
- Install the new blade, ensuring the teeth are pointing in the direction of rotation indicated by the arrow on the saw and blade.
- Replace the outer washer and blade bolt. Tighten the blade bolt securely by turning it clockwise while holding the spindle lock button. Do not overtighten.
- Atleiskite veleno fiksavimo mygtuką ir patikrinkite, ar pjovimo diskas laisvai sukasi.
5.4 Pjovimo gylio reguliavimas
- Atlaisvinkite gylio reguliavimo svirtį.
- Raise or lower the saw base plate to achieve the desired cutting depth. For optimal performance and safety, set the blade depth so that only about 1/8 inch to 1/4 inch of the blade teeth extends below the workpiece.
- Tvirtai priveržkite gylio reguliavimo svirtį.
5.5 Įstrižojo kampo reguliavimas
- Atlaisvinkite kampo reguliavimo svirtį.
- Tilt the saw base plate to the desired bevel angle (0-50°). Use the angle scale for reference.
- Tvirtai priveržkite nuožulnumo reguliavimo svirtį.
6. Naudojimo instrukcijos
6.1 Bendras veikimas
- Įsitikinkite, kad ruošinys tvirtai pritvirtintasamped or supported. Never attempt to cut freehand.
- Tvirtai laikykite pjūklą abiem rankomis – viena už pagrindinės rankenos, kita – už pagalbinės.
- Press the lock-off button (if applicable) and then squeeze the trigger switch to start the saw. Allow the blade to reach full speed before beginning the cut.
- Guide the saw smoothly and steadily through the workpiece. Do not force the saw; let the blade do the work.
- Maintain a clear line of sight to the cutting line.
- When the cut is complete, release the trigger switch and allow the blade to stop completely before lifting the saw from the workpiece.
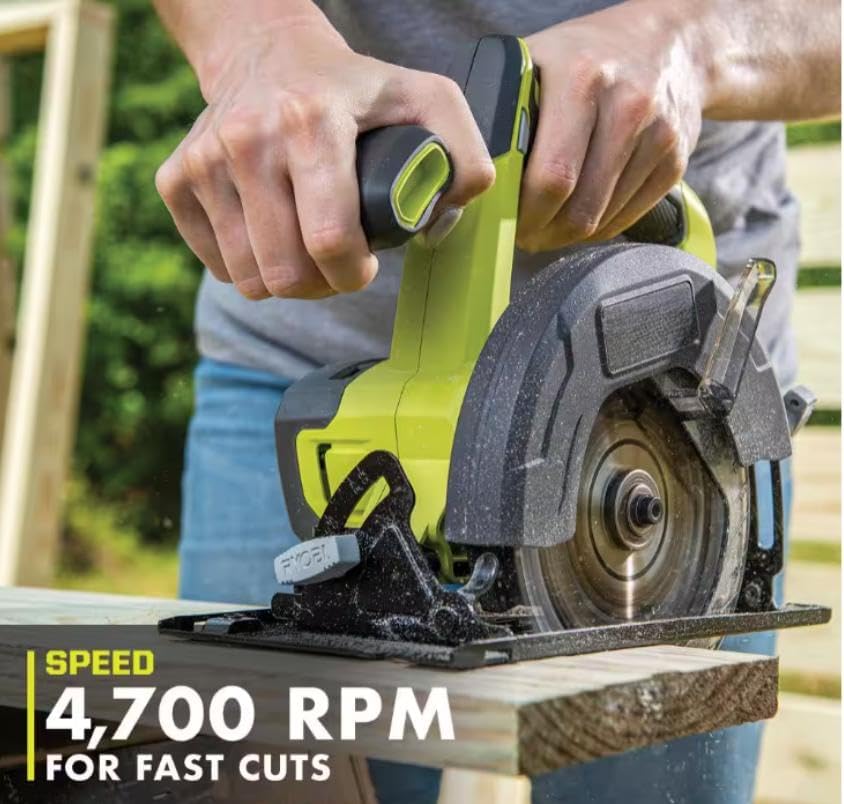
Figure 2: A user demonstrating the CUSHYBITE circular saw in operation, highlighting its speed for efficient cutting.
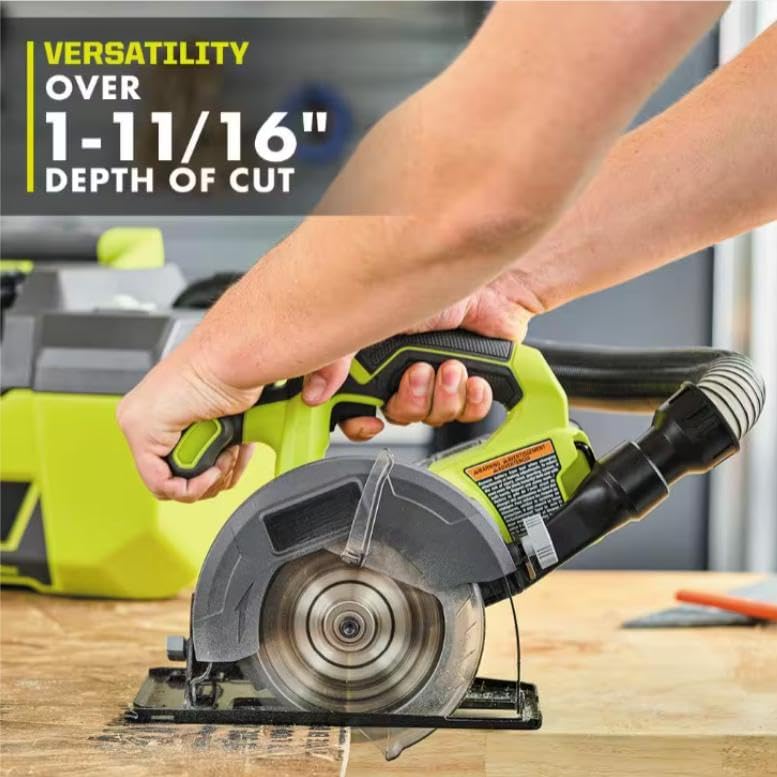
Figure 3: The CUSHYBITE circular saw being used to make a cut, illustrating its versatility with a 1-11/16 inch depth of cut.
6.2 Pjovimo būdai
- Skersinis pjovimas: For cutting across the grain of wood. Ensure the workpiece is well-supported.
- Pjovimas išilginiu būdu: For cutting along the grain of wood. Use a rip fence or straight edge guide for accuracy.
- Įstrižiniai pjūviai: Adjust the bevel angle as described in Section 5.5. Be aware that the effective cutting depth will be reduced at higher bevel angles.
- Įgiliniai pjūviai: Not recommended for this type of circular saw unless specifically designed and instructed. Always start cuts from the edge of the material.
7. Priežiūra
WARNING: Always remove the battery pack before performing any maintenance or cleaning to prevent accidental starting.
7.1 Valymas
- Keep the tool's air vents clean and free of debris to prevent overheating.
- Nuvalykite įrankį švaria šluoste,amp audinys. Nenaudokite stiprių cheminių medžiagų ar abrazyvinių valiklių.
- Regularly clean the blade guard mechanism to ensure it operates smoothly.
7.2 Peilių priežiūra
- Prieš kiekvieną naudojimą patikrinkite pjūklo diską, ar jis nėra aštrus, įtrūkęs ar netrūksta dantų. Pažeistus diskus nedelsdami pakeiskite.
- Naudokite tik diskiniams pjūklams skirtus ir pjaunamai medžiagai tinkamus diskus.
7.3 Baterijos priežiūra ir laikymas
- Baterijas laikykite vėsioje, sausoje vietoje, toliau nuo tiesioginių saulės spindulių ir ekstremalių temperatūrų.
- Nelaikykite išsikrovusių baterijų ilgą laiką. Jei nenaudojate, periodiškai jas įkraukite.
- Saugokite baterijas nuo vandens ar drėgmės.
- Senas baterijas išmeskite atsakingai laikydamiesi vietinių taisyklių.
8. Problemų sprendimas
| Problema | Galima priežastis | Sprendimas |
|---|---|---|
| Pjūklas neįsijungia | Battery not charged or improperly installed; Lock-off button not pressed; Faulty switch. | Ensure battery is fully charged and properly seated. Press lock-off button before trigger. If problem persists, contact service. |
| Pjūklas praranda galią veikimo metu | Battery charge low; Overload; Dull blade. | Recharge battery. Reduce cutting pressure. Replace or sharpen blade. |
| Peilis stringa arba rūksta | Dull blade; Improper cutting depth; Workpiece not supported; Forcing the saw. | Replace or sharpen blade. Adjust cutting depth. Secure workpiece. Allow saw to cut at its own pace. |
| Netikslūs pjūviai | Improper depth/bevel setting; Loose blade; Unstable workpiece. | Verify depth and bevel settings. Ensure blade bolt is tight. Secure workpiece firmly. |
9. Specifikacijos
| Funkcija | Specifikacija |
|---|---|
| Modelio numeris | PSK106SB-PCL500B |
| Prekės ženklas | CUSHYBITE |
| ttage | 18V DC |
| Greitis be apkrovos | 4,700 aps./min |
| Ašmenų skersmuo | 5-1/2 colio |
| Maks. pjovimo gylis (90°) | 1-11/16 colio |
| Kampinė talpa | 0-50° |
| Baterijos tipas | Ličio jonų |
| Battery Capacities Included | 2.0Ah, 4.0Ah |
10. Garantija ir palaikymas
This CUSHYBITE product is backed by a 3 metų gamintojo garantija from the date of purchase. This warranty covers defects in material and workmanship under normal use. It does not cover damage resulting from misuse, abuse, alteration, or unauthorized repair.
For warranty claims, technical support, or to purchase replacement parts, please contact CUSHYBITE customer service. Please have your model number (PSK106SB-PCL500B) and date of purchase available when contacting support.
For best results, compare the product’s image and listed dimensions to ensure proper fitment for any accessories or replacement parts.
Ask a question about this manual
Ask about setup, troubleshooting, compatibility, parts, safety, or missing instructions. Manuals+ will review the question and use this page’s manual context to help answer it.