
1. Įvadas
Thank you for choosing the CUSHYBITE P1180-PCLCK201K 18V Cordless Lawn Care Combo Kit. This kit provides a comprehensive solution for maintaining small to mid-sized yards, offering the convenience of cordless operation. It includes a 13-inch push lawn mower, a string trimmer, a blower, one 4.0 Ah 18V battery, one 2.0 Ah 18V battery, and two chargers. This manual provides essential information for the safe assembly, operation, maintenance, and troubleshooting of your new tools.
2. Svarbi saugos informacija
Visada perskaitykite ir supraskite visus su šiuo elektriniu įrankiu pateiktus saugos įspėjimus, instrukcijas, iliustracijas ir specifikacijas. Nesilaikant visų toliau išvardytų instrukcijų, gali kilti elektros smūgis, gaisras ir (arba) sunkūs sužalojimai.
- Dėvėkite tinkamas asmenines apsaugos priemones (AAP) including eye protection, hearing protection, long pants, and sturdy footwear.
- Saugokite vaikus ir pašalinius asmenis while operating the tools.
- Inspect the work area for objects that could be thrown or entangled in the cutting mechanism.
- Do not operate tools in wet conditions or in the rain.
- Išimkite akumuliatorių before making any adjustments, changing accessories, or storing the tools.
- Use only CUSHYBITE recommended batteries and chargers with these tools.
- Store tools indoors in a dry, secure place out of reach of children.
3. Pakuotės turinys
Carefully unpack all items and ensure you have received everything listed below. If any items are missing or damaged, contact customer support.

Image: The complete CUSHYBITE P1180-PCLCK201K 18V Cordless Lawn Care Combo Kit, showing the lawn mower, string trimmer, blower, two batteries (4.0 Ah and 2.0 Ah), and two chargers.
- 13-inch Cordless Push Lawn Mower
- Belaidis styginis kirptuvas
- Akumuliatorinis pūstuvas
- 18 V 4.0 Ah ličio jonų akumuliatorius
- 18 V 2.0 Ah ličio jonų akumuliatorius
- 18V Battery Charger (Quantity: 2)
- Naudotojo vadovas (šis dokumentas)
4. Surinkimas ir sąranka
4.1 Cordless Push Lawn Mower Assembly
- Rankenos surinkimas: Unfold the mower handle and secure it in place using the provided knobs or levers. Ensure the handle is fully extended and locked.
- Žolės surinkimo krepšio priedas: Assemble the grass bag if required. Hook the grass bag onto the rear discharge opening of the mower.
- Aukščio reguliavimas: Adjust the cutting height using the single-point lever on the mower deck. Select the desired height before operation.

Image: A person operating the CUSHYBITE 18V Cordless Push Lawn Mower in a small yard, demonstrating its use for tackling typical lawn areas.
4.2 Cordless String Trimmer Assembly
- Pagalbinė rankena: Attach the auxiliary handle to the trimmer shaft. Adjust its position for comfortable operation.
- Apsaugos priedas: Securely fasten the debris guard to the trimmer head using the provided hardware. This guard protects against thrown debris.
- Linijos montavimas: If necessary, refer to the trimmer head instructions for proper string line installation or replacement.

Image: A person using the CUSHYBITE 18V Cordless String Trimmer to trim grass edges around a tree, highlighting its maneuverability and runtime.
4.3 Cordless Blower Assembly
- Purkštuko tvirtinimas: Attach the blower nozzle securely to the blower housing. Ensure it clicks into place or is firmly twisted on.
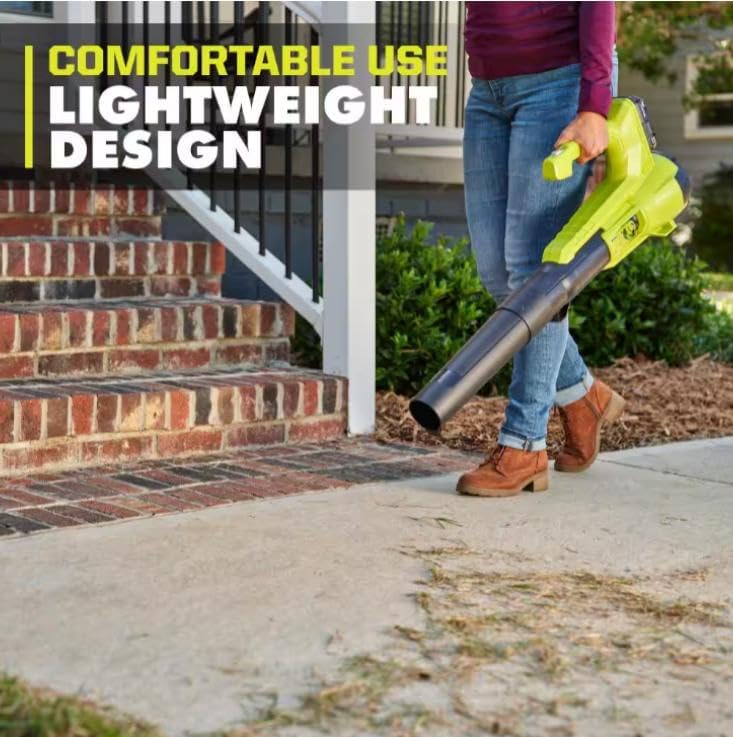
Image: A person using the CUSHYBITE 18V Cordless Blower to clear debris from a concrete pathway, demonstrating its lightweight design and ease of use.
5. Battery and Charger Operation
5.1 Akumuliatoriaus įkrovimas
- Įjunkite įkroviklį į standartinį elektros lizdą.
- Stumkite akumuliatorių bloką ant įkroviklio, kol jis spragtelėdamas užsifiksuos vietoje.
- The charger indicator light will show the charging status (e.g., solid red for charging, solid green for fully charged).
- Once fully charged, remove the battery from the charger. Do not leave batteries on the charger for extended periods after full charge.
5.2 Akumuliatoriaus įdėjimas ir išėmimas
- Norėdami įdiegti: Sulygiuokite akumuliatorių bloką su įrankio akumuliatoriaus lizdu ir stumkite jį, kol jis tvirtai užsifiksuos.
- Norėdami pašalinti: Press the battery release button(s) and slide the battery pack out of the tool.
6. Naudojimo instrukcijos
6.1 Cordless Push Lawn Mower
- Įsitikinkite, kad akumuliatorius yra visiškai įkrautas ir tinkamai sumontuotas.
- Press and hold the safety button, then pull the bail switch lever towards the handle to start the mower.
- Push the mower forward in overlapping rows for an even cut. Avoid cutting wet grass.
- Release the bail switch lever to stop the mower.
6.2 Cordless String Trimmer
- Įsitikinkite, kad akumuliatorius yra visiškai įkrautas ir tinkamai sumontuotas.
- Tvirtai laikykite žoliapjovę abiem rankomis.
- Press the safety lock-out button, then squeeze the trigger to start the trimmer.
- Move the trimmer head in a sweeping motion, keeping the line parallel to the ground for best results.
- Atleiskite gaiduką, kad sustabdytumėte žoliapjovę.
6.3 Akumuliatorinis pūstuvas
- Įsitikinkite, kad akumuliatorius yra visiškai įkrautas ir tinkamai sumontuotas.
- Hold the blower firmly.
- Norėdami paleisti orapūtę, paspauskite gaiduką.
- Nukreipkite oro srautą į šiukšles, kurias norite pašalinti.
- Atleiskite gaiduką, kad sustabdytumėte pūstuvą.
7. Priežiūra
Regular maintenance ensures optimal performance and extends the life of your tools. Always remove the battery pack before performing any maintenance.
- Valymas: After each use, clean all tools with a damp cloth. Remove any grass clippings, dirt, or debris from vents and moving parts. Do not use solvents.
- Vejapjovės peilis: Periodically inspect the mower blade for sharpness and damage. Sharpen or replace the blade as needed. Refer to the mower's specific instructions for blade removal and installation.
- Žoliapjovės valas: Replace the trimmer line when it becomes too short or breaks. Follow the instructions for your specific trimmer head.
- Saugykla: Store all tools, batteries, and chargers in a cool, dry, and secure location, away from direct sunlight and extreme temperatures. Ensure batteries are partially charged before long-term storage.
8. Problemų sprendimas
If you encounter issues with your CUSHYBITE lawn care kit, refer to the following common problems and solutions:
| Problema | Galima priežastis | Sprendimas |
|---|---|---|
| Įrankis neįsijungia | Baterija neįkrauta arba netinkamai įdėta; Neįjungtas apsauginis jungiklis. | Charge battery fully and ensure it is securely installed. Engage safety button and trigger/bail switch correctly. |
| Lawn mower cuts unevenly | Dull or damaged blade; Incorrect cutting height; Mowing too fast. | Inspect and sharpen/replace blade. Adjust cutting height. Mow at a slower, consistent pace. |
| Žoliapjovės valas nejuda | Line tangled or too short; Debris in trimmer head. | Remove battery, clear debris, and re-spool or replace line. |
| Pūstuvas skleidžia mažą oro kiekį | Nozzle obstructed; Battery low. | Remove battery, clear any obstructions from the nozzle or air intake. Charge battery. |
9. Specifikacijos
| Funkcija | Detalė |
|---|---|
| Prekės ženklas | CUSHYBITE |
| Modelio numeris | P1180-PCLCK201K |
| Maitinimo šaltinis | 18 V ličio jonų akumuliatorius |
| Lawn Mower Deck Size | 13 colių |
| Baterijos talpa | 1 x 4.0 Ah, 1 x 2.0 Ah |
| Įkrovikliai įtraukti | 2 |
| UPC | 670329599976 |
10. Garantija ir palaikymas
CUSHYBITE products are manufactured to high-quality standards. For warranty information, technical support, or to order replacement parts, please refer to the contact information provided with your purchase documentation or visit the official CUSHYBITE website. Please have your model number (P1180-PCLCK201K) and purchase date available when contacting support.