
Voktta A38IDCE0130-003
Voktta USB Rechargeable Soldering Iron Instruction Manual
Model: A38IDCE0130-003
1. Saugos informacija
Please read all safety instructions carefully before using the Voktta USB Rechargeable Soldering Iron. Failure to follow these instructions may result in electric shock, fire, or serious injury.
- Aukštos temperatūros: The soldering iron tip reaches very high temperatures (up to 450°C / 842°F). Avoid direct contact with the tip to prevent burns.
- Vėdinimas: Use the soldering iron in a well-ventilated area to avoid inhaling fumes produced during soldering.
- Akių apsauga: Always wear safety glasses to protect your eyes from solder splashes or fumes.
- Saugoti nuo vaikų: This product is not a toy. Keep it out of reach of children and unauthorized persons.
- Proper Stand Usage: Always place the hot soldering iron in its designated stand when not in use to prevent accidental contact or damage to surfaces.
- Išjungti: Disconnect the power and allow the iron to cool completely before cleaning, storing, or changing tips.
- Degios medžiagos: Laikykite degias medžiagas atokiai nuo litavimo vietos.
- Baterijos sauga: Do not expose the battery to extreme temperatures or disassemble it. Use only the provided charging cable.
2. Produktas baigtasview
The Voktta USB Rechargeable Soldering Iron is a portable and versatile tool designed for various electronic repair and DIY projects. It features an adjustable temperature range, quick heating, and a built-in battery for cordless operation.
Pagrindinės funkcijos:
- Reguliuojama temperatūra: Temperature range of 200-450°C (392-842°F), switchable between Celsius and Fahrenheit.
- Greitas šildymas: Heats up in approximately 10 seconds and reaches maximum temperature in about 30 seconds.
- LCD ekranas: High-resolution screen displays current temperature status.
- Belaidis veikimas: Built-in 800 mAh battery provides approximately 30 minutes of continuous use after a 1.5-hour charge via USB-C.
- Ergonomiškas dizainas: Features a non-slip, heat-resistant handle for comfortable and safe use.
- Keraminis kaitinimo šerdis: Ensures stable and efficient heating.
Pakuotės turinys:
- USB Electric Soldering Iron x 1
- Soldering Tip x 3 (various types)
- Rosin x 1
- Soldering Iron Holder (with sponge) x 1
- C tipo USB įkrovimo laidas x 1
- Soldering Wire x 1
- Toolbox x 1
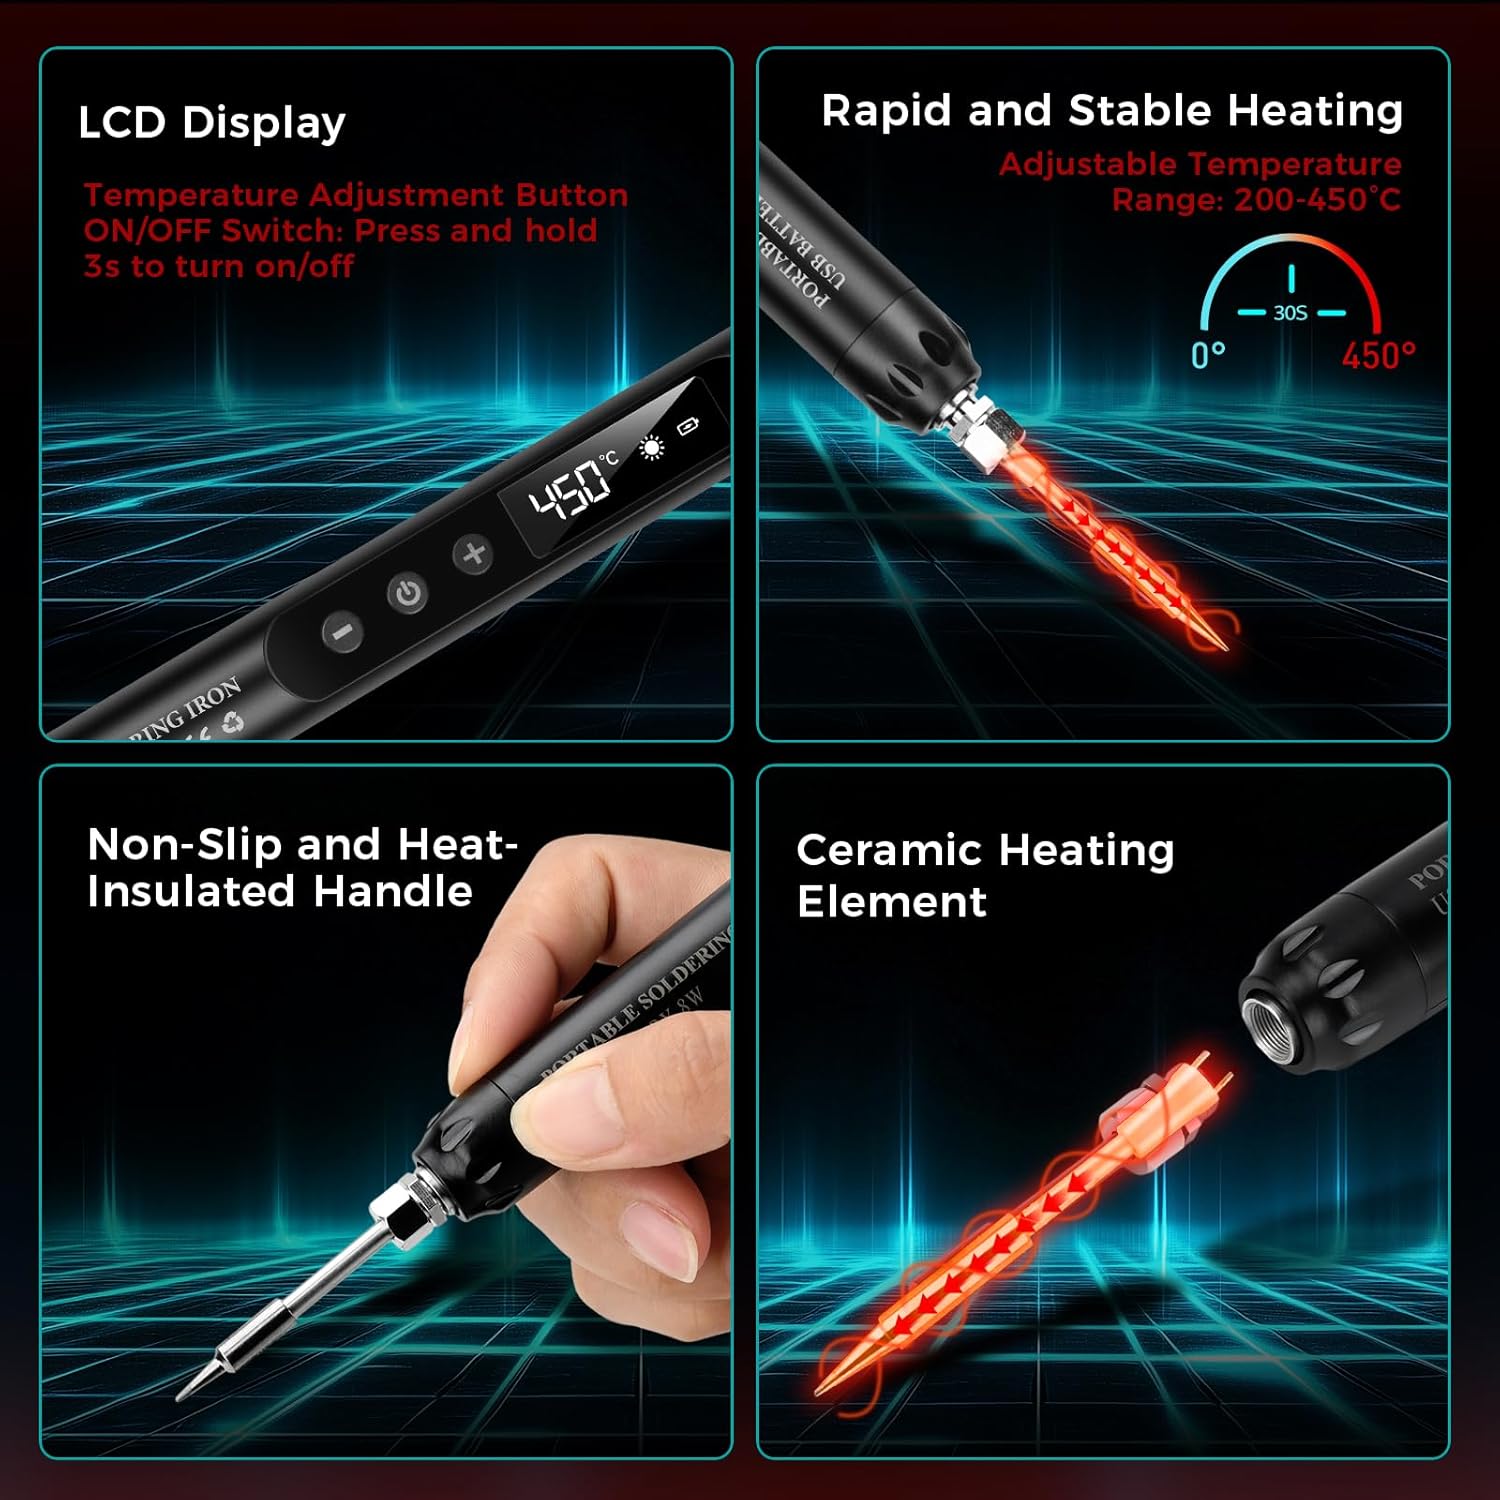
Vaizdas: Viršview of the soldering iron's key features including the LCD display, rapid heating, non-slip handle, and ceramic heating element.

Vaizdas: pvzamples of common applications for the soldering iron, such as repairing circuit boards, jewelry, and other small electronic components.
3. Sąranka
3.1 Pradinis įkrovimas
Before first use, fully charge the soldering iron. Connect the provided USB Type-C charging cable to the soldering iron's charging port and to a compatible USB power source (e.g., wall adapter, computer USB port, power bank).
- A raudona šviesa indicates that the device is charging.
- A žalia šviesa rodo, kad baterija visiškai įkrauta.
- Įkrovimas paprastai trunka apie 1.5 valandos.

Image: The soldering iron connected to a USB power source, illustrating the charging indicator lights (red for charging, green for fully charged).
3.2 Attaching a Soldering Tip
Ensure the soldering iron is cool and powered off before changing tips. Carefully screw the desired soldering tip onto the heating element. Do not overtighten.
3.3 Darbo vietos paruošimas
- Ensure your workspace is clean, well-lit, and well-ventilated.
- Place the soldering iron stand on a stable, heat-resistant surface.
- Moisten the sponge in the soldering iron holder with a small amount of water. This sponge is used for cleaning the tip.
- Have your solder wire, rosin, and components ready.
4. Naudojimo instrukcijos
4.1 Įjungimas / išjungimas
To power on the soldering iron, press and hold the power button for approximately 3 seconds until the LCD screen illuminates. To power off, press and hold the power button again for 3 seconds.
4.2 Temperatūros reguliavimas
Once powered on, use the '+' and '-' buttons to adjust the desired temperature. The temperature range is 200-450°C (392-842°F). The LCD screen will display the current temperature.

Image: The soldering iron's LCD screen displaying the temperature and controls for adjustment and unit conversion.
4.3 Temperatūros vienetų perjungimas
The soldering iron supports both Celsius (°C) and Fahrenheit (°F). Refer to the product's specific instructions or button labels for switching between these units, typically by a short press of a dedicated button or a combination of temperature adjustment buttons.
4.4 Soldering Process
Follow these steps for effective soldering:
- Moisten the Sponge: Ensure the cleaning sponge is damp.
- Maitinimas: Turn on the soldering iron and set the desired temperature. Allow it to heat up.
- Apply Rosin Flux: If necessary, apply a small amount of rosin flux to the components or PCB pads to improve solder flow.
- Heat the Joint: Touch the hot soldering iron tip to both the component lead and the PCB pad simultaneously. Heat them for a few seconds.
- Taikyti lydmetalį: While heating, touch the solder wire to the heated joint (not directly to the iron tip). The solder should melt and flow smoothly around the joint.
- Pašalinkite lydmetalį ir geležį: Once enough solder has flowed, remove the solder wire first, then remove the soldering iron. Allow the joint to cool naturally without disturbance.
- Nuvalykite antgalį: Wipe the hot soldering iron tip on the moist sponge to remove excess solder and oxidation.
- Išjungti: When finished, turn off the soldering iron and place it securely in its stand to cool.

Image: A step-by-step visual guide demonstrating the proper soldering technique.
5. Priežiūra
5.1 Litavimo antgalio valymas
Regular cleaning of the soldering tip is crucial for optimal performance and longevity. Wipe the hot tip on a moist sponge frequently during use to remove excess solder and oxidation. For stubborn residue, use a brass wire cleaner (not included) or specialized tip cleaner.
5.2 Replacing Soldering Tips
Ensure the iron is cool and unplugged. Unscrew the old tip and screw in a new one. Only use compatible replacement tips.
5.3 Baterijos priežiūra ir laikymas
- Avoid fully discharging the battery frequently. Recharge when the battery indicator is low.
- Store the soldering iron in a cool, dry place when not in use, preferably in its toolbox.
- If storing for extended periods, charge the battery to about 50% to prolong its lifespan.
6. Problemų sprendimas
- Lygintuvas nešildomas:
- Check if the iron is powered on (LCD screen should be lit).
- Įsitikinkite, kad akumuliatorius įkrautas. Prijunkite prie maitinimo šaltinio ir patikrinkite įkrovimo indikatorių.
- Verify the soldering tip is securely attached.
- Solder Not Melting or Poor Joints:
- Padidinkite nustatytą temperatūrą.
- Clean the soldering tip thoroughly; a dirty tip cannot transfer heat effectively.
- Ensure you are heating both the component lead and the pad, not just the solder.
- Use fresh solder wire.
- Akumuliatorius neįkraunamas:
- Check the USB Type-C cable for damage and ensure it's properly connected.
- Išbandykite kitą USB maitinimo šaltinį arba sieninį adapterį.
7. Specifikacijos
| Modelio numeris | A38IDCE0130-003 |
| Maitinimo šaltinis | Maitinamas baterijomis |
| Vattage | 8 vatų |
| Reguliuojama temperatūra | 200–450 °C (392–842 °F) |
| Baterijos talpa | 800 mAh (įmontuotas) |
| Įkrovimo laikas | apytiksliai 1.5 valandas |
| Veikimo laikas | Maždaug 30 minučių (nepertraukiamai) |
| Šildymo laikas | 10 seconds to heat, 30 seconds to max temperature |
| Rankenos medžiaga | Plastikas, Guma |
| Prekės svoris | 210 gramų |
| Pakuotės matmenys | 24 x 9.4 x 3.7 cm |
8. Garantija ir palaikymas
This Voktta product is covered by a standard manufacturer's warranty against defects in materials and workmanship. Please refer to your purchase documentation for specific warranty terms and duration.
For technical support, warranty claims, or replacement parts, please contact the retailer or manufacturer directly. Keep your proof of purchase for warranty validation.
Ask a question about this manual
Ask about setup, troubleshooting, compatibility, parts, safety, or missing instructions. Manuals+ will review the question and use this page’s manual context to help answer it.