
1. Įvadas
Thank you for choosing the COOSPO X1 Mini Electric Bicycle Pump. This compact and efficient pump is designed to provide quick and accurate tire inflation for various bicycles and sports equipment. Featuring a digital display, auto-stop function, and versatile valve compatibility, the X1 ensures a reliable and convenient inflation experience. Please read this manual thoroughly before use to ensure proper operation and maintenance.
2. Produktas baigtasview
2.1 Pakuotės turinys
- X1 Electric Bicycle Pump x1
- Presta vožtuvo adapteris x1
- High-Pressure Flexible Hose (with Schrader Valve x1) x1
- C tipo USB įkrovimo laidas x1
- Needle Valve Adapter (for balls) x1
2.2 Įrenginio komponentai
The COOSPO X1 pump features a clear digital LCD display, control buttons for pressure adjustment and power, and a charging port. Refer to the image below for a visual guide to the pump's components.
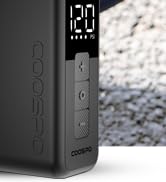
The digital display shows real-time pressure and battery level. Buttons allow for increasing/sumažėjimasasing preset pressure and powering the pump on/off.
3. Sąranka
3.1 Siurblio įkrovimas
Before first use, fully charge the pump. Connect the provided USB Type-C cable to the pump's charging port and a compatible USB power source (e.g., wall adapter, power bank). The battery indicator on the display will show charging status. A full charge takes approximately 40 minutes.

A 15-minute charge can inflate one full road bike tire (700x23C, 0-110 PSI).
3.2 Attaching the Flexible Hose and Adapters
Screw the flexible high-pressure hose securely onto the pump's output port. Depending on your tire valve type, attach the appropriate adapter to the other end of the flexible hose.
- Schrader vožtuvas: The flexible hose comes with a Schrader valve connector pre-installed.
- Presta vožtuvas: Screw the Presta valve adapter onto the Schrader connector of the flexible hose.
- Needle Valve (for balls): Screw the needle valve adapter onto the Schrader connector of the flexible hose.

4. Naudojimo instrukcijos
4.1 Įjungimas / išjungimas
Press and hold the power button (usually the center button) to turn the pump on or off. The LCD screen will illuminate upon activation.
4.2 Norimo slėgio nustatymas
Once powered on, the display will show the current tire pressure. Use the '+' and '-' buttons to adjust the target pressure. The pump supports a maximum pressure of 120 PSI. The unique atmospheric pressure sensor automatically calibrates upon startup, ensuring accurate inflation at any altitude.

4.3 Connecting to the Valve and Inflating
- Ensure the correct valve adapter is attached to the flexible hose.
- Securely connect the adapter to your tire's valve stem. For Presta valves, ensure the valve core is unscrewed before attaching the adapter.
- Press the power button to start inflation. The pump will automatically stop once the preset pressure is reached.
- After inflation, quickly disconnect the adapter from the valve stem.

The pump's high-efficiency internal ventilation system prevents overheating, ensuring safe operation without the need for a silicone case. Advanced dynamic balancing technology reduces vibrations for smooth inflation.
4.4 Inflation Performance Reference
The following table provides approximate inflation times and capacities based on laboratory data. Actual performance may vary due to battery charge, environmental conditions, and other factors.
| Tipas | PSI diapazonas | Inflation Quantity | Inflation Speed per Tire |
|---|---|---|---|
| Road Bike (700 x 23C) | 0 ~ 80 PSI | ≈5 tires | ≈50 sek |
| 0 ~ 90 PSI | ≈5 tires | ≈59 sek | |
| 0 ~ 100 PSI | ≈5 tires | ≈68 sek | |
| 0 ~ 110 PSI | ≈4 tires | ≈90 sek | |
| 0 ~ 120 PSI | ≈2 tires | ≈98 sek | |
| MTB (27.5 x 1.95) | 0 ~ 50 PSI | ≈3 tires | ≈80 sek |
| Kamuolys | 0 ~ 7 PSI | ≈19 Pcs | ≈30 sek |

5. Priežiūra
- Valymas: Wipe the pump with a soft, dry cloth. Do not use harsh chemicals or immerse the device in water.
- Saugykla: Store the pump in a cool, dry place away from direct sunlight and extreme temperatures. Ensure the battery is partially charged if storing for extended periods.
- Akumuliatoriaus priežiūra: To prolong battery life, avoid fully discharging the pump frequently. Recharge it when the battery level is low.
6. Problemų sprendimas
| Problema | Galima priežastis | Sprendimas |
|---|---|---|
| Siurblys neįsijungia. | Senka baterija. | Charge the pump using the provided USB-C cable. |
| Siurblys nepripučiamas. | Hose or adapter not securely connected. Incorrect valve adapter. Target pressure already reached. | Ensure all connections are tight. Use the correct adapter for your valve type. Check the current pressure reading. |
| Netikslus slėgio rodmuo. | Loose connection. Sensor calibration issue. | Ensure the hose is tightly connected. Turn the pump off and on again to recalibrate the sensor. |
| Pump overheats during use. | Ilgalaikis nepertraukiamas veikimas. | Allow the pump to cool down before resuming operation. The internal ventilation system is designed to manage heat, but prolonged use can still cause warmth. |
7. Specifikacijos
- Prekinis ženklas: CooSpo
- Modelis: X1
- Medžiaga: Plastikiniai
- Prekės svoris: 200 gramų
- Gaminio matmenys: 5.3 L x 3 W x 7.2 A cm
- Maitinimo šaltinis: Baterija
- Maksimalus slėgis: 120 PSI
- Baterijos tipas: Ličio jonų (500 mAh)
- Jungties tipas: C tipo USB
- Įtraukti komponentai: X1 Electric Bicycle Pump, Presta Valve Adapter, High-Pressure Flexible Hose (with Schrader Valve), USB Type-C Cable, Needle Valve Adapter.
8. Garantija ir palaikymas
The COOSPO X1 Mini Electric Bicycle Pump comes with a standard manufacturer's warranty. For detailed warranty information, product support, or service inquiries, please refer to the warranty card included in your package or visit the official CooSpo website. You can also contact the seller directly through your purchase platform for assistance.


