
rockspace AC1200
rockspace AC1200 Dual Band WiFi Extender Instruction Manual
Modelis: AC1200
1. Produktas baigtasview
The rockspace AC1200 Dual Band WiFi Extender is designed to expand your existing wireless network coverage, eliminating dead zones and providing a stronger, more reliable internet connection throughout your home or office. It operates on both 2.4 GHz and 5 GHz frequency bands, offering combined speeds up to 733Mbps for various online activities.

Image 1.1: The rockspace AC1200 Dual Band WiFi Extender with its two external antennas and indicator lights.
Pagrindinės funkcijos:
- Išplėstinė aprėptis: Provides 360° signal coverage, extending your WiFi network up to 1292 sq. ft.
- Dviejų dažnių diapazonas: Supports both 2.4 GHz (for wider coverage) and 5 GHz (for faster speeds) bands, with a combined rate of up to 733Mbps.
- Visuotinis suderinamumas: Works with all standard 802.11n/g/b/ac routers and gateways.
- Išmaniojo signalo indikatorius: Helps identify the optimal placement for the extender by displaying connection status with varied colors.
- Lengvas nustatymas: Features a one-press WPS button setup for quick connection to your router.

Image 1.2: Illustration showing how the WiFi extender expands coverage to eliminate dead zones in a multi-story home.
2. Sąrankos instrukcijos
There are two primary methods to set up your rockspace AC1200 WiFi Extender: using the WPS button or via a web naršyklė.
2.1. WPS Button Setup (Recommended for quick setup)
The WPS (Wi-Fi Protected Setup) method allows for a quick and easy connection to your existing router.
- Maitinimas: Plug the WiFi extender into an electrical outlet near your main router. Wait for the Power (PWR) LED to turn solid blue.
- Įjunkite WPS plėtiklį: Press the WPS button on the side of the extender. The WPS LED will start blinking.
- Įjunkite WPS maršrutizatoriuje: Within two minutes, press the WPS button on your main router. Refer to your router's manual if you cannot locate the WPS button.
- Prisijunkite: Wait for the WPS LED on the extender to turn solid blue, indicating a successful connection. This may take a few moments.
- Perkelti: Once connected, unplug the extender and move it to a location halfway between your router and the WiFi dead zone. Plug it into an outlet and wait for the Signal LED to turn blue (indicating a good connection).

Image 2.1: Diagram illustrating the WPS setup process, showing pressing WPS buttons on both the router and the extender.
2.2. Web Naršyklės sąranka
If your router does not have a WPS button, or if the WPS method fails, you can set up the extender using a web naršyklė.
- Maitinimas: Plug the WiFi extender into an electrical outlet near your main router. Wait for the Power (PWR) LED to turn solid blue.
- Connect to Extender's WiFi: On your computer or smartphone, connect to the extender's default WiFi network (e.g., "rockspace_EXT" or similar, usually found on a label on the device). No password is required initially.
- Prieigos sąrankos puslapis: Atidarykite a web browser (e.g., Chrome, Firefox) and enter the default IP address or domain name (e.g., re.rockspace.local or 192.168.0.254) adreso juostoje.
- Vykdykite ekrane pateikiamus nurodymus: Create an administrator password, select your existing WiFi network, and enter its password. The extender will then connect to your router.
- Perkelti: Once setup is complete, unplug the extender and move it to an optimal location. Plug it back in and wait for the Signal LED to turn blue.
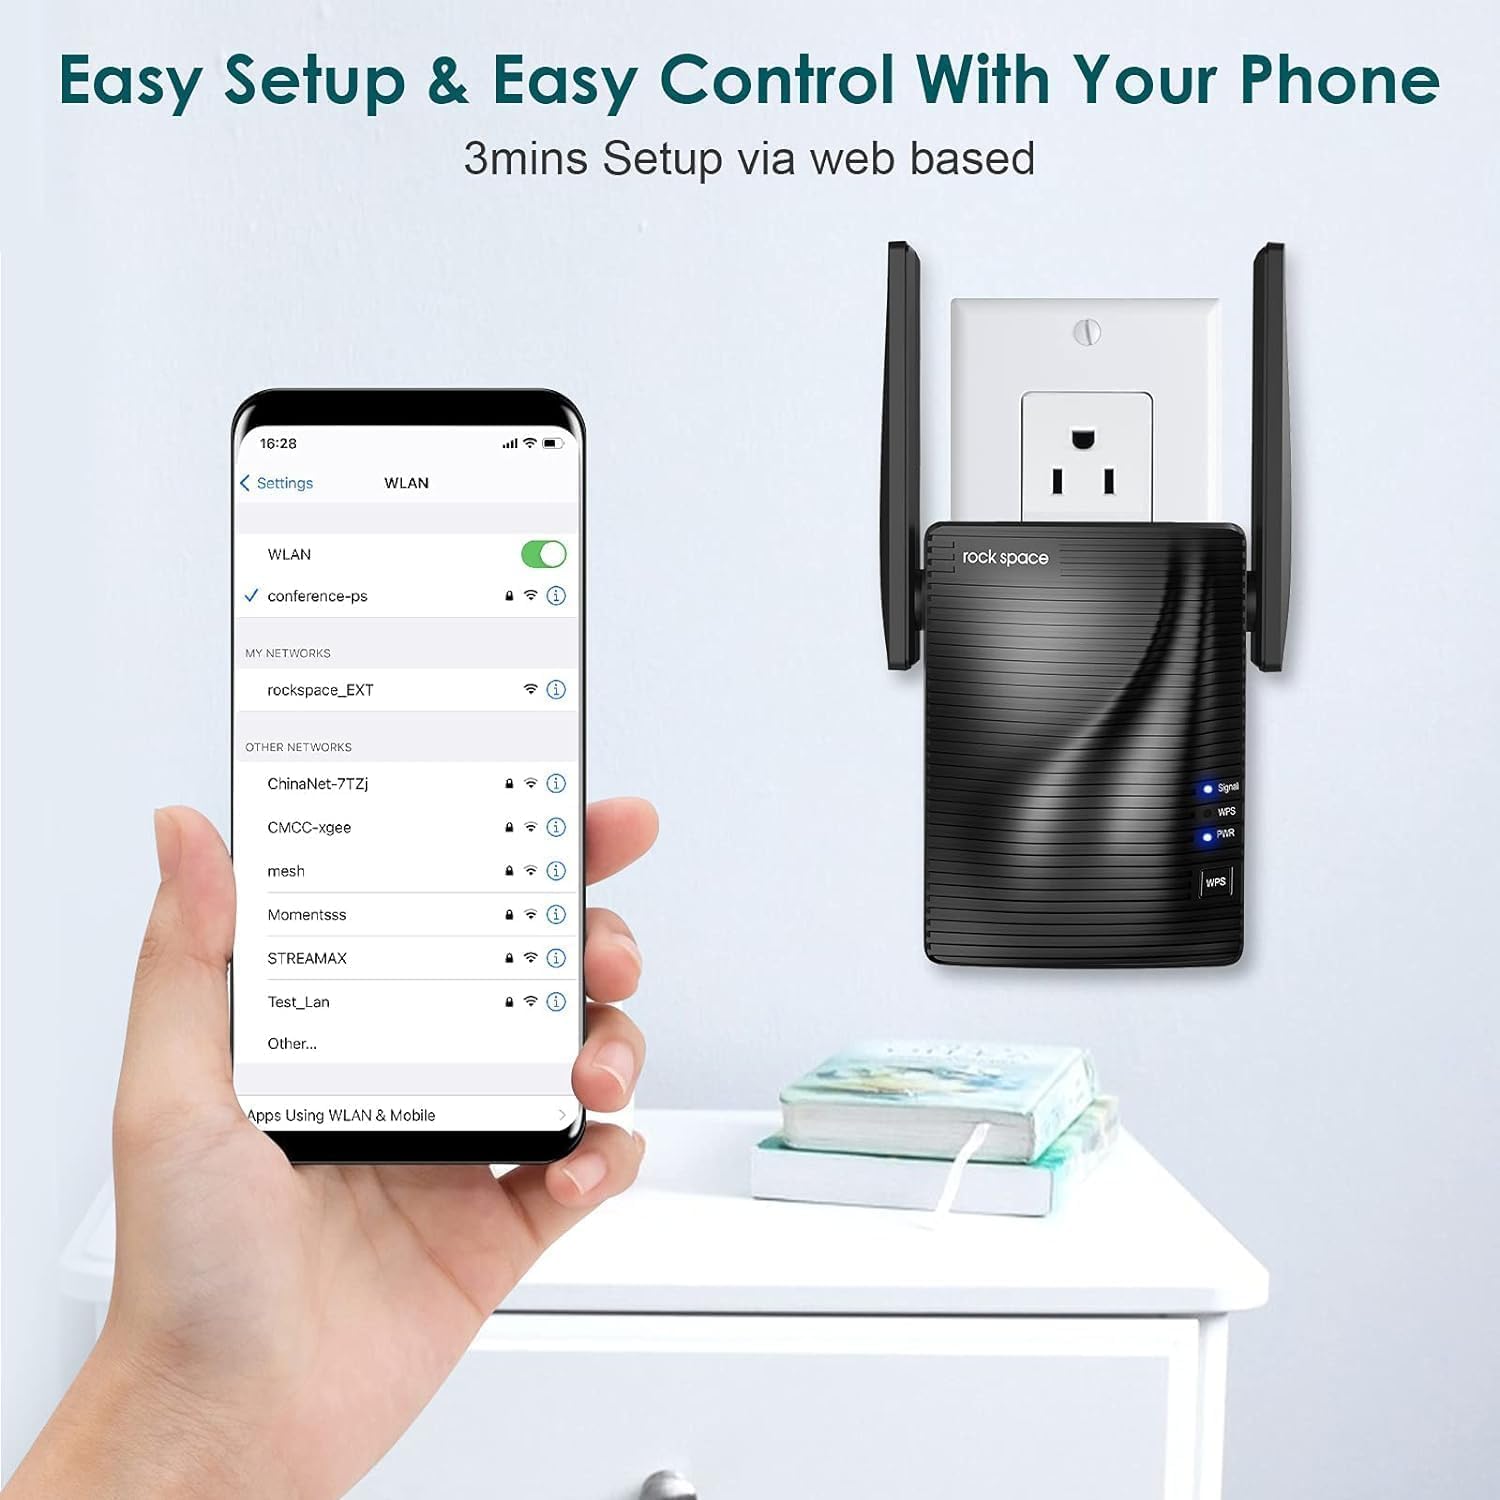
Image 2.2: A smartphone screen showing connection to the extender's WiFi network for web- pagrįsta sąranka.
3. Naudojimo instrukcijos
3.1. Indikatorių lempučių supratimas
- Maitinimo (PWR) šviesos diodas: Solid blue indicates the extender is powered on.
- WPS šviesos diodas: Blinking indicates WPS pairing mode. Solid blue indicates a successful WPS connection.
- Signalo šviesos diodas:
- Visai mėlyna: Good signal strength from the router.
- Vientisa raudona: Weak signal strength from the router. Consider relocating the extender closer to the router.
- Išjungta: No connection to the router.
3.2. Dviejų dažnių veikimas
The AC1200 extender creates two extended networks, one for 2.4 GHz and one for 5 GHz. Devices connected to the 2.4 GHz network will generally have a wider range, while devices connected to the 5 GHz network will experience faster speeds, ideal for streaming and gaming.

Image 3.1: Illustration showing devices connected to 2.4GHz and 5GHz bands with their respective speed capabilities.
3.3. Laidinis ryšys
The extender may include an Ethernet port, allowing you to connect a wired device (like a desktop computer, gaming console, or smart TV) to the extended network for a stable, high-speed connection.
4. Priežiūra
Proper maintenance ensures the longevity and optimal performance of your WiFi extender.
- Valymas: Gently wipe the device with a dry, soft cloth. Avoid using liquid cleaners or aerosols.
- Vėdinimas: Ensure the extender is placed in a location with adequate airflow to prevent overheating. Do not cover ventilation holes.
- Aplinka: Venkite ilgintuvo laikymo tiesioginiuose saulės spinduliuose, šalia šilumos šaltinių arba didelės drėgmės vietose.
- Firmware atnaujinimai: Periodically check the rockspace official websvetainės, kurioje rasite programinės įrangos atnaujinimus. Atnaujinus programinę įrangą, galima pagerinti našumą, pridėti naujų funkcijų ir ištaisyti klaidas.
5. Problemų sprendimas
If you encounter issues with your WiFi extender, try the following troubleshooting steps:
5.1. Nėra interneto ryšio arba silpnas signalas
- Patikrinkite vietą: Relocate the extender closer to your main router. The Signal LED should be solid blue.
- Patikrinkite maršrutizatoriaus ryšį: Ensure your main router is working correctly and providing internet access.
- Re-setup: Try performing the setup process again, either via WPS or web naršyklė.
- Trikdžiai: Move the extender away from large metal objects, microwaves, cordless phones, or other devices that might cause interference.
5.2. Mažas greitis
- Optimali vieta: Ensure the extender is placed in an optimal location (Signal LED solid blue).
- Juostos pasirinkimas: For speed-intensive tasks, try connecting your device to the 5 GHz extended network if available.
- Tinklo perkrova: Too many devices on your network or heavy internet usage can slow down speeds.
5.3. WPS Setup Fails
- Laikas: Ensure you press the WPS button on both the extender and router within the two-minute window.
- Maršrutizatoriaus WPS: Some routers require WPS to be enabled in their settings. Check your router's manual.
- Alternatyvi sąranka: Naudokite web naršyklės sąrankos metodą, jei WPS ir toliau nepavyksta.
5.4. Forgot Administrator Password or Network Name/Password
- Gamykliniai nustatymai: Locate the reset button (usually a small pinhole) on the extender. With the extender powered on, use a paperclip to press and hold the reset button for about 8-10 seconds until the LEDs flash. The extender will revert to factory default settings, and you will need to set it up again.
6. Specifikacijos
| Funkcija | Specifikacija |
|---|---|
| Modelis | AC1200 |
| bevielio ryšio standartas | IEEE 802.11ac/n/g/b |
| Dažnių juostos | 2.4 GHz ir 5 GHz |
| Kombinuotas greitis | Up to 733 Mbps (300 Mbps for 2.4 GHz, 433 Mbps for 5 GHz) |
| Antenos | Dual External Antennas |
| Ethernet prievadas | 1 x 10/100 Mbps |
| Saugumas | WPA-PSK/WPA2-PSK |
| Matmenys | 4.8 x 3.86 x 3.43 colio |
| Svoris | 9.4 uncijos |
7. Informacija apie garantiją
rockspace products typically come with a limited warranty. For detailed warranty terms and conditions, please refer to the warranty card included with your product or visit the official rockspace websvetainėje. Išsaugokite pirkimo kvitą kaip pirkimo įrodymą garantiniams reikalavimams.
8. Pagalba klientams
If you require further assistance or have questions not covered in this manual, please contact rockspace customer support through their official websvetainėje arba kontaktinę informaciją, pateiktą ant jūsų produkto pakuotės.
Ask a question about this manual
Ask about setup, troubleshooting, compatibility, parts, safety, or missing instructions. Manuals+ will review the question and use this page’s manual context to help answer it.