
1. Įvadas
The FNIRSI DST-210 is a compact and versatile 3-in-1 handheld device designed for electronic testing and measurement. It integrates the functions of a digital oscilloscope, a true RMS multimeter, and a signal generator into a single portable unit. This manual provides detailed instructions to help you effectively use and maintain your device.
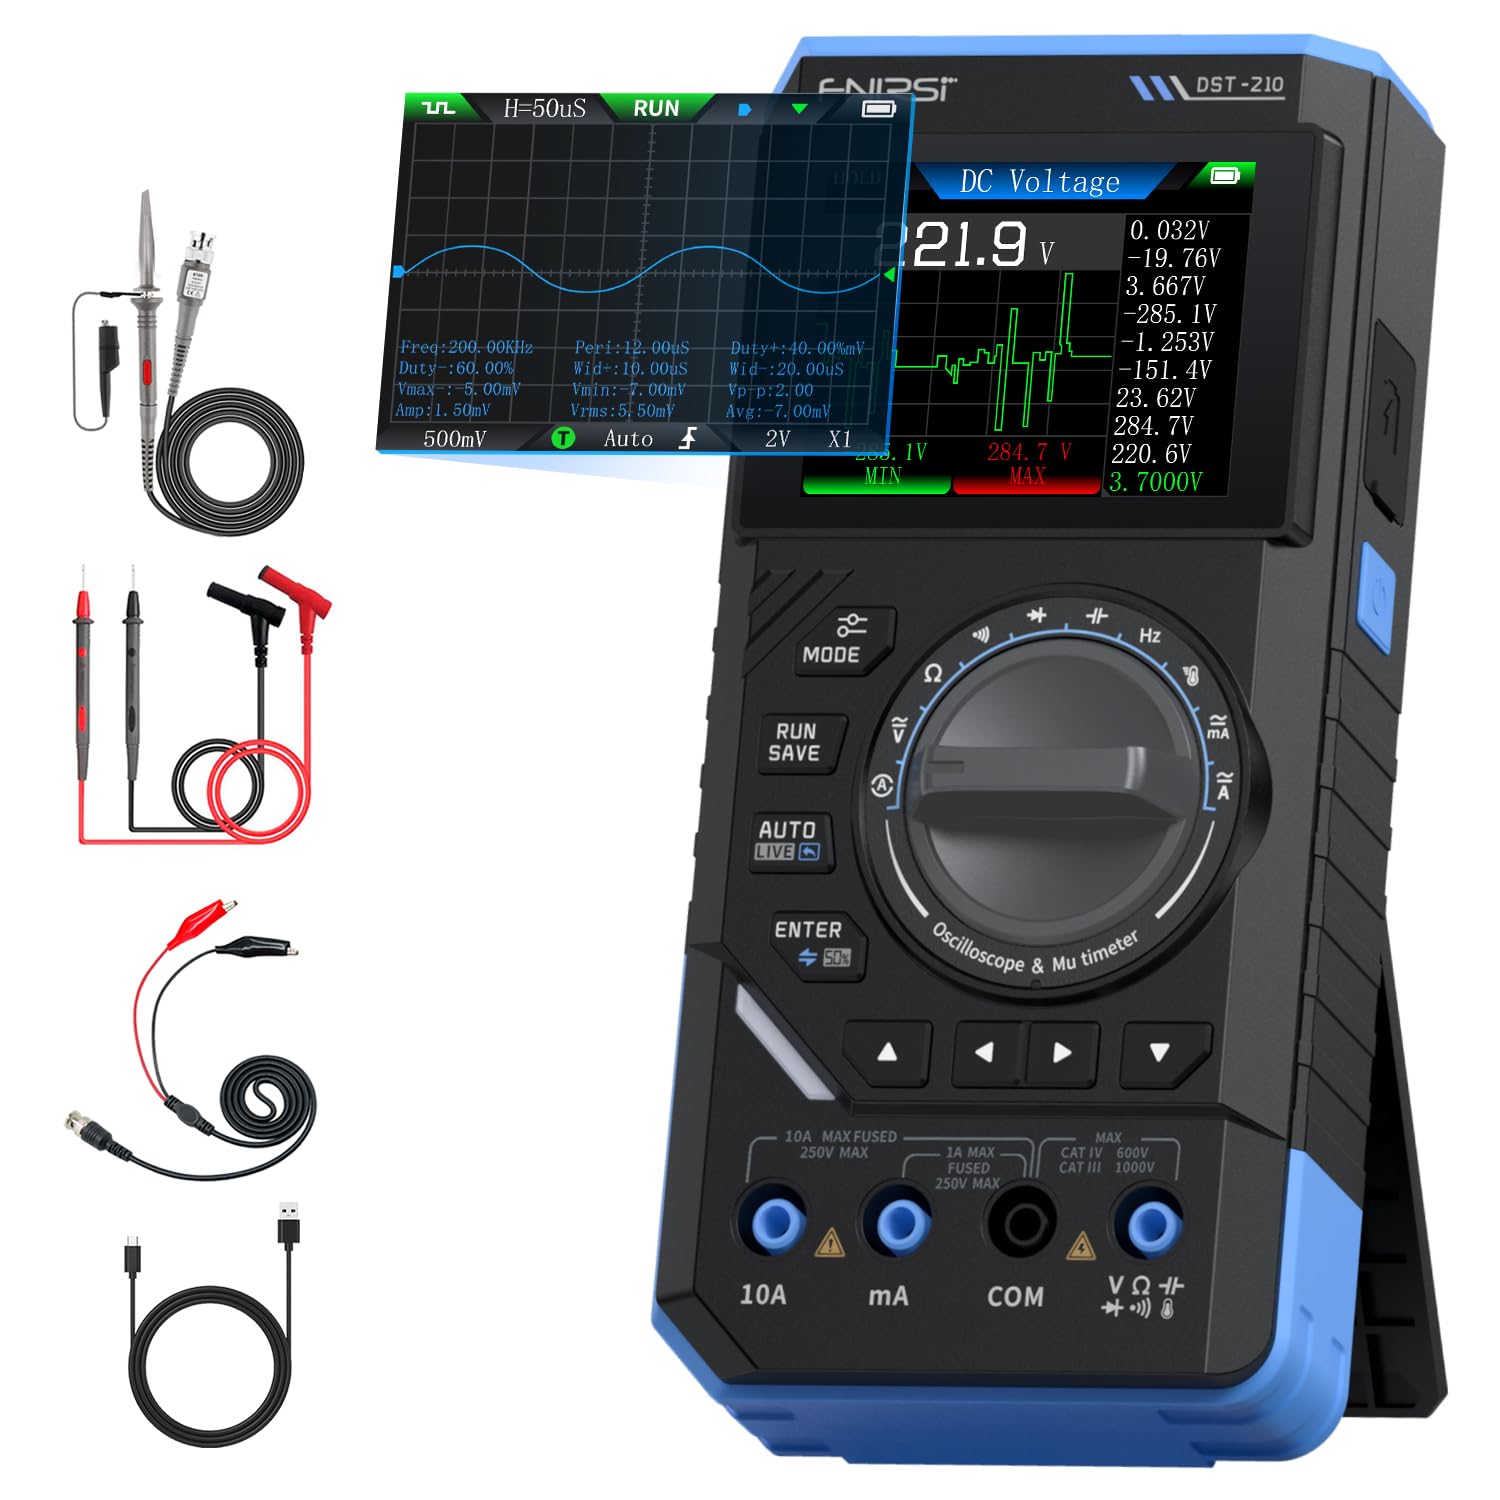
Figure 1: FNIRSI DST-210 3-in-1 Handheld Device
2. Produktas baigtasview
2.1 Pagrindinės savybės
- 3 viename funkcionalumas: Combines a digital oscilloscope, a true RMS multimeter, and a signal generator.
- Ekranas: 2.8-inch TFT color LCD for clear data visualization.
- Osciloskopas: 10MHz analog bandwidth, 48MSa/s real-time sampling rate, supports Auto/Normal/Single trigger modes, waveform image saving and display.
- Multimetras: 19999-count true RMS measurement for DC/AC voltage, DC/AC current, resistance, capacitance, frequency, temperature, diode, and continuity. Features data hold, record mode with graphical display, and LIVE function for voltage presence detection.
- Signalo generatorius: Outputs 13 types of waveforms (Sine, Square, Sawtooth, Half-wave, Full-wave, Step, Reverse Step, Index Up/Down, DC, Multi-audio, Sink Pulse, Lorentz Wave) with adjustable frequency (0-50KHz), amplitude (0.1-3.0V), and duty cycle (0-100%).
- Perkeliamumas: Compact design with an integrated stand, powered by a 3000mAh rechargeable lithium battery providing up to 10 hours of continuous use. Type-C charging supported.
2.2 Pakuotės turinys
Patikrinkite, ar pakuotėje yra visi reikalingi daiktai:
- FNIRSI DST-210 Main Unit
- P6100 Didelis tūristage Zondas
- Bandymo laidai (raudoni ir juodi)
- Aligatoriaus įrašai
- C tipo įkrovimo laidas
- Instruction Manual (PDF version available online)
- Pakavimo dėžutė

2 pav.: Pridedami priedai
3. Sąranka
3.1 Įrenginio įkrovimas
Before initial use, fully charge the DST-210. Connect the provided Type-C charging cable to the device's Type-C port and a compatible USB power adapter (5V/1A). The battery indicator on the display will show charging status.
3.2 Zondų prijungimas
For accurate measurements, ensure probes are correctly connected:
- Multimetro matavimai: Insert the red test lead into the VΩHzmA or 10A jack (depending on the measurement) and the black test lead into the COM jack.
- Osciloskopo matavimai: Prijunkite P6100 didelės talpostage probe to the oscilloscope input jack. Ensure the probe's attenuation setting (e.g., X1 or X10) matches the device's setting for accurate readings.
- Signalo generatoriaus išvestis: Connect the output cable to the signal generator output port.

Figure 3: Input Jacks and Controls
4. Naudojimo instrukcijos
4.1 Maitinimo įjungimas/išjungimas
Press and hold the power button (located on the side) to turn the device on or off.
4.2 Režimo pasirinkimas
Rotate the central knob to switch between Multimeter, Oscilloscope, and Signal Generator modes. Within each mode, further sub-functions can be selected using the knob or dedicated buttons.

Figure 4: Using the Oscilloscope Function
4.3 Multimetro veikimas
In Multimeter mode, the device offers various measurement functions:
- ttage/Current (DC/AC): Select the appropriate DC V, AC V, DC A, or AC A setting. Connect test leads to the circuit. The device supports a record mode that displays measurement trends graphically, and can store up to 10 sets of data.
- Varža (Ω): Select the resistance function. Connect test leads across the component.
- Talpa (F): Select the capacitance function. Connect test leads across the capacitor.
- Dažnis (Hz): Select the frequency function. Connect test leads to the signal source.
- Diodo testas: Select the diode function. Connect test leads across the diode to check its forward voltage lašas.
- Tęstinumo testas: Select the continuity function. Connect test leads across a conductor; a beep indicates continuity.
- Temperatūra: Use a K-type thermocouple (not included) connected to the appropriate jacks for temperature measurement.
- LIVE Function: For single-probe voltage presence detection.

Figure 5: Multimeter Measurement Examples
4.4 Osciloskopo veikimas
In Oscilloscope mode, the device displays waveforms:
- Bangos formos ekranas: Connect the oscilloscope probe to the circuit. The device automatically adjusts settings for stable waveform display.
- Trigerio režimai: Select between Auto, Normal, and Single trigger modes to capture different types of signals.
- Waveform Saving: Press the 'RUN/SAVE' button to save the current waveform image. Saved images can be reviewredagavo ir eksportavo.

Figure 6: Oscilloscope Waveform Display
4.5 Signalų generatoriaus veikimas
In Signal Generator mode, the device outputs various waveforms:
- Bangos formos pasirinkimas: Choose from 13 different waveform types using the menu options.
- Parametrų reguliavimas: Reguliuokite dažnį (0–50 kHz), amplitude (0.1-3.0V), and duty cycle (0-100%) as required for your application.

Figure 7: Signal Generator Waveform Selection
4.6 PC Connection and Data Export
The DST-210 can connect to a PC via its Type-C USB port for data management and firmware updates.
- Waveform Screenshots: Long-press the 'RUN/SAVE' button to save waveform screenshots.
- Duomenų eksportavimas: Connect the device to a computer to view, save, and export recorded waveform images and data.
- Firmware atnaujinimai: Periodiškai tikrinkite oficialų FNIRSI website for firmware updates to ensure optimal performance and access to new features. Follow the instructions provided with the firmware update package.

Figure 8: PC Connection for Data Management
5. Priežiūra
- Valymas: Įrenginį valykite minkšta, sausa šluoste. Nenaudokite abrazyvinių valiklių ar tirpiklių.
- Saugykla: Laikykite prietaisą vėsioje, sausoje vietoje, apsaugotoje nuo tiesioginių saulės spindulių ir ekstremalių temperatūrų.
- Akumuliatoriaus priežiūra: Norėdami pailginti akumuliatoriaus veikimo laiką, venkite dažnai visiškai jį iškrauti. Reguliariai įkraukite įrenginį, net jei jis ilgą laiką nenaudojamas.
- Zondų priežiūra: Inspect test leads and probes for damage before each use. Replace any damaged accessories immediately.
6. Problemų sprendimas
| Problema | Galima priežastis | Sprendimas |
|---|---|---|
| Įrenginys neįsijungia. | Low battery or faulty power button. | Charge the device fully. If the issue persists, contact support. |
| Unstable or inaccurate readings in Multimeter mode. | Poor probe connection, incorrect mode selection, or external interference. | Ensure probes are securely connected. Verify the correct measurement mode is selected. Minimize external electrical interference. |
| Oscilloscope waveform is not stable. | Incorrect trigger settings or probe attenuation. | Adjust trigger level and mode. Ensure probe attenuation (X1/X10) matches the device setting. |
| Signalo generatoriaus išvestis yra neteisinga. | Incorrect waveform type, frequency, amplitude, or duty cycle settings. | Verify all signal generator parameters are set as desired. |
| Cannot connect to PC or export data. | Faulty USB cable, incorrect PC driver, or software issue. | Try a different Type-C cable. Ensure necessary drivers are installed on your PC. Refer to the official websvetainė, skirta atsisiųsti programinę įrangą ir tvarkykles. |
7. Specifikacijos
7.1 Osciloskopo parametrai
| Kategorija | Specifikacija |
|---|---|
| Realiu laiku Samplingo norma | 48MSa / s |
| Analoginis dažnių juostos plotis | 10 MHz |
| Įvesties varža | 1MΩ |
| Sukabinimo metodas | AC/DC |
| Matavimas ttage Diapazonas | 1:1 Probe: ±80Vpp (±40V), 10:1 Probe: ±800Vpp (±400V) |
| Vertikalus jautrumas | 10mV/div ~ 10V/div (at X1) |
| Vertikalus poslinkis | Adjustable (with indicator) |
| Horizontalus laiko bazės diapazonas | 50 ns ~ 20 s |
| Trigerio režimas | Automatinis, Normalus, Vienvietis |
| Krašto paleidiklis | Rising/Falling Edge |
| Triggerio lygis | Adjustable (with indicator) |
| Bangos formos užšaldymas | Supported (HOLD function) |
| Automatinis matavimas | Max, Min, Average, RMS, Peak-to-Peak, Frequency, Duty Cycle, etc. |
7.2 Multimetro parametrai
| Matavimo funkcija | Diapazonas | Tikslumas |
|---|---|---|
| DC ttage | 1.9999V/19.999V/199.99V/1000V | ± (0.5 %+3) |
| AC ttage | 1.9999V/19.999V/199.99V/750V | ± (1.0 %+3) |
| DC srovė | 19.999 mA / 199.99 mA / 1.9999 A / 9.999 A | ± (1.2 %+3) |
| Kintamosios srovės srovė | 19.999 mA / 199.99 mA / 1.9999 A / 9.999 A | ± (1.5 %+3) |
| Atsparumas | 19.999MΩ/199.99kΩ/19.999kΩ | ± (2.0 %+5) |
| Talpa | 999.9uF/99.99uF/9.999uF/999.9nF/99.99nF, 9.999mF/99.99mF | ± (2.0 %+5) |
| Dažnis | 9.999MHz/999.9kHz/99.99kHz/9.999kHz/999.9Hz/99.99Hz | ± (0.1 %+2) |
| Temperatūra | [-55~1300°C] / [-67~2372°F] | ± (2.5 %+5) |
| Diodas / tęstinumas | Palaikoma | N/A |
| LIVE Function | Palaikoma | N/A |
7.3 Signalų generatoriaus parametrai
| Kategorija | Specifikacija |
|---|---|
| Išėjimo bangos formos | 13 rūšys |
| Bangos formos dažnis | 0 ~ 50KHz |
| Darbo ciklas | 0 ~ 100% (adjustable) |
| Bangos forma Ampilgis | 0.1 ~ 3.0 V |
7.4 Bendrosios specifikacijos
| Kategorija | Specifikacija |
|---|---|
| Produkto modelis | DST-210 |
| Ekranas | 2.8 colių TFT spalvotas ekranas |
| Foninis apšvietimas | Reguliuojamas ryškumas |
| Maitinimo šaltinis | C tipas (5 V / 1 A) |
| Baterija | 3000 mAh |
| Kalbos palaikymas | Kinų, anglų |
| Produkto dydis | apytiksliai 177.43 mm x 87 mm x 35 mm |
| Produkto svoris | apytiksliai 300 g |
8. Garantija ir palaikymas
For any questions, issues, or support needs regarding your FNIRSI DST-210, please contact us through the following methods:
- Amazon žinutė: If you purchased the product on Amazon, you can contact us via the Amazon messaging system. Go to your 'Order History', select the relevant order, and click 'Problem with order' or 'Contact Seller'.
- Pagalba el. paštu: You can also reach our after-sales service center directly via email at support@fnirsi.com. Please include your order number and a detailed description of your issue for faster assistance.
When attaching large photos or videos, email support is recommended due to potential attachment size limits on Amazon's messaging system.
Video 1: Demonstration of FNIRSI DST-210's Multimeter, Oscilloscope, and Signal Generator Functions.