
Įvadas
This manual provides detailed instructions for the safe and effective use of your Paipaitek 2-in-1 Dog Bark and Training Collar. This device combines an automatic bark correction system with a remote-controlled training collar, offering multiple modes to assist in dog behavior modification. Please read this manual thoroughly before first use and retain it for future reference.
Svarbi saugos informacija
- This training collar is designed for dogs weighing 40-150 lbs with neck sizes 8-27 inches. Ensure it is appropriate for your dog's size and temperament.
- Apykaklės tinkamumas: The collar should fit snugly but not too tightly. A finger-width gap should be maintained between the collar and your dog's neck to ensure proper contact and prevent skin irritation.
- Limited Wear Time: Do not leave the collar on your dog for more than 12 hours per day. Prolonged wear can lead to skin irritation or pressure sores.
- Reguliarus patikrinimas: Check your dog's neck daily for any signs of irritation, redness, or sores. If irritation occurs, discontinue use immediately and consult a veterinarian.
- Priežiūra: Always supervise your dog when the collar is in use, especially during initial training sessions.
- Netaikoma agresyviems šunims: This device is not intended for use with aggressive dogs. Consult a professional dog trainer or veterinarian for behavioral issues.
- Vandens apsauga: The receiver is IP67 waterproof. Ensure the rubber charging port cover is securely closed before exposing the receiver to water. The remote is not waterproof.
- Atsitiktinis aktyvavimas: The remote features a safety lock to prevent accidental activation. Always engage the safety lock when not actively training.
- Aplinkos veiksniai: Be aware that external sounds, such as human voices or other loud noises, may potentially trigger the automatic bark detection mode if sensitivity is set too high. Monitor your dog's reaction and adjust settings accordingly.
Pakuotės turinys
Patikrinkite, ar pakuotėje yra visi reikalingi daiktai:
- Nuotolinis siųstuvas x 1
- Imtuvas x 1
- Adjustable Collar Strap x 1
- Contact Points x 4 (two short, two long)
- Conductive Silicone Caps x 4
- Testas L.amp x 1
- USB Charging Cable x 1 (2-in-1)
- Diržas x 1
- Vartotojo vadovas x 1
- Dėžutė x 1
Produktas baigtasview
Nuotolinis siųstuvas
The remote transmitter allows you to manually control the training modes and settings. It features an LCD display, channel selection, and a safety lock.

1 paveikslas: Remote Transmitter and Receiver Components. This image illustrates the various parts of the remote control and the receiver collar, including the indicator light, bark sensor, charging port, power button, LCD display, keylock, signal channel, tone button, vibration button, and safe shock button.
- LCD Large Display: Shows current settings, battery level, and active channel.
- Keylock (Safety Lock): Slide switch to prevent accidental button presses.
- Kanalų (CH) mygtukas: Selects which receiver (dog) to control (up to 3 dogs).
- Tono mygtukas: Activates an audible beep correction.
- Vibracijos mygtukas: Activates a vibration correction.
- Safe Shock Button: Activates a static stimulation correction.
- +/- mygtukai: Adjust intensity levels for vibration and shock, or sensitivity for bark mode.
- Įkrovimo prievadas: Skirta nuotolinio valdymo pulto vidinei baterijai įkrauti.
Imtuvo apykaklė
The receiver unit attaches to your dog's collar and delivers the corrections. It is waterproof and includes an automatic bark detection sensor.
- Indikatoriaus lemputė: Shows operational status and battery level.
- Bark Sensor: Detects your dog's barking for automatic correction.
- Įkrovimo prievadas: For recharging the receiver's internal battery. Ensure the rubber cap is sealed for waterproofing.
- Maitinimo mygtukas: Turns the receiver on/off and activates/deactivates automatic bark mode.
- Kontaktiniai taškai: Deliver static stimulation. Use appropriate length for your dog's coat.
- Conductive Silicone Caps: Cover contact points for comfort and to prevent direct metal-to-skin contact.
Sąrankos vadovas
1. Įrenginių įkrovimas
Before initial use, fully charge both the remote transmitter and the receiver collar. Use the included 2-in-1 USB charging cable.
- Connect the 2-in-1 charging cable to a USB power adapter (not included) or a computer USB port.
- Plug the two charging ends into the charging ports of the remote and receiver.
- Charging typically takes about 2 hours. The indicator lights will change to show a full charge (refer to specific light indicators in the full manual if available).
- Once charged, disconnect the cable and ensure the rubber charging port cover on the receiver is securely sealed.

2 paveikslas: Charging the remote and receiver. Both devices can be charged simultaneously using the provided 2-in-1 USB cable. A full charge takes approximately 2 hours, providing extended standby time.
2. Attaching Contact Points and Silicone Caps
Select the appropriate length of contact points based on your dog's coat thickness. For dogs with shorter coats, use the shorter contact points. For dogs with thicker coats, use the longer contact points to ensure proper skin contact.
- Screw the chosen contact points into the receiver.
- Place the conductive silicone caps over the contact points for added comfort and to prevent direct metal contact with your dog's skin.
3. Nuotolinio valdymo pulto ir imtuvo susiejimas
The remote and receiver are typically pre-paired from the factory. If they are not responding, or if you are adding an additional receiver, follow these steps:
- Turn on the remote transmitter. Select the desired channel (1, 2, or 3) using the CH button.
- With the receiver turned off, press and hold the power button on the receiver until the indicator light flashes rapidly.
- While the receiver light is flashing, press any correction button (Tone, Vibration, or Shock) on the remote transmitter.
- Imtuvo indikatoriaus lemputė nustos mirksėti ir liks šviesti, rodydama sėkmingą susiejimą.
4. Apykaklės uždėjimas
Proper fit is essential for the collar's effectiveness and your dog's comfort and safety.
- Place the receiver on the center of your dog's neck, with the contact points underneath, making direct contact with the skin.
- Adjust the collar strap so it is snug. You should be able to fit one finger comfortably between the collar strap and your dog's neck.
- If the strap is too long, you can trim it to size. Use a lighter to singe the cut edge to prevent fraying.
- Ensure the contact points are making consistent contact with the skin. If your dog has a thick coat, you may need to part the fur to ensure contact.

3 paveikslas: Collar Fit and Waterproofing. The collar is adjustable to fit neck sizes from 8 to 27 inches, suitable for dogs weighing 40-150 lbs. The receiver is IP67 waterproof, allowing dogs to swim while wearing it.
Naudojimo instrukcijos
Įjungimas/Išjungimas
- Nuotolinis: Press and hold the power button until the screen illuminates. Press and hold again to turn off.
- Imtuvas: Press and hold the power button until the indicator light turns on/off.
Remote Control Modes
The remote offers three primary training modes: Tone, Vibration, and Safe Shock. Each mode can be adjusted for intensity.

4 paveikslas: Training Modes Overview. The collar offers Bark Collar mode (1-5 levels), Beep (9 types), Vibration (1-9 levels), and Safe Shock (1-16 levels) for comprehensive training.
- Tonas (pyptelėjimas): Press the Tone button to emit an audible beep from the receiver. This is often used as a warning or attention-getter.
- Vibracija: Press the Vibration button to deliver a vibration correction. Use the +/- buttons to adjust the intensity from level 1 to 9.
- Safe Shock: Press the Safe Shock button to deliver a static stimulation. Use the +/- buttons to adjust the intensity from level 1 to 16. Start at the lowest level and increase only if necessary, observing your dog's reaction.
Automatic Bark Collar Mode
The receiver can operate independently as an automatic bark collar, detecting and correcting excessive barking.
- Activating Automatic Mode: With the receiver on, press the power button briefly. The indicator light will change (refer to specific light indicators in the full manual if available) to confirm automatic bark mode is active.
- Jautrumo reguliavimas: In automatic bark mode, use the +/- buttons on the remote to adjust the bark detection sensitivity from level 1 to 5. Higher sensitivity means the collar will detect barks more easily.
- Correction Sequence: When a bark is detected, the collar typically delivers a warning beep, followed by vibration, and then static stimulation if barking continues. The intensity of these corrections will increase with persistent barking.
- Deactivating Automatic Mode: Briefly press the power button on the receiver again to switch back to remote-only mode or turn off the receiver.

5 paveikslas: Automatic Bark Detection. The collar automatically detects and responds to excessive barking, providing a reminder to the dog to stop.
Multi-Dog Training
The remote can control up to 3 receivers (dogs) simultaneously. Each receiver must be paired to a different channel (1, 2, or 3).
- Pair each receiver to a unique channel (refer to "Pairing the Remote and Receiver" section).
- Use the CH button on the remote to switch between dogs you wish to train.
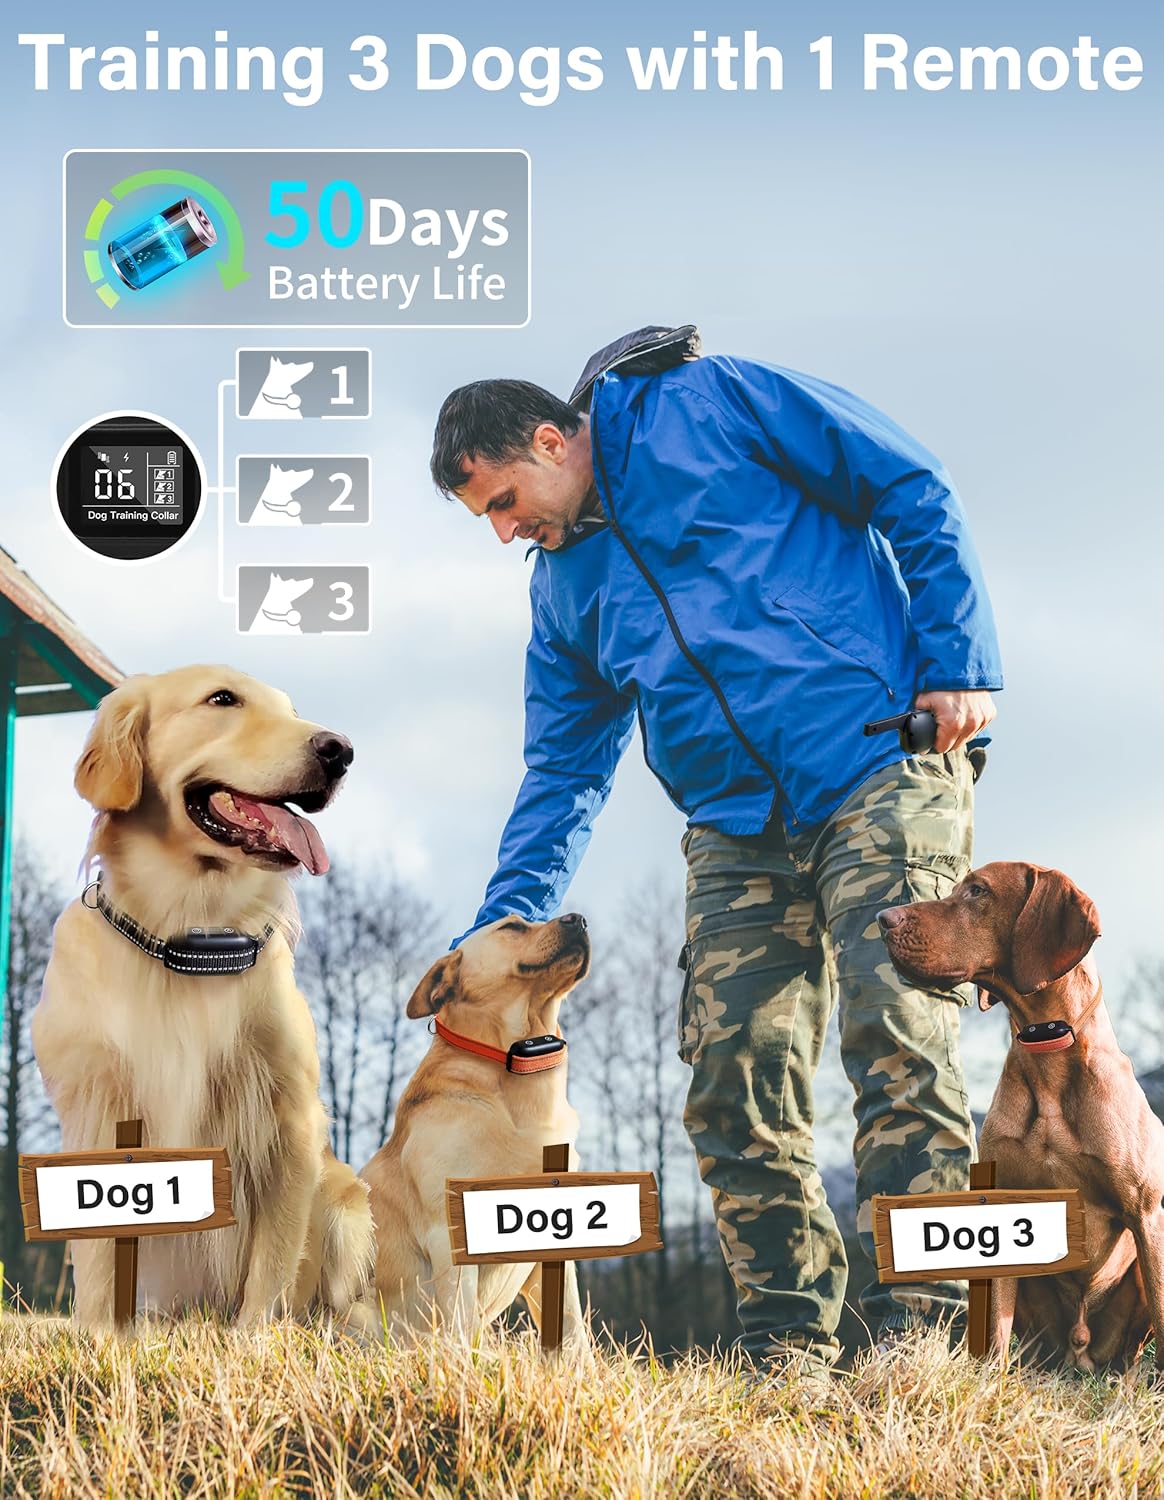
6 paveikslas: Multi-Dog Training. One remote can control up to three dogs, each on a separate channel.
Remote Safety Lock
To prevent unintended corrections, always engage the safety lock on the remote when not in active use.

7 paveikslas: Remote Safety Lock. The slide switch on the remote prevents accidental button presses, ensuring safe handling.
Priežiūra
- Valymas: The collar strap can be hand washed. The receiver can be wiped clean with a damp cloth. Do not submerge the remote.
- Kontaktiniai taškai: Regularly check the contact points and the area around them for dirt, debris, or corrosion. Clean as needed.
- Strap Condition: Inspect the collar strap for wear and tear. Replace if damaged.
- Įkrovimo prievadas: Ensure the rubber cap on the receiver's charging port is always securely closed when not charging to maintain its waterproof integrity.
- Saugykla: Nenaudojamą prietaisą laikykite vėsioje, sausoje vietoje.
Trikčių šalinimas
| Problema | Galima priežastis | Sprendimas |
|---|---|---|
| Collar not working (no beep, vibration, or shock) | Low battery on remote or receiver; Not paired; Remote safety lock engaged; Out of range. | Charge both devices fully. Re-pair the remote and receiver. Disengage the safety lock. Ensure devices are within 3300ft range. |
| Šuo nereaguoja į pataisymus | Collar too loose; Contact points not making skin contact; Intensity level too low; Dog's coat too thick. | Adjust collar for a snug fit (one finger gap). Ensure contact points touch skin, parting fur if necessary. Increase intensity level gradually. Use longer contact points if needed. |
| Automatic bark mode triggers unnecessarily | Bark sensitivity set too high; External noises (e.g., human voices, other dogs) triggering sensor. | Reduce the bark sensitivity level. Observe your dog's environment and adjust settings to minimize false triggers. Consider using remote mode for specific training if automatic mode is problematic in certain situations. |
| Remote not controlling multiple dogs | Receivers not paired to different channels; Remote on incorrect channel. | Ensure each receiver is paired to a unique channel (1, 2, or 3). Use the CH button on the remote to select the correct dog's channel. |
| Odos sudirginimas ant šuns kaklo | Collar worn too long; Collar too tight; Poor hygiene; Allergic reaction. | Remove collar immediately. Clean and dry the area. Consult a veterinarian. Ensure collar is worn for no more than 12 hours daily and is not too tight. Use silicone caps. |
Specifikacijos
- Modelio numeris: PD519-TIO
- Prekinis ženklas: Paipaitek
- Nuotolinis diapazonas: Iki 3300 pėdų (1000 metrų)
- Treniruočių režimai: Tone (9 types), Vibration (1-9 levels), Safe Shock (1-16 levels), Automatic Bark Detection (5 sensitivity levels)
- Atsparumas vandeniui (imtuvas): IP67 (galima panardinti iki 1 metro gylio 30 minučių)
- Baterijos tipas: Lithium Polymer (rechargeable, included)
- Įkrovimo laikas: Approximately 2 hours (for both remote and receiver)
- Budėjimo laikas: Up to 50 days (receiver), up to 90 days (remote)
- Collar Material: Nailonas, plastikas
- Reguliuojamas apykaklės dydis: Fits neck sizes 8-27 inches
- Rekomenduojamas šuns svoris: 40-150 lbs (Medium to Large breeds)
- Kelių šunų kontrolė: Supports up to 3 dogs with one remote
- Kilmės šalis: Kinija
Informacija apie garantiją
This Paipaitek product comes with a 1 metų garantija from the date of purchase. This warranty covers manufacturing defects and malfunctions under normal use. It does not cover damage caused by misuse, accident, unauthorized modification, or normal wear and tear.
Išsaugokite pirkimo įrodymą, kad galėtumėte kreiptis dėl garantijos.
Pagalba klientams
For any questions, technical assistance, or warranty claims, please contact Paipaitek customer service:
- El. paštas: service20220613@gmail.com
- Gamintojas: PaiPaitek