
1. Produktas baigtasview
The ACONEE 19 SEER 12000 BTU Ductless Mini-Split Inverter A/C Heat Pump System is designed to provide efficient cooling, heating, and dehumidifying for spaces up to 750 square feet. This 115V unit operates with a 19 SEER rating for energy efficiency and features ultra-quiet operation, as low as 42 dB(A) in sleep mode.
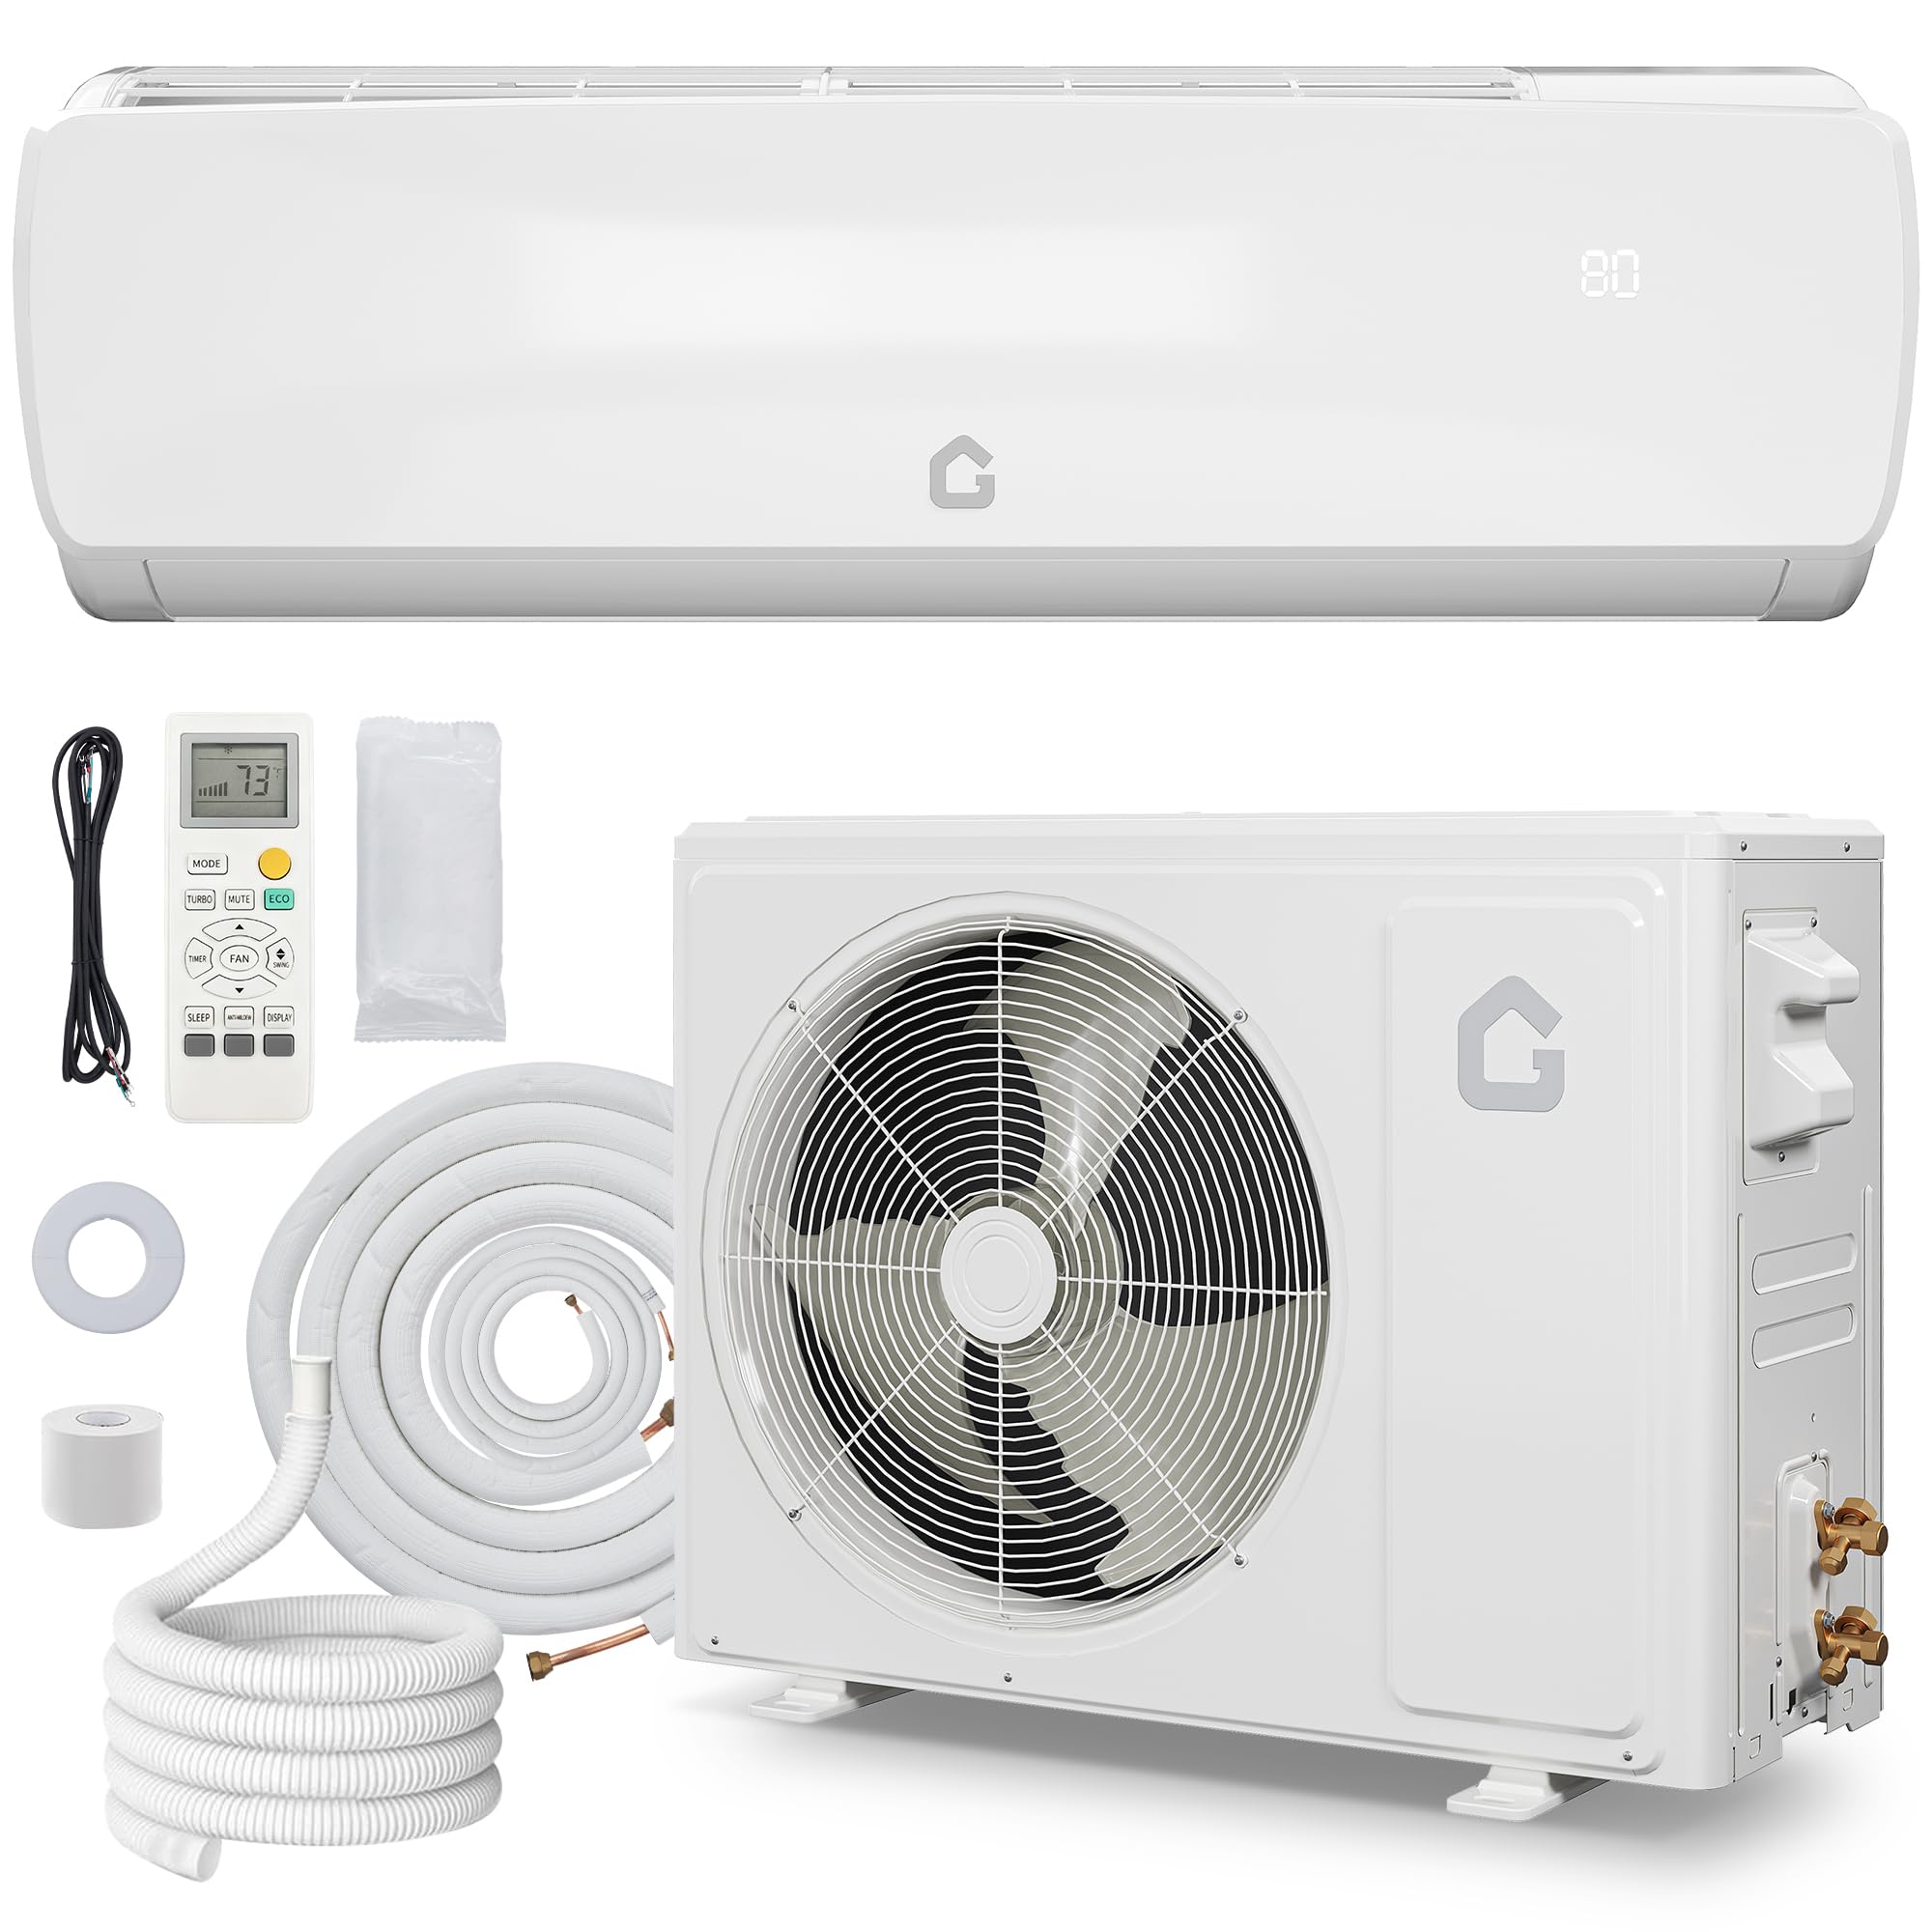
Figure 1: ACONEE 19 SEER 12000 BTU Split Air Conditioner components.

Figure 2: The ACONEE 12000 BTU system is designed to maintain optimal indoor comfort year-round for areas up to 750 sq. ft.

Figure 3: The indoor unit operates at a whisper-quiet 42 dB(A) in sleep mode, ensuring undisturbed comfort.
2. Sąranka ir diegimas
Proper installation is crucial for the optimal performance and longevity of your ACONEE Mini-Split system. It is highly recommended that installation be performed by a qualified professional to ensure compliance with all local electrical and safety codes, and to prevent damage from incorrect refrigerant handling.
Video 1: Detailed installation guide for the ACONEE 19 SEER Mini Split Air Conditioner. This video covers preparation, indoor unit installation, outdoor unit installation, and trial operation.
2.1 Paruošimas prieš montavimą
- Unpack all components and verify that all accessories are complete as per the packing list.
- Ensure the installation wall for the indoor unit is hard and firm to prevent vibration.
- Reserve adequate space around the indoor unit: 15cm above to the ceiling, 20cm above to the side walls, and 230-260cm from the floor.
- For the outdoor unit, ensure sufficient clearance: 50cm above to obstruction, 10cm above for air intake, 30cm to side obstructions, and 200cm for air outlet.
2.2 Vidinio įrenginio montavimas
- Drill pilot holes and use a '+' type screw to fasten the pegboard horizontally on the wall, ensuring it is level.
- Create a wall hole (60-80mm diameter) for piping, slanting it outwards by 5-10 degrees. Avoid pre-buried power wires.
- Pass the power cable out from the back of the indoor unit and fix it on the terminal board using a clamp.
- According to the piping direction, remove the knock-out panel with a knife and remove any burrs to prevent drain pipe damage.
- Carefully bend the pipes to the desired direction.
- Connect the connecting pipes to the indoor unit. Aim at the pipe center, tighten the taper nut with fingers, then use a torque wrench. Refer to the torque table below for specific values.
- Carefully check for any damage to joints before installation. Joints should not be reused unless re-flared.
- Use the insulation sleeve to wrap the joint part of the indoor unit and the connection pipe, then use insulating material to pack and seal the insulation pipe to prevent condensate water generation.
- Connect the water outlet with drain pipes and ensure the connection pipes, cables, and drain hose are straight.
- Jungiamųjų vamzdžių, kabelių ir išleidimo žarnos apvyniojimui naudokite plastikinius kabelių rišiklius. Nuleiskite vamzdį nuožulniai žemyn.
- Put the refrigerant piping through the wall hole.
- Hang the indoor unit on the peg board. Move the unit from left to right to ensure the hook is properly positioned. Push toward the lower left side and the upper right side of the unit until the hook is embedded in the slot and makes a click sound.
- To protect piping and wires, install a pipe protecting ring and seal it with putty.
Torque Specifications for Pipe Connections
| Vamzdžio dydis (mm) | Sukimo momentas (N·m) |
|---|---|
| Φ6 / Φ6.35 | 15 ~ 25 |
| Φ9 / Φ9.52 | 35 ~ 40 |
| Φ12 / Φ12.7 | 45 ~ 60 |
| Φ15 / Φ15.88 | 73 ~ 78 |
| Φ19 / Φ19.05 | 75 ~ 80 |
2.3 Lauko įrenginio montavimas
- Use at least 6 expansion bolts to fix the mounting brackets firmly on the wall. Ensure the brackets are level.
- Carefully place the outdoor unit onto the installed brackets.
- Use 4 screws to fix the feet of the outdoor unit to the brackets.
- Remove the nuts from the stop valves.
- Aim the pipe center of the stop valve, tighten the taper nut with fingers, then tighten with two wrenches.
- When the length of the connecting pipe is changed, extra refrigerant may need to be added or reduced. Refer to the table below.
- Nuimkite elektros dėžutės dangtelį.
- Connect the cables respectively to the corresponding terminals of the outdoor unit's terminal board. Refer to the wiring diagram provided on the unit. If signals are connected to a plug, conduct a butt joint.
- Remove the grounding screw from the electric bracket, cover the grounding wire end onto the grounding screw, and screw it into the grounding hole.
- Fix the cables reliably with fasteners (pressing board).
- Įdėkite E dalių dangtelį atgal į pradinę vietą ir pritvirtinkite varžtais.
- Before working on the air conditioner, remove the cover of the stop valve.
- Remove the caps from the gas and liquid valves and be sure to retighten them afterward to prevent potential air leakage.
- Fully open the handle Lo of the manifold valve and apply vacuum for at least 15 minutes. Check that the compound vacuum gauge reads -0.1MPa (-76cmHg).
- Pritaikę vakuumą, šešiabriauniu veržliarakčiu iki galo atidarykite uždarymo vožtuvą.
- Screw all the caps back on and tighten them securely.
Refrigerant Adjustment Table
When the length of the connecting pipe is changed, extra refrigerant needs to be added or reduced so that the operation and performance of the air conditioner will not be compromised.
| Jungiamojo vamzdžio ilgis | Pridėta arba sumažinta šaltnešio koncentracija | Įrenginio šaltnešio kiekis |
|---|---|---|
| <3 mln | CC≤12000Btu: sumažinti 20 g/m² CC≥18000Btu: sumažinti 40 g/m² | ≤ 1 kg ≤ 2 kg |
| 3-5 mln | Nereikia | - |
| 5-15 mln | CC≤12000Btu: pridėti 16 g/m² CC≥18000 Btu: pridėti 24 g/m² | ≤ 1 kg ≤ 2 kg |
3. Naudojimo instrukcijos
Your ACONEE Mini-Split system offers versatile climate control with multiple operating modes and features for year-round comfort.

Figure 4: Multi-functions and remote control overview.
3.1 Veikimo režimai
- Šaunu: Provides powerful cooling to quickly lower room temperature.
- Šiluma: Delivers efficient heating to warm your space.
- Sausinti: Reduces humidity levels for a more comfortable environment.
- Ventiliatorius: Cirkuliuoja orą be aušinimo ar šildymo.
- Auto: Automatically selects the appropriate mode (cooling or heating) based on the ambient temperature.
- Miegas: Adjusts temperature and fan speed for quiet, comfortable sleep, typically operating at 42 dB(A).
- EKO: Optimizes energy consumption for cost savings.
3.2 ventiliatoriaus greičiai
The unit offers 4 fan speeds: Low, Medium, High, and Turbo, allowing you to customize airflow intensity.
3.3 Papildomos funkcijos
- 4 krypčių sūpynės: Directs airflow in multiple directions for even distribution.
- Automatinis valymas: Padeda palaikyti vidinio bloko garintuvo švarą.
- Fast Cooling/Heating: Rapidly adjusts room temperature to your desired setting.
- 24h laikmatis: Allows scheduling of operation times.
- Ekrano apšvietimas: Controls the illumination of the unit's display.
4. Priežiūra
Regular maintenance ensures the efficiency and longevity of your ACONEE Mini-Split system.

Figure 5: Filter cleaning is simple and essential for maintenance.
4.1 Filtro valymas
- The unit will provide a filter-cleaning reminder.
- To clean, open the front panel of the indoor unit and carefully remove the air filters.
- Filtrus plaukite drungnu vandeniu ir švelniu plovikliu. Kruopščiai išskalaukite ir leiskite jiems visiškai išdžiūti prieš įdėdami atgal.
- Regular cleaning (e.g., every 2-4 weeks, depending on usage) helps maintain air quality and unit efficiency.
4.2 Bendras valymas
- Nuvalykite vidinių ir išorinių įrenginių išorę minkšta, d šluosteamp audinys. Nenaudokite stiprių cheminių medžiagų ar abrazyvinių valiklių.
- Įsitikinkite, kad lauko bloko ritėse nėra šiukšlių, lapų ir kitų kliūčių, kad būtų užtikrintas tinkamas oro srautas.
5. Problemų sprendimas
If you encounter issues with your ACONEE Mini-Split system, refer to the following common troubleshooting steps. For complex problems, contact qualified service personnel.
- Įrenginys neįsijungia: Patikrinkite maitinimo šaltinį, grandinės pertraukiklį ir įsitikinkite, kad nuotolinio valdymo pulto baterijos veikia.
- Nepakankamas aušinimas / šildymas: Verify temperature settings, ensure air filters are clean, and check for any obstructions to airflow indoors or outdoors.
- Neįprasti garsai: Minor noises during operation are normal. If loud or persistent noises occur, inspect for loose parts or contact support.
- Vandens nutekėjimas: Ensure the drain hose is not blocked or kinked and is sloping downward correctly. Check all pipe connections for tightness.
- Klaidų kodai: Refer to the specific error code in the full manual (if available) or contact customer support with the code.
5.1 Trial Operation
After installation, perform a trial operation to ensure proper function:
- Use a multimeter to test for possible leaking positions on the outdoor unit shell. If electricity leakage is detected, immediately turn off power and conduct further examination.
- Remove one filter from the indoor unit.
- Pour approximately 500ml of water along the evaporator for about 20 seconds.
- Check that water drains normally from the outdoor drain pipe and that there is no leakage around the indoor unit.
6. Specifikacijos
| Funkcija | Specifikacija |
|---|---|
| Modelio numeris | l1ZuA6uYMZeQGuNAyxSwIQhet |
| Aušinimo galia | 12000 XNUMX BTU |
| Šildymo pajėgumas | 12500 BTU/val |
| SEER įvertinimas | 19 |
| ttage | 115 V |
| Triukšmo lygis (patalpose) | 42 Decibels (in sleep mode) |
| Grindų ploto aprėptis | 750 kvadratinių pėdų |
| Gaminio matmenys (vidinis blokas) | 32.28 "D x 11.98" P x 8.23" A |
| Prekės svoris | 21.3 svaro |
| Įtraukti komponentai | 1 x Outdoor Unit, 1 x Indoor Unit, 1 x Accessory Kit, 1 x User Manual |
| Ypatingos savybės | Versatile 4-in-1 Mini Split, 4 Way Swing, Auto Clean, Fast Cooling |
7. Garantija ir palaikymas

Figure 6: ACONEE customer support and warranty information.
- Pagalba el. paštu: Receive assistance within 12 hours.
- Grąžinimo politika: 30-day unreasonable return period.
- Priežiūra ir technologijų palaikymas: 12 months of free maintenance and technology support.
For further assistance or to claim warranty services, please refer to the contact information provided in your product packaging or visit the official ACONEE websvetainę.