
1. Įvadas
Thank you for choosing the Haloview Byte Tango BT10 Wireless Rear View Mirror Dashcam Backup Camera System. This system provides comprehensive front and rear vehicle coverage with a 10-inch 1080P monitor, a built-in dashcam, and a wireless backup camera. This manual will guide you through the installation, operation, and maintenance of your new system to ensure optimal performance and safety.
2. Produktas baigtasview
2.1 Pakuotės turinys
Haloview Byte Tango BT10 system includes the following components:
- 1 x BT10 Monitor (10-inch, 1280x320 resolution)
- 1 x Rear Camera BTC128W (with WDR Technology)
- 1 x tarpiklis
- Guminiai dirželiai
- Micro-SD / TF Card
- Type-C to DC Power Cable
- Kameros konvertavimo kabelis
- Power Adapter for Pre-wired RV
- Poravimo kabelis
- Cigarečių žiebtuvėlių maitinimo adapteris
- Velcro dirželiai
- Vartotojo vadovas

Figure 2.1: Included components of the Haloview BT10 system.
2.2 Pagrindinės savybės
- 10-inch IPS Touchscreen Monitor: Provides a clear and intuitive interface for viewing and controlling the system.
- Built-in 1080P Dashcam: Captures forward-facing video with a 140° wide-angle lens.
- Wireless 1080P Backup Camera (BTC128W): Offers a 135° rear view, eliminating blind spots and aiding in safe reversing.
- Wide Dynamic Range (WDR) Technology: Improves image quality by balancing light and dark contrasts, especially useful in challenging lighting conditions.
- IP69K vandeniui atspari kamera: Užtikrina patvarumą ir patikimą veikimą įvairiomis oro sąlygomis.
- Lanksčios maitinimo parinktys: Can be powered via cigarette lighter socket or Type-C port (PD protocol required).
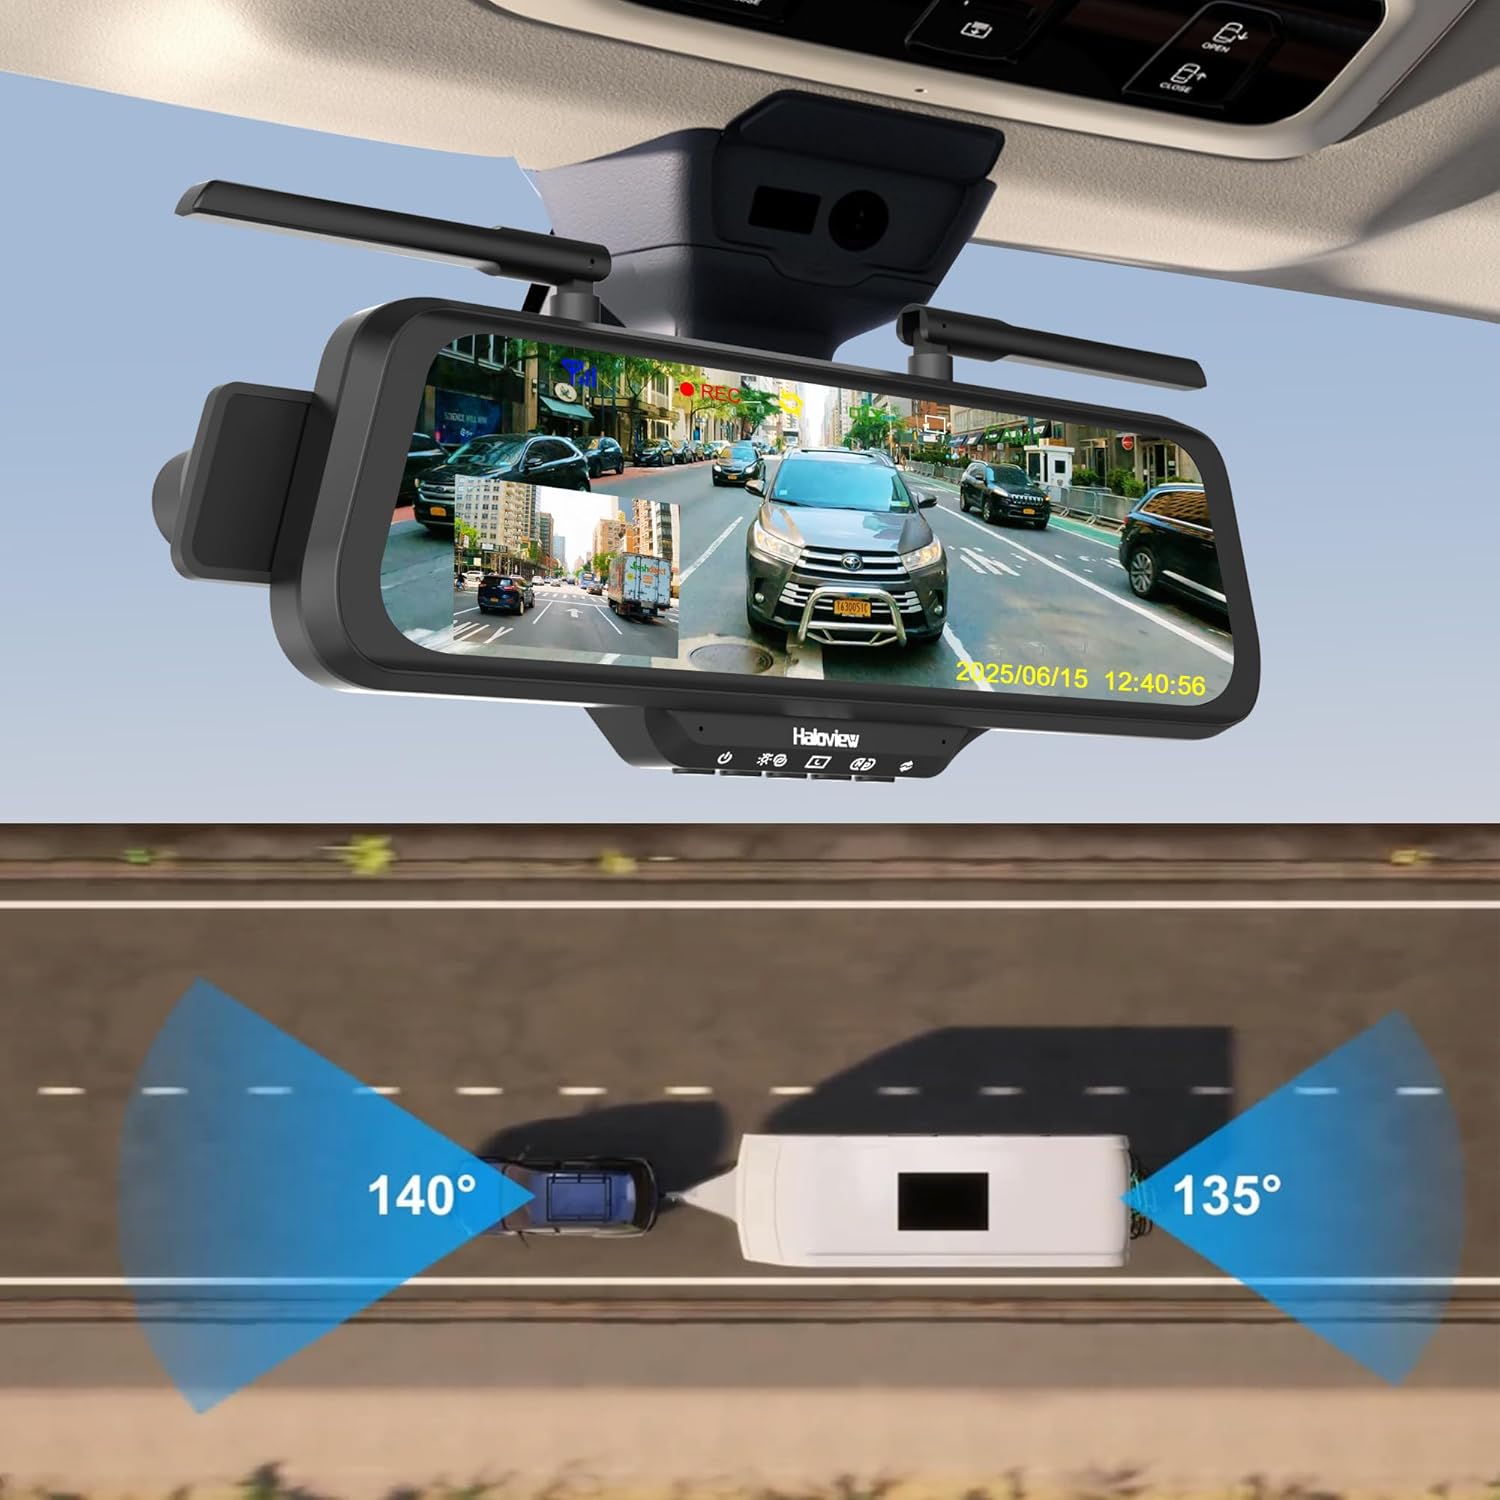
Figure 2.2: Haloview BT10 system with wide-angle views.
3. Sąranka ir diegimas
3.1 Patikra prieš montavimą
Before installing the system, please ensure the stability of your vehicle's rearview mirror. If the rearview mirror or its bracket is loose, it is recommended to replace or tighten it first. An unstable mirror may cause the streaming display to shake or fail to stay in position while driving.
3.2 Monitoriaus įrengimas
- Attach the BT10 monitor to your existing rearview mirror using the provided rubber straps. Ensure it is securely fastened and centered for optimal viewing.
- Adjust the monitor's angle to provide a clear view of the road ahead and the display.

Figure 3.1: Monitor and dashcam installation.
3.3 Wireless Rear Camera Installation (BTC128W)
- Choose a suitable location at the rear of your vehicle for the BTC128W camera, ensuring a clear line of sight and optimal viewing kampas.
- Tvirtai pritvirtinkite fotoaparatą naudodami pateiktą techninę įrangą.
- Connect the camera to a power source (e.g., reverse light power for automatic activation when reversing, or constant power for continuous monitoring).

Figure 3.2: Wireless rear camera installation on an RV.
3.4 Maitinimo jungtis
The BT10 monitor offers flexible power options:
- Cigarečių degiklio lizdas: Use the provided cigarette lighter power adapter to plug into your vehicle's 12V accessory socket.
- C tipo prievadas: Connect a Type-C cable to the monitor's Type-C port. Note that a Power Delivery (PD) protocol compatible power source is required for this option.

Figure 3.3: Flexible power options for the monitor.
4. Naudojimo instrukcijos
4.1 Pagrindinės operacijos
- Maitinimo įjungimas/išjungimas: The system will typically power on automatically when the vehicle starts and power off when the vehicle is turned off. A manual power button may also be available on the monitor.
- Jutiklinio ekrano sąsaja: Navigate through menus and settings by tapping and swiping on the 10-inch IPS touchscreen.
- Ekrano režimai: The monitor can display the front dashcam view, galinė kamera viewarba padalinto ekrano režimą view of both. Switch between modes via the touchscreen interface.
4.2 Dashcam Features
- Nepertraukiamas įrašymas: The built-in 1080P dashcam continuously records footage of the road ahead (140° wide-angle). Footage is stored on the Micro-SD card.
- Ciklo įrašymas: When the Micro-SD card is full, the oldest files will be overwritten automatically.
- Avarinės situacijos įrašymas: In the event of a sudden impact or collision, the G-sensor will trigger emergency recording, locking the current footage, kad jis nebūtų perrašytas.
- Greitas fiksavimas: Tap the "REC" icon on the screen to manually capture a snapshot or start/stop recording.

Figure 4.1: Quick capture function on the monitor.
4.3 Backup Camera Features
- Automatinis aktyvinimas: If wired to the reverse lights, the rear camera view will automatically display when the vehicle is put into reverse.
- Platus dinaminis diapazonas (WDR): The BTC128W camera features WDR technology, which enhances image clarity in high-contrast lighting conditions, such as bright sunlight and deep shadows, or at night.
- Full-Color Dim-Light Night Vision: Provides clear, full-color images even in low-light environments.

Figure 4.2: Wide Dynamic Range (WDR) technology comparison.
4.4 Parking Line Adjustment
The parking guidelines displayed on the monitor can be adjusted to match your vehicle's dimensions and preferences:
- Horizontalus reguliavimas: Slide left/right on the touchscreen to adjust the parking lines horizontally.
- Vertikalus reguliavimas: Slide up/down on the touchscreen to adjust the parking lines vertically.

Figure 4.3: Adjusting parking lines on the display.
5. Priežiūra
- Monitoriaus valymas: Use a soft, dry cloth to clean the monitor screen. For stubborn smudges, lightly dampNuvalykite šluostę vandeniu arba ekranui saugiu valikliu. Venkite stiprių cheminių medžiagų.
- Kameros objektyvo valymas: Gently wipe the camera lens with a soft, lint-free cloth to ensure clear image quality.
- „Micro-SD“ kortelių valdymas: Regularly format the Micro-SD card (at least once a month) to maintain optimal recording performance and prevent data corruption. Back up important footage prieš formatavimą.
- Firmware atnaujinimai: Check the Haloview pareigūnas website periodically for any available firmware updates for your BT10 system. Follow the instructions provided with the update carefully.
6. Problemų sprendimas
6.1 Bendrosios problemos ir sprendimai
- Nėra maitinimo monitoriui:
- Check if the power cable is securely connected to both the monitor and the power source (cigarette lighter or Type-C port).
- Įsitikinkite, kad transporto priemonės maitinimo lizdas veikia.
- If using Type-C, confirm the power source supports Power Delivery (PD) protocol.
- No Signal from Rear Camera:
- Verify the rear camera is receiving power.
- Ensure the camera and monitor are paired. Refer to the pairing instructions in the full user manual if re-pairing is needed.
- Check for any obstructions between the camera and monitor that might interfere with the wireless signal.
- Prasta vaizdo kokybė:
- Nuvalykite fotoaparato objektyvą ir monitoriaus ekraną.
- Įsitikinkite, kad kamera yra tvirtai pritvirtinta ir nevibruoja.
- Check for strong electromagnetic interference sources near the camera or monitor.
- Dashcam Not Recording:
- Ensure a Micro-SD card is inserted correctly.
- Formatuokite „Micro-SD“ kortelę.
- Check if the recording function is enabled in the monitor's settings.
7. Specifikacijos
| Funkcija | Specifikacija |
|---|---|
| Prekės ženklas | Haloview |
| Modelis | BT10 |
| Ekrano dydis | 10 colių |
| Gaminio matmenys | 11 colio ilgio x 9 colių pločio x 5 colio aukščio |
| Suderinami įrenginiai | BTC128W/BTC126/BTC125W |
| Diegimo tipas | Paviršinis montavimas |
| Objektyvo tipas | Platus kampas |
| Tikrasis kampas View (Dashcam) | 140 laipsnių |
| Laukas View (Atsarginė kamera) | 135 laipsnių |
| Jungties tipas | Bevielis |
| Vaizdo įrašymo raiška | 1080p |
| Integruota laikmena | Monitor and camera |
8. Informacija apie garantiją
Haloview Byte Tango BT10 system comes with a 1 metų gamintojo garantija. This warranty covers defects in materials and workmanship under normal use. Please retain your proof of purchase for warranty claims. For specific terms and conditions, refer to the warranty card included in your package or visit the official Haloview websvetainę.
9. Pagalba ir kontaktinė informacija
If you encounter any issues or have questions regarding your Haloview Byte Tango BT10 system that are not covered in this manual, please contact Haloview customer support. You can typically find contact information (email, phone, or support portal) on the official Haloview websvetainėje arba ant jūsų produkto pakuotės.
Norėdami gauti naujausius pagalbos išteklius, apsilankykite: www.haloview.com