Įvadas
This manual provides detailed instructions for the GIGABYTE X870E AORUS ELITE X3D ICE AMD AM5 ATX Motherboard. It covers essential information for installation, operation, maintenance, and troubleshooting to ensure optimal performance and longevity of your system. The X870E AORUS ELITE X3D ICE supports AMD Ryzen 9000, 8000, and 7000 Series Processors, features DDR5 memory support, 16+2+2 power phase design, four M.2 slots, PCIe 5.0, WIFI7, and 5 GbE connectivity.
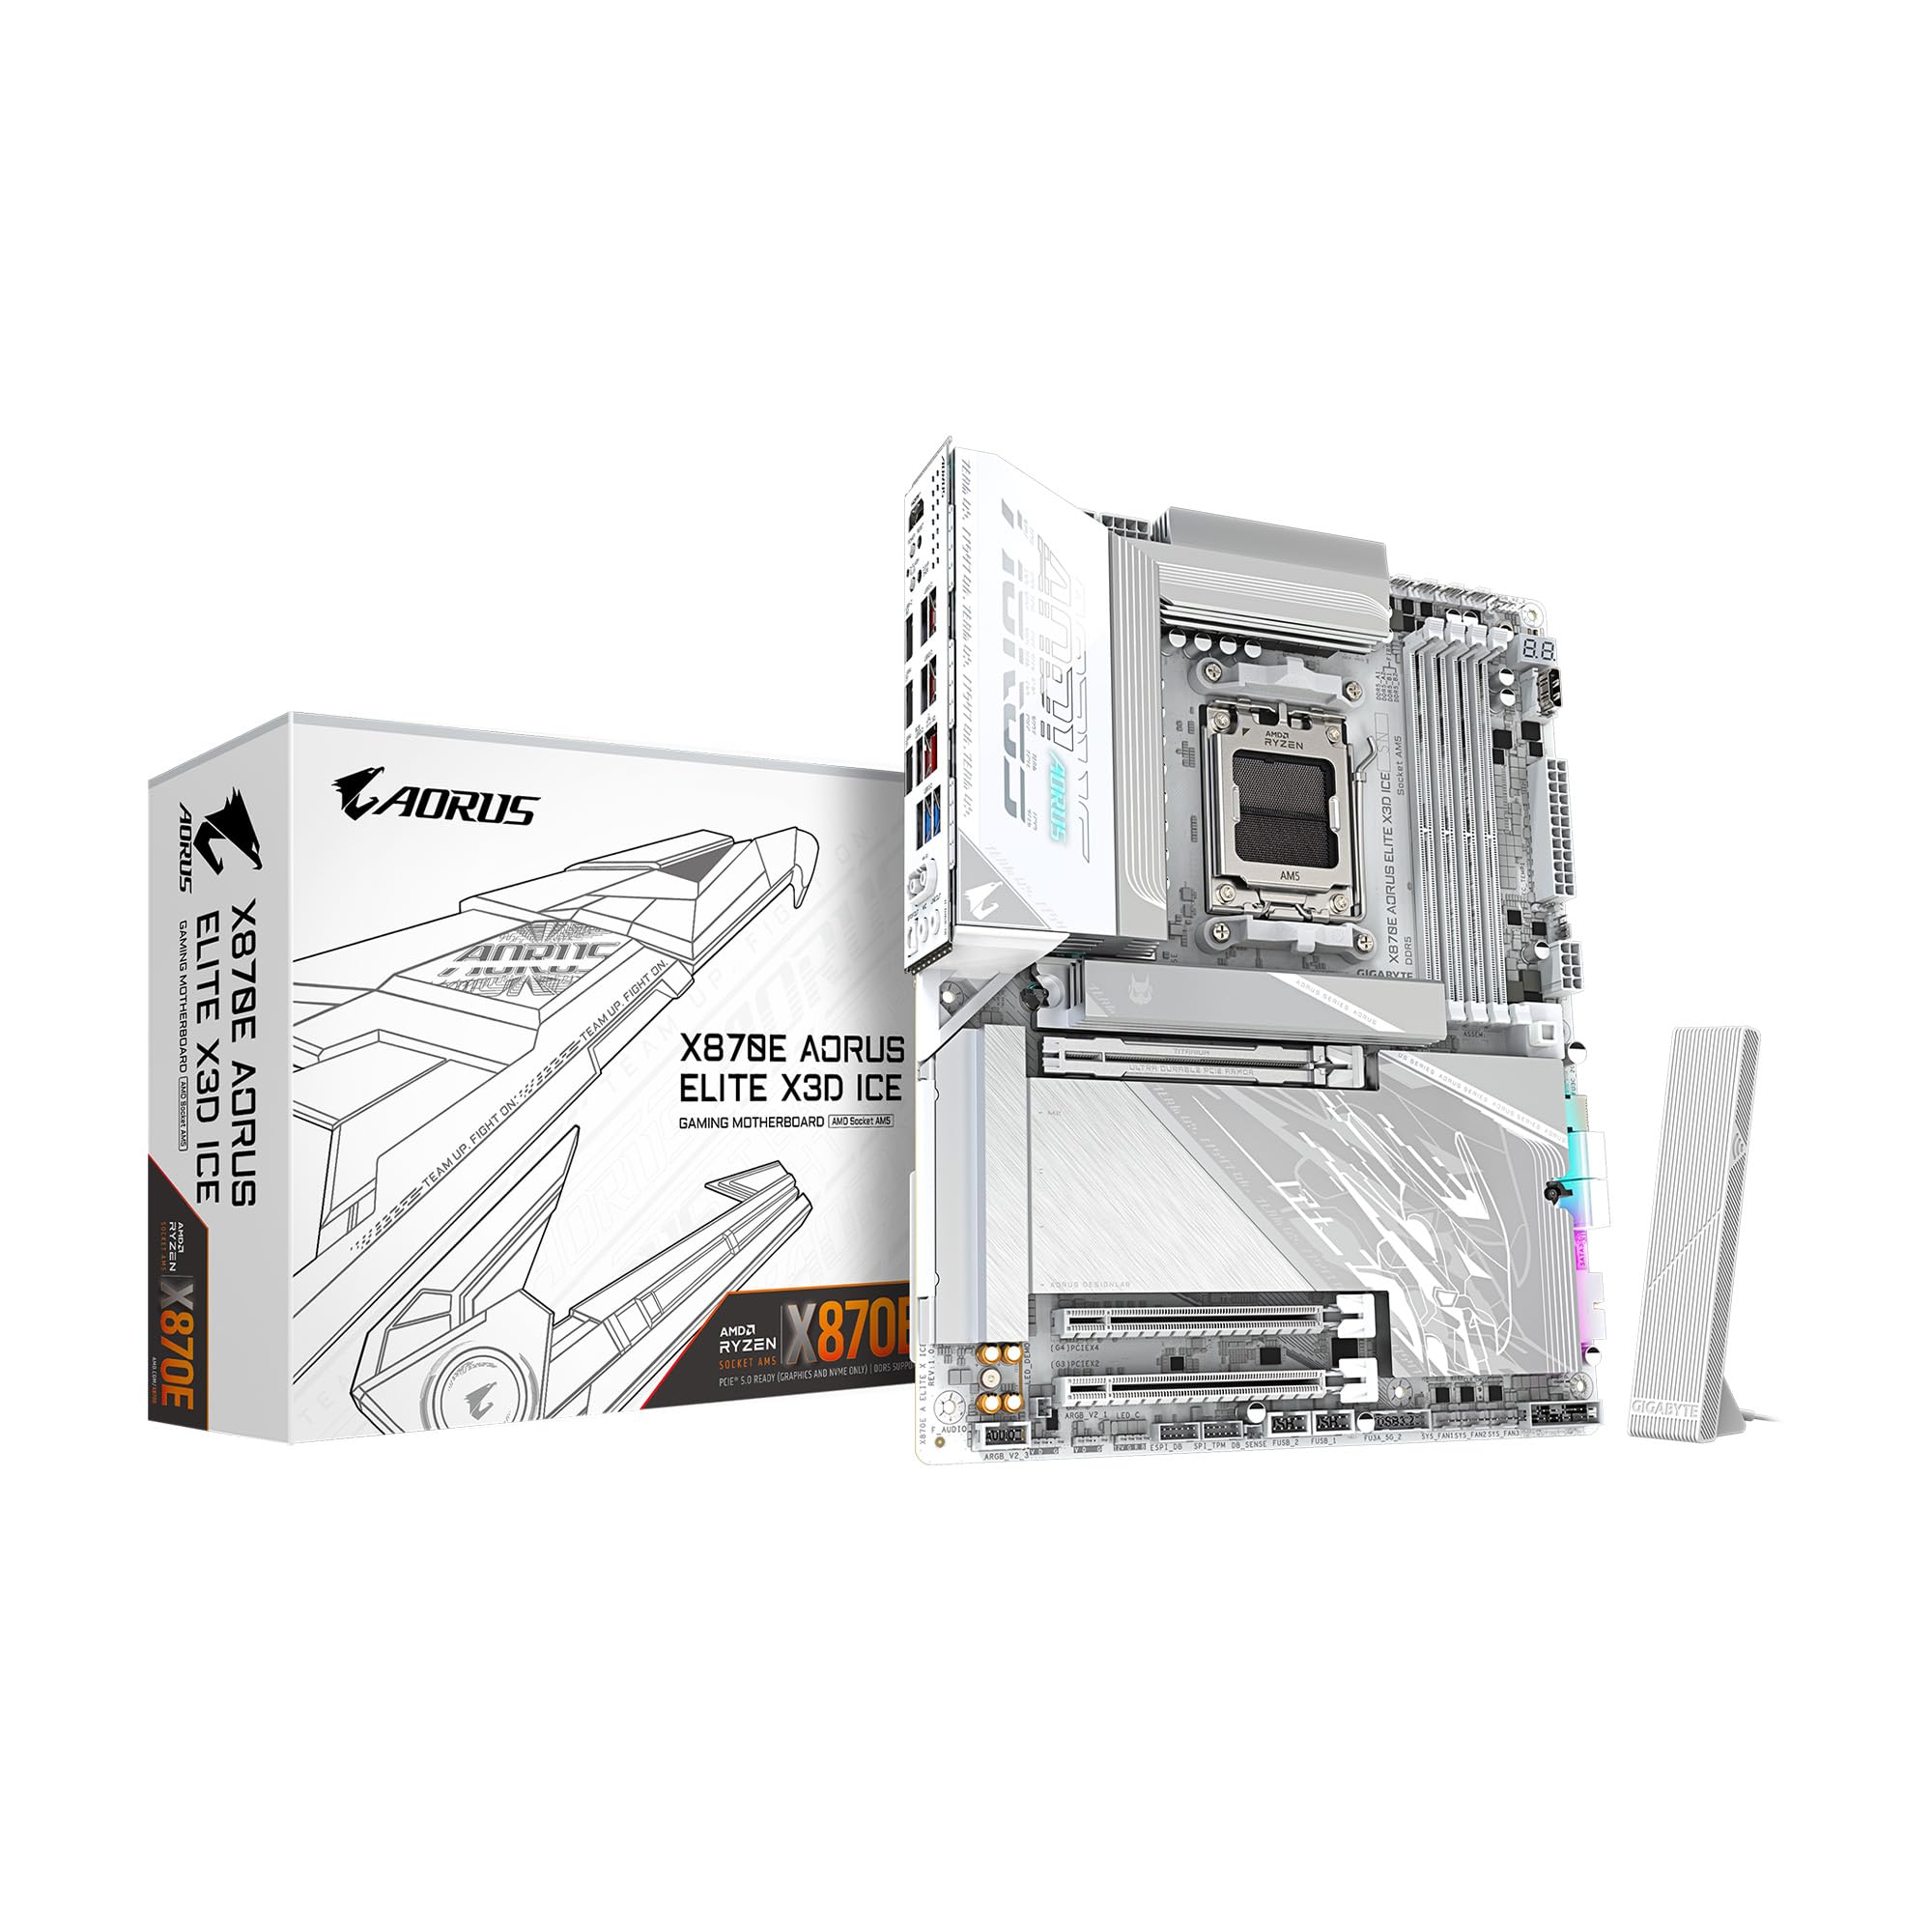
Figure 1: GIGABYTE X870E AORUS ELITE X3D ICE Motherboard, top-down view.
Sąranka ir diegimas
Tinkamas diegimas yra labai svarbus jūsų sistemos stabilumui ir veikimui. Atidžiai atlikite šiuos veiksmus.
1. Pagrindinės plokštės paruošimas
- Unpack the motherboard from its anti-static bag.
- Place the motherboard on a non-conductive surface, such as the anti-static bag itself or a cardboard box.
Video 1: Official unboxing of the X870E AORUS ELITE X3D ICE motherboard, showing the contents and initial handling.
2. CPU diegimas (AMD AM5 lizdas)
- Raskite AM5 procesoriaus lizdą pagrindinėje plokštėje.
- Open the CPU retention mechanism by pushing down and away from the socket.
- Carefully align the CPU with the socket, ensuring the golden triangle on the CPU matches the triangle on the socket. Do not force the CPU into place.
- Uždarykite tvirtinimo mechanizmą, kad pritvirtintumėte procesorių.

2 pav. Iš arti view of the AMD AM5 CPU socket on the motherboard, ready for processor installation.
3. Atminties (RAM) diegimas
- Atidarykite spaustukus abiejuose DDR5 DIMM lizdų galuose.
- Suderinkite DDR5 atminties modulio įpjovą su DIMM lizdo rakteliu.
- Insert the memory module firmly into the slot until the clips snap into place. Ensure both clips are closed.
- For dual-channel configuration, refer to the motherboard manual for specific slot pairing.

3 paveikslas: View of the DDR5 memory slots on the motherboard, indicating where RAM modules are installed.
4. M.2 SSD diegimas
- Locate the M.2 slots on the motherboard. The X870E AORUS ELITE X3D ICE features two PCIe 5.0 M.2 slots and two PCIe 4.0 M.2 slots.
- Nuimkite M.2 radiatorių ir tarpinį varžtą (jei yra).
- Įstatykite M.2 SSD diską į lizdą kampu.
- Push down the M.2 SSD and secure it with the stand-off screw or the M.2 EZ-Latch mechanism.
- Optimaliam šiluminiam našumui užtikrinti vėl prijunkite M.2 radiatorių.

Figure 4: Illustration of M.2 SSD installation, highlighting the EZ-Latch mechanism for tool-less setup.
5. Vaizdo plokštės (GPU) diegimas
- Locate the PCIe Gen5 x16 slot.
- Open the retention clip at the end of the PCIe slot.
- Sulygiuokite vaizdo plokštę su lizdu ir tvirtai spauskite žemyn, kol ji spragtelės ir užsifiksuos vietoje.
- Pritvirtinkite vaizdo plokštę prie kompiuterio korpuso varžtais.

Figure 5: Close-up of the PCIe EZ-Latch Plus, simplifying graphics card removal and installation.
6. Maitinimo jungtys
- Prijunkite 24 kontaktų ATX pagrindinį maitinimo jungtį iš maitinimo šaltinio prie pagrindinės plokštės.
- Connect the 8-pin (or 4+4 pin) CPU power connector(s) to the motherboard.
7. Priekinio skydelio ir periferinių įrenginių jungtys
- Connect the front panel headers (power switch, reset switch, HDD LED, power LED) according to the motherboard manual.
- Connect USB 2.0, USB 3.2 Gen 1, and USB 3.2 Gen 2 Type-C front panel connectors.
- Connect SATA drives to the available SATA 6Gb/s ports.
- Attach the WIFI antenna to the rear I/O panel for wireless connectivity.

6 pav. Išsamus view of the rear I/O panel, showing USB ports, Ethernet, audio jacks, and Wi-Fi antenna connectors.
Naudojimo instrukcijos
1. Pradinis paleidimas ir BIOS / UEFI sąranka
- Surinkę kompiuterį, prijunkite monitorių, klaviatūrą ir pelę.
- Įjunkite sistemą. Paspauskite DEL klavišą paleidimo metu, kad patektumėte į BIOS / UEFI sąranką.
- Configure boot order, enable XMP/EXPO for memory, and set up any other necessary system parameters.
- Išsaugokite pakeitimus ir išeikite iš BIOS / UEFI.
2. Tvarkyklės diegimas
- Install your operating system.
- After OS installation, install the latest drivers for your motherboard chipset, graphics card, audio, and network from the GIGABYTE website or the provided support DVD/USB.
3. GIGABYTE Software Utilities
GIGABYTE provides various software utilities to enhance your user experience:
- GIGABYTE Control Center (GCC): A unified software platform for managing system performance, RGB lighting, fan speeds, and more.
- BIOS Update Utility: For updating the motherboard BIOS from within the operating system.
- Programėlių centras: Provides access to various GIGABYTE applications and utilities.
Priežiūra
Reguliarus pagrindinės plokštės aptarnavimas užtikrina jos ilgaamžiškumą ir stabilų veikimą.
1. Valymas
- Reguliariai valykite dulkes nuo pagrindinės plokštės ir komponentų suslėgtu oru.
- Prieš valydami, įsitikinkite, kad sistema išjungta ir atjungta nuo elektros tinklo.
- Venkite naudoti skystus valiklius tiesiai ant komponentų.
2. BIOS atnaujinimai
- Check the GIGABYTE website for the latest BIOS versions.
- BIOS updates can improve compatibility, stability, and performance.
- Follow the instructions provided by GIGABYTE carefully when performing a BIOS update to avoid system damage.
3. Tvarkyklių atnaujinimai
- Regularly check the GIGABYTE website for updated drivers for your motherboard.
- Keeping drivers up-to-date can resolve issues and improve system performance.
Trikčių šalinimas
Jei kyla problemų, vadovaukitės toliau pateiktais įprastais trikčių šalinimo veiksmais.
1. Nėra maitinimo / Neįkraunama
- Įsitikinkite, kad visi maitinimo kabeliai (24 kontaktų ATX, 8 kontaktų CPU) yra tvirtai prijungti.
- Patikrinkite, ar maitinimo šaltinis įjungtas ir veikia tinkamai.
- Check front panel connections, especially the power switch.
- Pabandykite paleisti sistemą su minimaliais komponentais (procesoriumi, viena RAM atmintimi, GPU, jei nėra integruotos grafikos), kad išsiaiškintumėte problemą.
2. POST Code Errors
- The motherboard may display a POST code on its debug LED. Refer to the GIGABYTE manual for the meaning of specific codes.
- Common codes relate to CPU, RAM, or GPU initialization failures.
3. Sistemos nestabilumas / gedimai
- Įsitikinkite, kad visos tvarkyklės yra atnaujintos.
- Patikrinkite procesoriaus ir vaizdo plokštės temperatūrą, kad išvengtumėte perkaitimo.
- RAM stabilumo patikrinimas naudojant atminties diagnostikos įrankius.
- Reset BIOS settings to default if overclocking or custom settings are causing issues.
Specifikacijos
| Funkcija | Specifikacija |
|---|---|
| Prekės ženklas | GIGABITAS |
| Modelio pavadinimas | X870E AORUS ELITE X3D ICE |
| CPU lizdas | LGA 1718 (AMD AM5) |
| Suderinami procesoriai | AMD Ryzen 9000/8000/7000 serija |
| Lustų rinkinio tipas | AMD X870E |
| RAM atminties technologija | DDR5 |
| Galimi atminties lizdai | 4 |
| RAM atminties maksimalus dydis | 256 GB |
| PCIe lizdai | 1x PCIe Gen5 x16, 2x PCIe 5.0 M.2, 2x PCIe 4.0 M.2 |
| USB prievadai | 2x USB4 Type-C with DP Alt, 1x USB 3.2 Gen 2 Type-C, 5x USB 3.2 Gen 2 Type-A, 3x USB 3.2 Gen 1 Type-A, 65W Front USB-C |
| Ethernet | 5 GbE LAN |
| Belaidis ryšys | WIFI7 |
| Power Phase | Digital Twin 16+2+2 |
| Formos faktorius | ATX |
| Matmenys (I x P x A) | 12.01 colio ilgio x 9.61 colių pločio x 1.75 colio aukščio |
Garantija ir palaikymas
The GIGABYTE X870E AORUS ELITE X3D ICE Motherboard comes with a 5 metų gamintojo garantija. For technical support, driver downloads, BIOS updates, and further assistance, please visit the official GIGABYTE website. You can also refer to the multilingual installation guide included in the product packaging for additional details.
2 vaizdo įrašas: 360 laipsnių view of the X870E AORUS ELITE X3D ICE motherboard, showcasing jo dizainą ir savybes.