
1. Įvadas
Thank you for choosing the Magcubic HY350MAX Portable Projector. This manual provides essential information for setting up, operating, and maintaining your device. Please read it thoroughly before use to ensure optimal performance and safety.

Figure 1: Magcubic HY350MAX Portable Projector Overview
2. Kas yra dėžutėje
Patikrinkite, ar pakuotėje yra visi reikalingi daiktai:
- 1 x Magcubic HY350MAX Portable Projector
- 1 x Air Mouse Remote Control
- 1 x Vartotojo vadovas
3. Produkto ypatybės
The Magcubic HY350MAX projector offers a range of advanced features for an immersive viewpatirtis:
- Didelė raiška: Native 1080P Full HD (1920x1080) with support for 4K and 8K content decoding, enhanced by HDR10+.
- Ryškumas: 600 ANSI liumenų, užtikrinančių aiškius vaizdus net ir esant aplinkos apšvietimui.
- Išmanioji automatika: Automatic focus, 6D keystone correction, screen detection, and intelligent obstacle avoidance for a perfectly aligned and sharp image.
- Integruota išmanioji sistema: Powered by Allwinner H726 chip, 2GB RAM, and 16GB internal storage, running Android 14 with over 6000 pre-installed apps.
- Išplėstinis ryšys: Dual-band WiFi 6 (2.4 GHz and 5 GHz) for fast and stable wireless screen mirroring, and Bluetooth 5.4 for audio device connections.
- Įtraukiantis garsas: Built-in 12W Hi-Fi stereo speaker.
- Lanksti projekcija: 180° rotation allows projection onto walls or ceilings. Short throw ratio of 1.0:1, projecting 40 to 140 inches.
- Visuotinis suderinamumas: HDMI and USB ports for connecting PS5, laptops, TV sticks, USB drives, smartphones, and tablets.
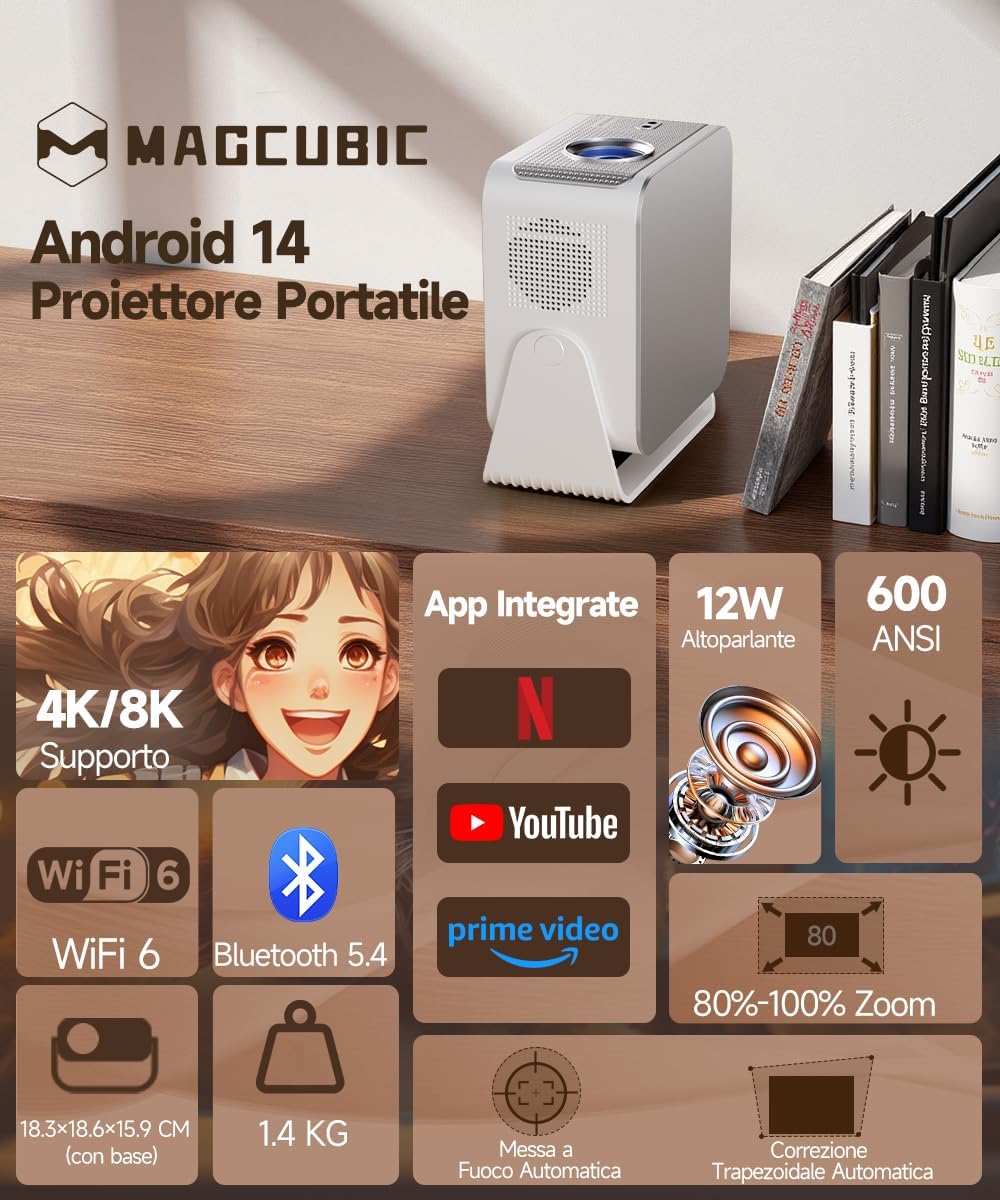
Figure 2: Key Features of the HY350MAX Projector

Figure 3: 1080P Native Resolution Clarity

Figure 4: Android 14 and Integrated Applications
4. Sąranka
4.1 Vieta ir galia
- Place the projector on a stable, flat surface. The 180° rotation feature allows for versatile placement, including ceiling projection.
- Connect the power cable to the projector and then to a power outlet.
- For optimal projection, ensure the room is sufficiently dark.

Figure 5: Flexible 180° Rotation for Placement
4.2 Initial Image Adjustment
The projector features automatic focus and keystone correction. Upon powering on or moving the projector, it will automatically adjust the image for clarity and shape.
- Automatinis fokusavimas: The projector will automatically focus the image. This works best for projection distances under 2.5 meters.
- Automatinė trapų korekcija: The projector will automatically correct the image's trapezoidal distortion.
- Rankinis fokusavimas: If the projection distance is greater than 2.5 meters or if automatic focus is not sensitive enough, use the remote control to adjust focus manually.

Figure 6: Automatic Image Correction Features

Figure 7: Auto and Manual Focus Guide
4.3 Įrenginių prijungimas
The projector supports various input methods:
- HDMI: Connect gaming consoles (e.g., PS5), laptops, or TV sticks using an HDMI cable.
- USB: Įkiškite USB atmintines medijos atkūrimui.
- „WiFi 6“: Connect to your home network for streaming and wireless screen mirroring from smartphones and tablets.
- "Bluetooth 5.4": Suporuokite su išoriniais „Bluetooth“ garsiakalbiais arba ausinėmis, kad garsas būtų geresnis.
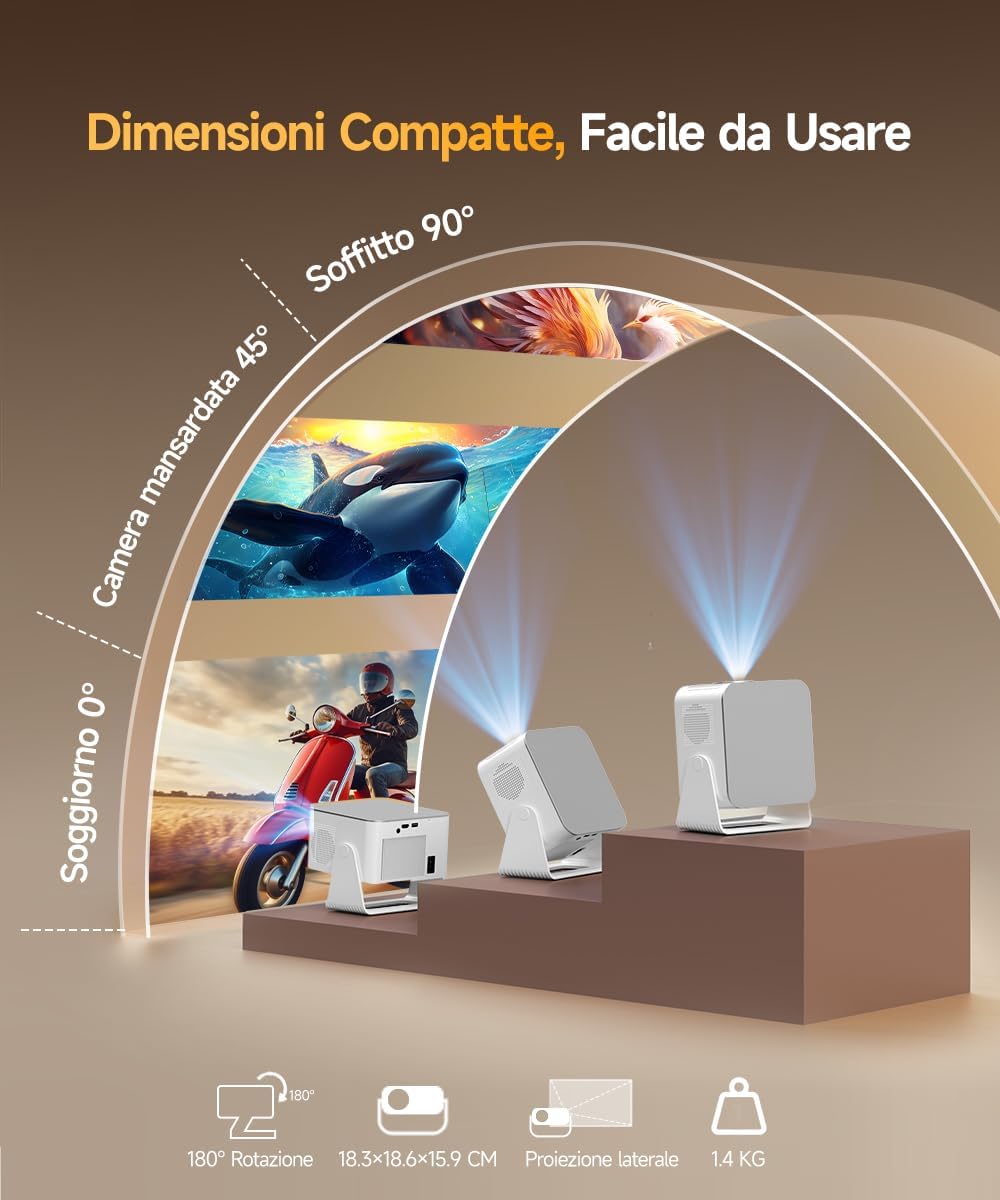
Figure 8: Universal Connectivity Options
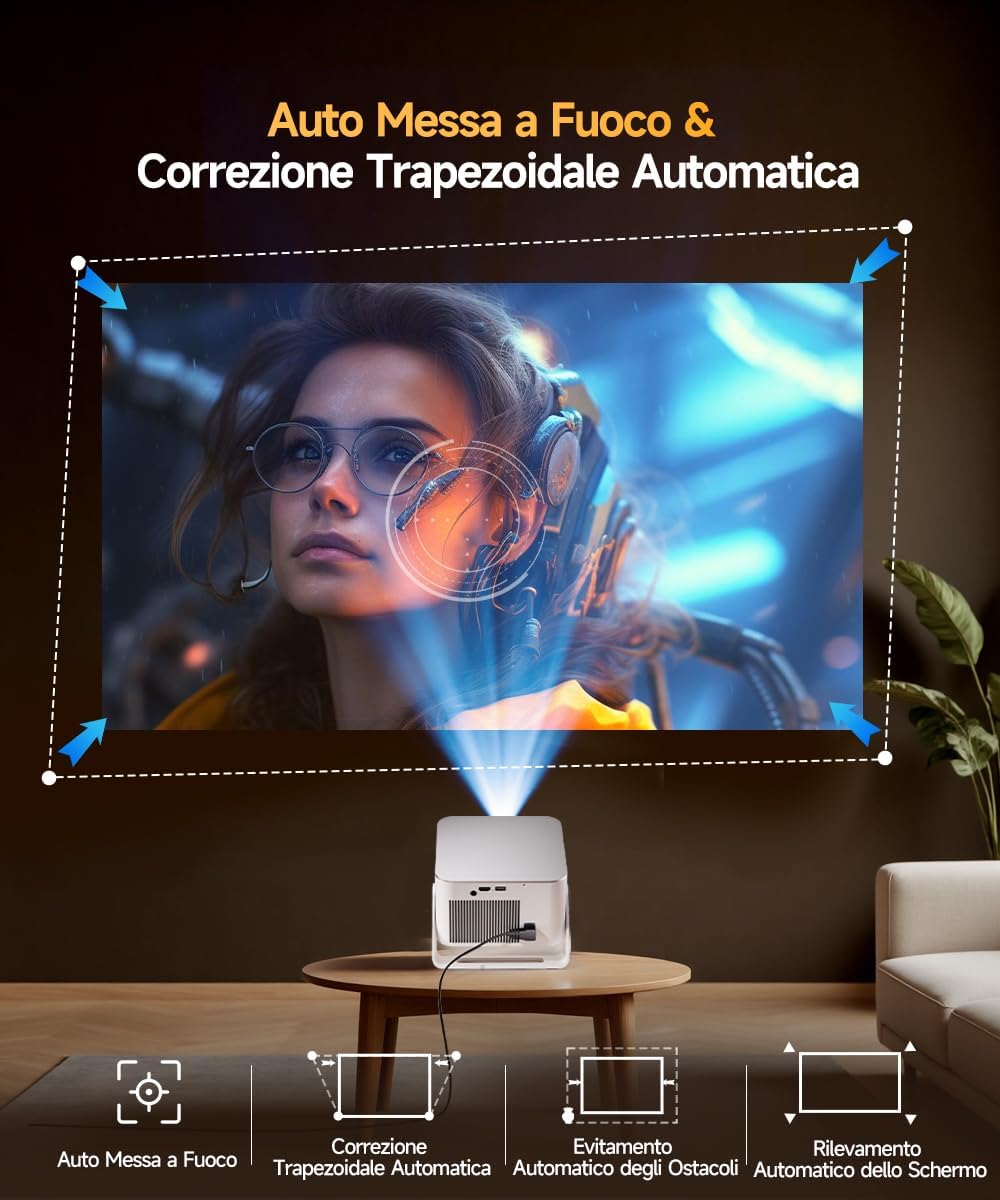
Figure 9: WiFi 6 and Bluetooth 5.4
4.4 Air Mouse Remote Control Setup
To use the Air Mouse function of your remote control, follow these steps:
- Activate Bluetooth on your projector.
- Simultaneously press the left and right directional buttons on the remote control until the projector emits an audible signal.
- Press the button with the 'mouse' symbol on the remote control to activate the Air Mouse function.
- Move your wrist to control the on-screen cursor.

Figure 10: Air Mouse Remote Control Usage
Video 1: Demonstrates the steps to pair and use the Air Mouse remote control for navigation.
5. Naudojimo instrukcijos
5.1 Maitinimo įjungimas/išjungimas
Norėdami įjungti arba išjungti įrenginį, paspauskite projektoriaus arba nuotolinio valdymo pulto maitinimo mygtuką.
5.2 Sąsajos naršymas
The projector runs on Android 14, providing a user-friendly interface. Use the remote control (or Air Mouse) to navigate through menus, select apps, and adjust settings.
- Pagrindinis ekranas: Access integrated apps, input sources (HDMI, USB), and settings.
- App Store: Download additional applications as needed.
- Nustatymai: Adjust display, sound, network, and system preferences.
5.3 Ekrano atspindėjimas
Utilize the WiFi 6 dual-band connectivity for seamless screen mirroring from compatible devices.
- Ensure both your device (smartphone, tablet, laptop) and the projector are connected to the same WiFi network.
- Select the screen mirroring option on the projector's interface (e.g., Airplay, Miracast).
- Initiate screen mirroring from your device's settings.
5.4 Garso išvestis
The projector features a built-in 12W Hi-Fi stereo speaker. For external audio, use Bluetooth 5.4 to connect to speakers or headphones.
- To connect via Bluetooth, go to the projector's settings, select Bluetooth, and pair with your desired audio device.
2 vaizdo įrašas: Viršview of the projector's features, including automatic adjustments, connectivity, and smart interface.
Video 3: Demonstration of the projector's image quality and clarity with various nature scenes.
6. Priežiūra
6.1 Valymas
- Projektoriaus išorę valykite minkštu, sausu skudurėliu.
- Objektyvui valyti naudokite specializuotą lęšių valymo šluostę ir tirpalą. Venkite abrazyvinių medžiagų.
- Įsitikinkite, kad ventiliacijos angos nėra užkimštos dulkėmis ir nėra jokių kliūčių.
6.2 Saugykla
Jei projektorius ilgesnį laiką nenaudojamas, jį laikykite vėsioje, sausoje vietoje, toliau nuo tiesioginių saulės spindulių ir ekstremalių temperatūrų.
7. Problemų sprendimas
Jei kyla problemų dėl projektoriaus, žr. šiuos dažniausiai pasitaikančius sprendimus:
- Nėra galios: Patikrinkite maitinimo laido jungtį ir įsitikinkite, kad maitinimo lizdas veikia.
- Nėra paveiksliuko: Verify the input source is correctly selected (HDMI, USB, WiFi). Ensure the lens cap is removed.
- Neryškus vaizdas: Allow the automatic focus to complete. If still blurry, manually adjust focus using the remote control. Ensure the projection surface is flat.
- Iškraipytas vaizdas: The automatic keystone correction should resolve this. If not, check projector placement or manually adjust keystone settings if available.
- Nėra garso: Check volume settings on both the projector and the connected source device. Ensure Bluetooth audio devices are correctly paired.
- „Wi-Fi“ / „Bluetooth“ ryšio problemos: Ensure the projector is within range of the router/Bluetooth device. Restart both devices.
Dėl papildomos pagalbos kreipkitės į klientų aptarnavimo tarnybą.
8. Specifikacijos
| Funkcija | Specifikacija |
|---|---|
| Prekės ženklas | Magkubinis |
| Modelio numeris | HY350MAX |
| Gimtoji raiška | 1920 x 1080 (1080P „Full HD“) |
| Maksimali ekrano skiriamoji geba | 7680 x 4320 (8K palaikymas) |
| Ryškumas | 600 ANSI liumenai |
| Kontrasto santykis | Aukštas |
| Ryšio technologija | Bluetooth 5.4, HDMI, USB, WiFi 6 (5 Ghz+2.4 Ghz) |
| Operacinė sistema | Android 14 |
| CPU | Allwinner H726 |
| RAM | 2 GB |
| Vidinė saugykla | 16 GB |
| Garsas | 12W Hi-Fi Stereo Speaker |
| Projekcijos dydis | 40–140 colio |
| Projection Distance (Min/Max) | 0.9 m / 3.1 m |
| Svoris | 1.4 kilogramo |
| Energijos suvartojimas | 100 vatų |
| Ypatingos savybės | Integrated Apps, Auto Focus, Auto Keystone Correction, Intelligent Image Adjustment, 180° Rotatable, HDR10+ |
Video 4: Comparison between Magcubic HY350MAX and HY350 models, highlighting system and CPU upgrades.
9. Garantija ir palaikymas
Magcubic is committed to providing quality products and customer satisfaction.
- Gaminio garantija: 1 metų gamintojo garantija.
- Grąžinimo garantija: 30 dienų pinigų grąžinimo garantija.
- Klientų aptarnavimas: 24-hour live customer assistance.
- Techninė pagalba: Techninė pagalba visą gyvenimą.
For any inquiries or support needs, please refer to the contact information provided with your purchase or visit the official Magcubic websvetainę.


