
1. Įvadas
The GOYOJO GH192 is a handheld thermal imaging camera designed for various inspection tasks, including mechanical maintenance, home HVAC, and electrical inspections. It features a 240x240 infrared resolution, a 2MP visual camera, and fusion imaging capabilities for detailed thermal analysis. With a 25Hz refresh rate, it provides smooth and clear thermal imagery.

Figure 1: GOYOJO GH192 Thermal Imaging Camera in operation.
2. Pakuotės turinys
Patikrinkite, ar pakuotėje yra visi reikalingi daiktai:
- GH192 Thermal Camera Body
- USB-C kabelis
- Vartotojo vadovas (šis dokumentas)
3. Sąranka
3.1 Akumuliatoriaus įkrovimas
The device is equipped with a built-in 18650 lithium-ion battery (3.7V, 3500mAh).
- Prijunkite pridėtą USB-C laidą prie fotoaparato USB-C prievado.
- Kitą USB-C laido galą prijunkite prie suderinamo USB maitinimo adapterio (nepridedamas) arba kompiuterio USB prievado.
- Užsidegs įkrovimo indikatorius. Visiškas įkrovimas paprastai trunka 3–4 valandas.
- The battery provides up to 8 hours of continuous operation on a full charge.
3.2 Pradinis įjungimas
Press and hold the power button located on the device until the screen illuminates. The device will boot up and display the main interface.
4. Naudojimo instrukcijos
4.1 Maitinimo įjungimas/išjungimas
- Norėdami įjungti: Paspauskite ir palaikykite maitinimo mygtuką.
- Norėdami išjungti: Paspauskite ir palaikykite maitinimo mygtuką, kol pasirodys išjungimo raginimas, tada patvirtinkite.
4.2 Ekranas ir navigacija
The GH192 features a 2.8" 240x320 IPS display. Use the directional buttons and selection button to navigate through menus and settings.
4.3 vaizdo režimai
The device offers multiple image modes to suit different inspection needs:
- Terminis režimas: Rodo tik infraraudonųjų spindulių šiluminį vaizdą.
- Visual Mode: Displays only the image from the 2MP visual camera.
- Suliejimo režimas: Blends the thermal image with the visual image for enhanced detail and context. This mode helps in identifying the exact location of temperature anomalies.
- PIP (vaizdas vaizde) režimas: Displays a smaller thermal image overlayed on the visual image.

Figure 2: Thermal and Visual Fusion for enhanced detail.
4.4 Spalvų paletės
Select from 6 adjustable color palettes to visualize temperature differences effectively. Each palette highlights temperature variations in a distinct way.
- Baltas karštas
- Juoda karšta
- Geležinis raudonas
- Vaivorykštė
- Red Hot
- Sintezija

Figure 3: Versatile Color Palettes and Temperature Units.
4.5 Temperature Measurement and Alarms
The GH192 provides accurate temperature measurements and tracking features:
- Automatic Center Spot: Rodo temperatūrą ekrano centre.
- Hot Spot Tracking: Automatically identifies and displays the highest temperature within the field of view.
- Cold Spot Tracking: Automatically identifies and displays the lowest temperature within the field of view.
- User-Defined Spots: Allows setting up to 3 custom measurement points.
- Temperatūros diapazonas: Matuoja temperatūrą nuo -20 °C iki 550 °C (-4 °F iki 1022 °F).
- Temperatūros signalas: Configurable high and low-temperature alarms provide visual and audio alerts when temperatures exceed or fall below set thresholds.

Figure 4: Hotspot Tracking and High-Temperature Alarm.
4.6 Emissivity and Distance Adjustment
For accurate temperature readings, adjust the emissivity setting based on the material being inspected and set the object distance. Refer to the device's settings menu for these adjustments.
4.7 Vaizdų fiksavimas ir saugojimas
Press the capture button to save thermal images. The device has 16GB of eMMC flash storage, capable of storing over 90,000 images.
4.8 Duomenų perdavimas
To transfer images to a computer:
- Connect the GH192 to your computer using the USB-C cable.
- On the camera, enable transfer mode (usually prompted on the screen or found in settings).
- The camera will appear as a removable storage device on your computer, allowing you to access and transfer images.
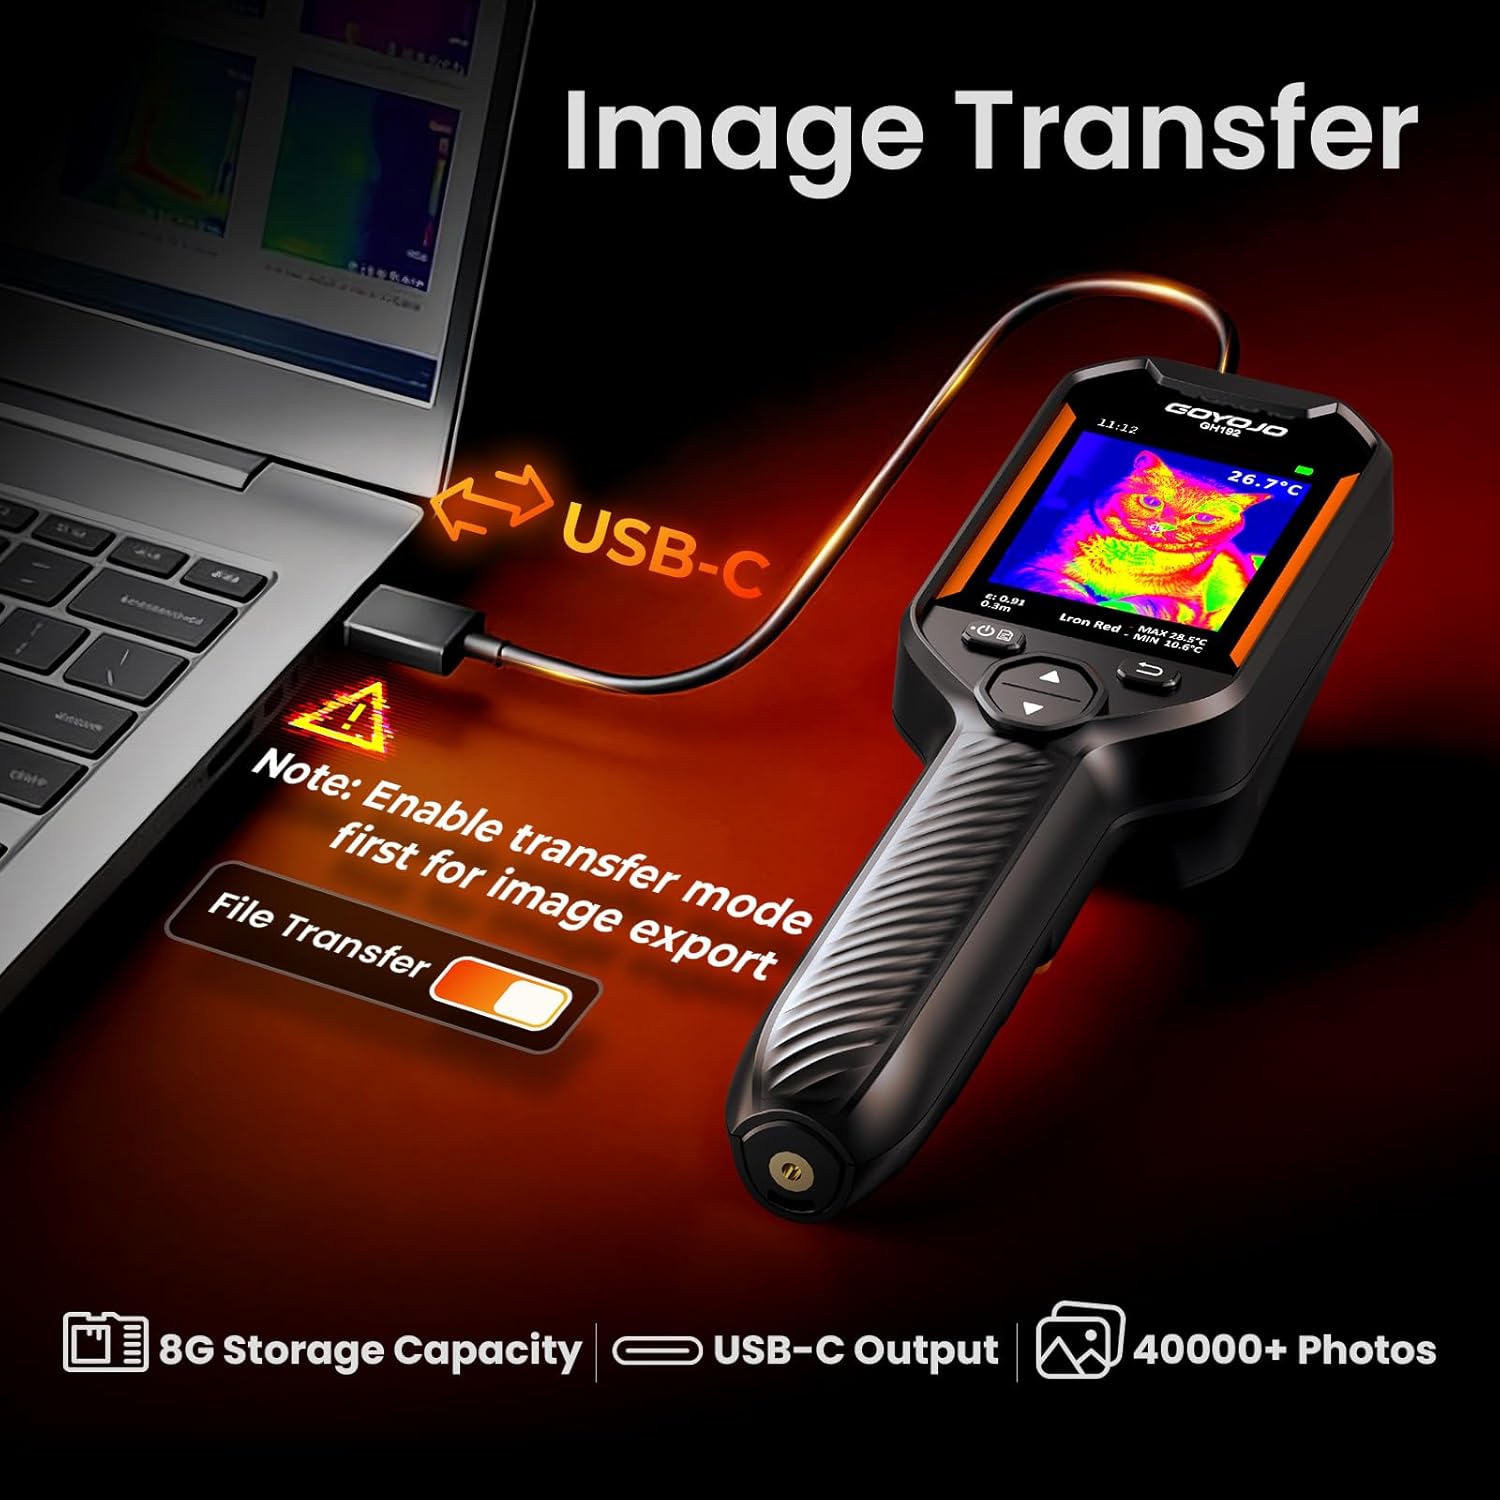
Figure 5: Image Transfer via USB-C.
5. Priežiūra
5.1 Prietaiso valymas
- Kameros korpusą valykite minkštu, sausu skudurėliu.
- For the lens and screen, use a lens cleaning cloth and solution specifically designed for optical surfaces.
- Nenaudokite abrazyvinių valiklių ar tirpiklių.
5.2 Akumuliatoriaus priežiūra
- Reguliariai įkraukite akumuliatorių, net jei įrenginys nėra dažnai naudojamas, kad palaikytumėte jo būklę.
- Venkite ilgesnį laiką visiškai iškrauti akumuliatorių.
- Laikykite prietaisą vėsioje, sausoje vietoje.
5.3 Saugykla
When not in use, store the GH192 in its protective packaging or a suitable case to prevent damage. Avoid exposing the device to extreme temperatures or high humidity. The device is IP54 rated for protection against dust and splashing water, and designed to withstand a 6.6ft (2 meter) drop.

Figure 6: Durability features: 6.6ft Drop-Proof and IP54 Protection.
6. Problemų sprendimas
| Problema | Galima priežastis | Sprendimas |
|---|---|---|
| Įrenginys neįsijungia. | Išsikrovęs akumuliatorius arba įrenginio gedimas. | Charge the battery for at least 30 minutes. If the issue persists, contact customer support. |
| Netikslūs temperatūros rodmenys. | Incorrect emissivity setting or object distance. | Adjust emissivity based on the material. Ensure correct object distance is set. Calibrate if necessary (refer to advanced settings). |
| Ekranas užstrigęs arba nereaguoja. | Programinės įrangos triktis. | Atlikite minkštą atkūrimą palaikydami maitinimo mygtuką 10–15 sekundžių, kol įrenginys bus paleistas iš naujo. |
| Nepavyksta perkelti vaizdų į kompiuterį. | Transfer mode not enabled or faulty USB-C cable. | Ensure transfer mode is enabled on the camera. Try a different USB-C cable or computer port. |
7. Specifikacijos
| Funkcija | Detalė |
|---|---|
| Modelis | GH192 |
| Infraraudonųjų spindulių raiška | 240 x 240 pikselių |
| Vaizdinė kamera | 2 MP |
| Ekranas | 2.8" 240x320 IPS |
| Atnaujinimo dažnis | 25 Hz |
| Temperatūros diapazonas | -4°F iki 1022°F (nuo -20°C iki 550°C) |
| Temperatūros tikslumas | ±2 °C arba 2 % |
| Šilumos jautrumas | <40 mK |
| Vaizdo režimai | Terminis, vizualinis, suliejimas, PIP |
| Spalvų paletės | White Hot, Black Hot, Iron Red, Rainbow, Red Hot, Fusion |
| Sandėliavimas | 16 GB eMMC (talpina >90 000 vaizdų) |
| Ryšys | USB-C |
| Baterijos tipas | 18650 Li-ion (3.7V, 3500mAh) |
| Baterijos veikimo laikas | Iki 8 valandų nepertraukiamo naudojimo |
| Įkrovimo laikas | 3-4 valandas |
| Patvarumas | IP54, 6.6ft (2m) drop resistance |
| Prekės svoris | 260 gramų |
8. Garantija ir palaikymas
For warranty information and technical support, please refer to the documentation provided with your purchase or visit the official GOYOJO websvetainėje. Išsaugokite pirkimo įrodymą garantiniams reikalavimams.