
1. Įvadas
This instruction manual provides comprehensive guidance for the safe and effective use of your Elna eXplore 130 Mechanical Sewing Machine. Please read this manual thoroughly before operating the machine to ensure proper setup, operation, and maintenance. Retain this manual for future reference.
2. Svarbios saugos instrukcijos
Naudojant elektrinį prietaisą, visada reikia laikytis pagrindinių saugos priemonių, įskaitant:
- Prieš naudodami siuvimo mašiną, perskaitykite visas instrukcijas.
- Pirštus laikykite toliau nuo visų judančių dalių. Siuvimo mašinos adata turi būti ypač atsargi.
- Visada naudokite tinkamą adatos plokštelę. Dėl netinkamos plokštelės adata gali nulūžti.
- Nenaudokite sulenktų adatų.
- Išjunkite siuvimo mašiną, kai atliekate bet kokius pakeitimus adatos srityje, pavyzdžiui, įveriate siūlo siūlą, keičiate adatą, įveriate ritinėlį arba keičiate prispaudimo pėdelę.
- Visada ištraukite siuvimo mašinos kištuką iš elektros lizdo, kai nuimate dangčius, tepate arba atliekate bet kokius kitus naudotojo priežiūros reguliavimus, nurodytus naudojimo vadove.
- Niekada nemeskite ir neįkiškite jokio daikto į jokią angą.
- Nenaudoti lauke.
- Nedirbkite ten, kur naudojami aerozoliniai (purškiami) produktai arba kur įvedamas deguonis.
- Norėdami atjungti, pasukite visus valdiklius į išjungimo padėtį, tada ištraukite kištuką iš lizdo.
- Neištraukite kištuko traukdami už laido. Norėdami atjungti kištuką, imkite už kištuko, o ne už laido.
3. Produktas baigtasview
The Elna eXplore 130 is a mechanical sewing machine designed for various sewing tasks, offering a selection of utility, stretch, and decorative stitches. It features a lightweight and portable design.
Pagrindinės funkcijos:
- 23 integruotos naudingosios, tampriosios ir dekoratyvinės siūlės.
- One four-step buttonhole.
- Front Loading Vertical Oscillating Bobbin system.
- Free-arm sewing capability by removing the front accessory tray.
- Maximum stitch width: 5mm.
- Maximum stitch length: 4mm.
- Maximum sewing speed: 800 stitches per minute (SPM).
- LED lighting for improved visibility.
- Convenient dial system for stitch pattern, length, and width selection.
Įtraukti komponentai:
The following accessories are included with your Elna eXplore 130 sewing machine:
- Presser Feet: Standard Foot A, Zipper Foot E, Blind Hem Foot G, Buttonhole Foot.
- Darning plate.
- Bobbins (x3).
- Seam Ripper.
- Needle Set.
- Atsuktuvas.
- Felt.
- Foot Controller.
- Naudojimo instrukcija (šis dokumentas).
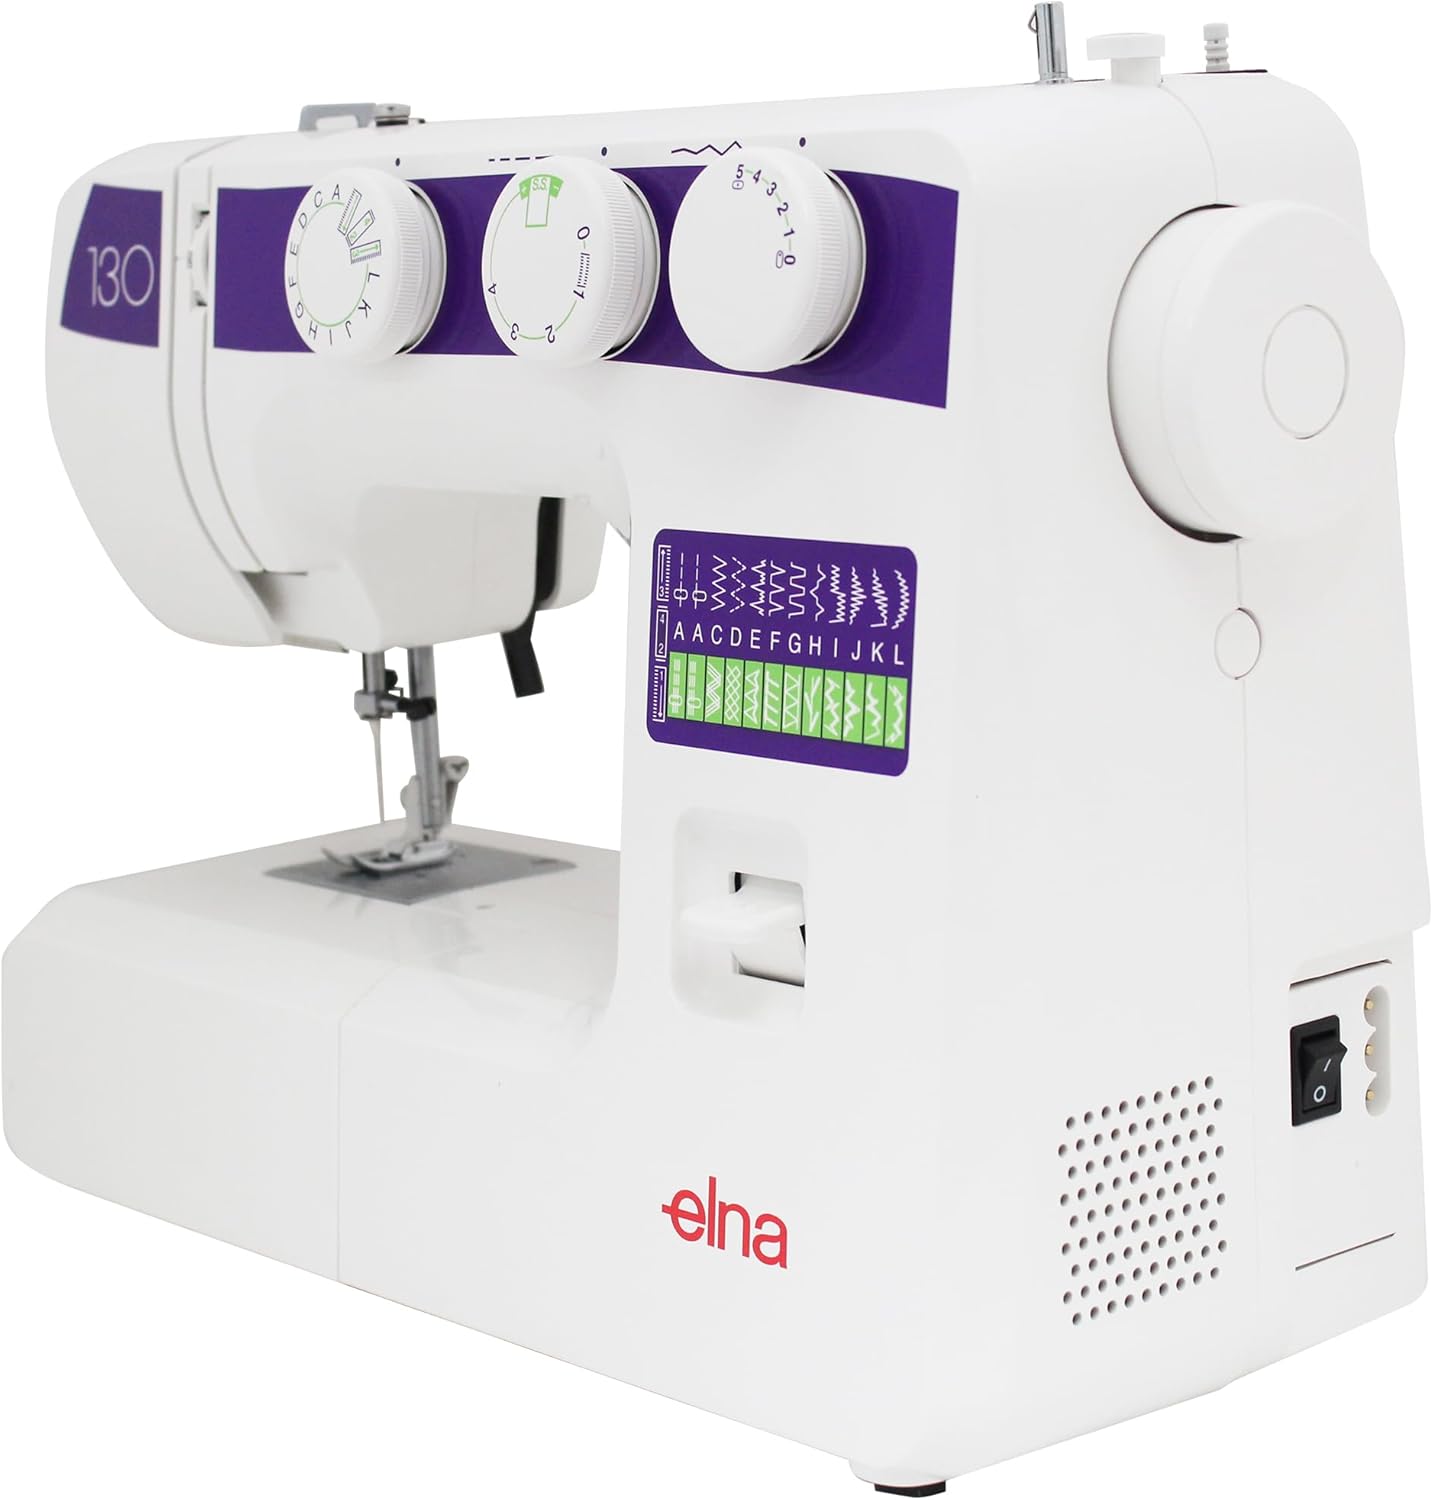
Mašina Views:




4. Sąranka
4.1 Išpakavimas ir įdėjimas
- Atsargiai išimkite mašiną iš pakuotės.
- Pastatykite mašiną ant stabilaus, lygaus paviršiaus.
- Užtikrinkite tinkamą apšvietimą ir erdvę patogiam darbui.
4.2 Maitinimo jungtis
- Prijunkite kojinio valdiklio kištuką prie mašinos maitinimo lizdo.
- Insert the power cord plug into a suitable electrical outlet.
- Ensure the power switch on the machine is in the "OFF" position before connecting.
4.3 Ritės užvyniojimas
- Uždėkite tuščią ritę ant ritės vyniotuvo veleno.
- Guide the thread from the spool pin through the upper thread guide and around the bobbin winding tension disc.
- Apvyniokite siūlą kelis kartus aplink ritę.
- Pastumkite ritės sukimo veleną į dešinę.
- Gently press the foot controller to start winding. Stop when the bobbin is full.
- Nukirpkite siūlą ir pastumkite ritės vyniotuvo veleną atgal į kairę.
4.4 Ritės įdėjimas
- Open the bobbin cover plate located on the free arm.
- Įkiškite suvyniotą ritę į ritės dėklą, užtikrindami, kad siūlas išsivyniotų teisinga kryptimi (paprastai prieš laikrodžio rodyklę).
- Ištraukite siūlą per įtempimo spyruoklę ir įkiškite jį į ritės korpuso angą.
- Uždarykite ritės dangtelio plokštę.
4.5 Viršutinio siūlo įvėrimas
- Pakelkite pėdutės keltuvą.
- Uždėkite siūlų ritę ant ritės kaiščio.
- Prakiškite siūlą per viršutinį siūlo kreipiklį.
- Sekite sunumeruotą siūlo įvėrimo kelią žemyn per įtempimo diskus ir iki paėmimo svirties.
- Įsukite įtempimo svirtį iš dešinės į kairę.
- Continue guiding the thread down through the remaining guides to the needle.
- Įverkite adatą iš priekio į galą.
- Per adatos akutę ištraukite apie 6 colių siūlo.
5. Naudojimo instrukcijos
5.1 Dygsnio pasirinkimas
- Pasukite Stitch Pattern Dial (leftmost dial) to select the desired stitch. Refer to the stitch pattern guide on the machine for available options.
- Sureguliuokite Dygsnio ilgio ratukas (middle dial) to set the desired stitch length (0-4mm). For stretch stitches, use the preset length indicated by the green mark.
- Sureguliuokite Dygsnio pločio ratukas (rightmost dial) to set the desired stitch width (0-5mm).
5.2 Pagrindinis siuvimas
- Padėkite audinį po pėdele.
- Nuleiskite prispaudimo pėdelę.
- Turn the handwheel towards you to bring the needle down into the fabric, then up again, pulling the bobbin thread through the needle plate hole.
- Pull both upper and bobbin threads to the back under the presser foot.
- Gently press the foot controller to begin sewing. Guide the fabric smoothly.
- To secure a seam, press the reverse lever for a few stitches at the beginning and end of your seam.
- When finished, raise the needle to its highest position, lift the presser foot, and pull the fabric away from the machine. Cut the threads using the thread cutter.
5.3 Laisvosios rankos naudojimas
To use the free arm for sewing tubular items like sleeves, cuffs, or trouser hems, simply slide off the accessory storage tray located at the front of the machine. This exposes the narrow free arm.
5.4 Four-Step Buttonhole
The Elna eXplore 130 features a four-step buttonhole function.
- Attach the Buttonhole Foot.
- Pažymėkite kilpos vietą ant audinio.
- Set the Stitch Pattern Dial to the first buttonhole step (indicated by a square symbol).
- Siūkite pirmąją sagos kilpos pusę.
- Adjust the Stitch Pattern Dial to the second step for the bar tack.
- Adjust to the third step for the second side, and the fourth step for the final bar tack.
- Carefully cut open the buttonhole using a seam ripper.
6. Priežiūra
Reguliarus prižiūrėjimas užtikrina jūsų siuvimo mašinos ilgaamžiškumą ir optimalų veikimą.
6.1 Įrenginio valymas
- Prieš valydami mašiną visada ištraukite iš elektros tinklo.
- Nuimkite adatą, prispaudimo pėdelę ir adatos plokštelę.
- Use the provided brush to remove lint and dust from the bobbin case area and feed dogs.
- Aparato išorę nuvalykite minkšta, sausa šluoste. Nenaudokite skystų valiklių.
6.2 Adatos keitimas
- Pakelkite adatą į aukščiausią padėtį.
- Atlaisvinkite adatą clamp prisukti.
- Nuimkite seną adatą.
- Įkiškite naują adatą plokščiąja puse į galą ir stumkite ją aukštyn kiek įmanoma aukščiau.
- Priveržkite adatą clamp tvirtai prisukite.
- Change needles regularly (after 8-10 hours of sewing) or if it becomes bent or dull.
7. Problemų sprendimas
Šiame skyriuje aptariamos dažniausiai pasitaikančios problemos, su kuriomis galite susidurti. Dėl problemų, kurios čia nepaminėtos, susisiekite su klientų aptarnavimo tarnyba.
| Problema | Galima priežastis | Sprendimas |
|---|---|---|
| Praleistos siūlės | Neteisingas adatos dydis / tipas, sulenkta adata, netinkamas siūlo įvėrimas. | Change needle, re-thread machine, ensure correct needle for fabric. |
| Thread Breaking (Upper) | Incorrect upper tension, improperly threaded, poor quality thread, bent needle. | Adjust tension, re-thread, use quality thread, change needle. |
| Thread Breaking (Bobbin) | Neteisingai suvyniota ritė, neteisingai įdėta ritė, pūkeliai ritės korpuse. | Rewind bobbin, re-insert bobbin correctly, clean bobbin case. |
| Audinys nemaitina | Prispaudimo pėdelė nenuleista, transporterio dantukai nuleisti, pūkeliai po adatos plokštele. | Lower presser foot, raise feed dogs, clean under needle plate. |
| Mašina neužsiveda | Neprijungtas maitinimo laidas, išjungtas maitinimo jungiklis, kojinio valdiklio problema. | Check power connections, turn on switch, inspect foot controller. |
8. Specifikacijos
| Funkcija | Detalė |
|---|---|
| Prekės ženklas | Elna |
| Modelio numeris | EL130 |
| Tipas | Mechaninė siuvimo mašina |
| Dygsnių skaičius | 23 įmontuotų siūlių |
| Sagų kilpų tipas | Four-step |
| Ritės tipas | Front Loading Vertical Oscillating |
| Maksimalus dygsnio plotis | 5 mm |
| Maksimalus dygsnio ilgis | 4 mm |
| Maksimalus siuvimo greitis | 800 SPM |
| Apšvietimas | LED |
| Maitinimo šaltinis | Elektrinis |
| Gaminio matmenys (D x P x A) | 6 "D x 15.3" P x 11.6" A |
| Prekės svoris | 13 svaro |
| Medžiaga | Metalas, Plastikas |
| UPC | 732212411939 |
9. Garantija ir palaikymas
For information regarding your product's warranty, please refer to the warranty card included with your purchase or visit the official Elna websvetainę.
If you require technical assistance, have questions about operation, or need to order replacement parts, please contact Elna customer support.
- Elna Official Websvetainė: www.elna.com
- Elna USA Store on Amazon: Visit the Elna Store