
1. Įvadas
This manual provides detailed instructions for assembling and operating your ROBOTIME Slow Life Café Miniature House Kit, model DG162-01. This 1:18 scale DIY kit allows you to construct a charming coffee shop diorama complete with intricate details and functional LED lighting. Designed for adults and hobbyists with intermediate crafting experience, this kit offers a rewarding building experience and results in a beautiful display piece.
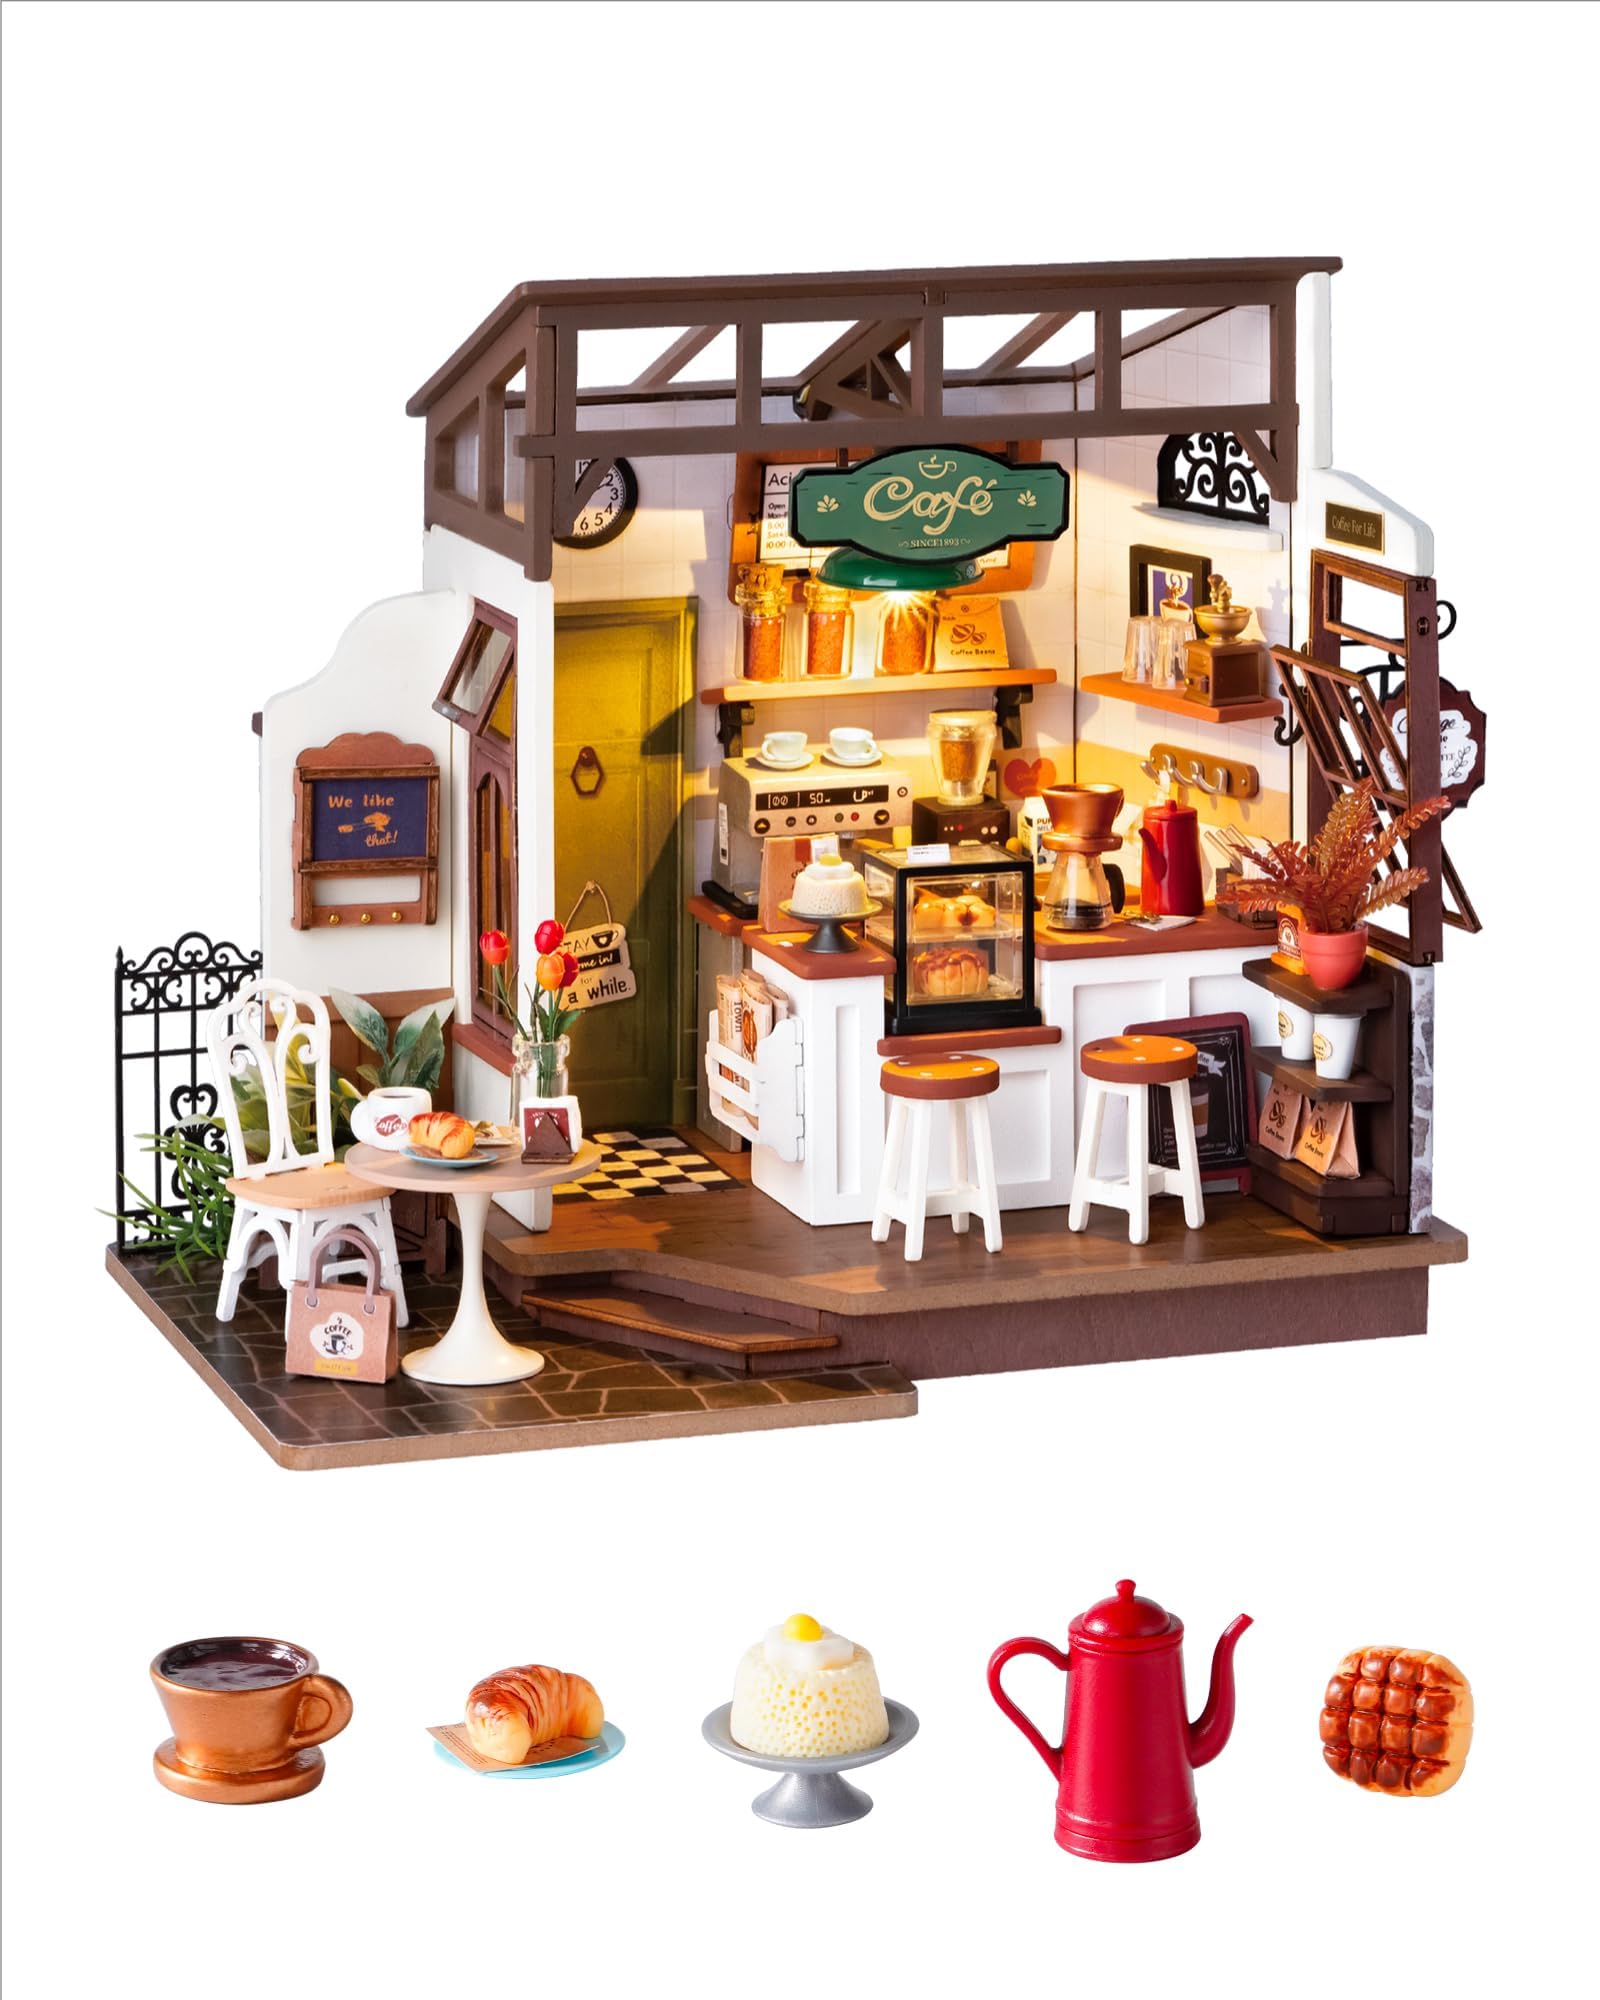
Image 1.1: The completed Slow Life Café Miniature House Kit.
2. Saugos informacija
- This kit contains small parts. Keep out of reach of small children to prevent choking hazards.
- Exercise caution when using sharp tools such as craft knives or scissors during assembly.
- Use glue in a well-ventilated area. Avoid contact with skin and eyes. In case of contact, rinse thoroughly with water.
- Batteries (AAA/LR03/AM4 1.5V) are not included. Ensure correct polarity when inserting batteries. Do not mix old and new batteries or different types of batteries. Remove batteries if the product is not used for an extended period.
3. Pakuotės turinys
Before beginning assembly, verify that all components are present. The kit includes approximately 240 precision pieces made primarily of wood, along with paper components, LED lighting elements, and basic assembly tools (tweezers, glue). Refer to the detailed parts list in your instruction booklet for a complete inventory.

Image 3.1: Various components and tools included in the kit.
4. Sąranka ir surinkimas
The assembly process is estimated to take approximately 8 hours. This kit is rated for intermediate difficulty, requiring patience and attention to detail. Follow the pictorial instructions provided in your kit booklet carefully.
4.1 Paruošimas
- Clear a well-lit, spacious workspace.
- Organize all pieces by their designated bags and labels as per the instruction booklet.
- Prepare 2 AAA/LR03/AM4 1.5V batteries (not included) for the LED lights.
- Have an art knife or precision scissors ready for cutting and trimming.
4.2 Žingsnis po žingsnio surinkimas
- Išpakuokite ir atpažinkite: Carefully remove all pieces from their packaging. Match each piece to the corresponding diagram in the instruction manual.
- Construct Base Structure: Begin by assembling the main structural components of the café, such as walls and flooring. Ensure all connections are secure.
- Detailing and Furniture: Proceed to assemble the smaller furniture pieces and decorative elements. Pay close attention to the order of assembly for these intricate parts.
- Paper Components: For paper elements, use the provided glue. Apply glue evenly and press firmly to ensure a smooth finish. Allow adequate drying time.
- Elektros instaliacija: Install the LED lighting system as directed. This involves connecting wires and securing the battery box. Ensure all connections are correct before inserting batteries.
- Galutinė vieta: Once all individual components are built, carefully place and secure them within the café structure.

Image 4.1: Close-up of various detailed elements within the café.
Video 4.2: An official ROBOTIME video demonstrating the assembly process and features of the Coffee Shop Miniature Kit.
5. LED lempučių valdymas
Your Slow Life Café kit includes LED lights to enhance its ambiance. To operate the lights:
- Ensure 2 AAA/LR03/AM4 1.5V batteries are correctly installed in the battery box, observing polarity.
- Locate the on/off switch on the battery box.
- Flip the switch to the 'ON' position to illuminate the café. Flip to 'OFF' to turn off the lights.

Image 5.1: Comparison of the miniature café with LED lights on (top) and off (bottom).
6. Priežiūra
To keep your miniature café in excellent condition:
- Dulkės: Gently dust the model regularly with a soft brush or compressed air to prevent accumulation.
- Tvarkymas: Handle the assembled model with care to avoid dislodging small components.
- Saugykla: Store in a dry environment away from direct sunlight and extreme temperatures to prevent material degradation.
- Baterijos: Remove batteries if the model will not be used for an extended period to prevent leakage.
7. Problemų sprendimas
| Problema | Galima priežastis | Sprendimas |
|---|---|---|
| Trūksta arba sulūžusios dalys | Gamybos defektas arba transportavimo metu atsiradusi žala. | Contact ROBOTIME customer support for assistance. |
| LED lemputės neveikia | Incorrect battery installation, dead batteries, loose wiring. | Check battery polarity, replace batteries, ensure all wire connections are secure. |
| Detalės nedera tarpusavyje | Incorrect orientation, excess material, or misidentified part. | Refer to the instruction manual to verify part orientation. Gently sand or trim excess material if necessary. Ensure you are using the correct piece. |
| Glue not holding | Insufficient glue, improper application, or not enough drying time. | Apply a sufficient amount of glue evenly. Ensure surfaces are clean and dry. Allow ample time for the glue to set before handling. |
8. Specifikacijos
- Modelio numeris: DG162-01
- Mastelis: 1:18
- Surinkto produkto matmenys (ilgis x plotis x aukštis): 9.8 x 5.9 x 7.7 colio (24.9 x 15 x 19.6 cm)
- Vienetų skaičius: Maždaug 240
- Numatomas surinkimo laikas: 8 valandos
- Rekomenduojamas amžius: 14+ metų
- Pagrindinė medžiaga: Mediena
- Apšvietimas: LED (requires 2 x AAA/LR03/AM4 1.5V batteries, not included)
9. Garantija ir palaikymas
For any issues regarding missing or broken parts, or other product-related inquiries, please contact ROBOTIME customer support. Detailed warranty information may be available on the official ROBOTIME websvetainėje arba per savo mažmenininką.
ROBOTIME Official Websvetainė: www.robotimeonline.com