PowerA Advantage Wireless Controller for Nintendo Switch 2 - Mario & Yoshi
Model: NSGP0569-01V
Įvadas
Šiame vadove pateikiamos išsamios „PowerA Advan“ naudojimo instrukcijos.tage Wireless Controller, designed for use with the Nintendo Switch family of devices. It covers setup, operation, maintenance, and troubleshooting to ensure optimal performance and longevity of your controller.
Pagrindinės savybės
Hall Effect Modules: Equipped with contact-free magnetic sensors in the thumbsticks to prevent stick drift, offering smoother control, enhanced precision, and increased longevity.
Advanced Gaming Buttons: Two mappable buttons can be programmed on the fly during gameplay without needing to access system settings.
Intuitive Motion Controls: Experience fluid and responsive motion controls for aiming, steering, flying, and other in-game actions.
C mygtukas: Provides quick access to GameChat features.
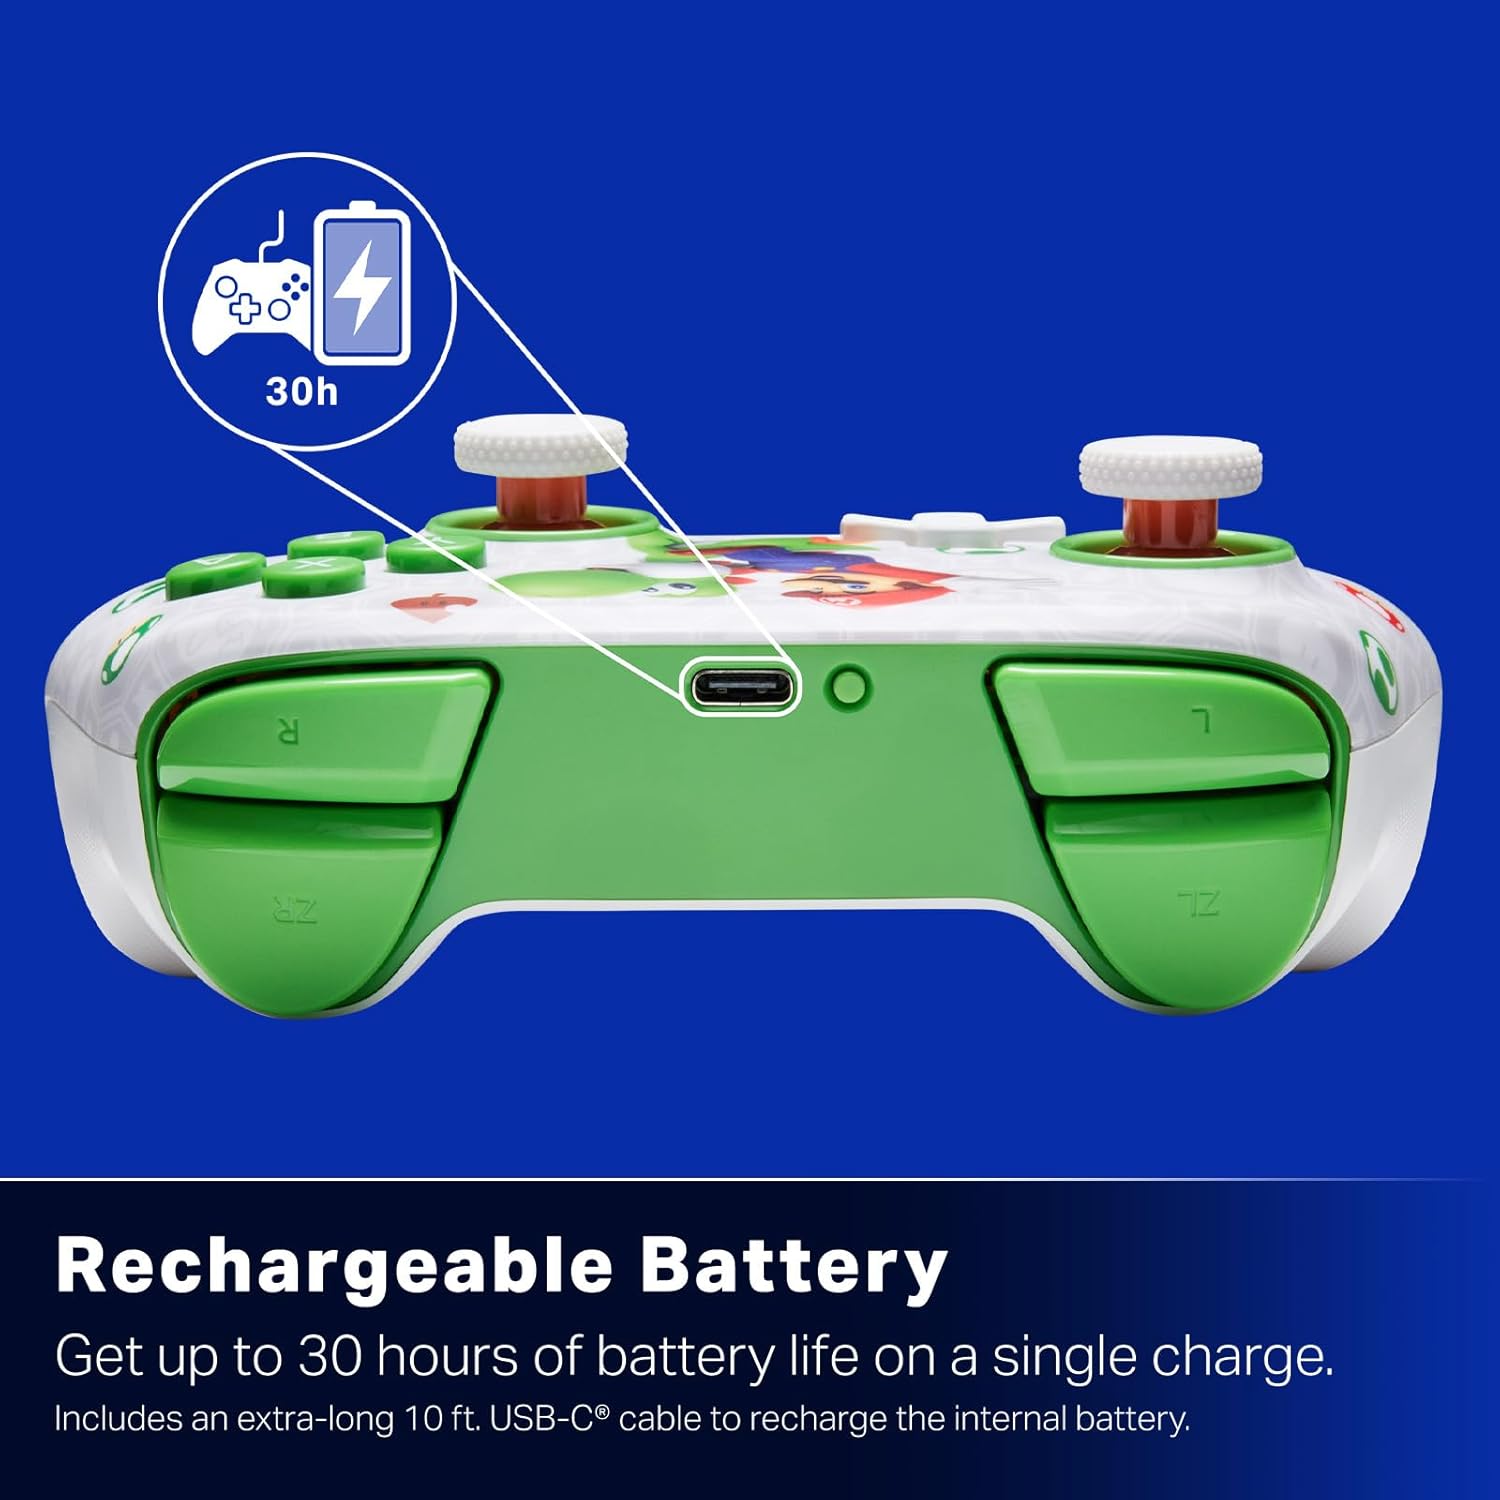
Įkraunama baterija: Offers up to 30 hours of gameplay on a single charge. Includes a 10 ft. (3m) USB-C cable for recharging.
Ergonomiškas dizainas: Crafted for comfort during extended gaming sessions, utilizing cutting-edge ergonomics and high-quality materials.
Nintendo Family Compatibility: Compatible with Nintendo Switch 2, Nintendo Switch, Nintendo Switch – OLED Model, and Nintendo Switch Lite.
Oficialiai licencijuota: PowerA products undergo rigorous testing by Nintendo to ensure compatibility and quality.
Sąrankos instrukcijos
1. Pradinis įkrovimas
Before first use, fully charge your PowerA Advantage Wireless Controller. Connect the included 10 ft. (3m) USB-C cable to the controller's USB-C port and the other end to a powered USB port on your Nintendo Switch dock or a USB wall adapter.
Figure 1: Controller connected via USB-C for charging, highlighting the rechargeable battery feature.
2. Susiejimas su „Nintendo Switch“
Įsitikinkite, kad jūsų „Nintendo Switch“ konsolė įjungta ir atnaujinta į naujausią sistemos programinę įrangą.
HOME meniu pasirinkite Valdikliai, tada Pakeiskite rankeną / tvarką.
On the PowerA Advantage Wireless Controller, press and hold the SYNC mygtukas located on the top edge of the controller for at least three seconds. The player indicator LEDs on the bottom of the controller will begin to flash.
Once the controller successfully pairs, the player indicator LED(s) corresponding to the controller number will remain lit.
Paspauskite A Mygtukas to confirm and exit the pairing screen.
For subsequent uses, simply press the HOME button on the controller to wake it up and automatically reconnect to your Switch console.
Naudojimo instrukcijos
Pagrindiniai valdikliai
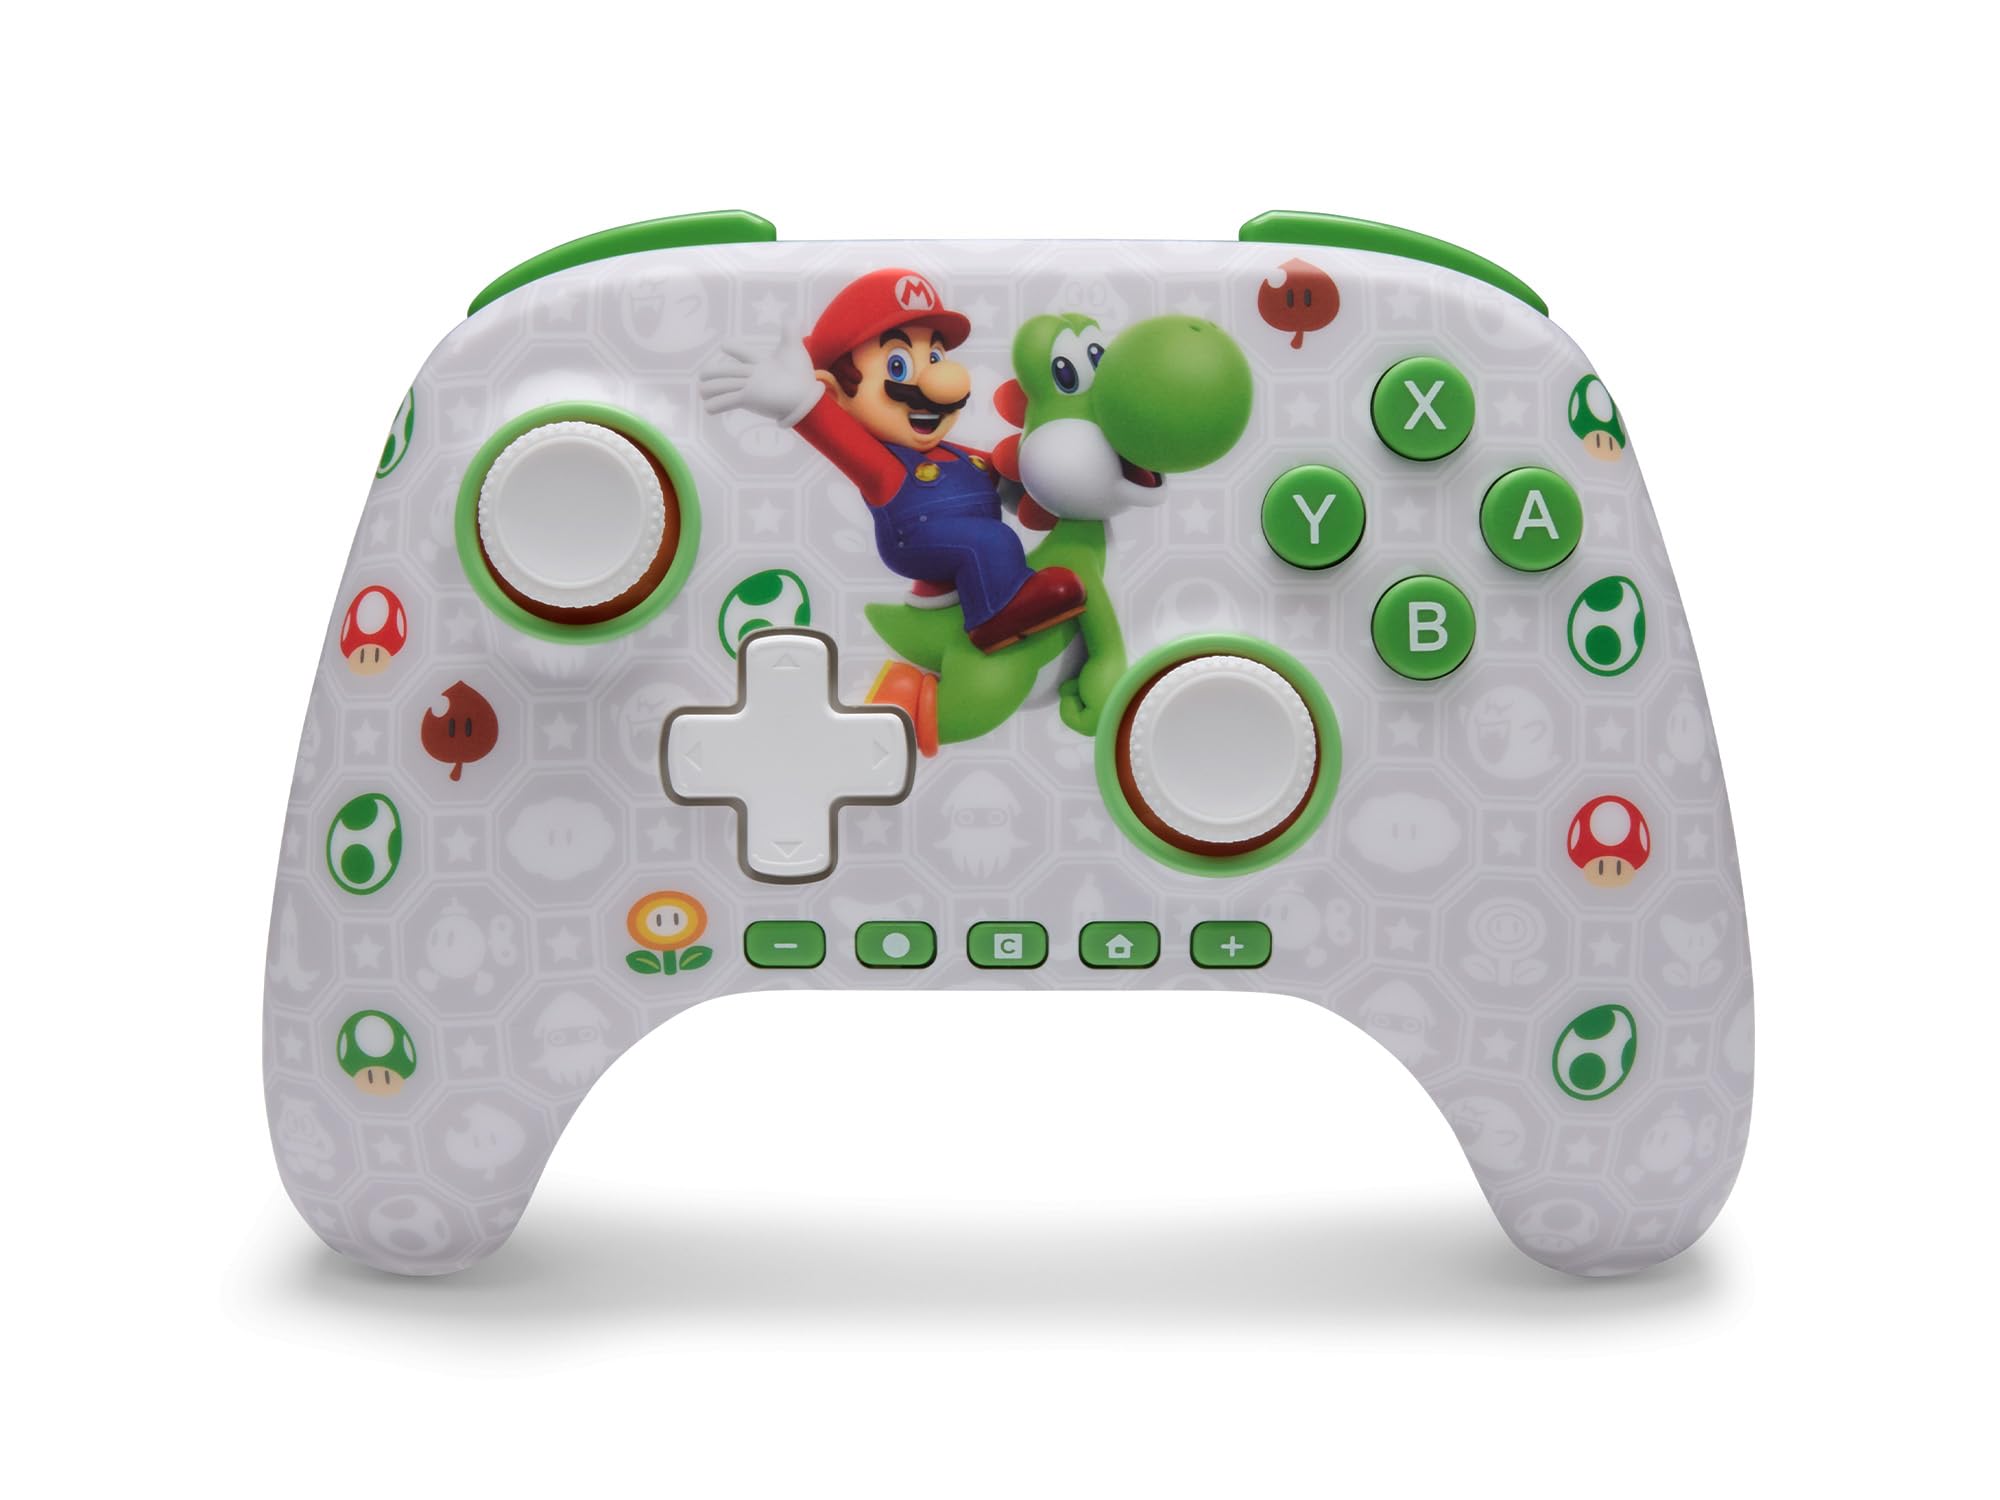
„PowerA Advan“tage Wireless Controller features standard Nintendo Switch button layouts, including A, B, X, Y buttons, L/R and ZL/ZR shoulder buttons, a D-pad, and dual analog sticks. Familiarize yourself with these controls for general gameplay.
2 pav.: priekis view of the PowerA Advantage Wireless Controller, highlighting the Mario and Yoshi design and button layout.
Advanced Gaming Buttons (AGB)
The controller includes two mappable Advanced Gaming Buttons (AGR and AGL) on the back. These buttons can be assigned to replicate any other button on the controller for quick access during gameplay.
Paspauskite Program Button (PRGM) on the back of the controller. The Program LED will flash.
Paspauskite Advanced Gaming Button (AGR or AGL) you wish to map. The Program LED will flash rapidly.
Paspauskite mygtuką you want to assign to the Advanced Gaming Button (e.g., A, B, X, Y, L, R, ZL, ZR, D-pad directions). The Program LED will stop flashing, indicating successful mapping.
To clear a mapped button, repeat steps 1-2, then press the Programos mygtukas vėl.
Figure 3: Advanced Gaming Buttons (AGB) on the back of the controller, with an illustration of mappable functions.
Judesio valdikliai
The controller supports motion controls, allowing for intuitive interaction in compatible games. These controls are automatically enabled when supported by the game.
Figure 4: Controller demonstrating motion control capabilities through tilting.
C Button (GameChat)
The dedicated C Button provides quick access to GameChat features in supported titles, enhancing your multiplayer experience.
Figure 5: The 'C' button, used for GameChat features.
Priežiūra
Valymas: Valdiklį valykite minkšta, sausa šluoste. Venkite naudoti stiprias chemines medžiagas ar abrazyvines medžiagas.
Saugykla: Laikykite valdiklį vėsioje, sausoje vietoje, apsaugotoje nuo tiesioginių saulės spindulių ir ekstremalių temperatūrų.
Akumuliatoriaus priežiūra: Norėdami pailginti baterijos veikimo laiką, venkite dažnai visiškai iškrauti valdiklį. Reguliariai jį įkraukite, net jei nenaudojate nuolat.
Kabelio priežiūra: Handle the USB-C charging cable with care. Avoid bending or twisting it excessively.
Trikčių šalinimas
Valdiklis neprisijungia / nesusieja
Įsitikinkite, kad valdiklis yra visiškai įkrautas.
Verify the Nintendo Switch console is updated to the latest system software.
Repeat the pairing process (see "Pairing with Nintendo Switch" in Setup Instructions).
If issues persist, try restarting both the controller and the Nintendo Switch console.
Stick Drift
„PowerA Advan“tage Controller features Hall Effect modules designed to prevent stick drift. If you experience any unintended input, ensure the controller's firmware is up to date (check PowerA's official websvetainę, kurioje pateikiami atnaujinimai).
Recalibrate the joysticks through the Nintendo Switch system settings if necessary (System Settings > Controllers and Sensors > Calibrate Control Sticks).
Trumpas baterijos veikimo laikas
Ensure the controller is fully charged before each use.
Battery life can vary based on game usage and features enabled.
Nintendo Switch 2, Nintendo Switch, Nintendo Switch – OLED Model, Nintendo Switch Lite
Baterijos veikimo laikas
Iki 30 valandų (kinta priklausomai nuo naudojimo)
Kabelio ilgis
10 ft. (3m) USB-C
Matmenys
5.88 x 4.21 x 2.36 colio
Svoris
0.66 svaro
Ypatingos savybės
Hall Effect Thumbsticks, Mappable Advanced Gaming Buttons, Motion Controls, C Button
Garantija ir palaikymas
„PowerA Advan“tage Wireless Controller comes with a Dvejų metų ribota garantija. For detailed warranty information, product support, or to register your product, please visit the official PowerA websvetainė adresu PowerA.com/Support.
Figure 6: Official Nintendo Licensed Product badge, ensuring quality and compatibility.
Ask a question about this manual
Ask about setup, troubleshooting, compatibility, parts, safety, or missing instructions. Manuals+ will review the question and use this page’s manual context to help answer it.