
1. Įvadas
Thank you for choosing the Contixo F15 Astro Mini Drone. This compact and lightweight drone is designed for beginners and experienced pilots alike, featuring a 720P HD camera, live video display, optical flow hover, and easy-to-use controls. Please read this manual thoroughly before operating the drone to ensure safe and optimal performance.
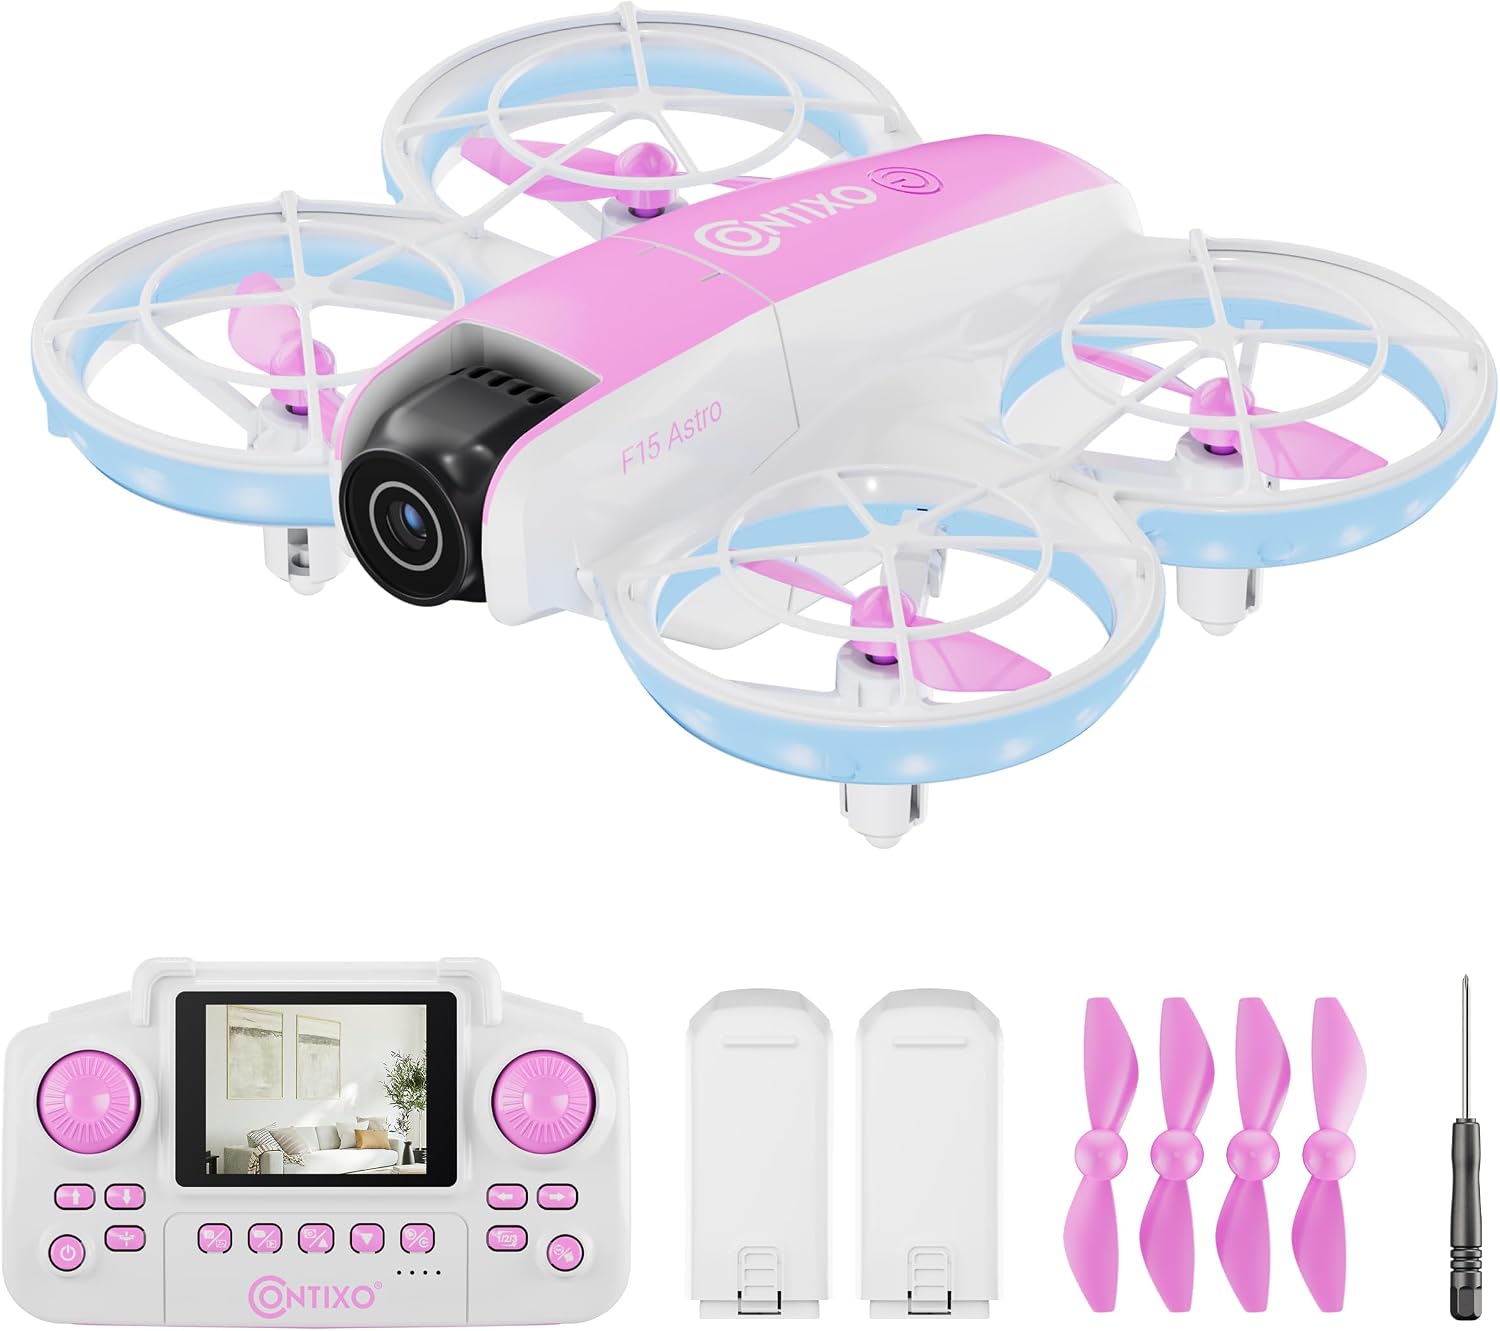
Image: The Contixo F15 Astro Mini Drone, showcasing its compact design and LED lighting.
2. Saugos gairės
- Visada naudokite droną atvirose, švariose vietose, atokiau nuo žmonių, gyvūnų ir kliūčių.
- Do not fly near airports, restricted airspace, or power lines.
- Ensure the drone's battery and remote control batteries are fully charged before each flight.
- Prižiūrėkite vaikus drono naudojimo metu.
- Venkite skraidyti esant stipriam vėjui arba nepalankioms oro sąlygoms.
- Nelieskite sraigtų, kol jie sukasi.
3. Pakuotės turinys
Patikrinkite, ar pakuotėje yra visi reikalingi daiktai:
- 1x F15 Astro Mini Drone
- 1x Remote Controller with 2.4" Screen
- 2x Drone Batteries
- 4x Spare Propellers
- 1x Atsuktuvas
- „1x“ USB įkrovimo laidas

Image: All components included in the Contixo F15 Astro Mini Drone package.
4. Drone Components Overview
4.1 dronas
- Propelerio apsaugos: Provide protection for propellers and enhance safety.
- Propeleriai: Sukurti keliamąją jėgą skrydžiui.
- 720p HD kamera: Captures photos and videos, with adjustable tilt.
- LED lemputės: Indicate drone status and provide visibility.
- Baterijų skyrius: Talpina drono įkraunamą bateriją.

Image: The Contixo F15 Astro Mini Drone highlighting its protected propeller design.
4.2 Nuotolinis valdiklis
- 2.4 colio ekranas: Displays live video feed from the drone's camera.
- Kairysis vairasvirtė: Valdo aukštį (aukštyn/žemyn) ir sukimąsi (kairėn/dešinėn).
- Dešinysis vairasvirtė: Valdo judėjimą pirmyn/atgal ir į kairę/dešinę.
- Vieno klavišo pakilimo / nusileidimo mygtukas: Pradeda automatinį kilimą arba nusileidimą.
- 360° apsisukimo mygtukas: Activates aerial stunt mode.
- Photo/Video Buttons: Fotografuokite vaizdus arba pradėkite / sustabdykite vaizdo įrašymą.

Image: The Contixo F15 Astro remote control with its integrated 2.4-inch screen for live video display.
5. Sąranka
5.1 Drono akumuliatoriaus įkrovimas
- Remove the drone battery from the drone.
- Connect the USB charging cable to the battery and a USB power source (e.g., computer, USB wall adapter).
- The indicator light on the charging cable will show charging status (refer to cable instructions for specific light patterns).
- Charging typically takes approximately 60-90 minutes.

Image: The Contixo F15 Astro Mini Drone and its two included rechargeable batteries.
5.2 Installing Drone Battery
- Įsitikinkite, kad dronas yra išjungtas.
- Carefully insert the fully charged battery into the battery compartment on the drone's underside.
- Užfiksuokite akumuliatoriaus dangtelį.
5.3 Nuotolinio valdymo pulto baterijų įdėjimas
- Atidarykite baterijų skyrių, esantį nuotolinio valdymo pulto gale.
- Įdėkite 3 AAA tipo baterijas (nepridedamos) pagal poliškumo žymes.
- Saugiai uždarykite akumuliatoriaus skyrių.
5.4 Pairing Drone and Remote
- Padėkite droną ant lygaus, lygaus paviršiaus.
- Power on the drone. The drone's LED lights will flash.
- Įjunkite nuotolinio valdymo pultą.
- Push the left joystick up to its maximum position, then pull it down to its minimum position. The drone's LED lights will stop flashing and remain solid, indicating successful pairing.
5.5 Giroskopo kalibravimas
- After pairing, ensure the drone is still on a flat, level surface.
- Simultaneously push both joysticks down and to the bottom-right corner.
- The drone's LED lights will flash rapidly and then become solid, indicating successful calibration.
Video: A detailed guide on how to use the Contixo F15 Astro Drone, covering setup and basic operations.
6. Drono valdymas
6.1 Kilimas ir tūpimas vienu klavišu
- Kilimas: After pairing and calibration, press the One-Key Takeoff/Landing button. The drone will automatically ascend and hover at a stable altitude.
- Nusileidimas: During flight, press the One-Key Takeoff/Landing button again. The drone will slowly descend and land automatically.

Image: Visual representation of the one-touch takeoff and landing feature of the F15 Astro drone.
6.2 Pagrindiniai skrydžio valdymo įtaisai
- Kairė valdymo svirtis (droselis/kryptis):
- Paspaudus aukštyn/žemyn: padidinkite/sumažinkite aukštį.
- Push left/right: Rotate drone left/right.
- Right Joystick (Forward/Backward/Sideways):
- Push up/down: Fly forward/backward.
- Push left/right: Fly left/right (strafe).
6.3 Optical Flow Hover
The F15 Astro drone features Optical Flow Hover technology, which uses a downward-facing camera to detect patterns on the ground and maintain a stable position. This feature helps the drone hover steadily, making it easier to control, especially for beginners.
6.4 360° Stunts
To perform a 360° flip:
- Ensure the drone is flying at a sufficient height (at least 2-3 meters).
- Press the 360° Flip button on the remote control.
- Immediately push the right joystick in the desired direction (forward, backward, left, or right) to execute the flip.

Image: The Contixo F15 Astro Mini Drone performing a 360-degree flip.
6.5 Camera Operation (720P HD)
The drone is equipped with a 720P HD camera that can capture photos and videos. The camera angle can be manually adjusted before flight.
- Tiesioginis vaizdo įrašas: The 2.4" screen on the remote control provides a real-time live video feed from the drone's camera.
- Fotografuoti: Press the Photo button on the remote control to capture a still image.
- Vaizdo įrašo įrašymas: Press the Video button once to start recording, and press it again to stop recording.

Image: The 720P HD camera of the F15 Astro drone, featuring an adjustable angle.
Video: A demonstration of the Contixo F15 Astro Drone's features and flight capabilities.
7. Priežiūra
7.1 Valymas
- Droną ir nuotolinio valdymo pultą valykite minkšta, sausa šluoste.
- Do not use water or cleaning solvents, as they may damage the electronics.
7.2 Propelerio keitimas
If a propeller is damaged, replace it with a spare propeller from the package. Use the included screwdriver to carefully remove the screw holding the damaged propeller and install the new one, ensuring it is securely fastened.
7.3 Akumuliatoriaus priežiūra
- Baterijas laikykite vėsioje, sausoje vietoje.
- Neperkraukite ir per daug neiškraukite baterijų.
- If the drone will not be used for an extended period, remove the batteries from both the drone and the remote control.
8. Problemų sprendimas
| Problema | Galima priežastis | Sprendimas |
|---|---|---|
| Dronas nereaguoja į nuotolinio valdymo pultą. | Nesuporuota arba baterija išsikrovusi. | Ensure drone and remote are powered on and paired correctly. Check battery levels. |
| Dronas dreifuoja skrydžio metu. | Gyro not calibrated. | Perform gyro calibration on a flat surface. |
| Poor video quality or no live feed. | Weak signal or camera issue. | Ensure drone is within range. Check for obstructions. Restart drone and remote. |
| Nesisuka sraigtai. | Kliūtis arba žala. | Check for hair or debris around propellers. Replace damaged propellers. |
9. Specifikacijos
- Prekinis ženklas: Contixo
- Modelio pavadinimas: F15 Astro
- Kamera: 720P HD, Adjustable Angle
- Remote Screen: 2.4 colių
- Baterijos talpa: 580 mAh (ličio polimeras)
- Gaminio matmenys: 10 colio ilgio x 7 colių pločio x 2 colio aukščio
- Skrydžio ypatybės: Optical Flow Hover, One-Key Takeoff/Landing, 360° Stunts
10. Garantija ir palaikymas
For warranty information, technical support, or any questions regarding your Contixo F15 Astro Mini Drone, please refer to the contact information provided on the product packaging or visit the official Contixo websvetainę. Išsaugokite pirkimo čekį garantiniams reikalavimams.
Vaizdo įrašas: Įvadinis vaizdo įrašasview of the Contixo F15 Astro Drone, highlighting its key features.