1. Įvadas
This user manual provides detailed instructions for the installation, operation, and maintenance of your ANRAN 4-Channel Digital Video Recorder (DVR) Security System, Model A-V1004. This DVR is designed for surveillance applications, supporting H.264 video compression, 960H recording resolution, and compatibility with AHD and 960H cameras. Please read this manual thoroughly before using the device to ensure proper setup and functionality.
2. Produktas baigtasview
2.1 Pagrindinės savybės
- 4 kanalų įrašymas: Supports full D1 960H recording on all four channels.
- Hard Drive Support: Does not include a hard drive. Supports user-installed 3.5" SATA hard drives up to 4TB capacity.
- Lengvas montavimas: „Plug-and-play“ dizainas paprastam sąrankai.
- Kelios išvesties sąsajos: Includes TV, VGA, and HDMI outputs for versatile display options.
- Nuotolinis stebėjimas: Access and monitor remotely via the "XMeye" software on mobile devices.
- Judesio aptikimas ir įspėjimai: Configurable motion detection with email alarm notifications.
- H.264 suspaudimas: Efficient video compression for optimized storage and network bandwidth.
2.2 DVR Components

1 paveikslas: ANRAN 4-Channel DVR, front angled view. This image shows the overall design of the DVR unit.

2 paveikslas: Front panel of the ANRAN DVR. This view highlights the power indicator, record indicator, alarm indicator, menu button, ESC button, and navigation controls.

3 paveikslas: Rear panel of the ANRAN DVR. This image displays the various input/output ports including BNC video inputs, VGA, HDMI, audio in/out, Ethernet, and power input. A caution label regarding electrical shock and outdoor use is also visible.
3. Sąranka
3.1 Kietojo disko įrengimas
The DVR does not come with a pre-installed hard drive. You must install a 3.5" SATA hard drive (up to 4TB capacity) for video recording. Compatible brands include Seagate, Western Digital, Hitachi, Samsung, and Toshiba. Refer to the DVR's internal structure for hard drive mounting points and SATA cable connections. After installation, the hard drive must be formatted through the DVR's menu system.
3.2 Komponentų sujungimas
Norėdami prijungti DVR sistemą, atlikite šiuos veiksmus:
- Kameros: Connect your surveillance cameras to the DVR using BNC video power cables.
- Monitorius: Connect a PC monitor or TV to the DVR using either a VGA cable or an HDMI cable.
- Tinklas: Connect the DVR to your router using an Ethernet network cable. Ensure your router is configured for WAN access.
- Galia: Connect the power adapter to the DVR and plug it into an electrical outlet.
- Pelė: Connect the included USB mouse to the DVR for navigation.

4 paveikslas: Connection diagram for the ANRAN DVR. This diagram illustrates how to connect cameras, monitors (VGA/HDMI), audio devices, network router, and mobile devices to the DVR.
3.3 Pradinė konfigūracija
Upon first power-up, the DVR may not be set to use DHCP by default. You may need to manually configure network settings using a connected monitor and mouse. Ensure the DVR's IP address is compatible with your router's network. Right-click the mouse to access the main menu and navigate to the network settings. Verify that the NAT status is 'Connected' for remote access functionality.
4. Naudojimo instrukcijos
4.1 Įrašymas ir atkūrimas
The DVR supports 960H high-resolution video recording. Once a hard drive is installed and formatted, you can configure recording schedules and modes (e.g., continuous, motion-triggered) through the DVR's menu. To play back recorded footage, access the playback menu and select the desired date, time, and camera channel.
4.2 Nuotolinė prieiga
To monitor your security system remotely, install the "XMeye" software on your smartphone. You will need to scan the DVR recorder's serial number (accessible by right-clicking the mouse and selecting 'Guide' from the DVR interface). Ensure the NAT status on your DVR is 'Connected' and that the DVR's IP address is correctly configured within your router's network for external access. The Media Port is used for connecting external devices like your iPhone, while the HTTP port is for administration via a web naršyklė.
4.3 Motion Detection and Email Alerts
The DVR features motion detection capabilities. You can configure specific detection zones for each camera and adjust pre-recording and post-recording times. When motion is detected, the system can be set to record and send an email alert with text notifications. This system is suitable for various environments such as villas, garages, offices, supermarkets, and warehouses.
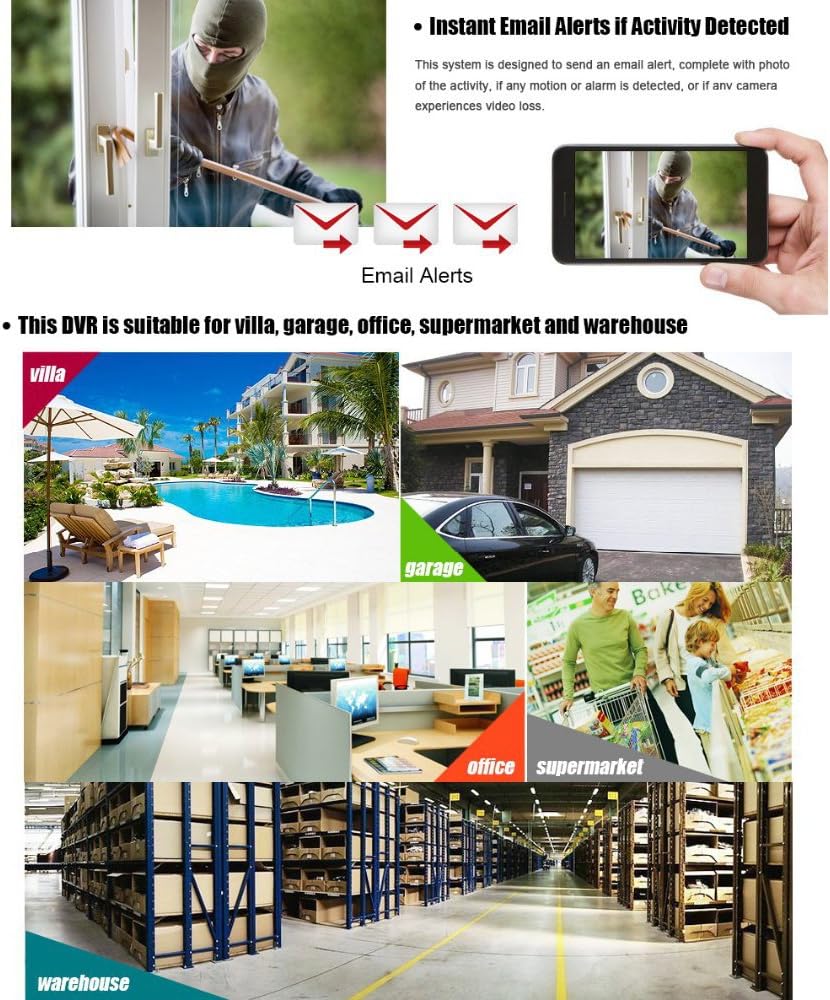
5 paveikslas: Email alerts for activity detection and typical application scenarios for the ANRAN DVR system.
5. Priežiūra
5.1 Kietojo disko valdymas
Regularly check the status of your installed hard drive through the DVR's system menu. If recording issues occur, verify that the hard drive is properly installed and formatted. For optimal performance and to prevent data loss, ensure the hard drive has sufficient free space. A 500GB hard drive typically provides approximately 16 days of recording for a 4-channel DVR.
5.2 Bendroji priežiūra
To ensure the longevity and proper functioning of your DVR, keep it in a dry, indoor environment. Avoid exposing the unit to moisture, extreme temperatures, or direct sunlight. Do not open the DVR casing, as this may void the warranty and expose you to risk of electrical shock. All servicing should be performed by qualified personnel.
6. Problemų sprendimas
This section addresses common issues you might encounter with your ANRAN DVR.

6 paveikslas: Frequently Asked Questions (FAQ) for the ANRAN DVR, covering common issues and solutions.
- Q: Why can't the DVR record video?
A: Ensure a hard drive is installed and properly formatted. The DVR will not record without a functional hard drive. - Q: My monitor shows "Not supported" or a black screen.
A: This often indicates a resolution mismatch. The default resolution is 1280x1024. Adjust the DVR's output resolution to match your monitor's capabilities. Also, check power connections for the DVR and monitor. - Q: Why isn't my camera working with the DVR?
A: Verify that your camera type is compatible with the DVR (e.g., HSDI). Ensure all camera cables are securely connected. - Q: I cannot view DVR nuotoliniu būdu.
A: Ensure the DVR is connected to the internet via an Ethernet cable and that the router's WAN is active. Check the NAT status on the DVR; it must be 'Connected'. Verify the DVR's IP address is correctly configured and matches your router's network. The "XMeye" app requires the DVR's serial number for setup. - Q: The video display has horizontal rolling or is black and white.
A: This can occur if the DVR is set to PAL mode in a region that uses NTSC. Access the DVR's menu, go to System settings, and change the video system to NTSC. - Q: Can I connect the DVR directly to a computer via USB?
A: No, the DVR cannot be directly connected to a computer using a USB cable for data transfer or control. Network connection is required for computer interaction. - Q: The included software CD has many programs. Which one should I use?
A: For PC remote viewing, it is often simpler to connect via Internet Explorer (IE) and install the required add-on. Note that modern browsers like Windows 10 Edge may not support these add-ons. - Q: I am experiencing issues with the DVR's functionality.
A: This device may require some technical knowledge for optimal setup. If issues persist, refer to the warranty and support section for assistance.
7. Specifikacijos
| Modelio numeris | A-V1004 |
| Prekės ženklas | ANRANAS |
| Kanalų skaičius | 4 |
| Vaizdo įrašų suspaudimas | H.264 |
| Įrašymo raiška | 960H (960x480 NTSC / 960x582 PAL) |
| Maksimali saugojimo talpa | 4TB (3.5" SATA HDD, not included) |
| Vaizdo išvestis | TV, VGA, HDMI |
| Ryšio technologija | Laidinis (Eternetas) |
| Suderinami įrenginiai | AHD Cameras, 960H Cameras, NVR |
| Gaminio matmenys | 10 x 1.57 x 9.06 colio |
| Prekės svoris | 2.87 svaro |

7 paveikslas: Details on H.264 High Profile compression and D1/960H resolution capabilities of the DVR.
8. Garantija ir palaikymas
Your ANRAN DVR comes with a 12 mėnesių garantija, which includes free brand-new parts for replacement during the warranty period. Additionally, ANRAN provides visą gyvenimą trunkanti nemokama techninė pagalba. If you encounter any problems or require assistance with your product, please contact ANRAN customer support. We are committed to assisting you and ensuring your satisfaction.


