
Produktas baigtasview
This manual provides essential information for the proper use and maintenance of your Mars Replacement Controller for the Original Xbox system. This controller is designed to offer a familiar gaming experience, serving as a direct replacement for your existing or worn Original Xbox controllers. It features a classic layout with ten buttons, a D-pad, and two joysticks, built for durability and extended gameplay sessions.
Sąrankos instrukcijos
Follow these steps to connect your new controller to your Original Xbox console:
- Locate Controller Port: Identify an available controller port on the front of your Original Xbox console. The Original Xbox typically has four controller ports.
- Prijunkite valdiklį: Align the proprietary connector of the Mars Replacement Controller with the chosen port on the console. Gently push the connector firmly into the port until it clicks into place.
- Įjungimo konsolė: Turn on your Original Xbox console. The controller should be automatically recognized by the system.
- Bandymo funkcionalumas: Once the console is on, test all buttons, joysticks, and the D-pad to ensure proper functionality before starting a game.
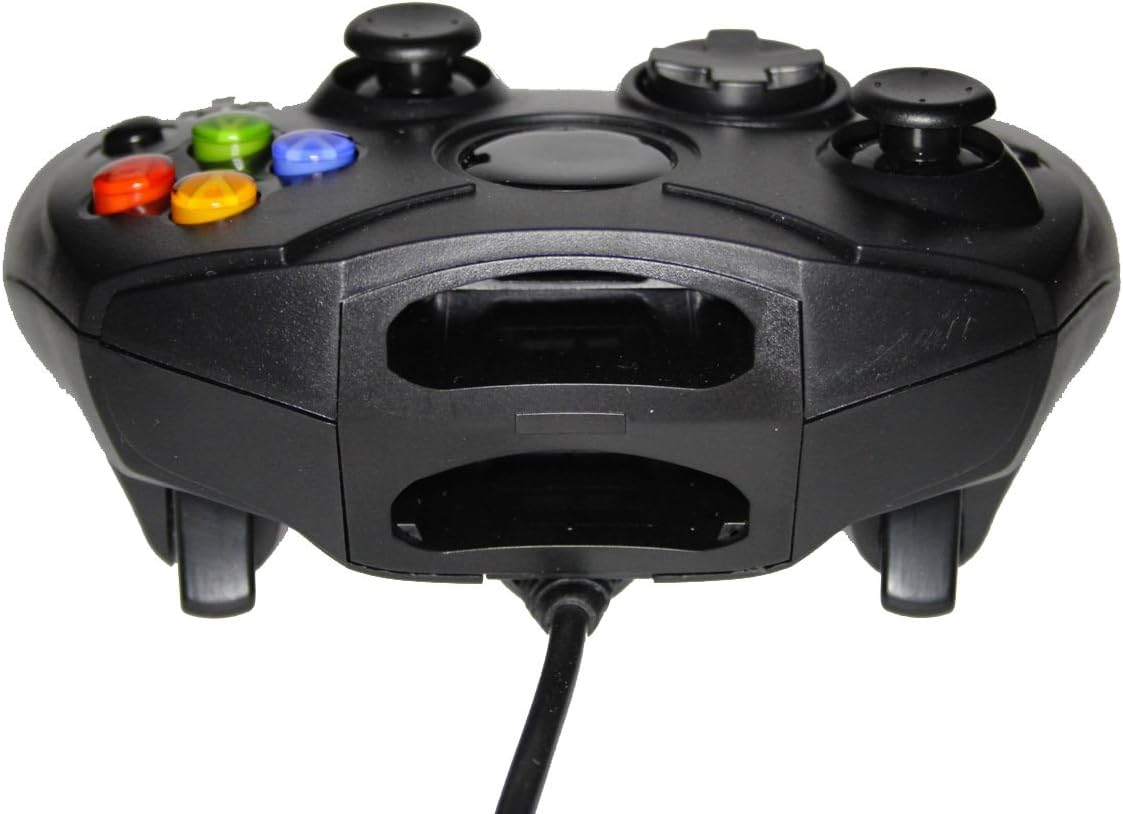
1 pav.: priekis view of the controller, highlighting the proprietary Xbox connector and memory card slots.
Valdiklio valdymas
The Mars Replacement Controller features the standard button layout for the Original Xbox, providing intuitive control for your games.

2 paveikslas: viršuje view of the controller, displaying the button layout.
Mygtukų funkcijos:
- A, B, X, Y mygtukai: Primary action buttons, typically used for jumping, attacking, interacting, or confirming selections.
- D-Pad (krypties valdiklis): Used for precise directional input, menu navigation, or specific in-game actions.
- Kairysis ir dešinysis analoginiai valdikliai: Užtikrina 360 laipsnių judėjimą ir kameros valdymą. Paspaudus juos žemyn, dažnai aktyvuojamos papildomos funkcijos (L3/R3).
- Black and White Buttons: Auxiliary action buttons, often used for secondary actions or specific game mechanics.
- Start mygtukas: Typically used to pause games, access in-game menus, or confirm selections.
- Atgal mygtukas: Often used to access maps, inventories, or return to previous menus.
- Left and Right Triggers: Analog triggers on the underside of the controller, commonly used for acceleration, braking, or firing weapons.
Specific button assignments may vary depending on the game. Refer to your game's instruction manual for detailed control schemes.
Priežiūra ir priežiūra
To ensure the longevity and optimal performance of your Mars Replacement Controller, follow these care guidelines:
- Valymas: Reguliariai valykite valdiklį minkšta, sausa šluoste. Jei nešvarumai sunkiai nuvalote, šiek tiek nuvalykite.ampen the cloth with water or a mild, non-abrasive cleaner. Avoid excessive moisture, especially near buttons and ports.
- Saugykla: Store the controller in a clean, dry place away from direct sunlight, extreme temperatures, and excessive dust. Avoid wrapping the cable too tightly around the controller to prevent damage.
- Tvarkymas: Do not drop the controller or subject it to strong impacts. Avoid pulling the cable forcefully when disconnecting it from the console; always grasp the connector itself.
- Skysčio ekspozicija: Keep the controller away from liquids. Spills can cause internal damage and void any potential warranty.
Trikčių šalinimas
Jei kyla problemų dėl valdiklio, žr. šias dažniausiai pasitaikančias problemas ir sprendimus:
| Problema | Galimas sprendimas |
|---|---|
| Valdiklis nereaguoja. |
|
| Buttons or joysticks are unresponsive or sticky. |
|
| Valdiklis periodiškai atsijungia. |
|
Jei problema išlieka ir išbandžius šiuos sprendimus, susisiekite su klientų aptarnavimo tarnyba.
Techninės specifikacijos
| Funkcija | Detalė |
|---|---|
| Gaminio matmenys | 7 x 5.6 x 2.4 colio |
| Prekės svoris | 3.99 uncijos |
| Suderinami įrenginiai | Original Xbox Console |
| Valdiklio tipas | Žaidimų pultelis |
| Ryšys | Wired (Proprietary Xbox Connector) |
| Spalva | Juoda |
| Gamintojas | Mars Devices |
Informacija apie garantiją
This Mars Replacement Controller is covered by a manufacturer's warranty. For specific details regarding warranty duration, coverage, and claims procedures, please refer to the official Mars Devices websvetainėje arba susisiekite tiesiogiai su jų klientų aptarnavimo tarnyba. Išsaugokite pirkimo įrodymą, kad galėtumėte patvirtinti garantiją.
Pagalba klientams
For further assistance, technical support, or inquiries regarding your Mars Replacement Controller, please contact Mars Devices customer support. Contact information can typically be found on the product packaging or the official Mars Devices websvetainę.
Internetiniai ištekliai: Mars Devices Store on Amazon


