1. Įvadas
Ačiū, kad pirkoteasing the iTOMA CKS3501BT Radio Alarm Clock. This manual provides detailed instructions for setting up and operating your device. Please read it thoroughly before use to ensure proper functionality and to maximize your user experience.
Pakuotės turinys:
- iTOMA CKS3501BT Radio Alarm Clock
- Maitinimo adapteris
- FM laido antena
- Vartotojo vadovas (šis dokumentas)
2. Produktas baigtasview
Familiarize yourself with the controls and display of your iTOMA CKS3501BT Radio Alarm Clock.
Viršutinio skydelio valdikliai:
- VOL- / VOL+: Adjust volume.
- NUSTATYTI: Enter setup mode for time, date, and alarms.
- LAIKO ZONA: Adjust time zone.
- AL 1 / AL 2: Set Alarm 1 / Alarm 2.
- SNOOSE / DIMMER: Snooze active alarm; adjust display brightness.
- TUNE - / TUNE +: Tune FM radio frequency; navigate menu options.
- ATMINTIS: Save and recall FM radio presets.
- ŠALTINIS: Select audio source (FM, Bluetooth, AUX).
- GALIA: Turn unit on/off.
Priekinis ekranas:
- 1.4-inch blue LED display for time, date, and status indicators.
- Indicators for Alarm 1, Alarm 2, FM frequency, Bluetooth status.

2.1 pav.: priekis view of the iTOMA CKS3501BT Radio Alarm Clock, showing the large blue LED display and top panel controls.
3. Sąranka
3.1 Pradinis įjungimas
- Prijunkite maitinimo adapterį prie DC IN lizdo, esančio įrenginio gale.
- Prijunkite maitinimo adapterį į standartinį sieninį lizdą. Ekranas užsidegs.
- The unit includes a pre-installed backup battery to maintain time and alarm settings during power outages.
3.2 Laiko ir datos nustatymas
- Ensure the unit is powered IŠJUNGTA (paspauskite GALIA button if display is on).
- Paspauskite ir palaikykite NUSTATYTI mygtuką, kol ekrane pradės mirksėti metai.
- Naudokite TUNE - / TUNE + mygtukais nustatykite metus. Paspauskite NUSTATYTI patvirtinti.
- Repeat the process for Month, Day, Hour, and Minute.
- After setting the minute, press NUSTATYTI , kad patvirtintumėte ir išeitumėte iš laiko nustatymo režimo.
3.3 Automatic Daylight Saving Time (DST)
The unit is equipped with an Auto DST feature. To enable or disable:
- Ensure the unit is powered IŠJUNGTA.
- Paspauskite ir palaikykite LAIKO ZONA button. The display will show "DST ON" or "DST OFF".
- Naudokite TUNE - / TUNE + buttons to toggle between "DST ON" and "DST OFF".
- Atleiskite LAIKO ZONA mygtuką, kad patvirtintumėte savo pasirinkimą.
4. Naudojimo instrukcijos
4.1 Signalizacijos nustatymai (dviguba signalizacija)
The CKS3501BT features two independent alarms (AL1 and AL2) that can be set to wake you with a buzzer or FM radio.
- Ensure the unit is powered IŠJUNGTA.
- Paspauskite ir laikykite bet kurį AL 1 or AL 2 mygtuką, kol mirksės žadintuvo valanda.
- Naudokite TUNE - / TUNE + to adjust the hour. Press the respective AL mygtuką, kad patvirtintumėte.
- Kartokite kelias minutes.
- Next, select the alarm source: Use TUNE - / TUNE + to choose between "Buzzer" or "FM Radio". Press the AL mygtuką, kad patvirtintumėte.
- If FM Radio is selected, use TUNE - / TUNE + to set the desired wake-up volume. Press the AL mygtuką, kad patvirtintumėte.
- Finally, select the alarm schedule: Use TUNE - / TUNE + to choose "Every Day", "Weekdays", or "Weekends". Press the AL mygtuką, kad patvirtintumėte ir išeitumėte iš žadintuvo nustatymo režimo.
Norėdami įjungti / išjungti žadintuvą, paspauskite atitinkamą AL 1 or AL 2 button briefly when the unit is powered IŠJUNGTA. The alarm indicator (1 or 2) will appear/disappear on the display.
4.2 Snausti funkcija
Kai suskamba žadintuvas, paspauskite SNOOSE / DIMMER button to temporarily silence it for 9 minutes. The alarm will sound again after the snooze period.
4.3 Miego laikmatis
The sleep timer allows you to fall asleep to FM radio or Bluetooth audio, which will automatically turn off after a set duration (10 to 90 minutes).
- While the unit is playing FM radio or Bluetooth audio, press the MIEGAS button (often integrated with SNOOZE or another button, refer to device markings if different).
- Pakartotinai paspauskite MIEGAS button to cycle through sleep timer options (e.g., 90, 80, 70... 10 minutes, OFF).
- Įrenginys automatiškai išsijungs praėjus pasirinktam laikui.
4.4 FM radijo veikimas

Figure 4.1: The iTOMA CKS3501BT can receive FM radio signals, indicated by the radio icon and waves.
- Ensure the FM wire antenna is properly connected to the antenna jack on the back of the unit for optimal reception.
- Paspauskite GALIA mygtuką, kad įjungtumėte įrenginį.
- Paspauskite ŠALTINIS mygtuką kelis kartus, kol ekrane pasirodys „FM“.
- Rankinis derinimas: Paspauskite TUNE - / TUNE + trumpai, kad palaipsniui reguliuotumėte dažnį.
- Automatinis nuskaitymas: Paspauskite ir palaikykite TUNE - / TUNE + for a few seconds to automatically scan for the next available station.
4.5 Saving and Recalling FM Presets
The unit can store up to 10 FM radio stations as presets.
- Nustatykite norimą FM stotį.
- Paspauskite ir palaikykite ATMINTIS mygtuką, kol ekrane pradės mirksėti „P01“ (arba kitas galimas išankstinio nustatymo numeris).
- Naudokite TUNE - / TUNE + , kad pasirinktumėte norimą iš anksto nustatytos nuostatos numerį (P01–P10).
- Paspauskite ATMINTIS dar kartą, kad patvirtintumėte ir išsaugotumėte stotį.
- Norėdami iškviesti iš anksto nustatytą stotį, trumpai paspauskite ATMINTIS mygtuką pakartotinai, kad peržiūrėtumėte išsaugotas stotis.
4.6 Bluetooth veikimas
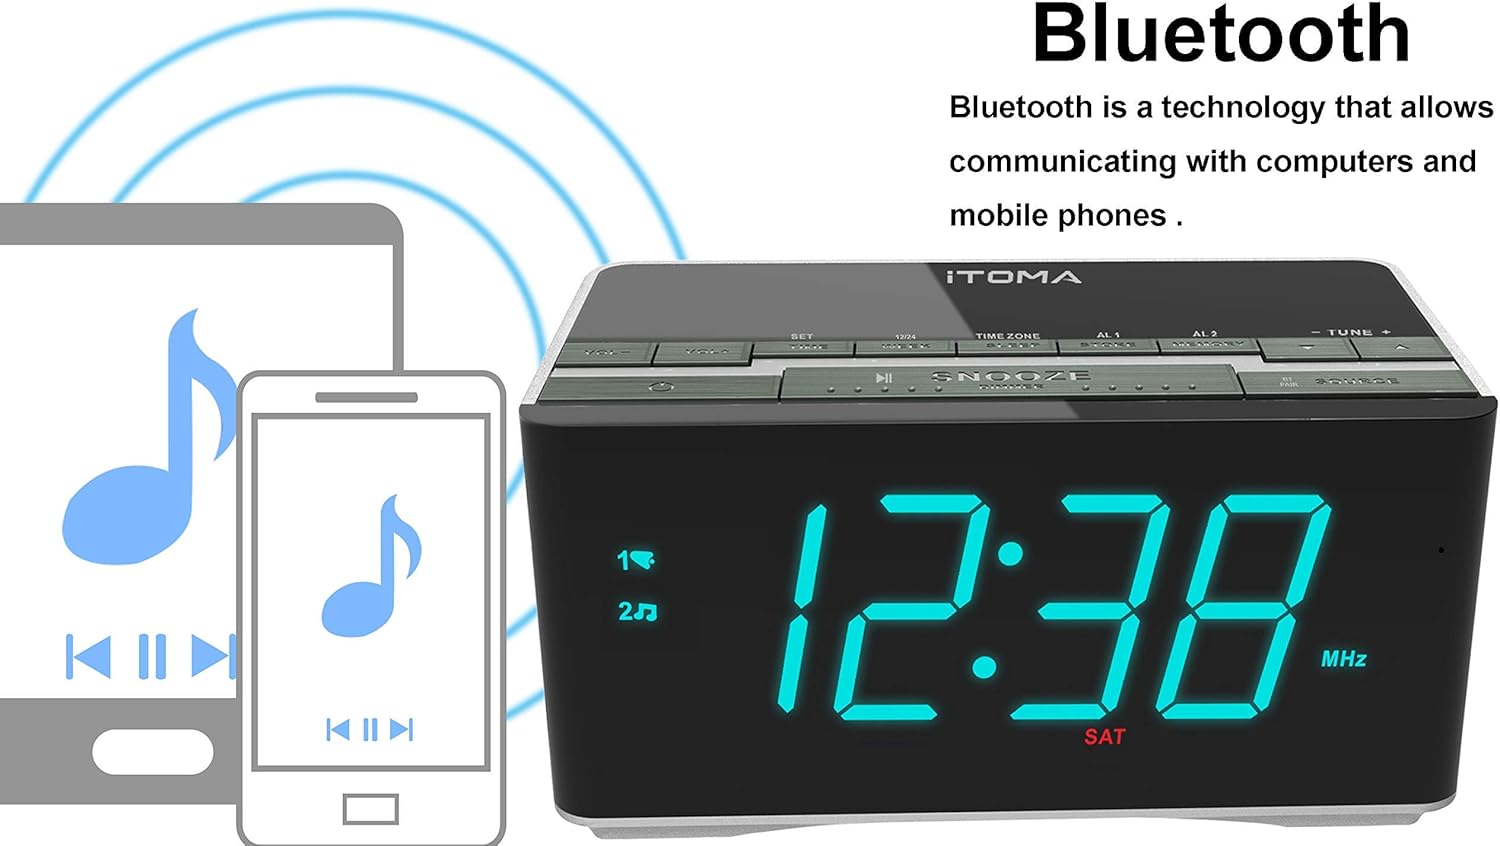
Figure 4.2: The iTOMA CKS3501BT supports Bluetooth connectivity for wireless audio streaming from compatible devices.
- Paspauskite GALIA mygtuką, kad įjungtumėte įrenginį.
- Paspauskite ŠALTINIS button repeatedly until "BT" appears on the display and the Bluetooth indicator flashes, indicating pairing mode.
- Savo „Bluetooth“ įrenginyje (pvz., išmaniajame telefone, planšetiniame kompiuteryje) įjunkite „Bluetooth“ ir ieškokite galimų įrenginių.
- Select "iTOMA CKS3501BT" from the list. Once paired, the Bluetooth indicator on the alarm clock will stop flashing and remain solid.
- You can now play audio from your device through the alarm clock's speakers. Use the GARSUMAS - / GARSUMAS + žadintuvo arba įrenginio mygtukus, kad sureguliuotumėte garsumą.
4.7 Pagalbinė įvestis (AUX)
Connect external audio devices (e.g., MP3 players) using a 3.5mm audio cable (not included).
- Connect one end of a 3.5mm audio cable to the AUX IN jack on the back of the unit.
- Kitą galą prijunkite prie išorinio įrenginio ausinių lizdo arba garso išvesties.
- Paspauskite GALIA mygtuką, kad įjungtumėte įrenginį.
- Paspauskite ŠALTINIS button repeatedly until "AUX" appears on the display.
- Play audio from your external device. Adjust volume using the GARSUMAS - / GARSUMAS + buttons on the alarm clock or your external device.
4.8 USB įkrovimo prievadas

Figure 4.3: The iTOMA CKS3501BT features a USB port for charging mobile devices.
The USB port on the back of the unit is for charging mobile devices only. It does not support data transfer or playing music from USB drives.
- Connect your mobile device's USB charging cable to the USB port on the alarm clock.
- Kitą kabelio galą prijunkite prie mobiliojo prietaiso.
- Jūsų įrenginys pradės krauti.
4.9 Ekrano ryškumas (pritemdymas)

Figure 4.4: The iTOMA CKS3501BT offers an auto-dimmer function and manual brightness control for its display.
The display has an auto-dimmer feature that adjusts brightness based on ambient light. You can also manually adjust it.
- Paspauskite SNOOSE / DIMMER button repeatedly to cycle through different brightness levels (e.g., High, Medium, Low, Auto).
- Select "Auto" for automatic brightness adjustment.
5. Priežiūra
5.1 Valymas
- Prieš valydami atjunkite maitinimo adapterį.
- Įrenginio išorę nuvalykite minkšta, sausa šluoste.
- Do not use liquid cleaners, abrasive cleaners, or sprays, as they may damage the finish.
5.2 Atsarginė baterija
The unit contains a pre-installed lithium-metal backup battery. This battery is designed to retain time and alarm settings during brief power interruptions. It is not user-replaceable and does not power the unit for normal operation.
6. Problemų sprendimas
| Problema | Galima priežastis | Sprendimas |
|---|---|---|
| Įrenginys neįsijungia. | Maitinimo adapteris neprijungtas arba sugedęs. | Įsitikinkite, kad maitinimo adapteris yra tvirtai prijungtas prie įrenginio ir veikiančio sieninio lizdo. |
| Nėra garso iš FM radijo. | Weak signal; volume too low; incorrect source. | Adjust FM antenna position. Increase volume. Ensure "FM" source is selected. |
| „Bluetooth“ įrenginio nepavyksta susieti. | Unit not in pairing mode; device too far; Bluetooth already connected. | Ensure "BT" is flashing on the display. Move device closer. Disconnect from other Bluetooth devices. |
| Signalizacija neskamba. | Alarm not activated; volume too low; incorrect time. | Verify alarm indicator (1 or 2) is on. Check alarm volume setting. Confirm alarm time is correct. |
| USB įkrovimas neveikia. | Cable faulty; device not compatible; unit not powered. | Try a different USB cable. Ensure the alarm clock is powered on. |
7. Specifikacijos
- Modelis: CKS3501BT
- Ekranas: 1.4-inch Blue LED
- Maitinimo šaltinis: AC 100-240V, 50/60Hz (via power adapter)
- Atsarginė baterija: 1 x Lithium-metal (pre-installed)
- Radijo grupės: FM
- Bluetooth versija: (Not specified, assuming standard)
- USB įkrovimo išvestis: (Not specified, typically 5V/1A)
- Pagalbinė įvestis: 3.5 mm stereo lizdas
- Matmenys: 14.5 x 8 x 7.52 cm (5.71 x 3.15 x 2.93 colio)
- Svoris: 390.09 g (0.86 svaro)
- Medžiaga: Plastikiniai

Figure 7.1: Dimensions of the iTOMA CKS3501BT Radio Alarm Clock.
8. Garantija ir palaikymas
For warranty information or technical support, please refer to the warranty card included with your product or visit the official iTOMA websvetainėje. Išsaugokite pirkimo kvitą kaip pirkimo įrodymą.
iTOMA Official Websvetainė: www.itoma.com


