1. Įvadas
Thank you for choosing the WALI M001XL Single Extra Tall Monitor Arm Mount. This product is designed to enhance your workspace by providing a flexible and ergonomic solution for mounting your monitor. By following these instructions, you can ensure a safe and efficient setup, allowing you to optimize your viewing experience and reclaim valuable desk space.
This monitor arm is compatible with most flat panel monitors up to 32 inches and supports a weight capacity of up to 22 lbs. It features detachable and height-adjustable mount plates for VESA patterns 75x75mm and 100x100mm.
2. Pakuotės turinys
Patikrinkite, ar pakuotėje yra visi toliau išvardyti komponentai:
- 1 x WALI Extra Tall Single Monitor Mount (Black)
- 1 x Mounting Hardware Kit (various screws, washers, and tools)
- 1 x Vartotojo vadovas

2.1 pav. Pakuotės turinys
3. Specifikacijos
| Funkcija | Aprašymas |
|---|---|
| Prekės ženklas | WALI |
| Modelio numeris | WL-M001XL |
| Monitoriaus dydžio suderinamumas | Iki 32 colių |
| Svorio talpa | Iki 22 svarų (10 kg) |
| VESA suderinamumas | 75x75mm, 100x100mm |
| Montavimo tipas | Stalinis laikiklis (C-Clamp arba žiedas) |
| Stalo storis (C-Clamp) | 0.4 colio – 3.5 colio (10 mm – 88 mm) |
| Stalo storis (įvorė) | 0.4 colio – 3 colio (10 mm – 76 mm) |
| Judėjimo tipas | Artikuliuojantis |
| Pakreipimo kampas | +/-90° |
| Pasukimo kampas | +/-90° (at arm joint), 360° (at pole) |
| Rotacija | 360° (peizažas į portretą) |
| Stulpo aukštis | 31.5 colių |
| Maksimalus rankos prailginimas | 17 colių |
| Medžiaga | Legiruotasis plienas |

Figure 3.1: Display Compatibility

3.2 pav.: Gaminio matmenys
4. Sąranka ir diegimas
The WALI M001XL monitor arm offers two installation options: C-Clamp and Grommet Base. Choose the method that best suits your desk setup.
4.1 C-Clamp Montavimas
- Pritvirtinkite C-clamp iki pagrindinio stulpo apačios.
- Position the pole on the edge of your desk.
- Priveržkite C-clamp screw until the mount is securely fastened to the desk. Ensure the desk thickness is between 0.4" and 3.5".
4.2 Žiedinio pagrindo montavimas
- If your desk has a grommet hole, insert the grommet base through the hole. Ensure the desk thickness is between 0.4" and 3".
- Pritvirtinkite pagrindą iš po stalo, naudodami pateiktus tvirtinimo elementus.
- Attach the main pole to the secured grommet base.

4.1 pav.: C-Clamp Montavimas

Figure 4.2: Grommet Base Installation
4.3 Monitoriaus prijungimas
- Attach the VESA plate to the back of your monitor using the appropriate screws from the hardware kit.
- Slide the monitor (with the attached VESA plate) onto the arm's mounting head.
- Secure the monitor by tightening the locking screw on the mounting head.
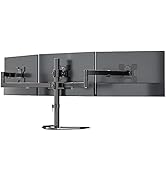
Figure 4.3: Attaching VESA Plate to Monitor

Figure 4.4: Sliding Monitor onto Arm

Figure 4.5: Fully Assembled Monitor Arm
4.4 Kabelių valdymas
Utilize the integrated cable clips along the arm and pole to route your monitor cables for a tidy and organized setup. This helps prevent cable clutter and potential damage.

4.6 pav. Kabelių valdymas
4.5 Demonstracinio vaizdo įrašo sąranka
Video 4.1: This video demonstrates the unboxing and initial setup of the WALI M001XL monitor arm, including attaching it to a desk and mounting a monitor. It also shows how to manage cables for a clean look.
5. Valdymas ir reguliavimas
The WALI M001XL monitor arm provides various adjustment options to achieve your desired viewing angle and ergonomic position.
5.1 Aukščio reguliavimas
To adjust the monitor's height along the 31.5-inch pole, loosen the collar clamp on the pole, slide the arm to the desired height, and then securely tighten the clamp.

5.1 pav.: Aukščio reguliavimas
5.2 Pakreipimas, pasukimas ir sukimas
The monitor arm allows for flexible positioning:
- Pakreipti: Reguliuokite monitoriaus ekraną +/-90° vertikaliai, kad sumažintumėte atspindžius ir optimizuotumėte vaizdą viewing.
- Sukamasis: Swivel the monitor +/-90° horizontally at the arm joint or 360° around the pole to share your screen or change viewkampų.
- Pasukimas: Rotate the monitor 360° to switch between landscape and portrait modes.

Figure 5.2: Angle Adjustment Options
5.3 Adjustment Demonstration Video
Video 5.1: This video demonstrates the various adjustments of the WALI M001XL monitor arm, including height, tilt, swivel, and rotation, showcasing jo lankstumą skirtingiems viewporeikius.
6. Priežiūra
To ensure the longevity and optimal performance of your WALI monitor arm, follow these simple maintenance guidelines:
- Reguliarus valymas: Nuvalykite laikiklį minkšta,amp šluoste dulkėms ir nešvarumams pašalinti. Nenaudokite abrazyvinių valiklių ar tirpiklių.
- Patikrinkite sandarumą: Periodically check all screws and connections to ensure they are securely tightened. Over time, vibrations or frequent adjustments may cause them to loosen.
- Tepimas: If any joints become stiff, a small amount of silicone-based lubricant can be applied to the moving parts.
7. Problemų sprendimas
If you encounter any issues with your WALI monitor arm, please refer to the following common problems and solutions:
- Monitorius nusviręs arba nelaiko savo pozicijos:
Ensure all adjustment screws on the arm joints and VESA plate are tightened. For height adjustment, ensure the pole clamp yra visiškai apsaugotas. - Mount is wobbly:
Verify that the C-clamp or grommet base is securely fastened to the desk. The desk surface should be stable and capable of supporting the weight of the mount and monitor. - Sunku reguliuoti rankeną:
Check if any locking mechanisms are engaged. Loosen them slightly before attempting to adjust, then re-tighten once the desired position is achieved. - Laidai nelaiko spaustukuose:
Ensure cables are properly routed and not overstuffed in the clips. If clips are damaged, contact customer support for replacements.
If the problem persists after attempting these solutions, please contact WALI customer support.
8. Garantija ir palaikymas
WALI products are backed by a manufacturer's warranty. For specific warranty details, please refer to the warranty card included in your package or visit the official WALI website. Our experienced and friendly US-based customer support team is available to assist you 7 days a week for any questions or concerns regarding your product.
Jei reikia pagalbos, apsilankykite: WALI Store on Amazon