1. Įvadas
The Autel AutoLink AL419 is a powerful and user-friendly diagnostic tool designed to quickly and efficiently troubleshoot OBDII/CAN compliant vehicles. This device allows you to read and clear Diagnostic Trouble Codes (DTCs), view live data, perform I/M readiness tests, and retrieve vehicle information, helping you identify and resolve vehicle issues.

Image 1.1: Autel AutoLink AL419 device highlighting key functions.
2. Pakuotės turinys
Please check the contents of your package carefully. If any items are missing or damaged, contact your vendor.

Image 2.1: Package contents of the Autel AutoLink AL419.
- Autel AutoLink AL419 Unit
- OBDII kabelis
- USB kabelis
- Vartotojo vadovas
- Dėklas nešiojimui
3. Produktas baigtasview
The AL419 features a TFT color display and an intuitive button layout for easy navigation. Key components include:
- LCD ekranas: Shows test results and menu options.
- OBDII jungtis: Jungiamas prie transporto priemonės duomenų perdavimo jungties (DLC).
- USB jungtis: For connecting to a PC for updates or printing data.
- I/M mygtukas: I/M parengties patikrinimas vienu spustelėjimu.
- ESC mygtukas: Išeina iš dabartinio ekrano arba atšaukia veiksmą.
- Gerai mygtukas: Patvirtina pasirinkimą ar veiksmą.
- Krypties pagalvėlė: Naršykite meniu ir parinktis.
- Pagalbos mygtukas: Provides context-sensitive help.

Image 3.1: Labeled components of the Autel AutoLink AL419.
4. Sąranka
Before using the AL419, ensure your vehicle is OBDII compliant and the ignition is in the ON position.
- Locate the DLC: The Data Link Connector (DLC) is typically located under the dashboard on the driver's side. Refer to your vehicle's service manual for the exact location.
- Prijunkite skaitytuvą: Plug the AL419's OBDII cable into the vehicle's DLC. The scanner will automatically power on.
- Sistemos inicijavimas: The scanner will perform a system initialization. Once complete, the main menu will appear.
5. Naudojimo instrukcijos
The AL419 offers various diagnostic functions accessible from the main menu.
5.1. Reading Codes
This function retrieves Diagnostic Trouble Codes (DTCs) from the vehicle's computer.
- Pagrindiniame meniu pasirinkite 'Read Codes' ir paspauskite OK.
- The scanner will display any stored or pending DTCs.
- Use the directional pad to scroll through the codes and their definitions.
5.2. Clearing Codes
This function erases DTCs from the vehicle's computer and turns off the Check Engine Light (MIL).
- Pagrindiniame meniu pasirinkite 'Erase Codes' ir paspauskite OK.
- Kai būsite paraginti, patvirtinkite veiksmą.
- Note: Clearing codes does not fix the underlying problem. Address the issue before clearing codes to prevent them from reappearing.
5.3. I/M Readiness Test
The I/M Readiness function checks the status of the emission-related monitoring systems on the vehicle.

Image 5.1: I/M Readiness status display on the AL419.
- Paspauskite skirtą AŠ button on the device or select 'I/M Readiness' iš meniu.
- The screen will display the status of various monitors. A green checkmark indicates the monitor has completed its test, while a red 'X' indicates it has not.
- Color-coded LEDs (Green, Yellow, Red) and an audible tone provide quick status indication.
5.4. Viewtiesioginius duomenis
This function displays real-time data from the vehicle's sensors and components.

Image 5.2: Live Data and RPM graph display.
- Pagrindiniame meniu pasirinkite 'Live Data' ir paspauskite OK.
- Pasirinkite view data in a list format or graphical format (if supported).
- Observe parameters such as engine RPM, vehicle speed, oxygen sensor readings, and more.
5.5. Viewfiksuoti kadro duomenis
Freeze Frame Data captures a snapshot of the vehicle's operating conditions at the moment a DTC was set.
- Pagrindiniame meniu pasirinkite 'Freeze Frame' ir paspauskite OK.
- The scanner will display various parameters recorded when the fault occurred, aiding in diagnosis.
5.6. DTC paieška
This feature provides detailed definitions for Diagnostic Trouble Codes.
- Pagrindiniame meniu pasirinkite 'DTC Lookup' ir paspauskite OK.
- Enter the DTC code manually or select a code from a previously read list.
- The scanner will display the definition of the code.
5.7. Retrieving Vehicle Information (VIN, CIN, CVN)
This function allows you to retrieve the Vehicle Identification Number (VIN), Calibration Identification (CIN), and Calibration Verification Number (CVN).
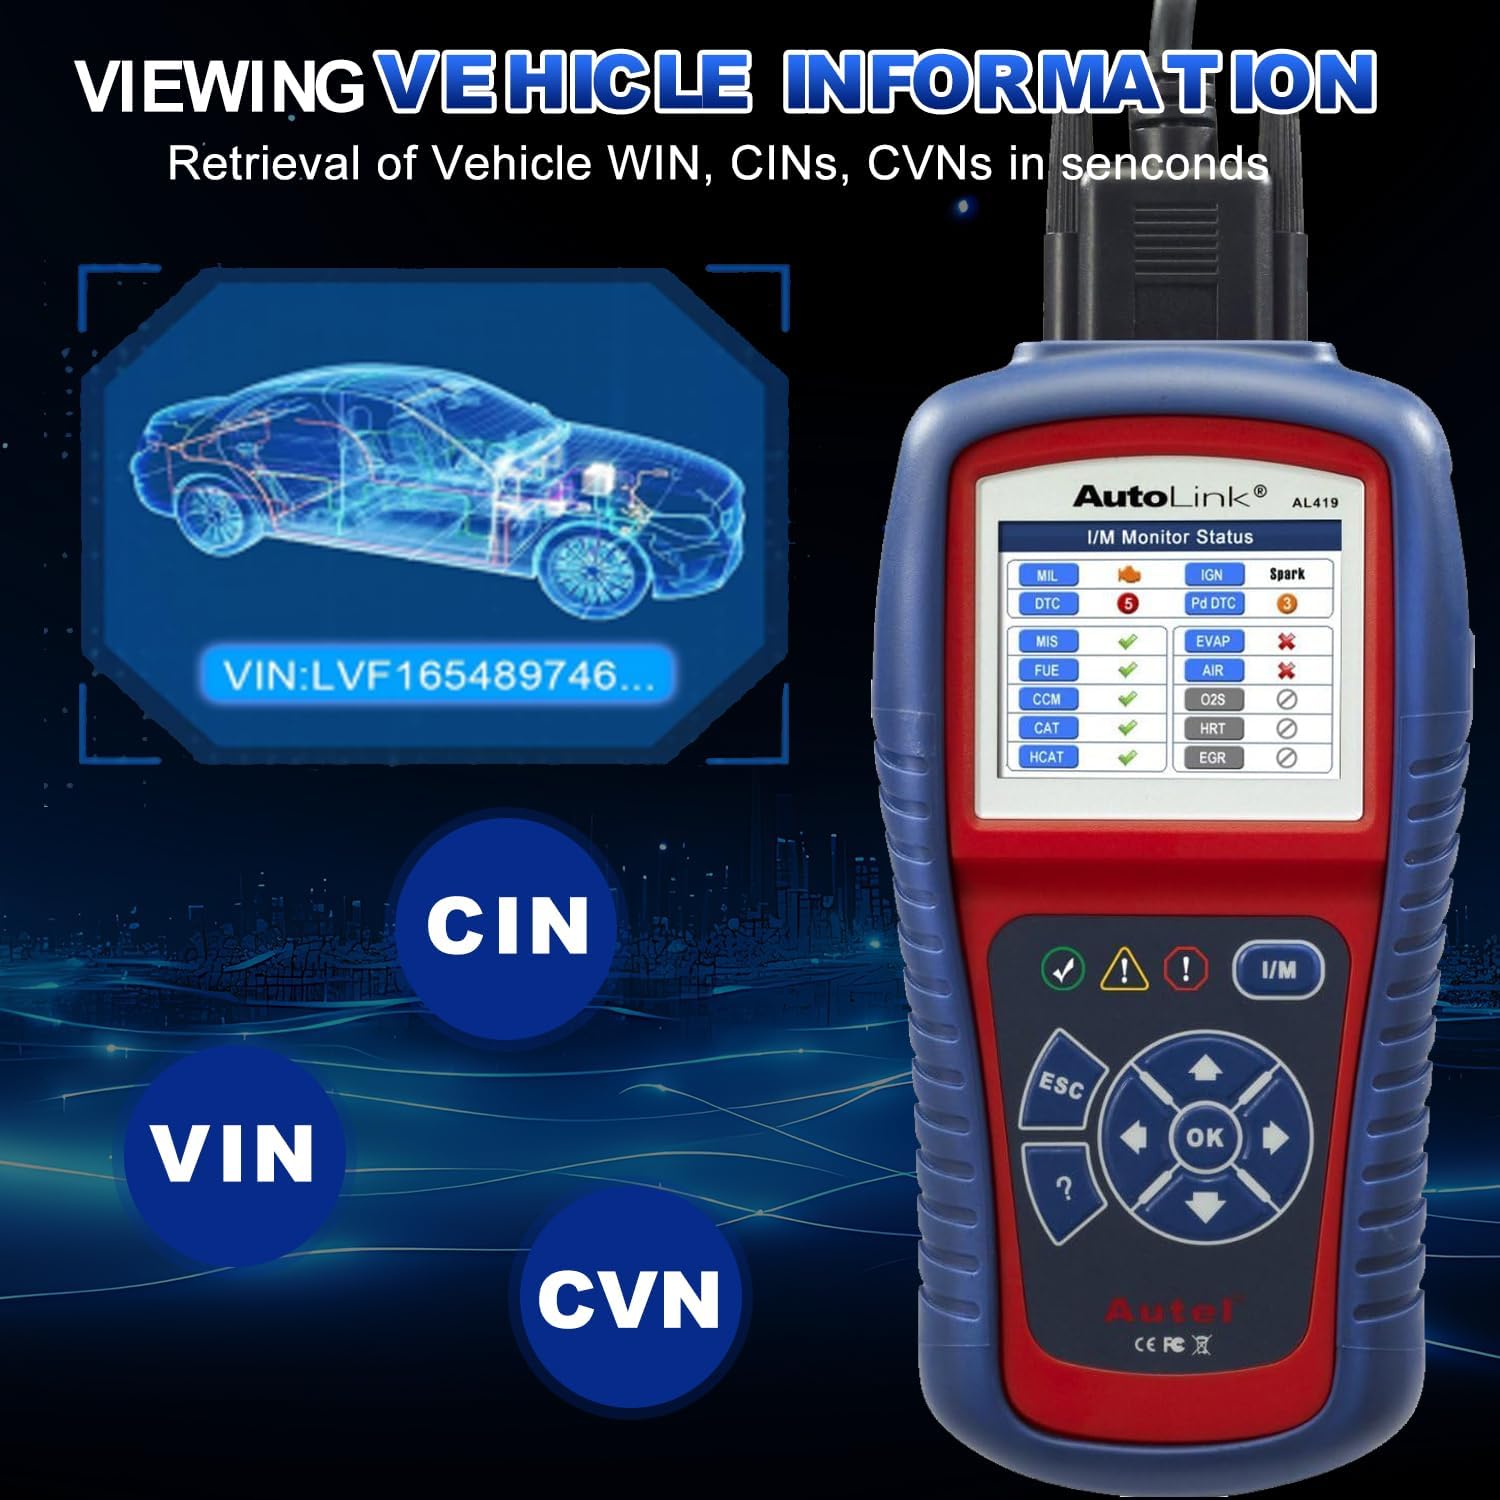
5.3 vaizdas: Viewing Vehicle Information on the AL419.
- Pagrindiniame meniu pasirinkite 'Vehicle Info' ir paspauskite OK.
- The scanner will display the available vehicle identification data.
5.8. Data Playback and Printing
The AL419 can store diagnostic data for later review ir spausdinimas.

Image 5.4: Additional features including Data Playback and Printing.
- Duomenų atkūrimas: Review previously recorded diagnostic data directly on the device.
- Duomenų spausdinimas: Connect the AL419 to a PC via the USB cable and use the provided software to print diagnostic reports.
6. Transporto priemonių suderinamumas
The Autel AutoLink AL419 is designed for broad vehicle compatibility, supporting most 1996 and newer vehicles that comply with OBDII & CAN protocols.
- Domestic & Imported Models: Works with a wide range of vehicles from various manufacturers.
- Petrol Vehicles: Applicable to models manufactured from 2001 onwards.
- Dyzelinės transporto priemonės: Applicable to models manufactured from 2004 onwards.

6.1 pav.: pvz.amples of vehicle brands supported by the AL419.
7. Priežiūra
To ensure the longevity and optimal performance of your AL419, follow these maintenance guidelines:
- Valymas: Naudokite minkštą, damp šluoste įrenginiui valyti. Nenaudokite abrazyvinių valiklių ar tirpiklių.
- Saugykla: Store the device in its carrying case in a dry, cool environment when not in use.
- Programinės įrangos atnaujinimai: Regularly check for software updates on the Autel official website to ensure the scanner has the latest vehicle data and features. Connect the device to a PC via the USB cable for updates.
- Kabelio priežiūra: Avoid bending or twisting the OBDII cable excessively. Store it neatly to prevent damage.
8. Problemų sprendimas
If you encounter issues with your AL419, refer to the following common problems and solutions:
- Scanner Fails to Power On:
- Ensure the OBDII cable is securely connected to the vehicle's DLC.
- Patikrinkite, ar transporto priemonės uždegimo jungiklis yra ON padėtyje.
- Patikrinkite automobilio akumuliatoriaus įkrovątage; a low battery might prevent the scanner from powering on.
- Nuorodos klaida:
- Įsitikinkite, kad transporto priemonė atitinka OBDII standartą (dauguma 1996 m. ir naujesnių transporto priemonių).
- Check for a loose connection at the DLC.
- Turn the ignition off, wait 10 seconds, then turn it back on and retry.
- Try the scanner on another OBDII compliant vehicle to rule out a vehicle-specific issue.
- DTCs Not Clearing:
- Ensure the ignition is ON and the engine is OFF.
- If the underlying fault is still present, the codes will reappear immediately after clearing. Address the vehicle issue first.
9. Specifikacijos
| Prekės ženklas | Autel |
| Modelis | AL419 |
| Ekranas | TFT Color Display (320 x 240 dpi) |
| Maitinimo šaltinis | 8.0–18.0 V maitinimas iš automobilio akumuliatoriaus |
| Darbinė temperatūra | 0–60 °C (32–140 °F) |
| Laikymo temperatūra | -20–70 °C (-4–158 °F) |
| Prekės svoris | 2.2 svaro |
| Pakuotės matmenys | 10.31 x 7.48 x 3.54 colio |
| OSD kalba | Anglų, ispanų, prancūzų |
10. Garantija ir palaikymas
Autel provides a limited warranty for its products. For specific warranty terms and conditions, please refer to the warranty card included with your product or visit the official Autel websvetainę.
For technical assistance, product inquiries, or after-sales support, please contact Autel customer service. The product includes 24/7 after-sale support.
Official Autel Websvetainė: www.autel.com


