1. Įvadas
This user manual provides comprehensive instructions for the setup, operation, maintenance, and troubleshooting of your CipherLab 1500P HP 1D Corded Barcode Scanner. Please read this manual thoroughly before using the device to ensure proper functionality and to maximize its lifespan. Keep this manual for future reference.
2. Produktas baigtasview
The CipherLab 1500P HP is a high-performance 1D corded barcode scanner designed for efficient data capture. It comes with a USB cable for connectivity and an autosense stand for hands-free operation.
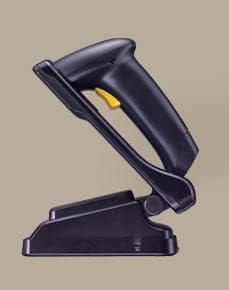
2.1 paveikslas: CipherLab 1500P HP barcode scanner placed in its autosense stand. The scanner is black with a yellow trigger button, and the stand is also black, providing a stable base for the scanner.
Pakuotės turinys:
- CipherLab 1500P HP Barcode Scanner
- USB jungties kabelis
- Autosense Stand
- This User Manual (or link to digital version)
3. Sąranka
- Išpakuokite įrenginį: Carefully remove the barcode scanner, USB cable, and autosense stand from their packaging.
- Prijunkite USB kabelį:
- Locate the USB port on the base of the barcode scanner.
- Insert the smaller end of the USB cable into the scanner's port.
- Insert the larger USB-A end of the cable into an available USB port on your host computer or point-of-sale (POS) system.
- Tvarkyklės diegimas („Plug & Play“): The CipherLab 1500P HP is typically a plug-and-play device. Your operating system should automatically detect and install the necessary drivers. Wait for the installation to complete (usually indicated by a notification).
- Position the Autosense Stand: Place the autosense stand on a stable, flat surface. The stand is designed to hold the scanner in an optimal position for hands-free scanning.
- Place Scanner in Stand: Gently place the barcode scanner into the autosense stand. Ensure it is securely seated. The scanner will automatically switch to presentation mode when placed in the stand, allowing it to detect and scan barcodes without pressing the trigger.
- Bandomasis ryšys: Open a text editor (e.g., Notepad, WordPad) or a compatible application on your computer. Scan a known barcode. The scanned data should appear in the text editor, confirming successful setup.
4. Naudojimo instrukcijos
Rankinis režimas:
- Remove the scanner from the autosense stand.
- Point the scanning window towards the barcode you wish to scan.
- Press and hold the yellow trigger button. A red scanning line will emit from the scanner.
- Position the scanner so the red line crosses the entire barcode.
- Once the barcode is successfully read, the scanner will emit an audible beep and/or a visual indicator (e.g., LED flash). The data will be transmitted to your connected device.
- Atleiskite gaiduko mygtuką.
Autosense (Presentation) Mode:
- Ensure the scanner is securely placed in the autosense stand.
- Hold the barcode in front of the scanner's window.
- The scanner will automatically detect the barcode and activate its scanning engine.
- Once the barcode is successfully read, the scanner will emit an audible beep and/or a visual indicator. The data will be transmitted to your connected device.
Skenavimo patarimai:
- Ensure the barcode is clean and not damaged.
- Optimaliam nuskaitymui sureguliuokite atstumą tarp skaitytuvo ir brūkšninio kodo.
- Avoid scanning at extreme angles; try to keep the scanner perpendicular to the barcode.
- For reflective surfaces, try tilting the scanner slightly to avoid glare.
5. Priežiūra
- Valymas:
- Reguliariai valykite nuskaitymo langą minkštu, nepūkuotu skudurėliu.
- Įsisenėjusiam purvui šiek tiek pamirkykiteampNuvalykite šluostę vandeniu arba švelniu, neabrazyviniu valikliu. Nepurkškite valiklio tiesiai ant skaitytuvo.
- Avoid using harsh chemicals, solvents, or abrasive materials, as these can damage the scanner's surface or internal components.
- Saugykla: Skaitytuvą laikykite vėsioje, sausoje vietoje, toliau nuo tiesioginių saulės spindulių ir ekstremalių temperatūrų.
- Kabelio priežiūra: Pernelyg nelenkite ir nesukite USB kabelio, nes tai gali pažeisti vidinius laidus.
- Stovo priežiūra: Keep the autosense stand clean and free of obstructions to ensure the scanner can be placed and removed smoothly.
6. Problemų sprendimas
| Problema | Galima priežastis | Sprendimas |
|---|---|---|
| Skaitytuvas neskaito brūkšninių kodų. |
|
|
| Į kompiuterį duomenys neperduodami. |
|
|
| Skeneris pypsi, bet duomenų nėra. |
|
|
7. Specifikacijos
| Funkcija | Detalė |
|---|---|
| Modelis | 1500P HP (33-A1500PCBKU001) |
| Tipas | 1D Corded Barcode Scanner |
| Ryšys | USB |
| Pridedami priedai | USB Cable, Autosense Stand |
| Gamintojas | CipherLab |
| ASIN | B01MDRIJRS |
| Pirmoji laisva data | 24 m. sausio 2024 d |
8. Garantija ir palaikymas
For specific warranty information regarding your CipherLab 1500P HP barcode scanner, please refer to the warranty card included with your product or contact your point of purchase. Warranty terms may vary by region and reseller.
For technical support, driver downloads, or additional product documentation, please visit the official CipherLab website or contact their customer support directly. You may need your product model number (33-A1500PCBKU001) and serial number for support inquiries.
CipherLab Official Websvetainė: www.cipherlab.com