Įvadas
This manual provides detailed instructions for the installation, operation, and maintenance of your Front Runner Recovery Device Mounting Kit (Model RRAC147). This kit is designed to securely attach 1 to 2 pairs of popular recovery devices, such as MAXTRAX and TRED Pro, to your vehicle's roof rack or bed rack system. Please read all instructions carefully before installation and use to ensure proper function and safety.
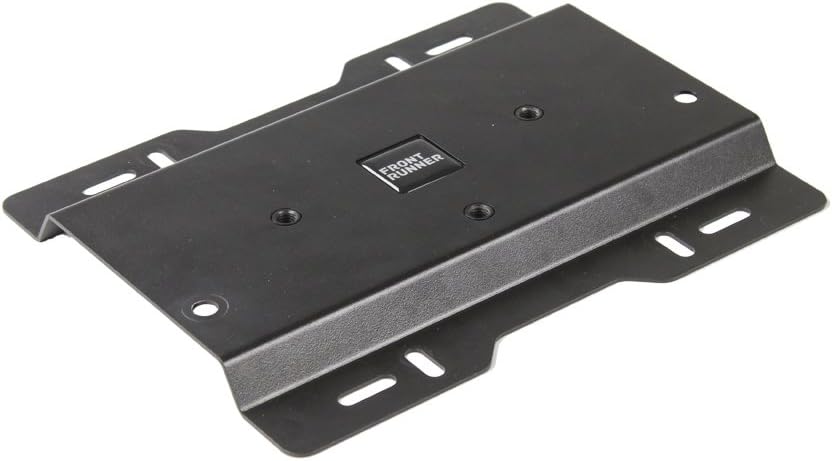
Pakuotės turinys
Patikrinkite, ar jūsų rinkinyje yra visi toliau išvardyti komponentai:
- 1 x Pair of Mounting Plates
- 2 x 70mm Mounting Keys (for TRED Pro style devices)
- 2 x 115mm Mounting Keys (for TRED Pro style devices)
- 4 x 60 mm varžtai
- 4 x 100 mm varžtai
- 4 x Eye Nuts (for MAXTRAX style devices)
- 1 x Installation Hardware Kit (includes washers, nuts, etc.)


Saugos informacija
Always ensure all fasteners are tightened securely before driving. Regularly inspect the mounting kit and recovery devices for any signs of wear, damage, or loose connections. Do not exceed the weight capacity of your roof rack or bed rack system. Improper installation or use can lead to serious injury or property damage.
Sąranka ir diegimas
The Front Runner Recovery Device Mounting Kit offers versatile installation options for various rack types. Follow the steps below based on your specific rack configuration.
Bendras montavimas baigtasview
The kit utilizes a T-slot system for secure attachment. Ensure your rack has compatible T-slots or suitable mounting points. Rubber washers should be placed under the recovery boards to prevent scratching and provide a snug fit.

Installation for Roof Racks with Slot Rails
- Assemble the threaded keys (70mm or 115mm depending on your recovery board thickness) with the appropriate bolts and washers.
- Slide the T-bolts (not included, but typically part of your rack system or recovery board kit) into your roof rack's slot rail.
- Position the mounting plates over the T-bolts, ensuring proper alignment.
- Attach the threaded keys or eye nuts to the mounting plates using the provided hardware.
- Adjust the spacing of the mounting holes to match your recovery boards before tightening all bolts and screws.
- Place rubber washers under the recovery boards for added stability and protection.
- Secure your recovery boards onto the threaded keys or eye nuts and tighten them firmly.

Installation for Roof Racks without Slot Rails (e.g., Roof Basket)
- Assemble the threaded keys or eye nuts with the appropriate bolts and washers.
- Position the mounting plates on the desired location of your roof rack or basket.
- Use the provided bolts, washers, and nuts to secure the mounting plates to the rack structure. You may need to shorten screws if necessary to avoid interference.
- Ensure the mounting plates are stable and firmly attached.
- Place rubber washers under the recovery boards.
- Secure your recovery boards onto the threaded keys or eye nuts and tighten them firmly.
Video Installation Guides
For visual assistance, please refer to the following installation videos:
Video 1: Detailed installation guide for ALL-TOP Recovery Board Mounting Bracket, demonstrating setup for TUB/Bed Racks, Roof Racks with Slot Rails, and Roof Racks without Rails. This video provides comprehensive visual steps for various mounting scenarios.
2 vaizdo įrašas: trumpa apžvalgaview of Recovery Device Mounting Solutions by Front Runner, showcasing the product's versatility and ease of use in securing recovery boards.
Naudojimo instrukcijos
Once the mounting kit is securely installed, attaching and detaching your recovery devices is straightforward:
- Pridėti: Align the holes of your recovery device with the threaded keys or eye nuts on the mounting plates. Place the recovery device over the keys/nuts and secure it by tightening the corresponding fasteners (e.g., T-handles for threaded keys, wing nuts for eye nuts). Ensure the device is firmly held and does not rattle.
- Norėdami atskirti: Loosen the fasteners until the recovery device can be easily removed from the keys/nuts. Store the fasteners securely to prevent loss.
Some recovery devices and mounting keys may offer a locking mechanism for added security. Utilize these features as appropriate.
Priežiūra
To ensure the longevity and reliable performance of your Front Runner Recovery Device Mounting Kit, follow these maintenance guidelines:
- Reguliarus patikrinimas: Periodically check all bolts, nuts, and mounting points for tightness. Vibrations during travel can cause fasteners to loosen.
- Valymas: Clean the mounting plates and hardware with mild soap and water. Avoid abrasive cleaners that could damage the powder-coated finish.
- Korozijos prevencija: The kit is made from stainless steel with a powder-coated finish for durability. However, in harsh environments (e.g., coastal areas, heavy road salt), occasional application of a corrosion inhibitor to exposed metal parts can extend their life.
- Saugykla: If removing the kit for extended periods, store it in a dry place away from direct sunlight and extreme temperatures.
Trikčių šalinimas
If you encounter issues with your mounting kit, consider the following:
- Laisvas kirpimas / barškėjimas: Ensure all bolts and nuts are fully tightened. Check that the rubber washers are correctly positioned under the recovery boards. Verify that the recovery device itself is compatible with the mounting keys/eye nuts and that the correct key length is used.
- Sunkumai pritvirtinant / atjungiant: Ensure the threaded keys or eye nuts are aligned correctly with the recovery board holes. Check for any obstructions or debris.
- Trūksta dalių: Refer to the 'Package Contents' section. If any parts are missing upon receipt, contact Front Runner customer support immediately.
Specifikacijos
| Funkcija | Specifikacija |
|---|---|
| Modelio numeris | RRAC147 |
| Prekės ženklas | Priekinis bėgikas |
| Medžiaga | Nerūdijantis plienas |
| Apdailos tipas | Dengtas milteliniu būdu |
| Prekės svoris | 9.28 svaro (4.22 kilogramo) |
| Pakuotės matmenys | 1.46 x 1.3 x 0.31 colio |
| Prekės gylis | 23 milimetrai |
| Montavimo tipas | Wall Mount (referring to the mounting plates' design, adaptable to various rack surfaces) |
| Vienetų skaičius | 11.0 Count (referring to main components) |
Garantija ir palaikymas
For warranty information, product support, or to purchase replacement parts, please visit the official Front Runner Outfitters websvetainėje arba susisiekite su jų klientų aptarnavimo skyriumi. Išsaugokite pirkimo įrodymą, jei prireiktų garantijos.