1. Įvadas
Thank you for choosing the NEDIS Automatic Lead Acid Battery Charger, model BACCH02. This charger is designed for safe and efficient charging and maintenance of 2V, 6V, and 12V lead-acid batteries. Please read this manual thoroughly before use to ensure proper operation and to prevent damage to the charger or battery.
2. Saugos instrukcijos
Always observe the following safety precautions when using the battery charger:
- This charger is for indoor use only. Do not expose to rain or moisture.
- Laikyti vaikams nepasiekiamoje vietoje.
- Įkrovimo metu užtikrinkite tinkamą vėdinimą, kad nesikauptų dujos.
- Avoid sparks, flames, or smoking near the battery during charging. Batteries can produce explosive gases.
- Dirbdami su baterijomis dėvėkite akių apsaugą ir apsauginius drabužius.
- Prieš prijungdami arba atjungdami akumuliatoriaus laidą, visada atjunkite kintamosios srovės maitinimo šaltinį.amps.
- Prijunkite raudoną (+) jungtįamp prie teigiamo akumuliatoriaus gnybto ir juodo (-) gnybtoamp prie neigiamo akumuliatoriaus gnybto.
- Do not attempt to charge frozen, damaged, or non-rechargeable batteries.
- Neatidarykite įkroviklio casing. Visus techninės priežiūros darbus patikėkite kvalifikuotiems darbuotojams.
- Jei maitinimo laidas yra pažeistas, jį turi pakeisti gamintojas, jo techninės priežiūros atstovas arba panašios kvalifikacijos asmenys, kad būtų išvengta pavojaus.
3. Produktas baigtasview
The NEDIS BACCH02 is a compact and automatic battery charger. It features a main unit with LED indicators and a voltage selection switch, connected to an AC power cable and DC output cables with battery clamps.

Image: The main unit of the NEDIS BACCH02 charger, showing the LED indicators for polarity and charge status, and the voltage pasirinkimo jungiklis.
Komponentai:
- Įkroviklis: Main body containing the electronics.
- ttage pasirinkimo jungiklis: Allows selection between 2V, 6V, and 12V charging modes.
- Polarity LED (Red): Indicates incorrect battery connection.
- Charge LED (Green): Indicates charging status (blinking for charging, solid for fully charged).
- Akumuliatorius Clamps: Red (+) and Black (-) for connecting to the battery terminals.
- Kintamosios srovės maitinimo kabelis: Prijungimui prie sieninio lizdo.
4. Sąranka
Norėdami nustatyti akumuliatoriaus įkroviklį, atlikite šiuos veiksmus:
- Ensure Charger is Unplugged: Before making any connections, ensure the charger's AC power cable is disconnected from the wall outlet.
- Identify Battery Voltage: Nustatykite tūrįtage of the battery you intend to charge (2V, 6V, or 12V).
- Select Correct Voltage: Naudokite ttage selection switch on the charger unit to set the appropriate voltage (2V, 6V, or 12V) for your battery.
- Prijunkite bateriją Clamps:
- Prijunkite raudona (+) akumuliatoriaus klamp prie teigiamo (+) akumuliatoriaus gnybto.
- Prijunkite juoda (-) akumuliatoriaus klamp prie neigiamo (-) akumuliatoriaus gnybto.
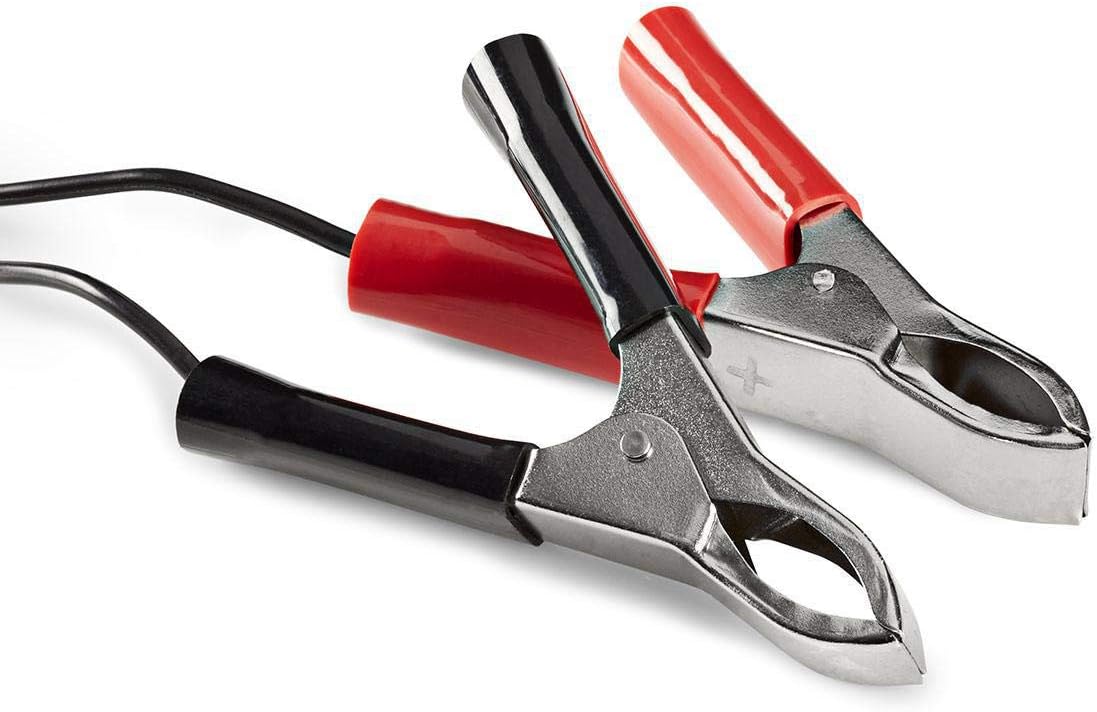
Image: Close-up of the red (positive) and black (negative) battery clamps.
- Prijunkite prie maitinimo: Kai baterija klamps are securely connected, plug the charger's AC power cable into a standard 220V wall outlet.
5. Naudojimo instrukcijos
The NEDIS BACCH02 is a fully automatic charger. Once connected to the battery and power, it will automatically begin the charging process.
Įkrovimo procesas:
- Poliškumo patikrinimas: If the red 'Polarity' LED illuminates, it indicates that the battery clamps are connected incorrectly. Immediately unplug the charger from the AC outlet and correct the connections before plugging it back in.
- Įkrovimo indikacija: The green 'Charge' LED will blink when the battery is actively charging.
- Viso įkrovimo indikacija: When the battery is fully charged, the green 'Charge' LED will stop blinking and remain solid. The charger will then automatically switch to a maintenance (float) charge mode to keep the battery at optimal capacity without overcharging.
Įkroviklio atjungimas:
To disconnect the charger after use:
- Unplug the charger's AC power cable from the wall outlet first.
- Disconnect the black (-) battery clamp from the negative terminal of the battery.
- Disconnect the red (+) battery clamp nuo teigiamo akumuliatoriaus gnybto.
6. Priežiūra
Tinkama priežiūra užtikrina jūsų įkroviklio ilgaamžiškumą:
- Įkroviklį laikykite švarų ir sausą. Valykite minkštu, sausu skudurėliu. Nenaudokite abrazyvinių valiklių ar tirpiklių.
- Nenaudojamą įkroviklį laikykite vėsioje, sausoje vietoje.
- Regularly inspect the AC power cable, DC output cables, and battery clampPatikrinkite, ar nėra kokių nors pažeidimo, susidėvėjimo ar korozijos požymių. Jei reikia, pakeiskite.
7. Problemų sprendimas
Jei kyla problemų dėl įkroviklio, žr. šią lentelę:
| Problema | Galima priežastis | Sprendimas |
|---|---|---|
| Charger not turning on / No LEDs lit | No power supply; Faulty outlet; Damaged cable. | Check AC power connection; Try a different outlet; Inspect cable for damage. |
| Red 'Polarity' LED is lit | Atvirkštinio poliškumo jungtis. | Unplug charger, correct battery clamp connections (red to +, black to -), then plug back in. |
| Green 'Charge' LED not blinking / Battery not charging | Battery too deeply discharged; Incorrect voltage selected; Damaged battery. | Užtikrinkite teisingą ttage is selected; Battery may be beyond recovery; Have battery tested by a professional. |
| Charger unit feels excessively hot | Normal operation (some warmth is expected); Overload; Internal fault. | Ensure adequate ventilation; Disconnect immediately if excessively hot and contact support. |
8. Specifikacijos
| Funkcija | Specifikacija |
|---|---|
| Modelis | BACCH02 |
| Prekės modelio numeris | 5412810284245 |
| Įvesties tomastage | 220V kintamoji srovė |
| Išėjimas ttage | 2V / 6V / 12V DC (selectable) |
| Suitable Battery Capacity | Nuo 2.2 Ah iki 10 Ah |
| Apsaugos ypatybės | Reverse Polarity, Short Circuit |
| Gaminio matmenys (I x P x A) | 7 x 10 x 6 cm |
| Prekės svoris | 680 gramų |
| Atitiktis | CE |
| Spalva | Juoda |
9. Garantija ir palaikymas
This product is covered by the standard warranty terms provided by the retailer at the time of purchase. For specific warranty details, please refer to your purchase documentation or contact the retailer directly.
For technical support, troubleshooting assistance beyond what is provided in this manual, or inquiries regarding parts and service, please contact your point of purchase or the manufacturer's customer service department.