1. Įvadas
This manual provides detailed instructions for the safe installation, operation, and maintenance of your Utilitech 100-CFM Bathroom Ventilation Fan with 13-Watt LED Light. This ENERGY STAR compliant fan is designed to provide efficient ventilation and illumination for your bathroom. Please read this manual thoroughly before beginning installation or operation and retain it for future reference.
2. Svarbi saugos informacija
ĮSPĖJIMAS: Kad sumažintumėte gaisro, elektros smūgio ar žmonių sužalojimo pavojų, laikykitės šių nurodymų:
- Montavimo darbus ir elektros instaliaciją turi atlikti kvalifikuotas (-i) asmuo (-iai) pagal visus galiojančius kodeksus ir standartus, įskaitant ugniai atsparius statybos kodeksus ir standartus.
- Naudokite šį įrenginį tik taip, kaip numatė gamintojas. Jei turite klausimų, susisiekite su gamintoju.
- Prieš atlikdami prietaiso techninę priežiūrą ar valymą, išjunkite maitinimą techninės priežiūros skydelyje ir užrakinkite paslaugų atjungimo priemones, kad netyčia neįjungtumėte maitinimo. Kai paslaugų atjungimo priemonių negalima užrakinti, saugiai pritvirtinkite garsų įspėjamąjį įtaisą, pvz., A tag, į aptarnavimo skydelį.
- Nenaudokite šio ventiliatoriaus su jokiu kietakūniu greičio reguliavimo įtaisu, nebent jis būtų specialiai patvirtintas naudoti su šiuo modeliu.
- Šis įrenginys skirtas tik bendram vėdinimui. Nenaudokite pavojingoms ar sprogioms medžiagoms ir garams ištraukti.
- Duct work must always be vented to the outdoors.
- Kad nepažeistumėte variklio guolių ir išvengtumėte triukšmingų ir (arba) nesubalansuotų sparnuočių, laikykite atokiau nuo maitinimo bloko gipso kartono purškiklius, statybines dulkes ir pan.
- Montavimo metu visada mūvėkite apsauginius akinius ir pirštines.
- Ensure the fan housing is securely mounted to structural framing.
3. Pakuotės turinys
Carefully unpack your ventilation fan and check that all components are present and undamaged. If any parts are missing or damaged, do not attempt to install the product. Contact customer support.
- Ventilation Fan Housing Assembly
- Motor and Blower Wheel Assembly
- LED Light Grille Assembly
- Montavimo detalės (varžtai, vielinės veržlės)
- Vartotojo vadovas
4. Montavimo instrukcijos
This fan is designed for easy fit installation, often replacing common bath fan housing sizes without extensive drywall modification. However, careful attention to detail is required for proper mounting and wiring.
4.1 Reikalingi įrankiai
- Atsuktuvas (Phillips ir Flathead)
- Gręžtuvas
- Vielos nuėmikliai
- Replės
- Matavimo juosta
- Naudingas peilis
- Apsauginiai akiniai ir pirštinės
4.2 Ventiliatoriaus korpuso montavimas
- Išjunkite maitinimą: Before starting, ensure power is OFF at the circuit breaker or fuse box to avoid electrical shock.
- Paruoškite atidarymą: If replacing an existing fan, remove the old unit. The new housing may be smaller, requiring additional wood blocking between joists for secure mounting.
- Pozicija Korpusas: Place the fan housing between ceiling joists. The housing should be positioned so that its bottom edge is flush with the finished drywall surface, not the bottom of the joist. This is crucial for the LED light/cover to sit properly.
- Saugus būstas: The fan housing has pre-drilled mounting holes. Secure the housing to the joists using appropriate screws. It is recommended to add additional mounting screws on all sides for stability. Before drilling new holes, temporarily install the fan motor housing to identify locations where screws will not interfere with its installation.
- Connect Duct Work: Attach the appropriate size duct (typically 4-inch round) to the fan's duct connector. Secure with duct tape or clamps to ensure an airtight seal. Ensure the duct work vents directly to the outdoors.

1 pav. Apatinė dalis view of the fan housing, showing the duct connector and internal components.
4.3 Elektros laidai
ATSARGIAI: Visa instaliacija turi atitikti vietinius elektros kodeksus. Jei nesate tikri, kreipkitės į kvalifikuotą elektriką.
- Prieigos laidų skyrius: Open the wiring compartment cover on the fan housing. Note that the wiring compartment is compact.
- Maršruto laidai: Route the electrical supply wires (typically black, white, and ground) into the wiring compartment through an appropriate knockout hole. Use a strain relief clamp to prevent wire chaffing.
- Padarykite ryšius:
- Prijunkite black (hot) wire from the power supply to the juodas fan wire.
- Prijunkite balta (neutrali) wire from the power supply to the baltas fan wire.
- Prijunkite bare copper (ground) wire from the power supply to the žalias arba plikas varis fan ground wire.
- If connecting to separate switches for fan and light, ensure correct connections for each circuit. The fan may come with quick-connect fittings; if your wiring requires multiple incoming wires per connection, use appropriate wire nuts.
- Saugus laidas: Carefully tuck all wires into the wiring compartment and secure the cover. Ensure no wires are pinched.
4.4 Variklio ir grotelių montavimas
- Variklio mazgo montavimas: Slide the motor and blower wheel assembly into the fan housing. Ensure it clicks securely into place or is fastened with provided screws.
- Prijunkite LED lemputę: Plug the LED light connector from the grille assembly into the receptacle on the fan motor assembly.
- Pritvirtinkite groteles: Squeeze the mounting springs on the grille assembly and insert them into the slots in the fan housing. Push the grille firmly against the ceiling until it is flush.
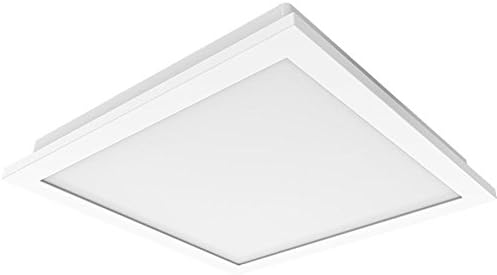
Figure 2: The LED light grille assembly, which covers the fan housing.
5. Naudojimo instrukcijos
Your Utilitech ventilation fan is designed for quiet and efficient operation, providing both air circulation and illumination.
- Ventiliatoriaus veikimas: Turn on the wall switch connected to the fan. The DC brushless motor may start slightly slower than traditional AC motors, but it will quickly reach its full 100 CFM capacity.
- LED lempos veikimas: Turn on the wall switch connected to the LED light. The integrated 13-watt LED light provides bright illumination. This light is dimmable; if you wish to adjust its brightness, ensure it is connected to a compatible dimmer switch (sold separately).
- Optimalus našumas: For best ventilation, operate the fan during and after showering or bathing to effectively remove moisture and odors from the bathroom.
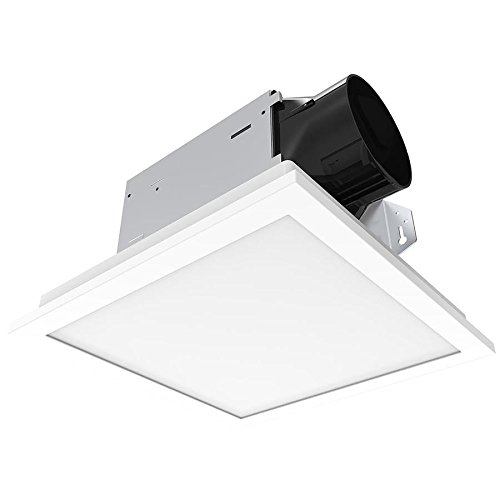
Figure 3: The Utilitech fan and LED light integrated into a bathroom ceiling.
6. Priežiūra
Regular maintenance ensures optimal performance and extends the life of your ventilation fan.
- Maitinimo atjungimas: Always disconnect power at the service panel before performing any maintenance.
- Grotelių valymas: Remove the LED light grille by gently pulling down on the sides to release the mounting springs. Wipe the grille with a soft, damp audinys. Nenaudokite abrazyvinių valiklių.
- Fan Housing and Blower Cleaning: With the grille removed, carefully vacuum or wipe away any dust or debris from the fan housing interior and the blower wheel. Avoid bending or damaging the blower blades.
- LED šviesos modulis: The integrated LED light module is designed for long life (up to 30,000 hours) and is not user-replaceable. If the LED light fails or malfunctions, the entire unit may need to be replaced. Contact customer support for assistance.
- Surinkimas: Once clean, reattach the grille by squeezing the mounting springs and inserting them back into the housing slots. Restore power.
7. Trikčių šalinimo vadovas
Prieš kreipdamiesi į klientų aptarnavimo tarnybą, dažniausiai pasitaikančioms problemoms spręsti žr. toliau pateiktą trikčių šalinimo vadovą.
| Problema | Galima priežastis | Sprendimas |
|---|---|---|
| Ventiliatorius neveikia. | Nėra maitinimo šaltinio; atsilaisvinę laidai; sugedęs jungiklis. | Patikrinkite grandinės pertraukiklį / saugiklį. Įsitikinkite, kad visi laidai yra tvirtai prijungti. Patikrinkite sieninį jungiklį. |
| LED light does not turn on or flickers. | Nėra maitinimo šaltinio; atsilaisvinę laidai; sugedęs LED modulis. | Check circuit breaker/fuse. Ensure light connector is fully plugged in. If module is faulty, the unit may require replacement. |
| Ventiliatorius triukšmauja arba per daug vibruoja. | Loose mounting; debris in blower; damaged blower wheel. | Ensure fan housing is securely mounted. Disconnect power and clean blower wheel. Inspect for damage. |
| Silpnas oro judėjimas. | Blocked duct work; improper duct size; fan motor issue. | Check duct work for obstructions or kinks. Ensure duct size matches fan outlet. Clean blower wheel. |
8. Gaminio specifikacijos
| Funkcija | Detalė |
|---|---|
| Prekės ženklas | Utilitech |
| Modelio numeris | B07JZXNRRN |
| Oro srauto talpa | 100 kubinių pėdų per minutę (CFM) |
| Sone Rating | 1.5 Garsai |
| Šviesos tipas | Integrated 13 Watt Dimmable LED |
| Variklio tipas | DC be šepetėlių |
| Energijos efektyvumas | Atitinka ENERGY STAR reikalavimus |
| Medžiaga | Cinkuotas plienas, plastikas |
| Kambario tipas | Vonios kambarys |
| Maitinimo šaltinis | Su laidu elektra |
| Prekės svoris | 8.87 svaro |
| Pakuotės matmenys | 13.59 x 13.55 x 8.63 colio |
9. Garantija ir klientų aptarnavimas
For warranty information or technical assistance, please contact Utilitech customer support. Keep your purchase receipt as proof of purchase.
Pastaba: The integrated LED light module is not user-replaceable. If the LED light fails, the entire unit may need to be exchanged under warranty, if applicable.
Contact information for Utilitech can typically be found on their official websvetainėje arba ant produkto pakuotės.


