1. Įvadas
This manual provides detailed instructions for the installation, operation, and maintenance of your Everycom EC801B 80mm Thermal Printer. Please read this manual thoroughly before using the printer to ensure proper function and longevity of the device. The EC801B is a high-speed thermal receipt printer equipped with an auto-cutter and versatile connectivity options including USB and LAN.
2. Saugos informacija
- DO NOT DISASSEMBLE THE PRINTER PERSONALLY. For any service-related queries, please contact Everycom support.
- The printer should be installed on a flat and solid surface to avoid vibration or impact damage.
- Ensure the power supply matches the printer's requirements to prevent electrical damage.
- Laikykite spausdintuvą atokiau nuo vandens, dulkių ir tiesioginių saulės spindulių.
3. Pakuotės turinys
Patikrinkite, ar jūsų siuntinyje yra visi toliau išvardyti daiktai:
- 1 x Everycom EC801B Thermal Receipt Printer
- 1x maitinimo adapteris
- 1 x USB duomenų kabelis
- 1 x Paper Roll (Sample)
- 1 x Vartotojo vadovas
- 1 x tvarkyklės kompaktinis diskas

Image: Contents of the Everycom EC801B printer package, including the printer unit, power adapter, USB cable, sample paper roll, user manual, and driver CD.
4. Produktas baigtasview
Familiarize yourself with the various parts of your Everycom EC801B thermal printer.
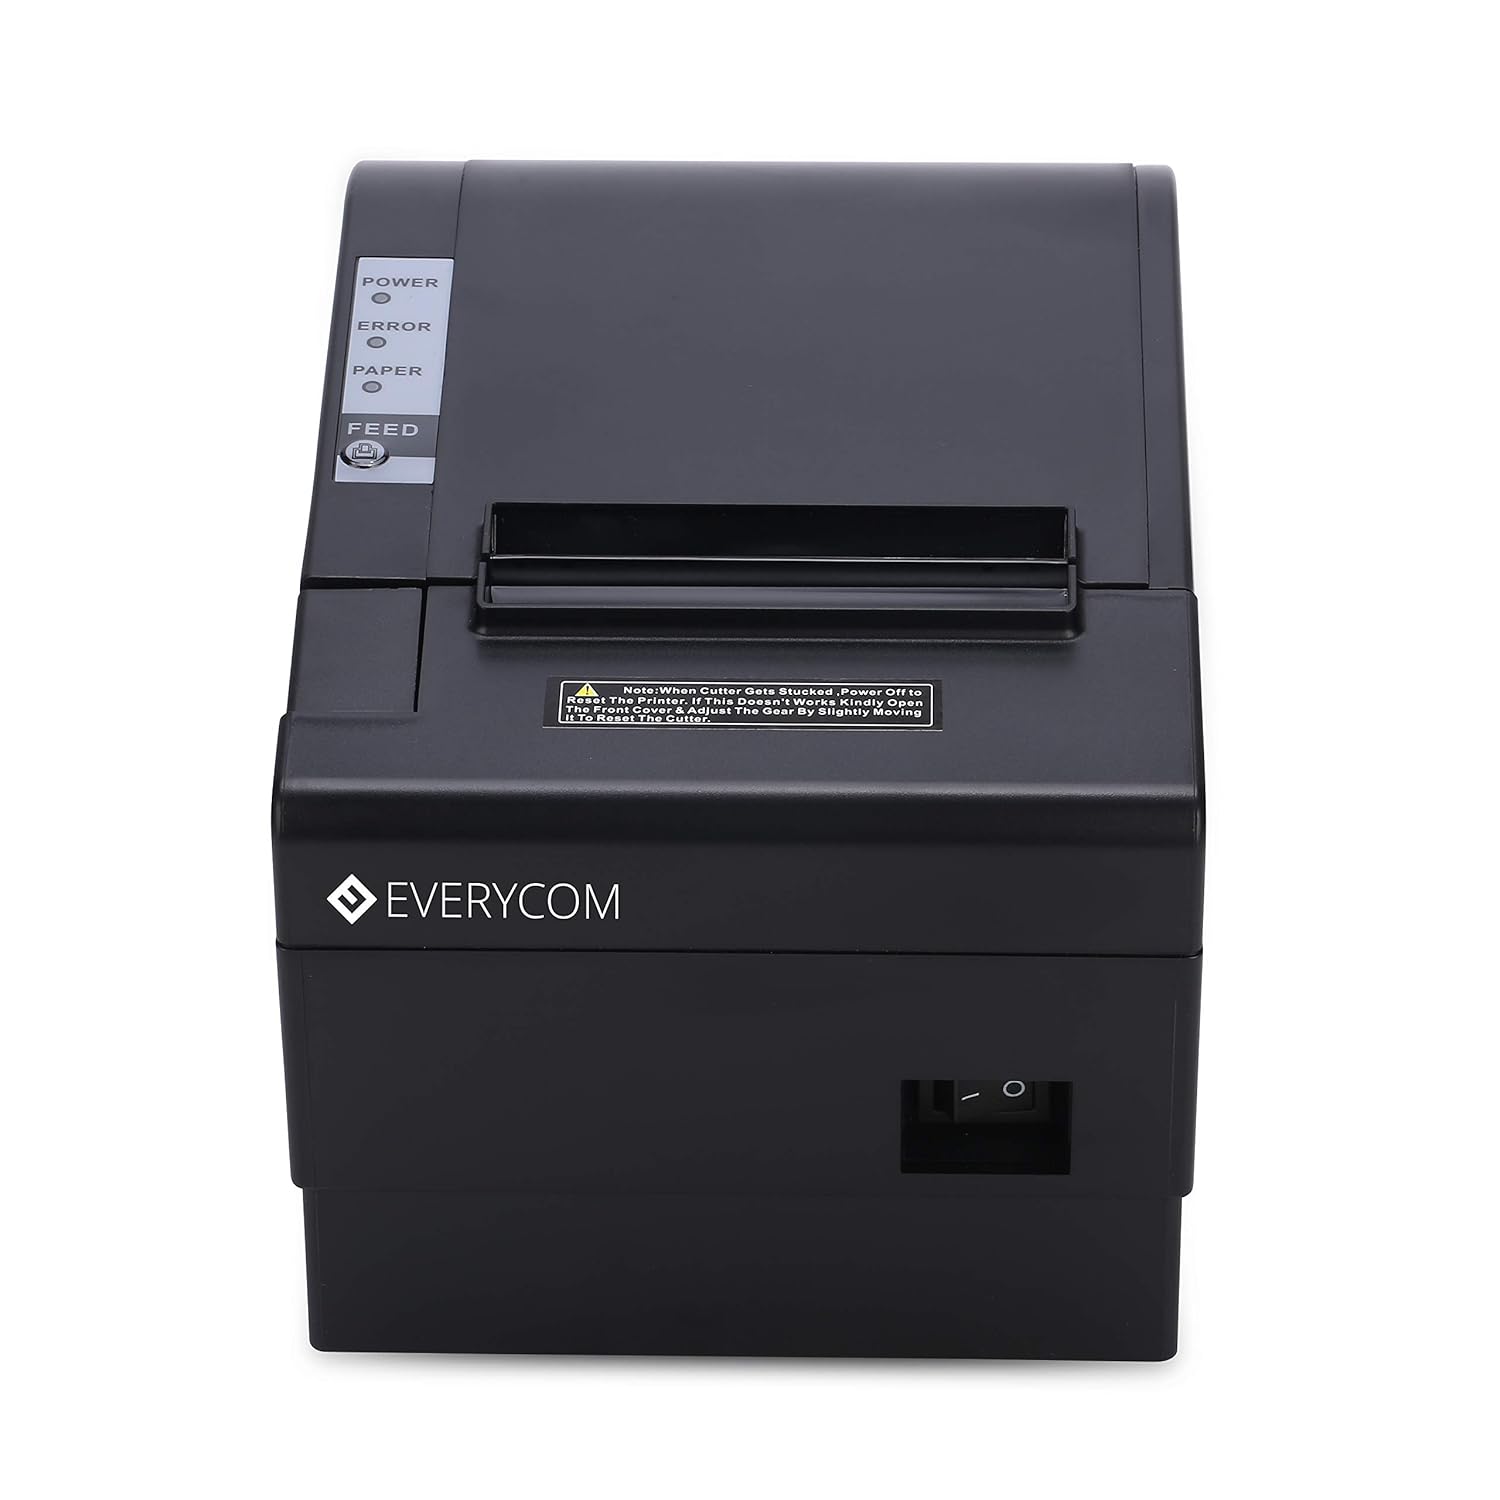
4.1 Priekinė ir viršutinė dalis View

Vaizdas: priekis view of the Everycom EC801B thermal printer, showing the paper output slot and control panel.

Vaizdas: Viršus view of the Everycom EC801B thermal printer, highlighting the control panel with POWER, ERROR, PAPER indicators, and the FEED button.
4.2 Valdymo skydas
- MAITINIMO indikatorius: Illuminates when the printer is powered on.
- KLAIDOS indikatorius: Flashes or illuminates to indicate an error (e.g., paper out, cover open).
- PAPER Indicator: Illuminates when paper is present, flashes when paper is low.
- PATEIKIMO mygtukas: Press to advance paper. Hold to print a self-test page.
4.3 Rear Panel (Connectivity Ports)

Vaizdas: Galinis view of the Everycom EC801B thermal printer, showing the power port, cash drawer port, Ethernet (LAN) port, and USB port.
- MAITINIMO prievadas: Jungiamas prie maitinimo adapterio.
- CASH Drawer Port: Connects to a compatible cash drawer.
- LAN (eterneto) prievadas: Connects to a network for network printing.
- USB prievadas: Connects to a computer via USB cable.
5. Sąranka
5.1 Fizinis išdėstymas
Place the printer on a stable, flat surface. Ensure there is adequate space around the printer for ventilation and easy access to ports and paper loading.
5.2 Jungiamieji kabeliai
- Maitinimo jungtis: Connect the power adapter to the printer's POWER port and then plug the adapter into a power outlet.
- Data Connection (Choose one):
- USB: Prijunkite USB duomenų kabelį nuo spausdintuvo USB prievado prie laisvo USB prievado kompiuteryje.
- LAN: Prijunkite spausdintuvo LAN prievadą prie tinklo maršrutizatoriaus arba komutatoriaus eterneto kabelį.
- Kasos stalčius (neprivaloma): If using a cash drawer, connect its cable to the printer's CASH Drawer port.
5.3 Popieriaus įdėjimas
- Open the printer cover by pushing the cover open lever (if present) or lifting the top cover.
- Insert the 80mm thermal paper roll into the compartment, ensuring the paper feeds from the bottom and the leading edge extends out of the printer.
- Close the printer cover firmly until it clicks into place. Ensure there is no slack in the paper.

Vaizdas: Viršus view of the Everycom EC801B printer with the cover open, revealing the paper roll compartment.
5.4 Tvarkyklės diegimas
For the printer to communicate with your computer, drivers must be installed.
- Insert the provided Driver CD into your computer's CD-ROM drive.
- Follow the on-screen instructions to install the printer drivers. If your computer does not have a CD drive, drivers can typically be downloaded from the Everycom official websvetainę.
- After installation, configure the printer settings through your operating system's printer management tools.
6. Naudojimo instrukcijos
6.1 Įjungimas / išjungimas
To power on the printer, ensure the power adapter is connected and press the power switch located on the side or rear of the printer. The POWER indicator light will illuminate. To power off, press the power switch again.
Vaizdas: priekis view of the Everycom EC801B printer, showing the location of the power switch on the side.
6.2 Savikontrolės puslapio spausdinimas
A self-test page can confirm basic printer functionality and print quality without requiring a computer connection.
- Įsitikinkite, kad spausdintuvas išjungtas ir įdėtas popierius.
- Paspauskite ir palaikykite PAŠARAS mygtuką.
- Laikydami PAŠARAS mygtuką, įjunkite spausdintuvą.
- Atleiskite PAŠARAS button once the printer starts printing. A self-test page will print, showing printer information and a sampspaudinys.

Image: Everycom EC801B printer actively printing a self-test receipt with a QR code and text.
6.3 Pagrindinės spausdinimo operacijos
Once drivers are installed and the printer is connected, you can print from any application that supports printing. Select the Everycom EC801B from your list of available printers and initiate the print command.
6.4 Automatinio pjaustytuvo funkcija
The EC801B features an automatic cutter that will cut the receipt paper after each print job, or as configured in your printer settings/software.
7. Priežiūra
7.1 Spausdintuvo valymas
Reguliarus valymas padeda išlaikyti spausdinimo kokybę ir pailgina spausdintuvo tarnavimo laiką.
- Spausdinimo galvutė: Švelniai nuvalykite vatos tamponuampened with isopropyl alcohol to gently wipe the thermal print head. Allow it to dry completely before use.
- Popieriaus kelias: Use a soft, dry cloth to remove any paper dust or debris from the paper path.
- Išorė: Išorę nuvalykite minkšta, damp audinys. Nenaudokite stiprių cheminių medžiagų ar abrazyvinių valiklių.
7.2 Popieriaus ritinio keitimas
When the PAPER indicator flashes or printing becomes faint, it's time to replace the paper roll. Follow the steps in Section 5.3 to load a new 80mm thermal paper roll.
8. Problemų sprendimas
Jei kyla problemų dėl spausdintuvo, žr. toliau pateiktas dažniausiai pasitaikančias problemas ir sprendimus:
| Problema | Galima priežastis | Sprendimas |
|---|---|---|
| Spausdintuvas neįsijungia | No power, faulty adapter | Check power cable connection, ensure outlet is working, try another adapter if available. |
| No printing / Blank output | Paper loaded incorrectly, no paper, print head issue, driver issue | Reload paper correctly (thermal side facing print head), replace paper roll, clean print head, reinstall drivers. |
| ERROR indicator on/flashing | Paper out, cover open, print head overheat | Check paper, close cover firmly, allow printer to cool down. |
| Prasta spausdinimo kokybė | Dirty print head, low quality paper, old paper roll | Clean print head, use high-quality thermal paper, replace old paper. |
| Kompiuteris neatpažįsta spausdintuvo | Driver not installed, incorrect cable, port issue | Install/reinstall drivers, check USB/LAN cable connection, try a different port. |
If the problem persists after attempting these solutions, please contact Everycom customer support.
9. Specifikacijos
Key technical specifications for the Everycom EC801B Thermal Printer:
| Funkcija | Detalė |
|---|---|
| Modelis | EC801B |
| Spausdinimo technologija | Terminis linijinis spausdinimas |
| Spausdinimo greitis | 220 mm/sek |
| Popieriaus plotis | 80 mm |
| Ryšys | USB, LAN (Ethernet) |
| Automatinis pjaustytuvas | Taip |
| Spausdintuvo išvestis | Vienspalvis |
| Matmenys (IxPxH) | 18.6 x 14.5 x 13.3 cm |
| Prekės svoris | 1.2 kg |
| Gamintojas | Everycom Electronics (Made in India) |
10. Garantija ir palaikymas
The Everycom EC801B Thermal Printer comes with a 1 metų garantija nuo įsigijimo datos. Ši garantija taikoma gamybos defektams ir gedimams įprastomis naudojimo sąlygomis.
For technical assistance, troubleshooting, or warranty claims, please contact Everycom Customer Support:
- Nemokamas numeris: 1800 121 4480
- Customer Support Working Hours: Pirmadienis–šeštadienis, 10:00–6:30 (išskyrus valstybinių švenčių dienas)

Image: Everycom customer service contact details, including the toll-free number and working hours.


