1. Įvadas
This manual provides detailed instructions for the installation, setup, and operation of your LoraTap WiFi Smart Relay Switch (Model RR400W). Please read this manual thoroughly before use to ensure proper functionality and safety.
Pakuotės turinys:
- LoraTap WiFi Smart Relay Switch (RR400W)
- Vartotojo vadovas
- Mounting accessories (screws, anchors, mini screwdriver, electrical wires)

Image 1.1: LoraTap WiFi Smart Relay Switch (Model RR400W) and its mobile application interface.
2. Saugos informacija
- ĮSPĖJIMAS: Electrical installation should only be performed by a qualified electrician or in accordance with local electrical codes.
- Prieš montuodami arba atlikdami įrenginio techninę priežiūrą, visada atjunkite maitinimą grandinės pertraukikliu.
- Šis prietaisas skirtas naudoti tik patalpose.
- Neviršykite maksimalios 10 A / 2500 W apkrovos.
- Ensure the device is installed in a location with a neutral wire for correct electrical supply.
- Laikyti vaikams nepasiekiamoje vietoje.
3. Gaminio specifikacijos
| Funkcija | Specifikacija |
|---|---|
| Modelio numeris | RR400W |
| Įvesties tomastage | 100-250V kintamoji srovė, 50/60Hz |
| Maksimali apkrova | 10A / 2500W |
| Belaidis protokolas | Wi-Fi 2.4GHz (IEEE 802.11 b/g/n) |
| Matmenys (I x P x A) | 4.8 x 4.2 x 2.3 cm (1.89 x 1.65 x 0.91 colio) |
| Kontrolės metodas | Remote (App), Voice |
| Suderinamumas | Amazon Alexa, Google Assistant, Smart Life App, Tuya App |
| Sertifikatai | CE, RoHS, FCC |
4. Diegimo vadovas
The LoraTap WiFi Smart Relay Switch is designed for easy integration into existing electrical systems. It requires a neutral wire for operation.
Sujungimo schema:
- Atjunkite maitinimą: Before starting, turn off the power at the main circuit breaker to avoid electrical shock.
- Identifikuokite laidus: Locate the Live (L) and Neutral (N) input wires from your power source, and the Live (L) and Neutral (N) load wires going to your appliance (e.g., lamp).
- Prijungti įvestį: Connect the Live input wire to the 'L in' terminal and the Neutral input wire to the 'N in' terminal on the LoraTap switch.
- Prijungti išvestį: Connect the Live load wire to the 'L out' terminal and the Neutral load wire to the 'N out' terminal on the LoraTap switch.
- Saugūs ryšiai: Ensure all wire connections are secure. The device supports 26-16AWG wires.
- Montavimo įrenginys: The compact size allows installation in narrow spaces, such as behind a socket or in a ceiling rose. Use the provided mounting accessories if needed.
- Atkurti maitinimą: Kai visos jungtys yra tvirtos ir įrenginys tinkamai sumontuotas, atkurkite maitinimą grandinės pertraukikliu.

Image 4.1: Simplified wiring diagram for the LoraTap Smart Relay Switch. Ensure a neutral wire is present for installation.
5. Programėlės sąranka ir susiejimas
To control your LoraTap Smart Relay Switch, you need to download the Smart Life or Tuya app and pair the device.
Reikalavimai:
- A smartphone (Android or iOS).
- A 2.4GHz Wi-Fi network. 5GHz networks are not supported.
- The Smart Life or Tuya app installed on your smartphone.
Poravimo žingsniai:
- Atsisiųsti programą: Ieškokite "Smart Life" or "Tuya Smart" in your smartphone's app store (App Store for iOS, Google Play for Android) and install it.
- Registruotis / Prisijungti: Atidarykite programėlę ir užregistruokite naują paskyrą arba prisijunkite naudodami esamą.
- Pridėti įrenginį: Tap the "+" icon in the top right corner of the app to add a new device. Select "Electrical Switch" or "Switch (Wi-Fi)".
- Įjunkite susiejimo režimą: Power on the LoraTap switch. If the indicator light is not blinking rapidly, press and hold the button on the switch for approximately 5 seconds until it blinks rapidly. This indicates pairing mode.
- Prisijunkite prie „Wi-Fi“: In the app, confirm the indicator is blinking rapidly. Enter your 2.4GHz Wi-Fi network name and password.
- Visiškas susiejimas: The app will search for and connect to the device. Once connected, you can rename the device for easier control.

Image 5.1: Easy pairing process with the Smart Life/Tuya app. Ensure your Wi-Fi network is 2.4GHz.
6. Operacija
The LoraTap Smart Relay Switch offers multiple control options for convenience.
6.1. Programos valdymas
Once paired, you can control your device from anywhere using the Smart Life or Tuya app on your smartphone.
- Įjungimo / išjungimo valdymas: Tap the switch icon in the app to turn your connected appliance on or off.
- Būsena realiuoju laiku: The app displays the current status of your appliance, allowing you to verify if it's on or off remotely.
- Grupės valdymas: You can group multiple LoraTap switches together in the app to control them simultaneously.
- Įrenginio bendrinimas: Share control of the device with family members through the app.

Image 6.1: Remote control via the Smart Life app.
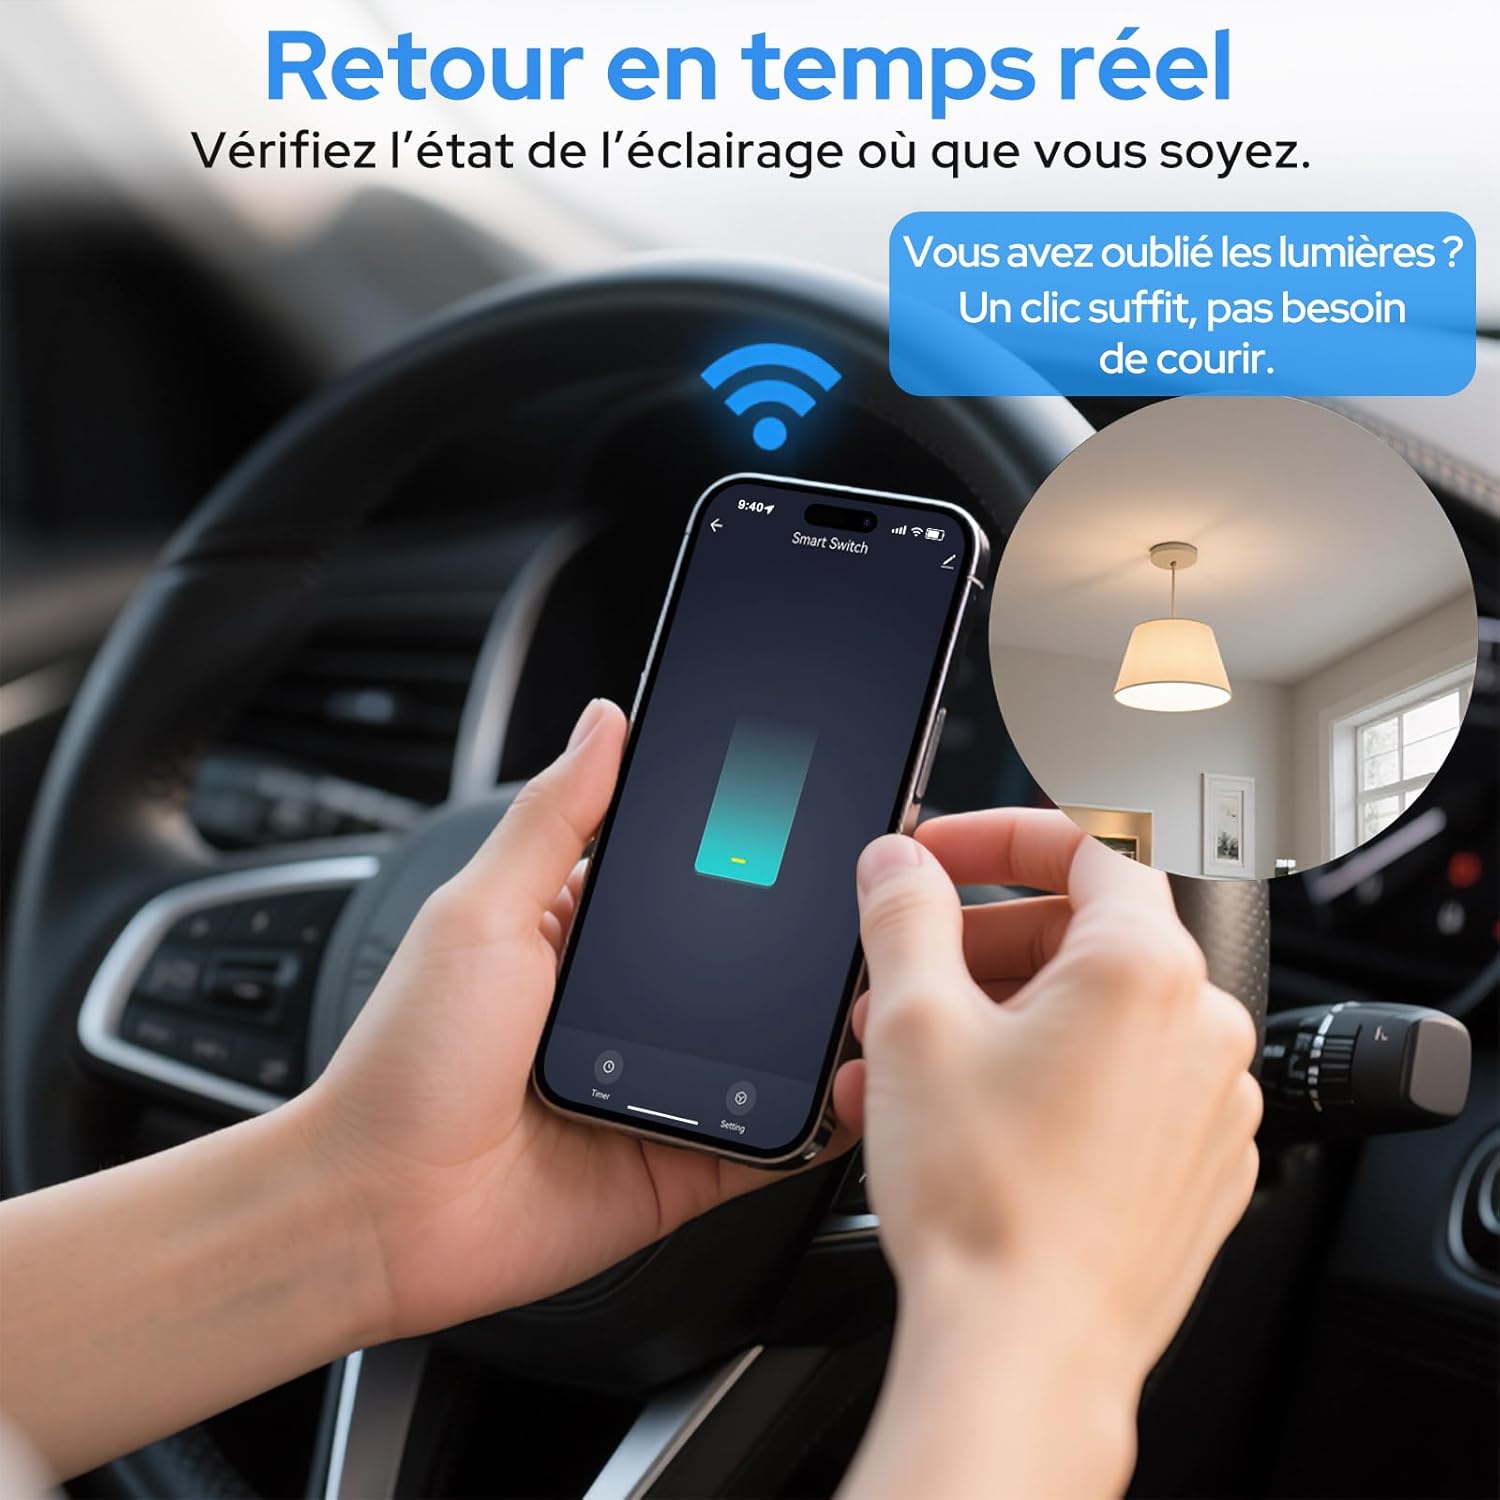
Image 6.2: Real-time status monitoring from anywhere.

Image 6.3: Device sharing feature for family members.
6.2. Valdymas balsu
The LoraTap Smart Relay Switch is compatible with Amazon Alexa and Google Assistant for convenient voice control.
- Susieti paskyrą: „Alexa“ arba „Google Home“ programėlėje susiekite savo „Smart Life“ / „Tuya“ paskyrą.
- Atraskite įrenginius: Paprašykite „Alexa“ arba „Google Assistant“ atrasti naujus įrenginius.
- Balso komandos: Use commands like "Alexa, turn on [device name]" or "Hey Google, turn off [device name]".

Image 6.4: Voice control integration with Amazon Alexa and Google Assistant.

Image 6.5: Family using voice commands for smart home control.
6.3. Planavimas ir laikmačiai
Automate your appliances by setting schedules and timers within the Smart Life/Tuya app.
- Laikmačio funkcija: Set a countdown timer for the switch to turn on or off automatically after a specified duration.
- Planavimas: Create daily or weekly schedules for your appliance to turn on or off at specific times (e.g., turn on lights at sunset, turn off at bedtime).
- Pakartojimo funkcija: Configure schedules to repeat on selected days of the week.

Image 6.6: Automate lighting with countdown timers.

Image 6.7: Program your lights with custom schedules.
6.4. Restart Status Settings
Configure the power-on state of your smart switch after a power outage.
- IŠJUNGTA: Įrenginys liks išjungtas, kai maitinimas bus atkurtas.
- ĮJUNGTA: The device will turn on automatically after power is restored.
- Prisiminti paskutinę būseną: The device will return to its last known state (on or off) before the power outage.

Image 6.8: Configure the device's restart status after a power interruption.
7. Priežiūra
- Prietaisą valykite minkštu, sausu skudurėliu. Nenaudokite stiprių cheminių medžiagų ar abrazyvinių valiklių.
- Ensure the device is kept in a dry environment and away from direct sunlight or extreme temperatures.
- Regularly check for firmware updates in the Smart Life/Tuya app to ensure optimal performance and security.
8. Problemų sprendimas
| Problema | Galima priežastis / sprendimas |
|---|---|
| Device not pairing / Indicator not blinking rapidly. |
|
| Įrenginys neprisijungęs prie interneto programėlėje. |
|
| Balso valdymas neveikia. |
|
| Device not responding to manual switch. |
|
9. Garantija ir palaikymas
LoraTap offers a 3-year warranty for this product. For technical support or warranty claims, please contact LoraTap customer service through their official websvetainėje arba mažmenininke, iš kurio įsigijote produktą.
Kontaktinė informacija: Please refer to the packaging or LoraTap's official websvetainę, kurioje rasite naujausią palaikymo kontaktinę informaciją.


