1. Įvadas
This manual provides essential information for the correct installation, use, and maintenance of your Cybex Gold Pallas S-Fix 2-in-1 child car seat. Designed for children approximately 9 months to 12 years old (9-36 kg), this seat offers versatility and advanced safety features. Please read these instructions carefully before using the car seat and keep them for future reference.

Image 1.1: The Cybex Gold Pallas S-Fix car seat with its adjustable impact shield.
2. Saugos informacija
Your child's safety is paramount. Always ensure the car seat is installed and used according to these instructions. Failure to do so can result in serious injury.
2.1. Pagrindinės saugos funkcijos
- One-Hand Depth-Adjustable Impact Shield: Reduces the risk of serious neck injuries without confining the child.
- Patentuota atlošiama galvos atrama: Prevents the child's head from falling forward while asleep, keeping it in the safety zone.
- Energiją sugeriantis apvalkalas: The flexible material structure of the shell absorbs the forces of an impact.
- Integrated Linear Side-Impact Protection (L.S.P. System): Extends towards the door, reducing the force of a side-impact collision by approximately 25%.

Image 2.1: Illustration of correct head positioning with the reclining headrest (right) versus incorrect positioning (left).
2.2. Svarbūs įspėjimai
- Niekada nepalikite savo vaiko be priežiūros automobilinėje kėdutėje.
- Ensure the car seat is always securely fastened, even when not in use.
- Nenaudokite automobilinės kėdutės, jei ji pateko į avariją, net jei nėra matomų pažeidimų.
- Naudokite tik originalius „Cybex“ priedus ir atsargines dalis.
- Always refer to your vehicle's owner's manual for information on child restraint installation.
3. Montavimas
The Pallas S-Fix car seat can be installed using the vehicle's ISOFIX connectors or the vehicle's 3-point seat belt.
3.1. ISOFIX Installation (Recommended)
- Locate the ISOFIX anchorage points in your vehicle. These are usually found between the seat back and seat cushion.
- Extend the ISOFIX connectors on the car seat base by pressing the release buttons (refer to Image 3.1).
- Align the ISOFIX connectors with the vehicle's anchorage points and push until they click securely into place. Green indicators will confirm correct engagement.
- Tvirtai prispauskite automobilio kėdutę prie automobilio sėdynės atlošo, kad ji tvirtai laikytųsi.
- For Group 1 (9-18 kg), secure the child with the impact shield and the vehicle's 3-point seat belt. For Group 2/3 (15-36 kg), secure the child directly with the vehicle's 3-point seat belt.

Image 3.1: ISOFIX connectors extended from the car seat base.
3.2. Seat Belt Installation (Without ISOFIX)
- Place the car seat firmly on the vehicle's seat.
- For Group 1 (9-18 kg), position the impact shield in front of the child. Route the vehicle's 3-point seat belt over the impact shield and through the designated belt guides. Ensure the belt is taut and not twisted.
- For Group 2/3 (15-36 kg), remove the impact shield. Place the child in the seat and route the vehicle's 3-point seat belt through the red belt guides on the headrest and seat. Ensure the lap belt is low over the child's hips and the shoulder belt crosses the shoulder, not the neck.
- Always ensure the vehicle's seat belt is securely buckled and tightened.
4. Naudojimo instrukcijos
4.1. Galvos atramos reguliavimas
The 12-position adjustable headrest allows the seat to grow with your child, ensuring optimal head and neck support at every stage.
- Raskite reguliavimo rankenėlę galvos atramos gale.
- Squeeze the handle and move the headrest up or down to the desired height.
- Release the handle to lock the headrest in position. Ensure the headrest is adjusted so that the child's shoulders are comfortably below the headrest's lowest point, and their head is well-supported.

Image 4.1: Vertical adjustment of the headrest.
4.2. Atlošo funkcija
The car seat features a reclining function for enhanced comfort, especially during longer journeys.
- Locate the recline adjustment lever, typically at the front base of the seat.
- Pull the lever and gently tilt the seat back to the desired recline position.
- Atleiskite svirtį, kad užsifiksuotumėte sėdynėje.
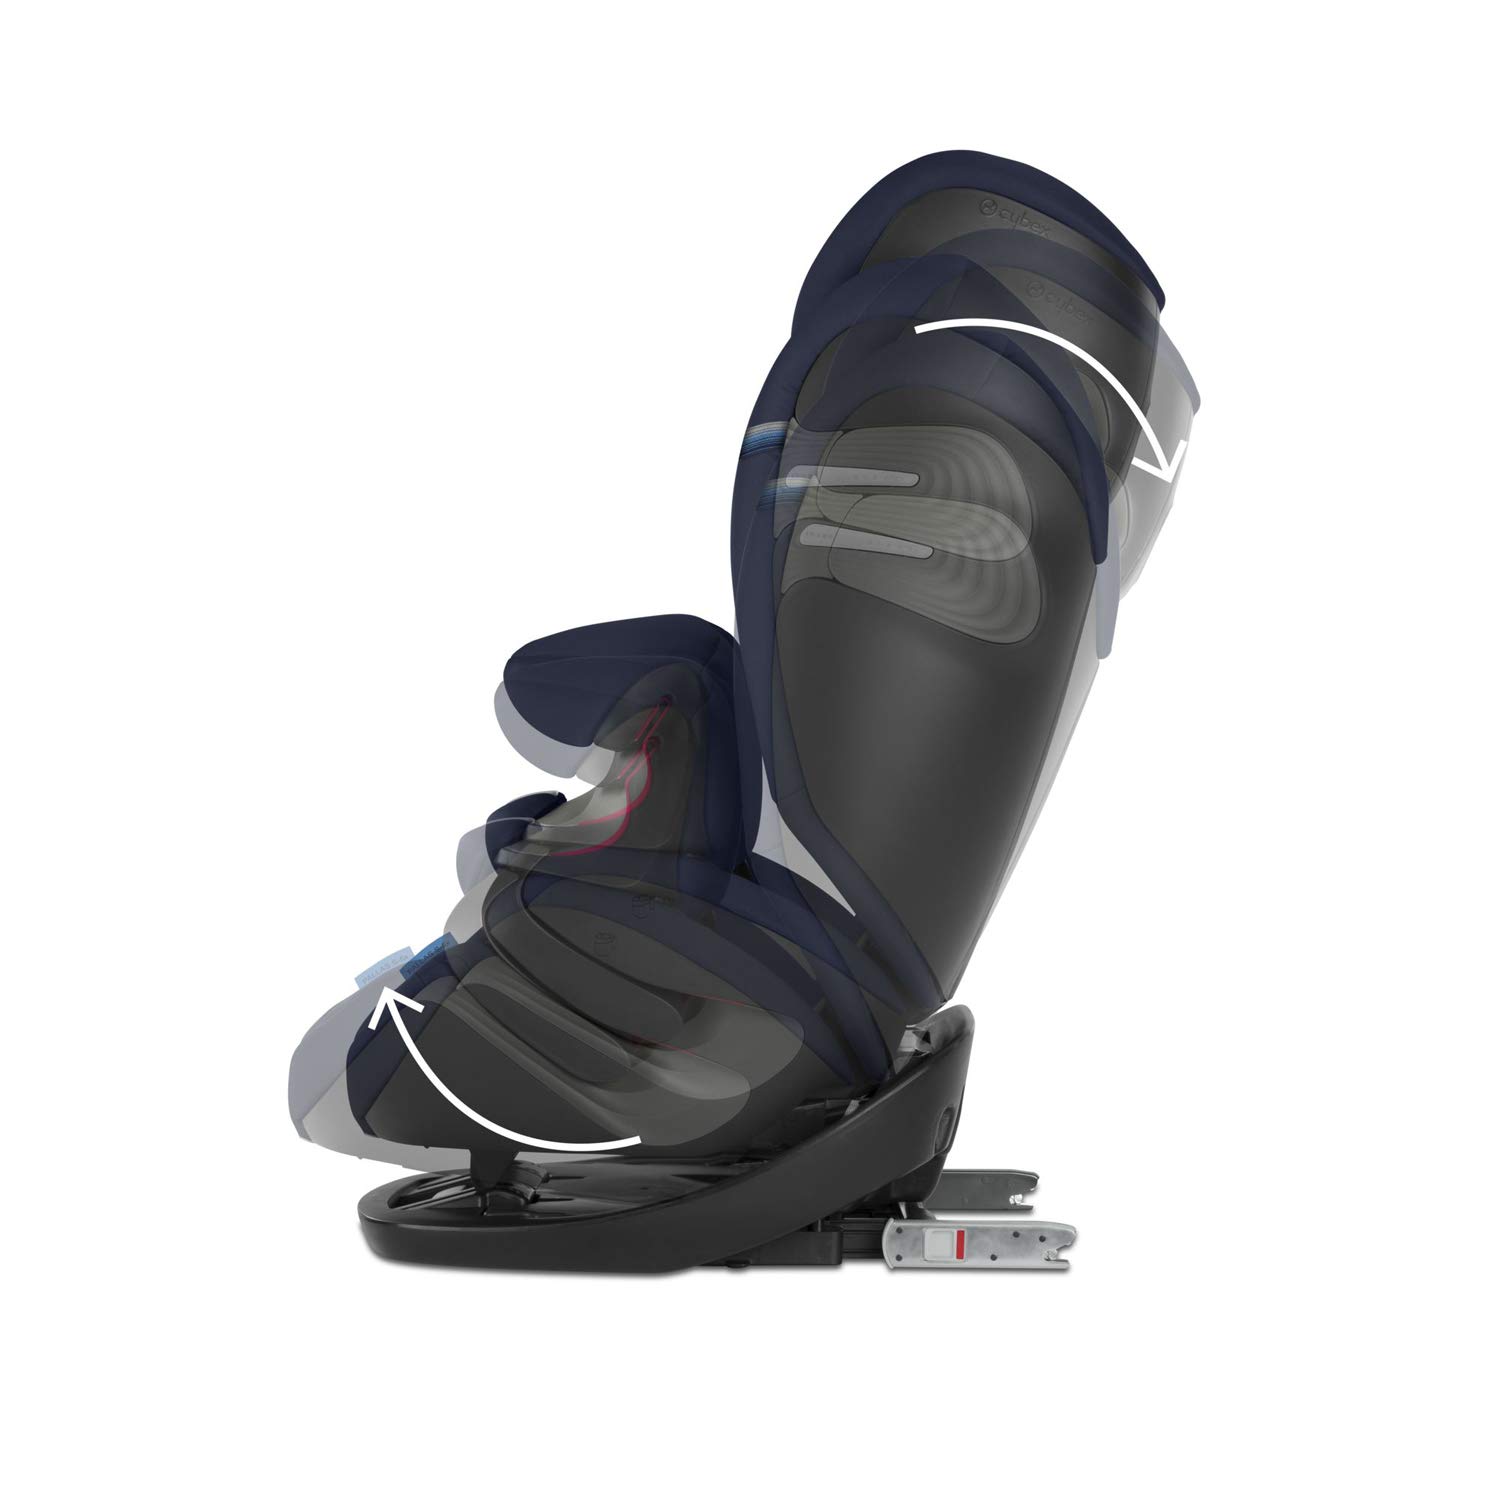
Image 4.2: The car seat in a reclined position.
4.3. Impact Shield Usage (Group 1: 9-18 kg)
The impact shield is a crucial safety component for younger children (Group 1). It acts like an airbag, distributing impact forces over a larger area.
- Įdėkite vaiką į automobilio kėdutę.
- Position the impact shield in front of the child, ensuring it rests snugly against their torso.
- Route the vehicle's 3-point seat belt over the impact shield and through the designated belt guides on the shield.
- Buckle and tighten the seat belt, ensuring the impact shield is held firmly in place.

Image 4.3: Child secured with the impact shield.
4.4. Converting to Solution S-Fix (Group 2/3: 15-36 kg)
For children from approximately 3 years old (15 kg), the Pallas S-Fix can be converted into a high-back booster seat (Solution S-Fix) by removing the impact shield and base.
- Ensure the child meets the minimum weight and age requirements for Group 2/3.
- Remove the impact shield from the car seat.
- Detach the car seat backrest from the base. The backrest then functions as a standalone booster seat.
- Secure the child directly with the vehicle's 3-point seat belt, routing it through the red belt guides on the headrest and seat.

Image 4.4: Conversion process from Pallas S-Fix to Solution S-Fix.
5. Priežiūra
5.1. Valymo instrukcijos
- The fabric covers are removable and machine washable at 30°C on a delicate cycle. Refer to the care label on the fabric for specific instructions.
- Do not tumble dry, iron, or dry clean the covers.
- Plastic parts can be cleaned with a mild detergent and warm water. Do not use harsh cleaning agents or solvents.
- The harness straps should be wiped clean with a damp cloth. Do not remove or wash the harness straps, as this may affect their integrity.
5.2. Sandėliavimas
Kai nenaudojate, laikykite automobilinę kėdutę švarioje, sausoje vietoje, apsaugotoje nuo tiesioginių saulės spindulių ir ekstremalių temperatūrų.
6. Problemų sprendimas
If you encounter issues with your Cybex Gold Pallas S-Fix car seat, please review šie dažni rūpesčiai:
- Automobilio sėdynė po montavimo atrodo laisva: Ensure ISOFIX connectors are fully engaged (green indicators visible) or that the vehicle's seat belt is pulled taut and correctly routed through all guides. Push the seat firmly into the vehicle's seat back.
- Headrest or recline not adjusting: Check for any obstructions. Ensure the adjustment levers are fully engaged when attempting to move the components. Do not force adjustments.
- Child uncomfortable with impact shield: Ensure the impact shield is adjusted to the correct depth for your child. It should be snug but not restrictive. Verify the child meets the minimum weight and height requirements for using the impact shield.
- Difficulty with belt routing: Double-check the belt path diagrams in this manual and on the car seat itself. Ensure the belt is not twisted and lies flat.
Jei problema išlieka, susisiekite su „Cybex“ klientų aptarnavimo tarnyba.
7. Specifikacijos

7.1 pav.: Gaminio matmenys.
| Funkcija | Detalė |
|---|---|
| Modelio numeris | 520000557 |
| Tikslinė lytis | Unisex |
| Minimalaus svorio rekomendacija | 9 kilogramo |
| Didžiausio svorio rekomendacija | 36 kilogramo |
| Rekomenduojamas amžiaus intervalas | Nuo 9 mėnesių iki 12 metų |
| Medžiaga | Poliesteris |
| Priežiūros instrukcijos | Machine Washable (covers) |
| Diegimo tipas | ISOFIX or Vehicle Seat Belt |
| Orientacija | Susidūrimas į priekį |
| Gaminio matmenys (IxPxH) | 43 x 50 x 68.5 cm |
| Prekės svoris | 9.5 kg |
| Papildomos funkcijos | 12-Position Adjustable Headrest, 2-in-1 Convertible, Built-in Side Impact Protection, Removable Cover |

Image 7.2: Independent test results for the Pallas S-Fix.
8. Garantija ir palaikymas
Cybex products are manufactured to the highest quality standards. For information regarding warranty coverage, terms, and conditions, please refer to the warranty card included with your product or visit the official Cybex websvetainę.
For customer support, spare parts, or further assistance, please contact your local Cybex retailer or the Cybex customer service department. Contact details can typically be found on the Cybex websvetainėje arba produkto pakuotėje.


