1. Įvadas
This manual provides detailed instructions for the installation and care of your STINGER Polaris RZR SPXRZRDASH2 3-inch Aftermarket Multimedia Dash Kit. This kit is designed to integrate a 3-inch gauge-style radio into selected 2019+ Polaris RZR models, providing a factory-like appearance and secure mounting.
Svarbi pastaba: This dash kit is not compatible with Polaris RZR models equipped with TURBO S or Ride Command. It is also not compatible with Pro XP models. The radio itself is not included with this dash kit.
2. Produktas baigtasview
The STINGER SPXRZRDASH2 is constructed from thick, fade-free ASA plastic, engineered to withstand various weather conditions, impacts, and scratches. It allows for the seamless installation of popular 3-inch gauge-style radio platforms without requiring vehicle modifications.
2.1. Pakuotės turinys
- STINGER SPXRZRDASH2 3-inch Aftermarket Multimedia Dash Kit
- Installation Hardware (if applicable, not explicitly listed but implied by "easy to install")
- Note: Multimedia radio is not included.
2.2. Suderinamos transporto priemonės
- 2019+ Polaris RZR XP1000
- 2019+ XP Turbo (Note: Not compatible with TURBO S or Ride Command models)
3. Montavimo instrukcijos
Installation of the STINGER SPXRZRDASH2 dash kit is designed to be straightforward, typically taking less than 30 minutes. No vehicle modifications are required.
3.1. Reikalingi įrankiai
- Hex key set (Allen wrenches)
- Basic hand tools for panel removal (e.g., panel removal tool, screwdriver)
3.2. Žingsnis po žingsnio diegimas
- Paruoškite transporto priemonę: Ensure the vehicle is turned off and the parking brake is engaged. Disconnect the battery's negative terminal for safety.
- Remove Existing Dash Panel: Carefully locate and remove the screws or clips securing the factory dash panel where the multimedia unit will be installed. Use appropriate tools to avoid damaging the plastic.
- Install the Dash Kit: Position the STINGER SPXRZRDASH2 dash kit into the opening. Ensure all mounting points align correctly.
- Secure the Dash Kit: Use the provided hardware (or original hardware if specified) to secure the dash kit in place. Tighten screws firmly but do not overtighten to prevent stripping.
- Install Multimedia Unit: Follow the manufacturer's instructions for your 3-inch gauge-style multimedia radio to install it into the newly mounted dash kit.
- Prijunkite iš naujo ir patikrinkite: Reconnect the vehicle battery. Turn on the vehicle and test the functionality of the newly installed multimedia unit and ensure all dash components are secure.

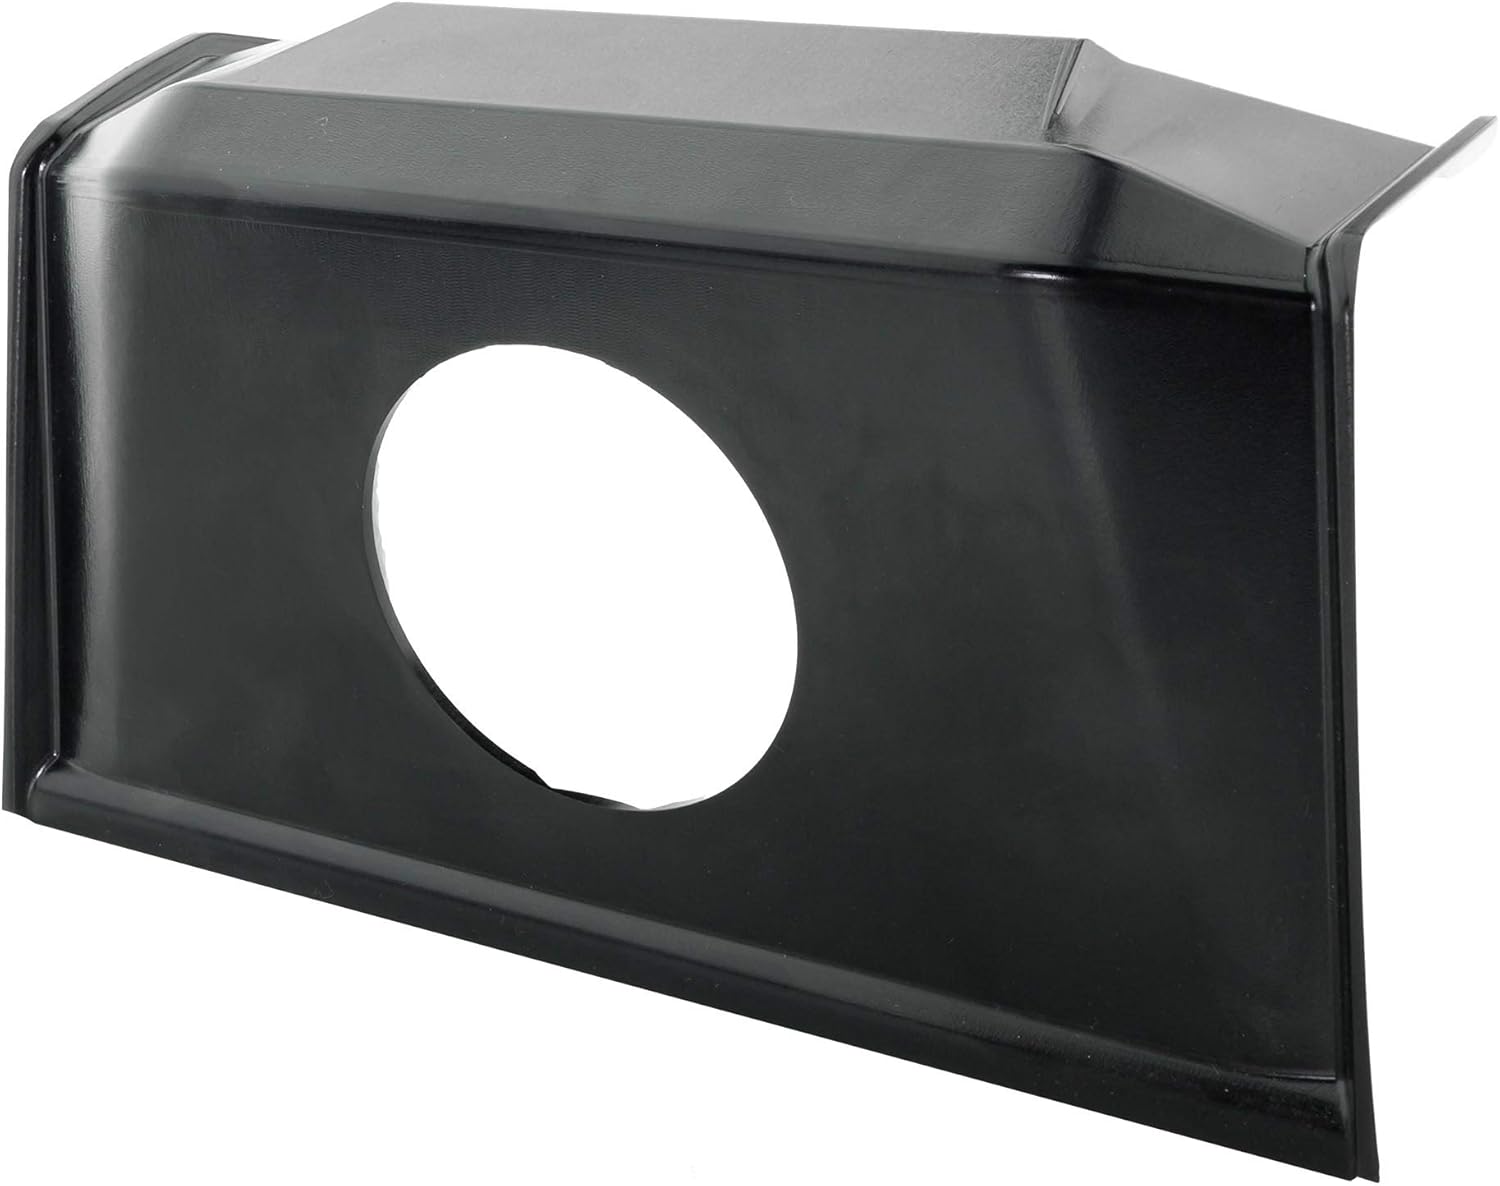
1 pav.: priekis view of the STINGER SPXRZRDASH2 3-inch Aftermarket Multimedia Dash Kit. This image shows the main component with the circular opening for the multimedia unit.
2 pav.: Kampinis view of the STINGER SPXRZRDASH2 Dash Kit, highlighting its contours and mounting points.

3 pav.: šonas view of the STINGER SPXRZRDASH2 Dash Kit, showing its depth and structural design.

Figure 4: The STINGER SPXRZRDASH2 Dash Kit with a compatible multimedia unit installed, demonstrating the integrated appearance. Note: Multimedia unit is for illustration only and not included.

5 pav.: Kampinis view of the STINGER SPXRZRDASH2 Dash Kit with a multimedia unit installed, showcasing the flush fit and factory-like integration. Note: Multimedia unit is for illustration only and not included.
4. Operacija
The STINGER SPXRZRDASH2 is a mounting kit and does not have operational functions itself. Its purpose is to securely house a 3-inch gauge-style multimedia radio. Refer to the instruction manual provided with your specific multimedia radio for operational details.
5. Priežiūra ir priežiūra
To ensure the longevity and appearance of your dash kit, follow these maintenance guidelines:
- Valymas: Wipe the dash kit with a soft, damp cloth. Avoid abrasive cleaners or solvents, as these can damage the ASA plastic.
- Patikra: Periodically check the mounting screws to ensure they remain tight. Vibrations from vehicle operation can sometimes loosen fasteners.
- Apsauga: While the ASA plastic is fade-resistant, prolonged exposure to extreme UV radiation can still affect its finish over many years. Consider using a UV protectant spray designed for automotive plastics if desired.
6. Problemų sprendimas
This section addresses common issues related to the dash kit itself. For issues with the multimedia radio, refer to its specific manual.
- Laisvas kirpimas: If the dash kit feels loose after installation, re-check all mounting screws and ensure they are properly tightened. Verify that the kit is correctly seated in the dash opening.
- Gap Around Radio: If there is an unexpected gap between the dash kit and the multimedia radio, ensure the radio is fully seated and secured according to its own installation instructions. Confirm that the radio is a compatible 3-inch gauge-style unit.
- Dash Kit Does Not Fit: Double-check your vehicle's make, model, and year against the compatibility list in Section 2.2. Ensure your RZR is not a TURBO S, Ride Command, or Pro XP model, as these are not compatible.
7. Specifikacijos
| Funkcija | Detalė |
|---|---|
| Prekės ženklas | STINGER |
| Modelio numeris | SPXRZRDASH2 |
| Medžiaga | ASA Plastic (Thick, fade-free) |
| Suderinamumas | 2019+ Polaris RZR XP1000, 2019+ XP Turbo (Excludes TURBO S, Ride Command, and Pro XP models) |
| Radio Size Compatibility | 3-inch Gauge Style Radio Platforms |
| Diegimo laikas | Maždaug 30 minučių |
| Vehicle Modification Required | Nėra |
| Prekės svoris | 10.8 uncijos |
| Pakuotės matmenys | 12.87 x 10.24 x 6.69 colio |
8. Garantija ir palaikymas
For warranty information and technical support regarding your STINGER SPXRZRDASH2 Dash Kit, please refer to the official STINGER websvetainėje arba susisiekite tiesiogiai su jų klientų aptarnavimo tarnyba. Išsaugokite pirkimo kvitą kaip pirkimo įrodymą bet kokiems garantiniams prašymams.
STINGER Official Websvetainė: Visit the STINGER Store on Amazon


