1. Svarbios saugos instrukcijos
Prieš montuodami ir naudodami atidžiai perskaitykite visas instrukcijas. Išsaugokite šį vadovą ateičiai.
Bendra sauga
- Prieš montuodami, atlikdami techninę priežiūrą ar valymą, įsitikinkite, kad maitinimo šaltinis yra atjungtas.
- Šis prietaisas nėra skirtas naudoti asmenims (įskaitant vaikus), kurių fizinės, jutimo ar psichikos negalios arba neturintys patirties ir žinių, nebent už jų saugumą atsakingas asmuo juos prižiūrėtų arba instruktuotų, kaip naudoti prietaisą.
- Vaikus reikia prižiūrėti, kad jie nežaistų su prietaisu.
Elektros sauga
- All electrical connections must be made by a qualified electrician and conform to local codes and regulations.
- Įsitikinkite, kad ttage and frequency of your power supply match the specifications of the fan.
- The fan must be properly grounded to prevent electric shock.
Montavimo sauga
- Mount the fan to a ceiling structure capable of supporting a minimum of 15 kg (33 lbs).
- Ensure there is adequate clearance between the fan blades and any obstacles (walls, furniture) and the floor. A minimum distance of 2.3 meters (7.5 feet) from the floor to the blades is recommended.
- Do not install the fan in a location where it can be easily reached by children or pets.
2. Produktas baigtasview
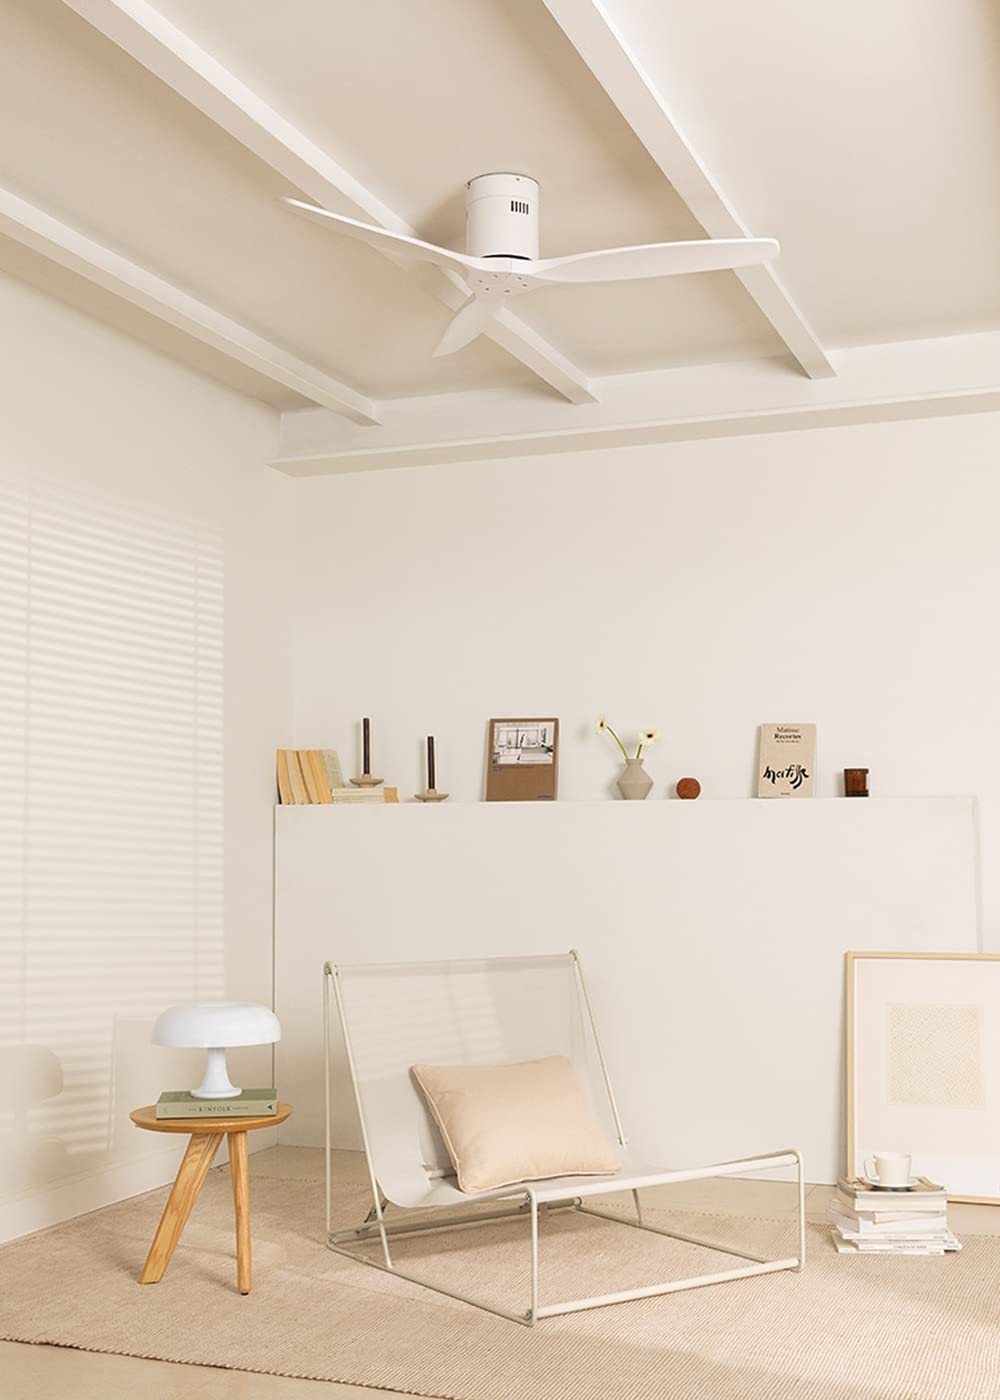
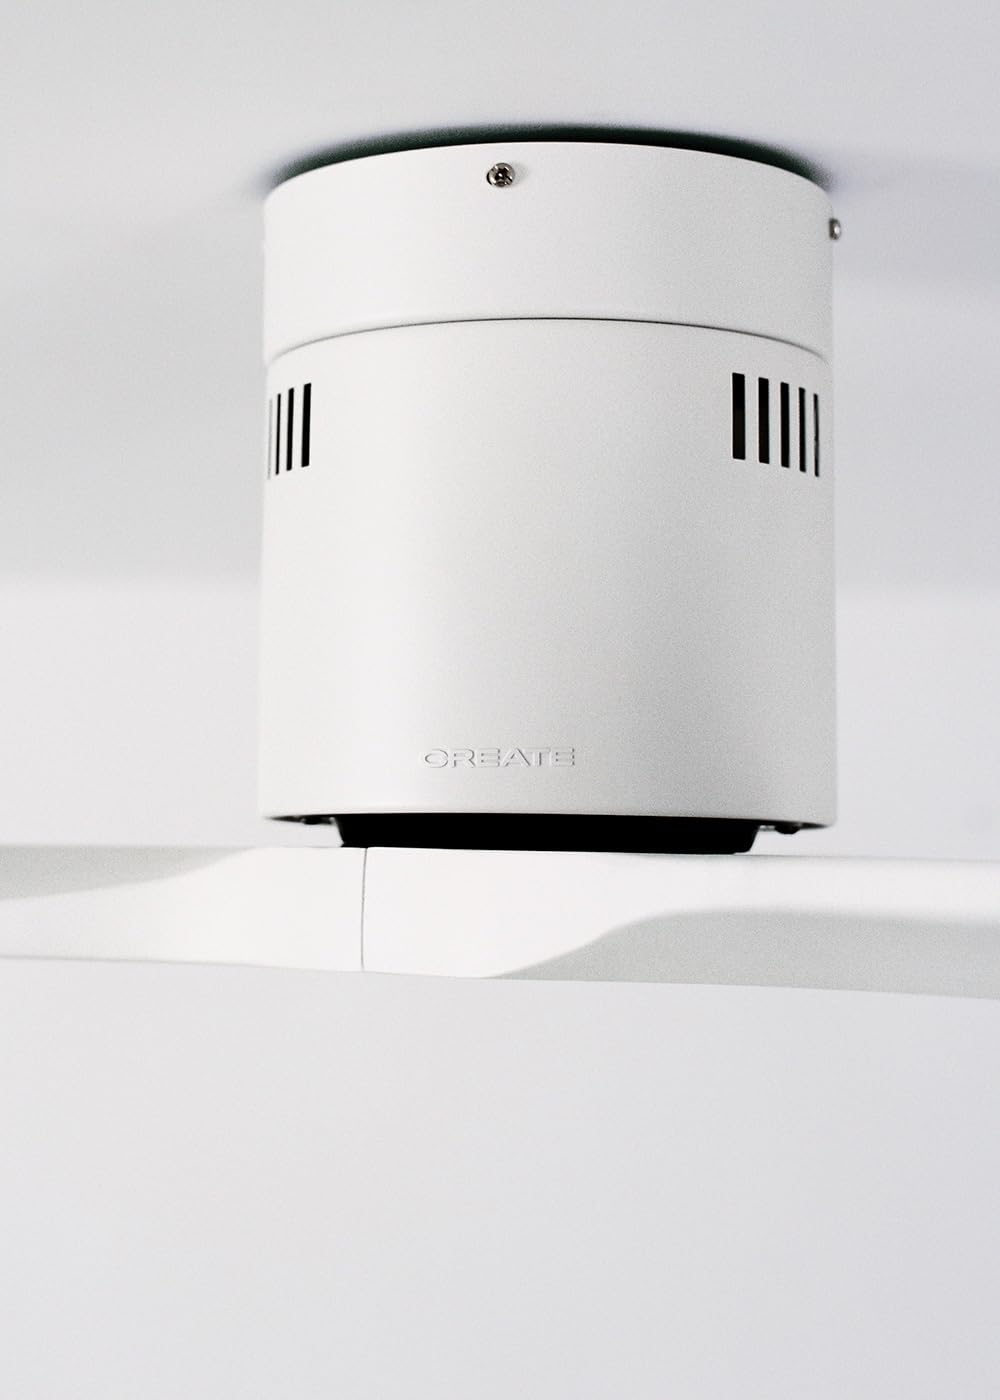
The CREATE WINDCALM DC Ceiling Fan is designed for efficient and quiet air circulation in various indoor spaces. It features a durable aluminum body, a silent DC motor, and three lightweight blades, ensuring minimal noise operation. The fan offers 6 adjustable speeds and a programmable timer for convenience.

3. Techninės specifikacijos
| Funkcija | Specifikacija |
|---|---|
| Prekės ženklas | KURTI |
| Modelio numeris | 43479_88375 |
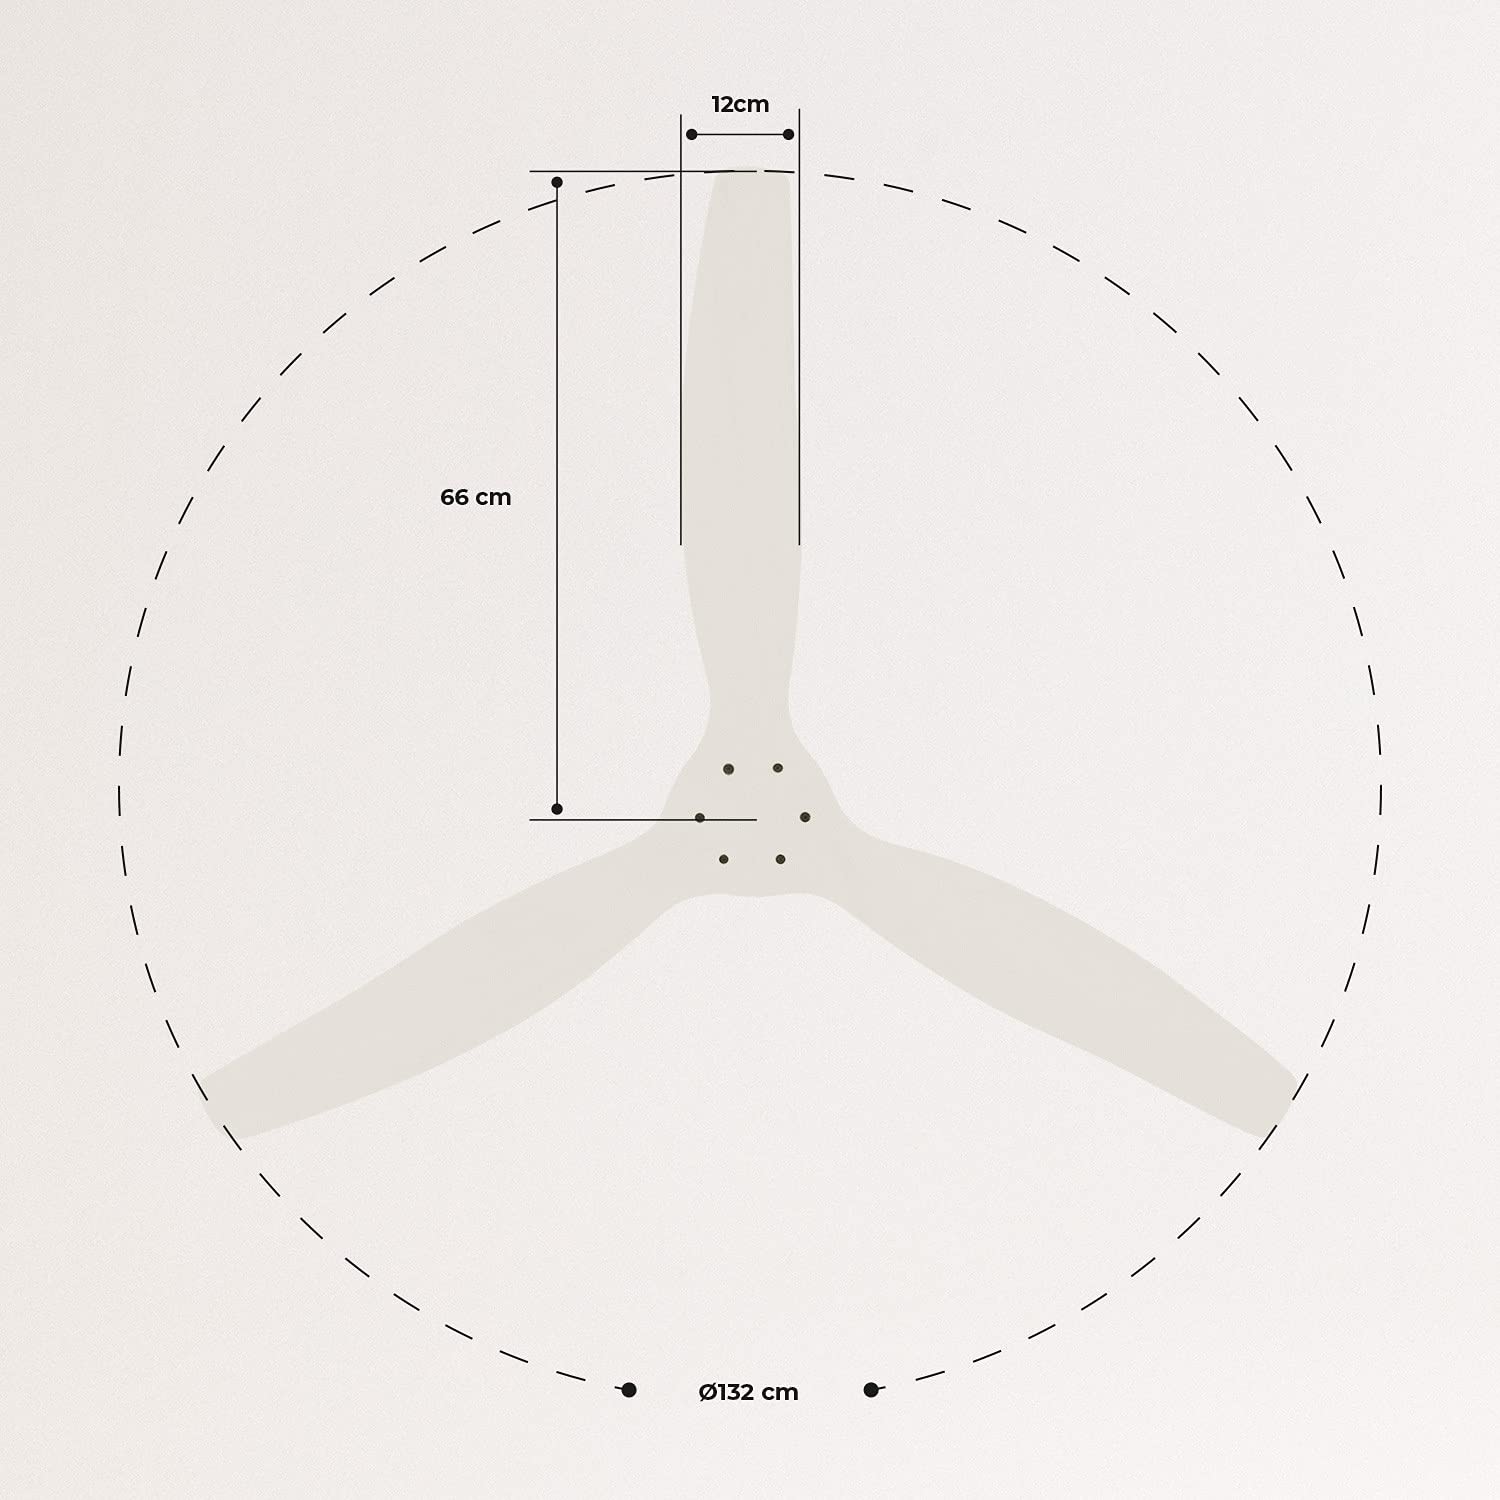
| Matmenys (I x P x A) | 132 x 132 x 29 cm |
| Svoris | 6.38 kg |
| Ventiliatoriaus dizainas | Lubinis ventiliatorius |
| Maitinimo šaltinis | Elektros kabelis |
| Ypatinga funkcija | High Speed, Silent DC Motor, Timer, Summer/Winter Function |
| Rekomenduojamas naudojimas | Vėdinimas |
| Kambario tipas | Living Room (suitable for 13m² to 25m² rooms) |
| Spalva | White Blades |

4. Diegimo vadovas
Proper installation is crucial for the safe and efficient operation of your ceiling fan. It is highly recommended that installation be performed by a qualified electrician.
Patikrinimai prieš montavimą
- Išpakuokite visus komponentus ir patikrinkite juos pagal pakavimo sąrašą.
- Ensure the ceiling joist or support structure is strong enough to hold the fan's weight.
- Prieš pradėdami bet kokius elektros darbus, išjunkite maitinimą pagrindiniu grandinės pertraukikliu.
Ventiliatoriaus montavimas
- Secure the mounting bracket to the ceiling outlet box using appropriate screws and washers.
- Atsargiai pakelkite ventiliatoriaus variklio mazgą ir pritvirtinkite jį prie tvirtinimo laikiklio.
Laidų jungtys
Connect the electrical wires according to the wiring diagram provided in the separate detailed installation manual (not included in this general overview). Ensure all connections are secure and insulated.
Peilių tvirtinimas
Attach the fan blades to the motor hub using the provided screws. Ensure all screws are tightened securely.

5. Naudojimo instrukcijos
Your CREATE WINDCALM DC Ceiling Fan comes with a remote control for convenient operation of all its functions.
Nuotolinio valdymo pulto funkcijos
Nuotolinio valdymo pultas leidžia:
- Maitinimo įjungimas/išjungimas: Įjunkite arba išjunkite ventiliatorių.
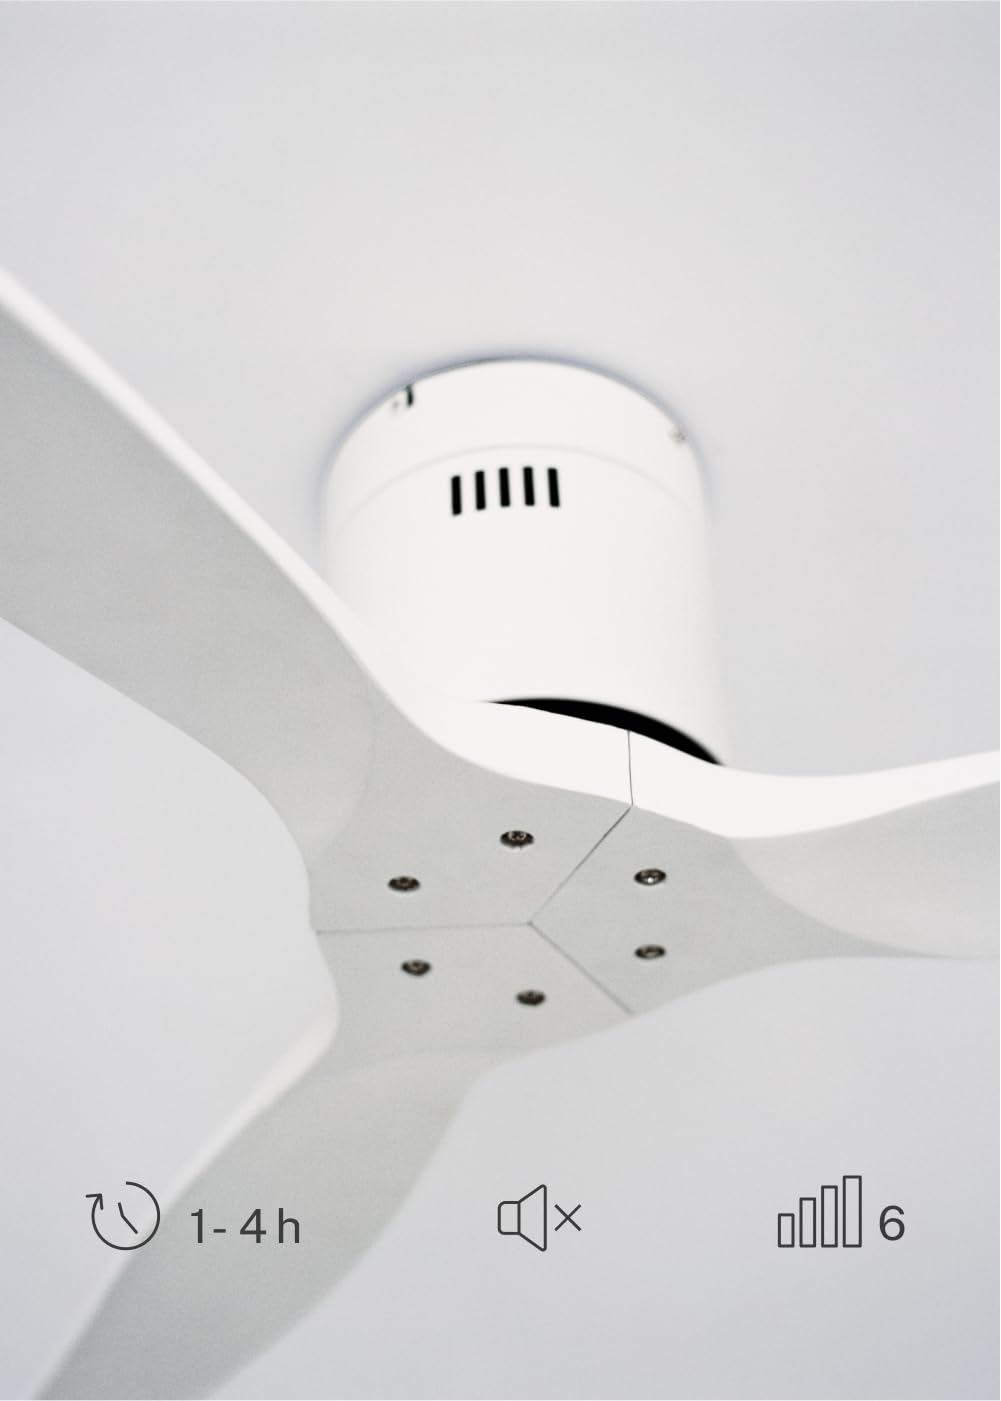
- Greičio reguliavimas: Select from 6 different fan speeds to control airflow intensity.
- Laikmačio nustatymas: Program the fan to automatically turn off after 1, 2, or 4 hours.
- Vasaros / žiemos režimas: Keiskite menčių sukimosi kryptį, kad optimizuotumėte oro cirkuliaciją skirtingais metų laikais.
Vasaros režimas
In summer mode, the fan blades rotate counter-clockwise, pushing air downwards. This creates a cooling breeze effect, helping to dissipate heat and refresh the room.

Žiemos režimas
In winter mode, the fan blades rotate clockwise, drawing air upwards. This helps to circulate warm air that accumulates near the ceiling, distributing it evenly throughout the room and improving heating efficiency.
6. Priežiūra ir priežiūra
Reguliarus lubų ventiliatoriaus remontas užtikrina jo ilgaamžiškumą ir optimalų veikimą.
Valymas
- Prieš valydami visada išjunkite ventiliatoriaus maitinimą grandinės pertraukikliu.
- Naudokite minkštą, damp Šluoste nuvalykite ventiliatoriaus mentes ir variklio korpusą. Nenaudokite abrazyvinių valiklių ar tirpiklių, nes jie gali pažeisti apdailą.
- Prieš vėl įjungdami maitinimą, įsitikinkite, kad ventiliatorius yra visiškai sausas.
Reguliarūs patikrinimai
- Periodically check all screws and fasteners on the mounting bracket and blade attachments to ensure they are secure. Tighten if necessary.
- Listen for any unusual noises during operation, which may indicate a loose part or an issue with the motor.
7. Problemų sprendimas
If you encounter any issues with your fan, refer to the following common problems and their solutions:
| Problema | Galima priežastis | Sprendimas |
|---|---|---|
| Ventiliatorius neįsijungia | Nėra maitinimo Atsipalaidavusi laidų jungtis Nuotolinio valdymo pulto baterija senka | Patikrinkite grandinės pertraukiklį ir sieninį jungiklį Verify all wiring connections are secure (consult electrician) Pakeiskite nuotolinio valdymo pulto baterijas |
| Ventiliatorius kelia per didelį triukšmą | Loose screws on blades or mounting Išlenktas peiliukas Variklio problema | Priveržkite visus varžtus Check blades for damage and replace if necessary Susisiekite su klientų aptarnavimo tarnyba |
| Nuotolinio valdymo pultas neveikia | Išsikrovė baterija Kliūtis tarp nuotolinio valdymo pulto ir imtuvo Remote not paired (if applicable) | Pakeiskite baterijas Užtikrinkite aiškią matomumo liniją Refer to detailed manual for pairing instructions |
| Ventiliatoriaus virpėjimas | Atsilaisvinęs tvirtinimo kronšteinas Nesubalansuoti peiliai | Įsitikinkite, kad tvirtinimo laikiklis yra tvirtai pritvirtintas Check blade balance and use balancing kit if needed |
8. Garantija ir palaikymas
For warranty information, technical support, or replacement parts, please contact CREATE customer service. Keep your purchase receipt as proof of purchase.
You can find more information and contact details on the official CREATE websvetainė: www.create-store.com


