1. Įvadas
Ačiū, kad pirkoteasing the HOMPOW Mini Projector. This projector is designed to provide a high-quality viewing experience with its 1080P Full HD support and 6500 lumens brightness. It includes a 100-inch projection screen for immediate use. This manual will guide you through the setup, operation, and maintenance of your new projector.
Pakuotės turinys
- HOMPOW Mini Projector
- 100-inch Projection Screen
- Nuotolinio valdymo pultas
- HDMI kabelis
- Maitinimo adapteris
- Vartotojo vadovas
2. Saugos instrukcijos
Please read all safety instructions carefully before using the projector. Failure to follow these instructions may result in fire, electric shock, or other injuries.
- Nežiūrėkite tiesiai į projektoriaus objektyvą, kai lamp įjungtas. Ryški šviesa gali pažeisti akis.
- Neužblokuokite ventiliacijos angų. Tinkamas oro srautas yra būtinas norint išvengti perkaitimo.
- Projektorių laikykite atokiai nuo vandens ar kitų skysčių. Nenaudokite drėgnoje aplinkoje.
- Padėkite projektorių ant stabilaus, lygaus paviršiaus, kad jis nenukristų.
- Naudokite tik prie projektoriaus pridėtą maitinimo adapterį.
- Atjunkite projektorių nuo elektros tinklo žaibuojant arba kai jis ilgą laiką nenaudojamas.
- Nebandykite patys taisyti projektoriaus. Visus techninės priežiūros darbus patikėkite kvalifikuotiems specialistams.
3. Produktas baigtasview
Projektoriaus komponentai
Familiarize yourself with the main parts of your HOMPOW Mini Projector.


Įvesties/išvesties prievadai
- HDMI prievadas: Connect to devices like laptops, gaming consoles (PS3/PS4), Fire TV Stick, and TV boxes.
- USB prievadas: Connect USB drives for media playback or power for streaming devices.
- SD kortelės lizdas: Insert SD cards for direct media playback.
- AV prievadas: Prijunkite prie senesnių įrenginių naudodami AV kabelį.
- VGA prievadas: Prijunkite prie kompiuterių su VGA išvestimi.
- Garso išvestis (3.5 mm lizdas): Prijunkite išorinius garsiakalbius arba ausines.
- DC įvestis: Projektoriaus maitinimo įvestis.
4. Sąranka
Pradinis išdėstymas
Place the projector on a stable surface. For optimal viewing, ensure the projector is positioned directly in front of the projection surface (wall or screen). The recommended projection distance is approximately 3 meters for a clear image.
Maitinimo prijungimas
- Connect the power adapter to the DC In port on the projector.
- Įjunkite maitinimo adapterį į maitinimo lizdą.
- Paspauskite projektoriaus arba nuotolinio valdymo pulto maitinimo mygtuką, kad jį įjungtumėte.
Įrenginių prijungimas
The projector supports various input sources. Below are common connection methods:
HDMI Connection (e.g., Fire TV Stick, Laptop, Gaming Console)
- Connect the HDMI output cable from your device (e.g., Fire TV Stick) to the HDMI input port on the projector.
- If using a streaming stick like Fire TV Stick, connect its USB power cable to the projector's USB port for power.
- On the projector's main menu, select the "HDMI" input source.
Smartphone/Tablet Connection
To connect a smartphone or tablet, an HDMI conversion adapter (not included) is required. Connect your device to the adapter, then connect the adapter to the projector's HDMI port.

USB Drive/SD Card Playback
Insert a USB drive into the USB port or an SD card into the SD card slot. Select the corresponding input source from the main menu to browse and play media files.
5. Naudojimo instrukcijos
Fokuso reguliavimas
Rotate the focus ring on the projector lens until the image appears clear and sharp on the screen.
Keystone Korekcija
The projector features a ±15-degree keystone correction function. Adjust the keystone dial to correct distorted images (trapezoidal shape) if the projector is not perfectly perpendicular to the screen.
Šaltinio pasirinkimas
Use the remote control or the buttons on the projector to navigate the main menu and select your desired input source (HDMI, USB, SD, AV, VGA).
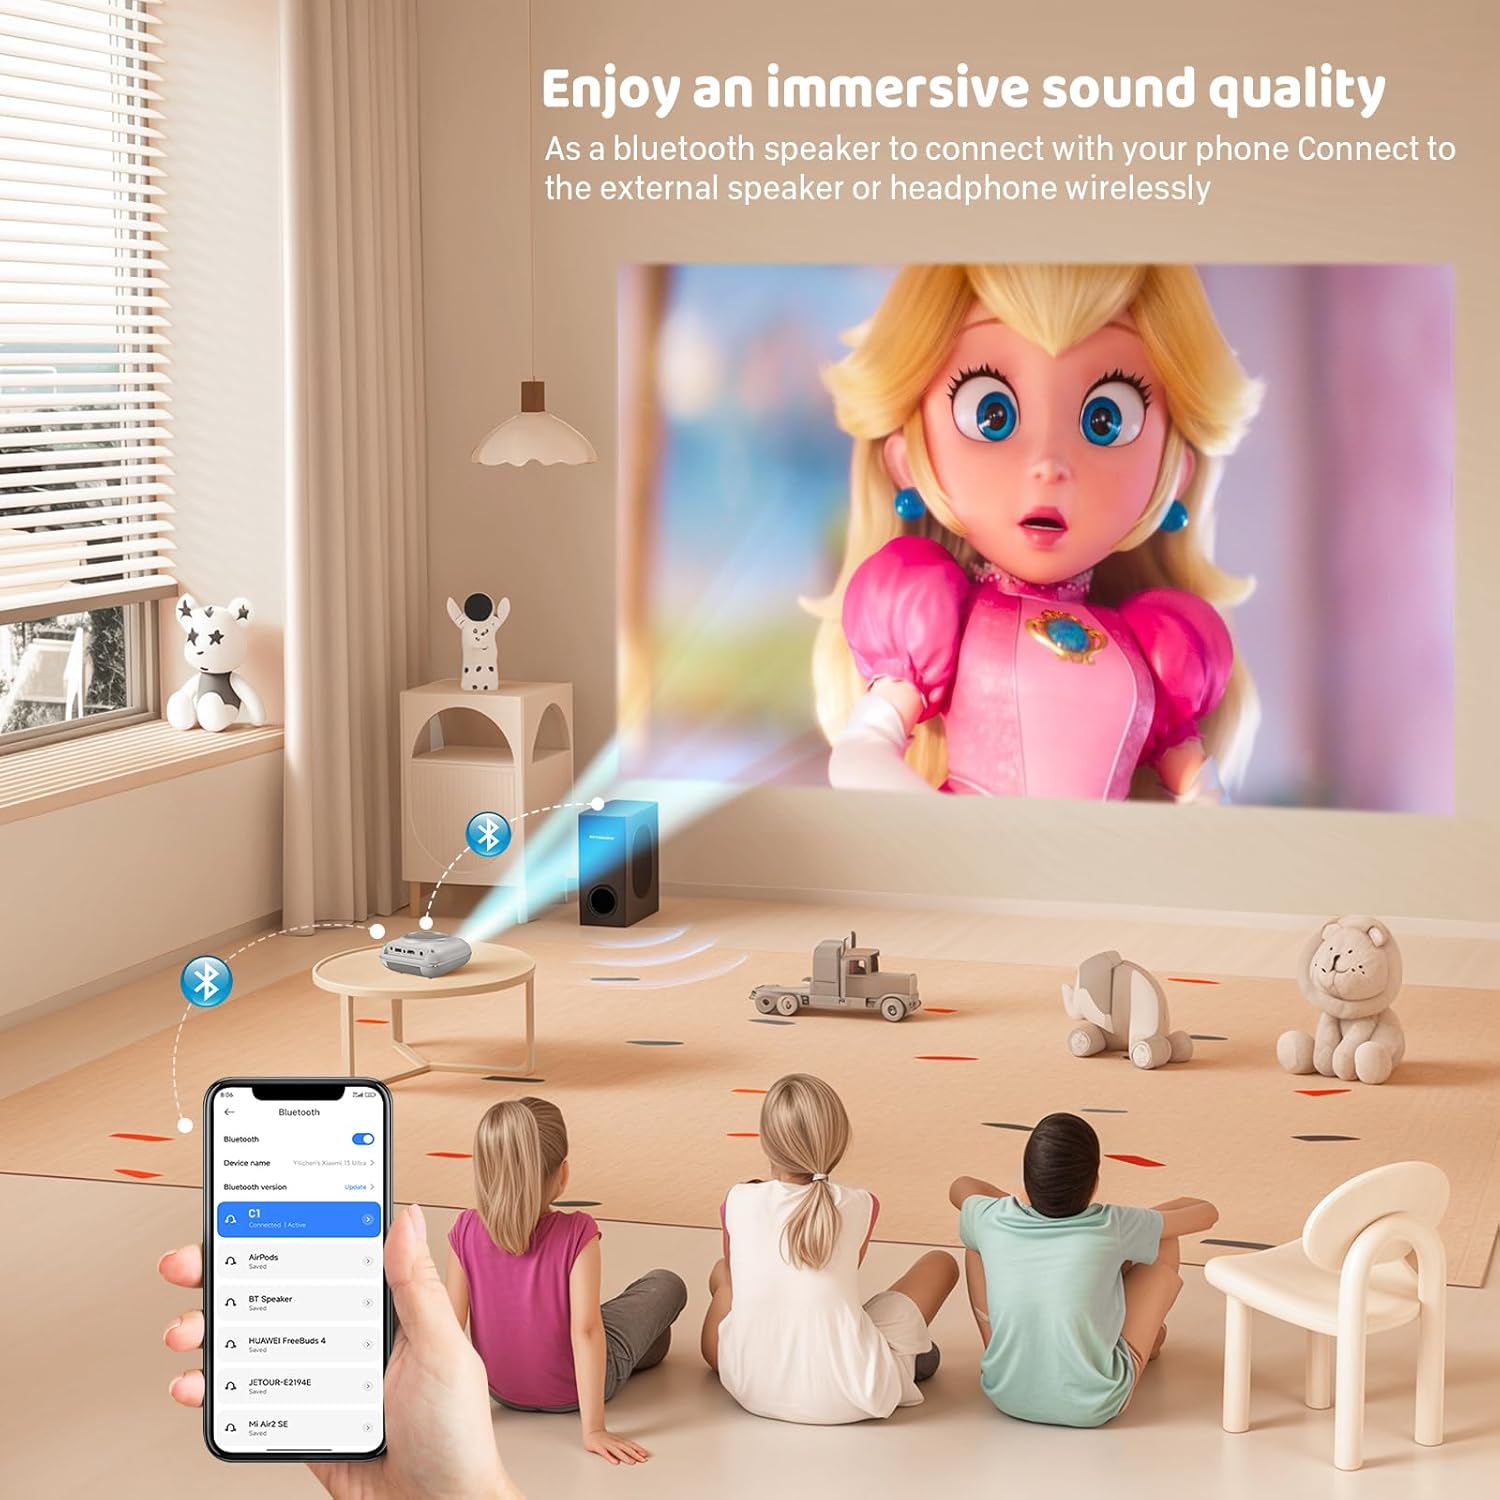
Garso išvestis
The projector has two built-in speakers for immersive sound. For a different audio experience, you can connect external speakers or headphones via the 3.5mm audio jack.
Ekrano veidrodis
The projector supports screen mirroring for compatible devices. Refer to the on-screen instructions or the projector's menu for specific steps to enable screen mirroring from your smartphone or tablet.
6. Priežiūra
Objektyvo valymas
Use a soft, lint-free cloth specifically designed for optical lenses to gently wipe the projector lens. Avoid using abrasive cleaners or cloths that could scratch the lens.
Projektoriaus korpuso valymas
Projektoriaus išorę nuvalykite minkštu, sausu skudurėliu. Nenaudokite skystų valiklių ar tirpiklių.
Vėdinimas
Ensure the ventilation openings are clear of dust and debris. The projector features a dual-fan cooling system to maintain optimal operating temperature and extend lamp life. Do not obstruct these vents.
Lamp Gyvenimas
LED lemputė lamp in your HOMPOW projector has a lifespan of approximately 60,000 hours, providing long-term use without frequent lamp pakeitimas.
7. Problemų sprendimas
| Problema | Galima priežastis | Sprendimas |
|---|---|---|
| Nėra vaizdo arba vaizdas neryškus | Focus not adjusted; incorrect input source; cable not connected properly. | Adjust the focus ring; select the correct input source; check all cable connections. |
| Nėra garso | Volume too low; audio cable not connected; device audio settings. | Increase projector volume; ensure audio cables are connected; check audio output settings on the connected device. |
| Vaizdas yra trapecijos formos | Projektorius nėra statmenas ekranui. | Adjust the keystone correction dial or reposition the projector. |
| Nuotolinio valdymo pultas neveikia | Batteries low or dead; obstruction between remote and projector. | Pakeiskite baterijas; užtikrinkite, kad projektoriaus IR imtuvas būtų matomas tiesiogiai. |
| Projektorius perkaista | Ventilation ports blocked. | Įsitikinkite, kad visos ventiliacijos angos yra švarios ir neuždengtos. |
8. Specifikacijos
- Ekrano technologija: LCD
- Vietinė skiriamoji geba: 1280 x 720 pikselių
- Palaikoma skiriamoji geba: Iki 1080p Full HD
- Ryškumas: 6500 liumenų
- Kontrasto santykis: 3000:1
- Lamp Gyvenimas: 60,000 valandos
- Projekcijos dydis: 32-176 inches (Recommended: 100 inches)
- Projekcijos atstumas: 1m - 5.2m (Recommended: 3m)
- Keystone korekcija: ±15 degrees manual
- Ryšys: HDMI, USB, SD, AV, VGA
- Garsas: Built-in dual speakers, 3.5mm audio out
- Energijos suvartojimas: 48W
- Gaminio matmenys: 19 x 15 x 8 cm
- Produkto svoris: 1.71 kg
9. Garantija ir palaikymas
The HOMPOW Mini Projector comes with a manufacturer's warranty. Please refer to the warranty card included in your package for specific terms and conditions. For any product inquiries, technical support, or warranty claims, please contact HOMPOW customer service through the contact page on their official website or the platform where you purchased the product. Our customer support team aims to respond promptly during business hours.

