1. Įvadas
This instruction manual provides essential information for the safe and effective use of your Aideepen DC 4.5-100V Digital Volt Amp Voltmeter. This device is designed for monitoring DC voltage and current in various applications, including storage batteries, solar panels, model railroads, RVs, motorcycles, and other electrical systems. Please read this manual thoroughly before installation and operation.
2. Produkto ypatybės
- ttage Matavimo diapazonas: DC 4.5-100V
- Current Measuring Range: DC 0-50A
- Ekranas: 0.28" digital tube, dual color display (blue for current, red for voltage)
- Plačios programos: Suitable for monitoring storage batteries, solar panels, model railroads, RVs, motorcycles, house batteries, motors, and more.
3. Specifikacijos
| Specifikacija | Vertė |
|---|---|
| Gamintojas | Aideepenas |
| Prekės modelio numeris | 50A Ammeter Voltmeter |
| Spalva | Juoda |
| Stilius | Skaitmeninis |
| Medžiaga | ABS |
| Maitinimo šaltinio tipas | Su laidu elektra |
| Min. Veiklos ttage | 4 volto (DC) |
| Didžiausias darbinis tūristage | 100 voltų |
| Viršutinės temperatūros įvertinimas | 65 laipsniai Celsijaus |
| Matavimo tipas | Ampermetras, voltmetras |
| Prekės svoris | 0.28 g (0.01 uncijos) |
| Siuntinio matmenys | 16.1 x 11.99 x 4.9 cm |
Pastaba: The 50A 75mV shunt is required for current measurement and is typically purchased separately.
4. Saugos informacija
ĮSPĖJIMAS: The shunt must be connected when wiring the device for current measurement. Failure to connect the shunt will result in damage to the meter. Ensure all connections are secure and correct according to the wiring diagrams to prevent electrical hazards and product malfunction. This device measures current on the negative side of the circuit. Review wiring diagrams carefully to ensure compatibility with your circuit's grounding scheme.
5. Sąranka ir diegimas
Proper installation is critical for accurate readings and safe operation. Refer to the diagrams and video below for detailed wiring instructions.
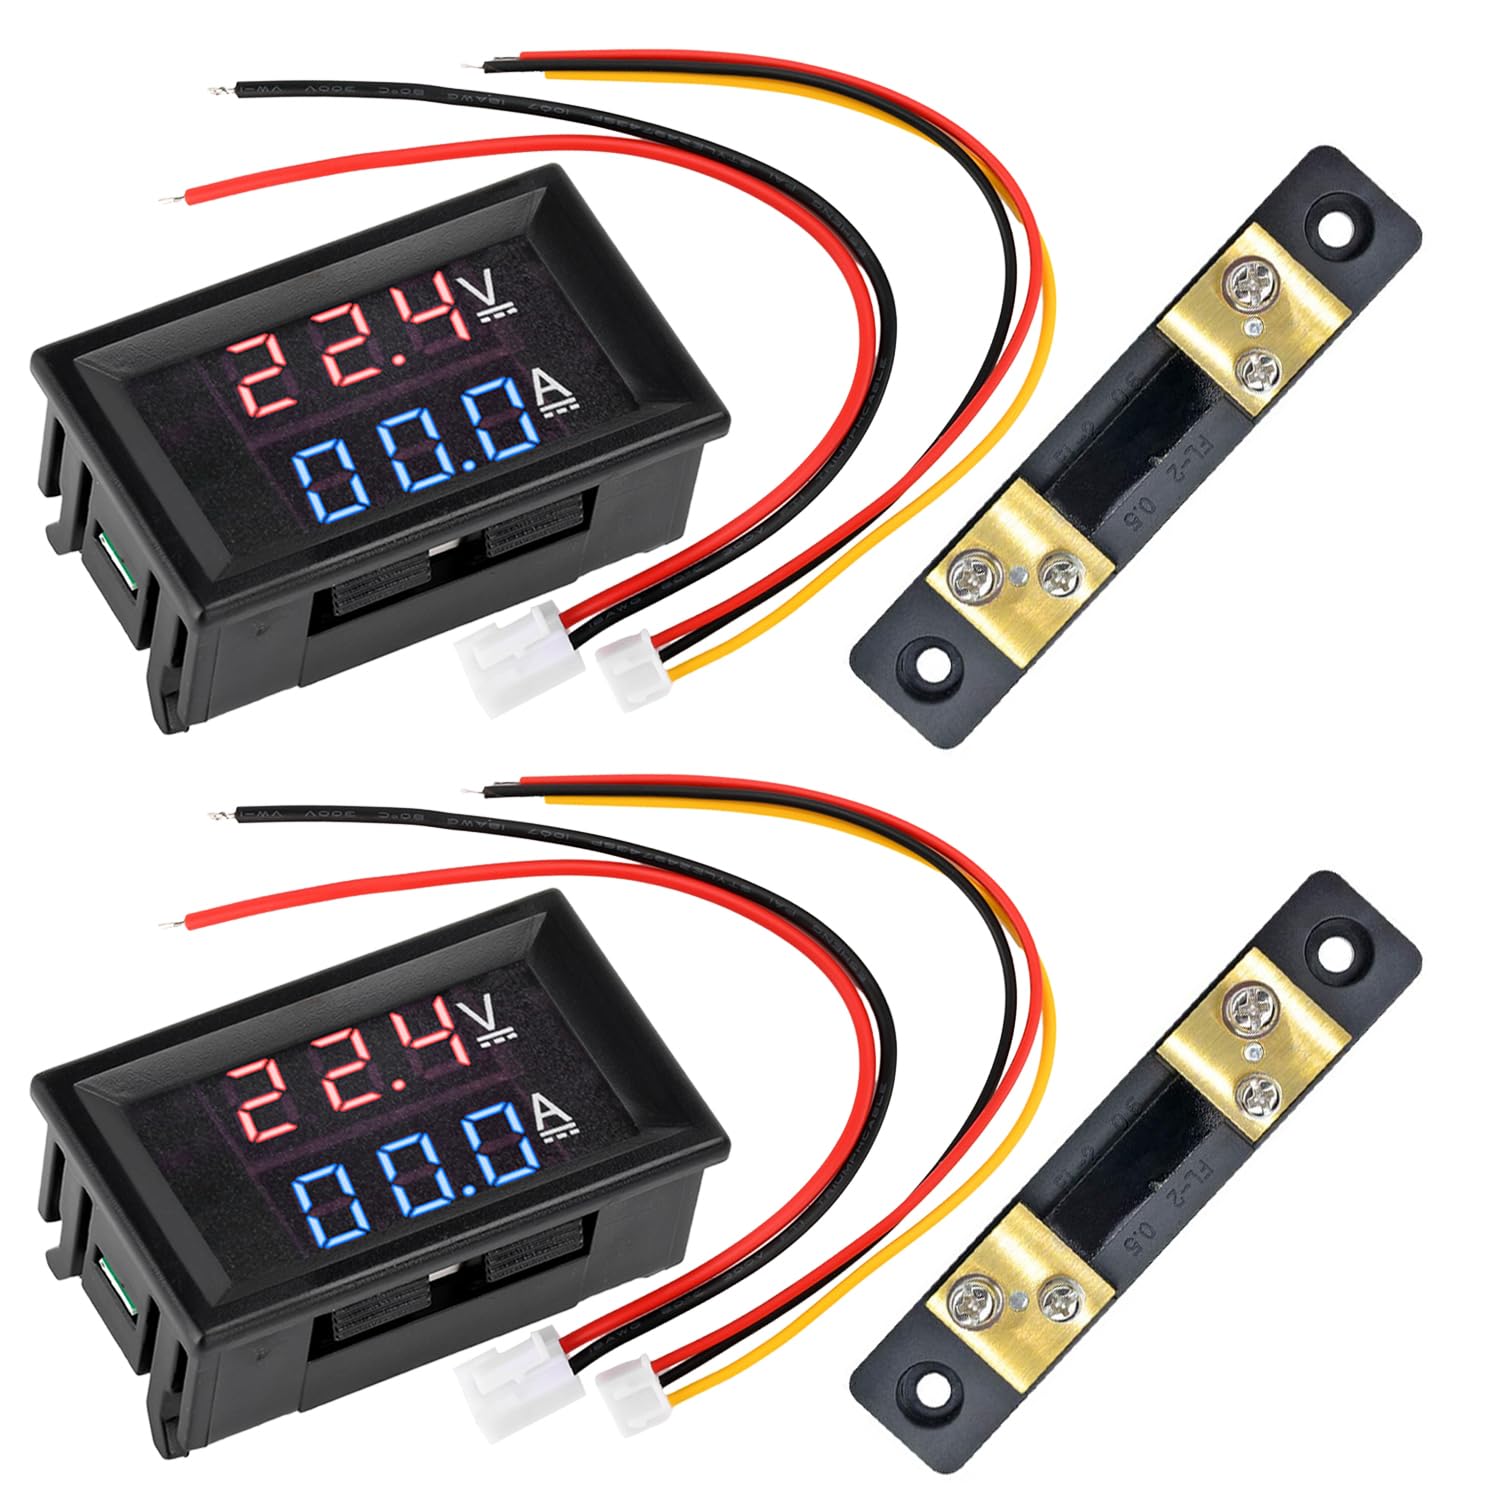
Priekyje view of the Aideepen DC Volt Amp Voltmeter, showing the dual LED display and connected wiring harness.

Iš arti view of the 50A 75mV shunt resistor, a critical component for accurate current measurement with the voltmeter.
5.1 Sujungimo schemos
The voltmeter requires connection to a 50A 75mV shunt for current measurement. There are two primary wiring methods:
5.1.1 50A Range Wiring Method (Shared Power Supply)

Detailed wiring diagram illustrating the connection of the 50A 75mV shunt with the voltmeter for current measurement in a 50A range circuit. This diagram shows the power supply, load, shunt, and voltmeter connections. When the power supply is shared, the thin black wire does not need to be connected to the shunt.
In this configuration, the voltmeter draws its power from the same source as the circuit being measured. The thin black wire from the voltmeter's wiring harness should NOT be connected to the shunt if the power supply is shared. The shunt is connected in series with the negative line of the load.
5.1.2 Independent Power Supply Wiring Diagram

Wiring diagram for the voltmeter when using an independent power supply for the meter itself, separate from the circuit being measured. It shows connections for both voltage and current measurement with the shunt. The thin black wire from the voltmeter's harness connects to the negative terminal of the independent power supply.
For applications requiring higher accuracy or when the measured circuit's voltage is outside the meter's operating range (DC 4.5-100V), an independent power supply (DC 4-28V) can be used for the voltmeter. In this setup, the thin black wire from the voltmeter's harness connects to the negative terminal of the independent power supply. The shunt is still connected in series with the negative line of the load.
5.2 Įdiegimo vaizdo įrašas
Watch this video for a visual guide on wiring and testing the Aideepen DC Volt Amp Voltmetras.
This video demonstrates the wiring process for the Aideepen DC Volt Amp Voltmeter, including connecting the shunt and powering on the device to display voltage ir dabartiniai rodmenys.
6. Operacija
Once correctly wired and powered, the voltmeter will automatically display the measured DC voltage and current on its dual LED screen. The red display indicates voltage (V), and the blue display indicates current (A). Ensure the power supply is within the specified range (DC 4.5-100V for measurement, DC 4-28V for meter power if independent supply is used).
7. Priežiūra
- Laikykite prietaisą švarų, be dulkių ir drėgmės.
- Venkite ilgalaikio skaitiklio laikymo tiesioginiuose saulės spinduliuose arba itin aukštose temperatūrose.
- Regularly check wiring connections for tightness and signs of wear or corrosion.
- Do not attempt to open or modify the device, as this may void the warranty and cause damage.
8. Problemų sprendimas
| Problema | Galima priežastis | Sprendimas |
|---|---|---|
| Nėra ekrano / Matuoklis neįsijungia | Incorrect power connection; Power supply outside range; Damaged wiring. | Verify power connections (red and black thin wires). Ensure power supply is within DC 4.5-100V. Check for loose or damaged wires. |
| ttage displays, but current shows 0.00A | Shunt not connected; Incorrect shunt wiring; No current flowing through the load. | Ensure the 50A 75mV shunt is correctly installed in series with the negative line of the load. Verify the thick red and black wires are connected to the shunt. Confirm there is a load drawing current. |
| Netikslūs rodmenys | Poor connections; Shunt not properly rated; Interference; Meter requires calibration. | Check all connections for tightness. Ensure the shunt is rated for 50A 75mV. Minimize electrical interference. Some meters may have internal potentiometers for fine-tuning calibration (refer to specific product details if available, otherwise professional calibration may be needed). |
| Meter burnt out | Shunt not connected during current measurement; Overcurrent. | This indicates a critical wiring error, specifically operating the meter for current measurement without the shunt. The meter is likely damaged and requires replacement. Always connect the shunt before applying power for current measurement. |
9. Garantija ir palaikymas
Aideepen products typically come with a 24-month service period. If you encounter any quality issues with your product, you may be eligible for a replacement. For technical support or warranty claims, please contact Aideepen customer service through the retailer where the product was purchased or visit the official Aideepen store online.


