1. Saugos informacija
Please read and understand all safety information and operating instructions before using this multimeter. Failure to follow these instructions may result in electric shock, fire, or damage to the meter.
- Always ensure the test leads are properly connected and the function switch is set to the correct range before making any measurements.
- Nebandykite matuoti tūriotages or currents exceeding the maximum rated values for this meter.
- Dirbdami su įtampos grandinėmis, būkite itin atsargūs. Didelė įtampataggali būti pavojinga.
- Never open the meter casing unless specifically instructed for battery or fuse replacement. Ensure test leads are disconnected before opening.
- Kad užtikrintumėte tikslius rodmenis, pakeiskite bateriją, kai pasirodys išsikrovusio akumuliatoriaus indikatorius.
- Nenaudokite matuoklio, jei jis atrodo pažeistas arba jei pažeista bandymo laidų izoliacija.
1 paveikslas: Galinis view of the Rebel MIE-RB-830 Multimeter, showing the battery compartment cover and a warning label. The label advises removing test leads before opening the case to avoid electrical shock and to install fuses with correct amp/volt ratings. It also indicates the power supply is a 9V battery, type NEDA 1604 9V 6F22.
2. Produktas baigtasview
The Rebel MIE-RB-830 is a compact, battery-operated digital multimeter designed for measuring DC/AC voltage, DC current, resistance, diode, and transistor (hFE) values. It is suitable for general electrical testing and troubleshooting.
2.1. Komponentai
- Digital Multimeter Unit
- Bandymo laidai (raudoni ir juodi)
- 9 V baterija (gali būti komplekte arba parduodama atskirai)
- Vartotojo vadovas (šis dokumentas)

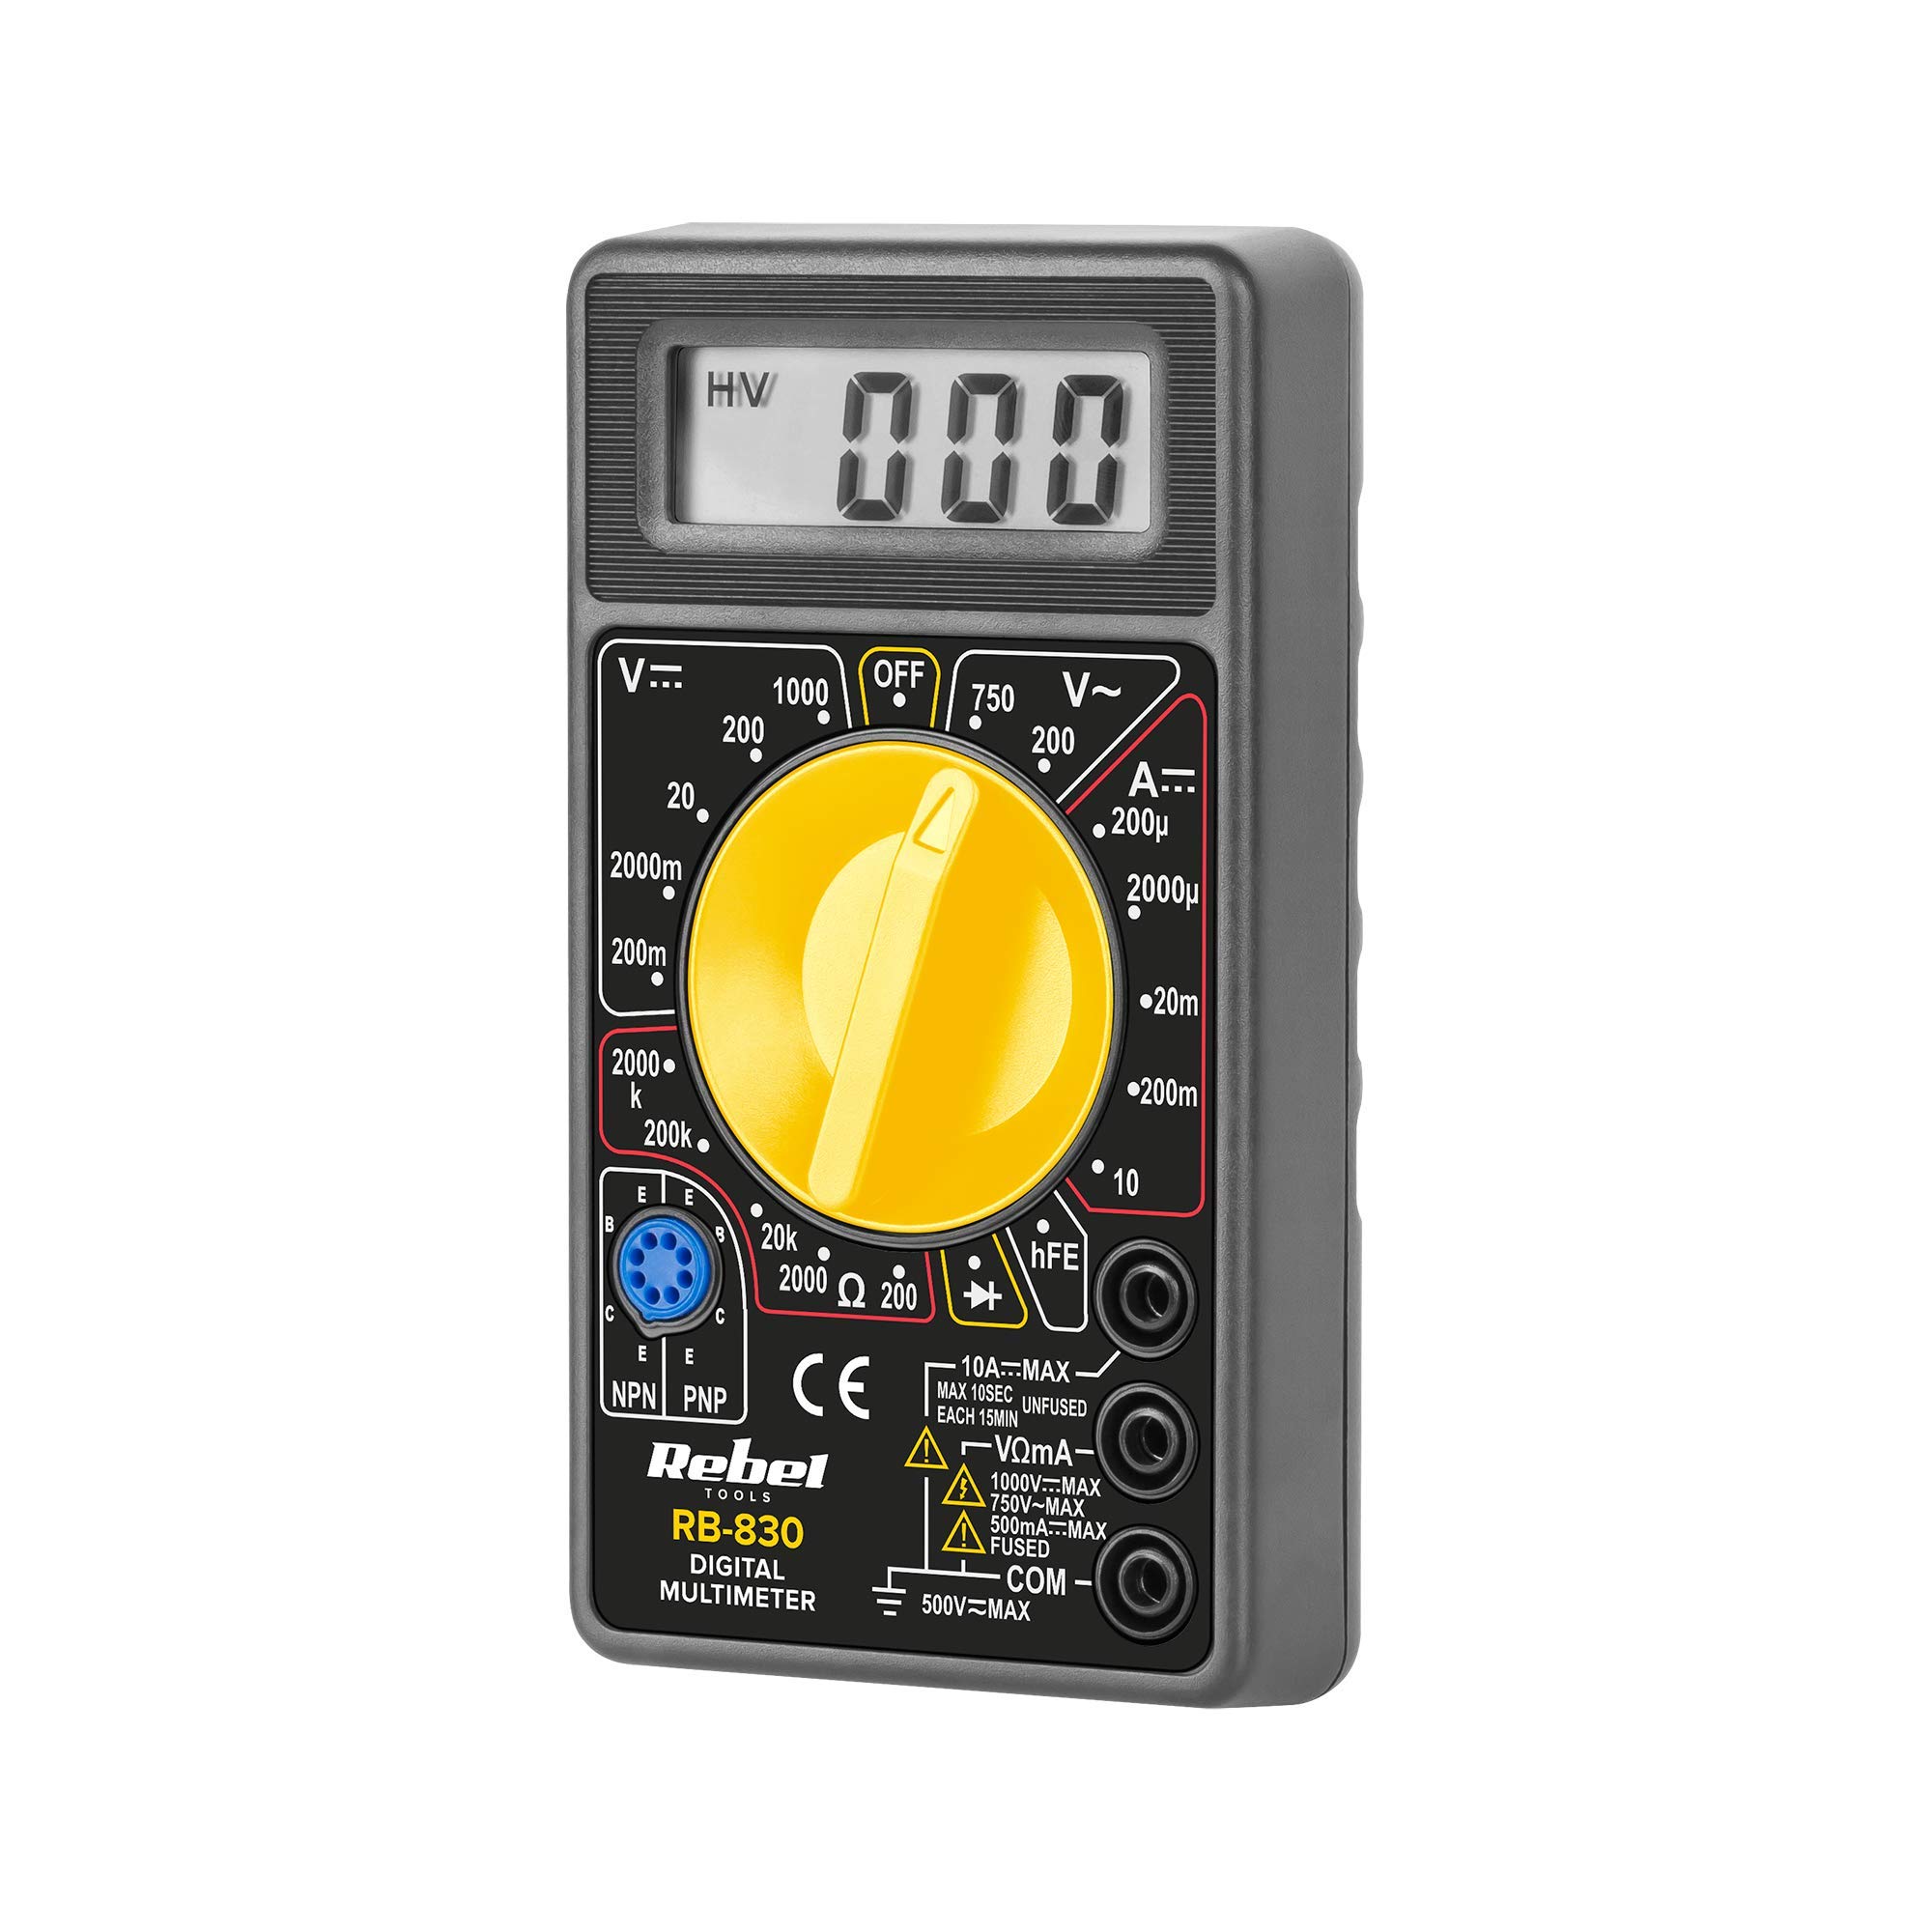
2 paveikslas: The Rebel MIE-RB-830 Digital Multimeter shown with its accompanying red and black test leads. The multimeter features a large LCD display and a rotary function switch.

3 paveikslas: Iš arti view of the red and black test leads. These leads are essential for connecting the multimeter to the circuit under test.
3. Sąranka
3.1. Akumuliatoriaus įdėjimas
- Įsitikinkite, kad multimetras yra IŠJUNGTAS ir visi bandymo laidai yra atjungti.
- Locate the battery compartment cover on the back of the meter (refer to Figure 1).
- Atsukite tvirtinimo varžtą (-us) ir atsargiai nuimkite dangtelį.
- Insert a new 9V battery (NEDA 1604 or 6F22 type), observing the correct polarity (+ and -).
- Uždėkite baterijų skyriaus dangtelį ir pritvirtinkite jį varžtu (-ais).
3.2. Bandymo laidų prijungimas
- Prijunkite raudona test lead to the "VΩmA" input jack.
- Prijunkite juodas test lead to the "COM" (common) input jack.
- For current measurements exceeding 200mA (up to 10A), connect the red test lead to the "10A" input jack.
4. Naudojimo instrukcijos
4.1. Funkcijos pasirinkimas
Turn the rotary switch to the desired measurement function and range. Always start with a higher range if the approximate value is unknown to prevent overloading the meter.
4.2. Nuolatinės srovės įtampos matavimastage (V–)
- Nustatykite sukamąjį jungiklį į norimą nuolatinės srovės įtampątage (V–) range (e.g., 20V, 200V).
- Prijunkite raudoną bandymo laidą prie teigiamos (+) grandinės pusės, o juodą bandymo laidą – prie neigiamos (-) pusės.
- Perskaitykite ttage reikšmė LCD ekrane.
4.3. Matavimas AC Voltage (V∼)
- Nustatykite sukamąjį jungiklį į norimą kintamosios srovės garsumo lygį.tage (V∼) range (e.g., 200V, 750V).
- Prijunkite bandymo laidus prie kintamosios srovės įtampostage šaltinis.
- Perskaitykite ttage reikšmė LCD ekrane.
4.4. Measuring DC Current (A–)
Atsargiai: To measure current, the meter must be connected in series with the circuit. Never connect the meter in parallel with a voltage source when in current mode, as this can damage the meter and the circuit.
- Set the rotary switch to the desired DC Current (A–) range (e.g., 20mA, 200mA, 10A).
- For currents up to 200mA, ensure the red lead is in the "VΩmA" jack. For currents up to 10A, move the red lead to the "10A" jack.
- Open the circuit where current is to be measured and connect the meter in series.
- Skaitykite dabartinę vertę LCD ekrane.
4.5. Varžos (Ω) matavimas
Atsargiai: Ensure the circuit or component under test is de-energized before measuring resistance.
- Set the rotary switch to the desired Resistance (Ω) range (e.g., 200Ω, 2kΩ, 200kΩ).
- Prijunkite bandymo laidus prie matuojamo komponento arba grandinės.
- Nuskaitykite varžos vertę LCD ekrane.
4.6. Diode Test (→|–)
- Set the rotary switch to the Diode Test (→|–) position.
- Prijunkite raudoną bandymo laidą prie diodo anodo, o juodą bandymo laidą – prie katodo.
- Ekrane bus rodomas garsumas pirmyntage kritimas (paprastai nuo 0.5 V iki 0.8 V silicio diodams).
- Apkeiskite laidus vietomis. Ekrane turėtų būti rodoma „OL“ (atvira kilpa), tai reiškia, kad diodas veikia gerai.
4.7. Transistor (hFE) Test
- Pasukite sukamąjį jungiklį į hFE padėtį.
- Nustatykite, ar tranzistorius yra NPN, ar PNP.
- Insert the transistor's emitter, base, and collector leads into the corresponding sockets on the hFE test socket.
- Read the hFE (DC current gain) value on the display.
5. Priežiūra
5.1. Baterijos keitimas
Kai ekrane pasirodo išsikrovusios baterijos indikatorius, pakeiskite 9 V bateriją, kaip aprašyta 3.1 skyriuje. Naudojant išsikrovusią bateriją, rodmenys gali būti netikslūs.
5.2. Saugiklio keitimas
If the current measurement function stops working, the fuse may need replacement. This operation should only be performed by qualified personnel.
- Įsitikinkite, kad multimetras yra IŠJUNGTAS ir visi bandymo laidai yra atjungti.
- Open the back casing of the meter (this may involve more screws than just the battery compartment).
- Locate the blown fuse and replace it with a fuse of the exact same type and rating (e.g., F200mA/250V for mA range, F10A/250V for 10A range). Refer to the internal markings or specifications for precise fuse ratings.
- Carefully reassemble the meter, ensuring all screws are tightened.
5.3. Valymas
Nuvalykite skaitiklį reklamaamp cloth and mild detergent. Do not use abrasives or solvents. Keep the meter dry.
6. Problemų sprendimas
| Problema | Galima priežastis | Sprendimas |
|---|---|---|
| Nėra ekrano arba ekranas silpnas | Senka arba išsikrovusi baterija | Pakeiskite 9 V akumuliatorių. |
| Neteisingi rodmenys | Low battery; Incorrect range selection; Poor test lead connection | Replace battery; Select appropriate range; Ensure leads are firmly connected. |
| Srovės matavimas neveikia | Blown fuse; Incorrect lead connection for current | Replace fuse (see Section 5.2); Ensure red lead is in "VΩmA" or "10A" jack as appropriate. |
| Rodoma „OL“ (perkrova) | Measured value exceeds selected range; Open circuit (for resistance/continuity) | Select a higher range; Check circuit for breaks. |
7. Specifikacijos
| Matavimo funkcija | Diapazonas | Tikslumas |
|---|---|---|
| DC ttage (V–) | 200mV, 2V, 20V, 200V, 1000V | ± (0.5 % + 2 skaitmenys) |
| AC ttage (V∼) | 200V, 750V | ± (1.2 % + 10 skaitmenys) |
| DC Current (A–) | 200 µA, 2 mA, 20 mA, 200 mA, 10 A | ± (1.0 % + 2 skaitmenys) |
| Atsparumas (Ω) | 200Ω, 2kΩ, 20kΩ, 200kΩ, 2MΩ | ± (0.8 % + 2 skaitmenys) |
| Diodo testas | Taip | Pirmyn ttage lašas |
| Tranzistoriaus (hFE) bandymas | Taip | hFE value |
| Maitinimo šaltinis | 9V Battery (NEDA 1604 or 6F22) | |
| Ekranas | 3½ Digit LCD, Max. 1999 | |
| Matmenys | Apytiksl. 13.5 x 10 x 4 cm | |
| Svoris | Approx. 107 grams (without battery) | |
| Darbinė temperatūra | nuo 0°C iki 40°C (32°F iki 104°F) | |
| Laikymo temperatūra | -10°C iki 50°C (14°F iki 122°F) | |
| Saugos standartai | CE, RoHS |
8. Garantija ir palaikymas
This Rebel MIE-RB-830 Digital Multimeter is covered by a standard manufacturer's warranty against defects in materials and workmanship. Please refer to the warranty card included with your purchase or contact your retailer for specific warranty terms and conditions.
For technical support or service inquiries, please contact the point of purchase or visit the official Rebel websvetainė kontaktinei informacijai.