1. Įvadas
Thank you for choosing the Rebel RB-0005 Weather Station. This device provides accurate indoor and outdoor temperature readings, indoor humidity, and features a clock, calendar, and alarm function. This manual will guide you through the setup, operation, and maintenance of your new weather station to ensure optimal performance.
2. Saugos informacija
- Nelaikykite prietaiso ekstremaliose temperatūrose, tiesioginiuose saulės spinduliuose ar didelėje drėgmėje.
- Stenkitės, kad prietaisas nenumestų ar nepatirtų stipraus smūgio.
- Saugokite prietaisą nuo vandens ir kitų skysčių.
- Naudotas baterijas išmeskite atsakingai pagal vietines taisykles.
- Nebandykite patys ardyti ar taisyti įrenginio. Dėl remonto kreipkitės į kvalifikuotus specialistus.
- The outdoor sensor cable should be handled with care to prevent damage.
3. Pakuotės turinys
Išpakuodami patikrinkite pakuotės turinį:
- 1x Rebel RB-0005 Weather Station Main Unit
- 1x Wired Outdoor Temperature Sensor
- 1x Naudotojo vadovas (šis dokumentas)
Note: 1x AAA battery is required for operation and is not included in the package.
4. Produkto ypatybės
- Indoor and Outdoor Temperature Measurement
- Indoor Humidity Measurement
- Kalendoriaus funkcija
- Signalizavimo funkcija
- 12/24 valandų laikrodžio ekranas
- Memory Function for Highest and Lowest Temperature Readings
- Clear and Easy-to-Read LCD Display
- Nešiojamam naudojimui naudojamas akumuliatorius
5. Produktas baigtasview
Familiarize yourself with the main components of your Rebel RB-0005 Weather Station.
5.1 Priekinis ekranas
The large LCD screen displays various information simultaneously:
- IN Temperature: Dabartinė vidaus temperatūra.
- OUT Temperature: Current outdoor temperature from the wired sensor.
- Laikas: Current time in 12-hour (AM/PM) or 24-hour format.
- RH %: Current indoor relative humidity.
- Kalendorius: Date display (day, month).
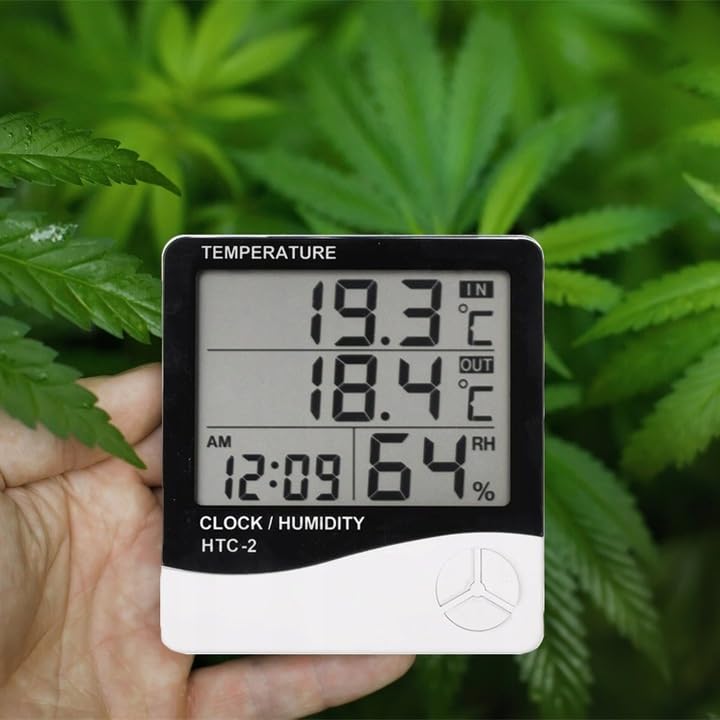
Figure 1: Front display of the weather station showing temperature, time, and humidity readings.

2 pav. Išsamus view of the display and control buttons.
5.2 Valdymo mygtukai
The device features three control buttons located on the front, below the display:
- MODE: Used to switch between display modes (e.g., time, alarm, calendar) and to enter/exit setting modes.
- ADJ (Adjust): Used to adjust values (e.g., hours, minutes, date) when in setting mode.
- ATMINTINĖ: Įpratę view the highest and lowest recorded temperature and humidity values.
5.3 Galinis View ir Jutiklis
The back of the unit houses the battery compartment, a foldable stand, and the input for the wired outdoor temperature sensor.

3 pav.: galinis view of the weather station with battery compartment and wired sensor.
6. Sąranka
6.1 Akumuliatoriaus įdėjimas
- Atidarykite baterijų skyriaus dangtelį pagrindinio įrenginio gale.
- Insert one (1) AAA battery, ensuring the correct polarity (+/-).
- Close the battery compartment cover securely. The device should power on automatically.
6.2 Lauko jutiklio išdėstymas
- Connect the wired outdoor temperature sensor to the designated port on the back of the main unit.
- Carefully route the sensor cable to the desired outdoor location. Ensure the cable is not pinched or damaged.
- Place the sensor in a shaded area, protected from direct sunlight and precipitation, to ensure accurate readings. Avoid placing it near heat sources or vents.

4 pav. Pvzample placement of the weather station for indoor temperature monitoring.
7. Naudojimo instrukcijos
7.1 Laiko ir datos nustatymas
- Paspauskite ir palaikykite REŽIMAS mygtuką maždaug 3 sekundes, kol pradės mirksėti laiko ekranas.
- Naudokite ADJ mygtuką, kad sureguliuotumėte mirksinčią reikšmę (pvz., valandas, minutes).
- Paspauskite REŽIMAS button again to confirm the setting and move to the next value (e.g., minutes, 12/24 hour format, year, month, day).
- Repeat step 2 and 3 until all time and date settings are configured.
- Paspauskite REŽIMAS paskutinį kartą, kad išeitumėte iš nustatymų režimo.
7.2 Signalizacijos nustatymas
- Įprastame laiko ekrane paspauskite REŽIMAS button once to enter alarm display mode (usually indicated by an alarm icon).
- Paspauskite ir palaikykite REŽIMAS button for approximately 3 seconds until the alarm time starts flashing.
- Naudokite ADJ mygtuką, kad nustatytumėte norimą žadintuvo valandą.
- Paspauskite REŽIMAS button to confirm the hour and move to set the minutes.
- Naudokite ADJ mygtuką norėdami nustatyti norimą žadintuvo minutę.
- Paspauskite REŽIMAS mygtuką, kad patvirtintumėte ir išeitumėte iš žadintuvo nustatymo režimo.
- Norėdami įjungti / išjungti žadintuvą, paspauskite ADJ button once while in alarm display mode. An alarm icon will appear/disappear on the display.
7.3 Viewing Min/Max Temperature and Humidity
- Įprastame ekrane paspauskite ATMINTIS button once to show the maximum recorded indoor/outdoor temperature and indoor humidity.
- Paspauskite ATMINTIS button again to show the minimum recorded indoor/outdoor temperature and indoor humidity.
- Paspauskite ATMINTIS mygtuką trečią kartą, kad grįžtumėte prie dabartinių rodmenų.
- To clear the min/max memory, press and hold the ATMINTIS mygtuką maždaug 3 sekundes, tuo pačiu metu viewing the min/max values.
7.4 Temperatūros vienetų (°C/°F) perjungimas
While in normal display mode, press the ADJ button once to toggle between Celsius (°C) and Fahrenheit (°F) temperature units.
8. Priežiūra
- Valymas: Prietaisą valykite minkštu, sausu skudurėliu. Nenaudokite abrazyvinių valiklių ar tirpiklių.
- Baterijos keitimas: Replace the AAA battery when the display becomes dim or the device stops functioning. Follow the battery installation steps in Section 6.1.
- Jutiklio priežiūra: Ensure the outdoor sensor cable is not damaged. Periodically check the sensor's placement to ensure it remains protected from elements for accurate readings.
9. Problemų sprendimas
| Problema | Galima priežastis | Sprendimas |
|---|---|---|
| Nėra ekrano arba ekranas pritemdytas. | Low or depleted battery. Incorrect battery polarity. | Replace the AAA battery with a new one, ensuring correct polarity. |
| Outdoor temperature reading is incorrect or "---". | Outdoor sensor cable is disconnected or damaged. Sensor is exposed to direct sunlight or heat source. | Check if the sensor cable is securely connected. Ensure the sensor is placed in a shaded, protected area. Inspect the cable for damage. |
| Laikas / data neteisingi. | Time/Date not set correctly after battery installation. | Refer to Section 7.1 "Setting Time and Date" to adjust. |
| Signalizacija neskamba. | Alarm is not activated. Alarm volume is too low (if adjustable, though this model likely isn't). | Ensure the alarm icon is displayed, indicating it is active (refer to Section 7.2). |
10. Specifikacijos
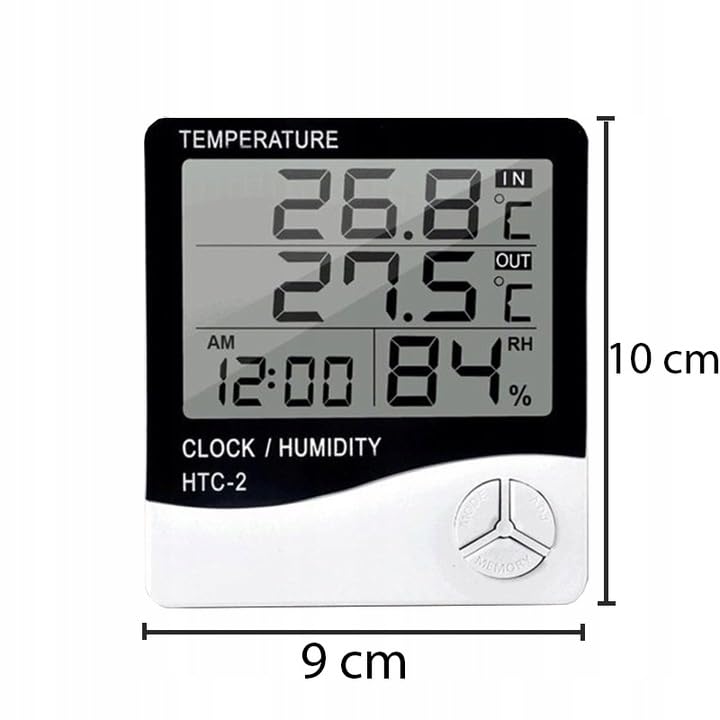
Figure 5: Approximate dimensions of the weather station.
- Modelis: RB-0005
- Prekinis ženklas: Maištininkas
- Maitinimo šaltinis: 1x AAA baterija (nepridedama)
- Medžiaga: Plastikiniai
- Ypatingos savybės: Alarm, Calendar, Min/Max Memory
- Pakuotės matmenys: 18 x 12 x 10 cm
- Gaminio matmenys (apytiksliai): 9 cm (plotis) x 10 cm (aukštis)
- Pirmoji prieinama data: 23 m. lapkričio 2020 d
11. Garantija ir palaikymas
Šiam produktui taikoma standartinė gamintojo garantija. Dėl konkrečių garantijos sąlygų žr. pirkimo metu pateiktus dokumentus arba susisiekite su pardavėju.
For technical support or inquiries, please contact the Rebel customer service department through their official websvetainėje arba pardavėjo pateiktą kontaktinę informaciją.


