1. Įvadas
The MECHEER Power Meter Plug is an advanced electricity usage monitor designed to help you track and manage the power consumption of your home appliances. This device provides detailed insights into various electrical parameters, enabling you to identify energy-intensive devices and optimize your electricity usage.
It features a large, clear LCD display with adjustable backlight, multiple display modes, and built-in overload protection, making it a versatile tool for energy monitoring.
2. Saugos informacija
ĮSPĖJIMAS!
- DO NOT use this device in a wet environment.
- DO NOT connect the power meter to a multi-plug outlet to measure multiple electrical appliances simultaneously, as this may cause the total power to exceed the threshold of 1800W and result in a short circuit.
PASTABA:
- Consumption and time will NOT be measured or counted when your device is in standby or not working, or if the rated power of your device is smaller than 0.5 watts. However, energy consumption is always measured once the device is plugged in.
- The device saves electricity quantity, cost, electricity price, and cumulative time. It does NOT save current, voltage, power, or power factors.
- If there is an abnormal display or no response, reset the electric meter by pressing the RESET button.
- The power of electrical appliances connected to this device must not exceed 1800W.
3. Produktas baigtasview
The MECHEER Power Meter Plug is designed for ease of use and clear data presentation. It consists of the main unit with a display and control buttons, and an integrated power plug for connecting to a wall outlet.
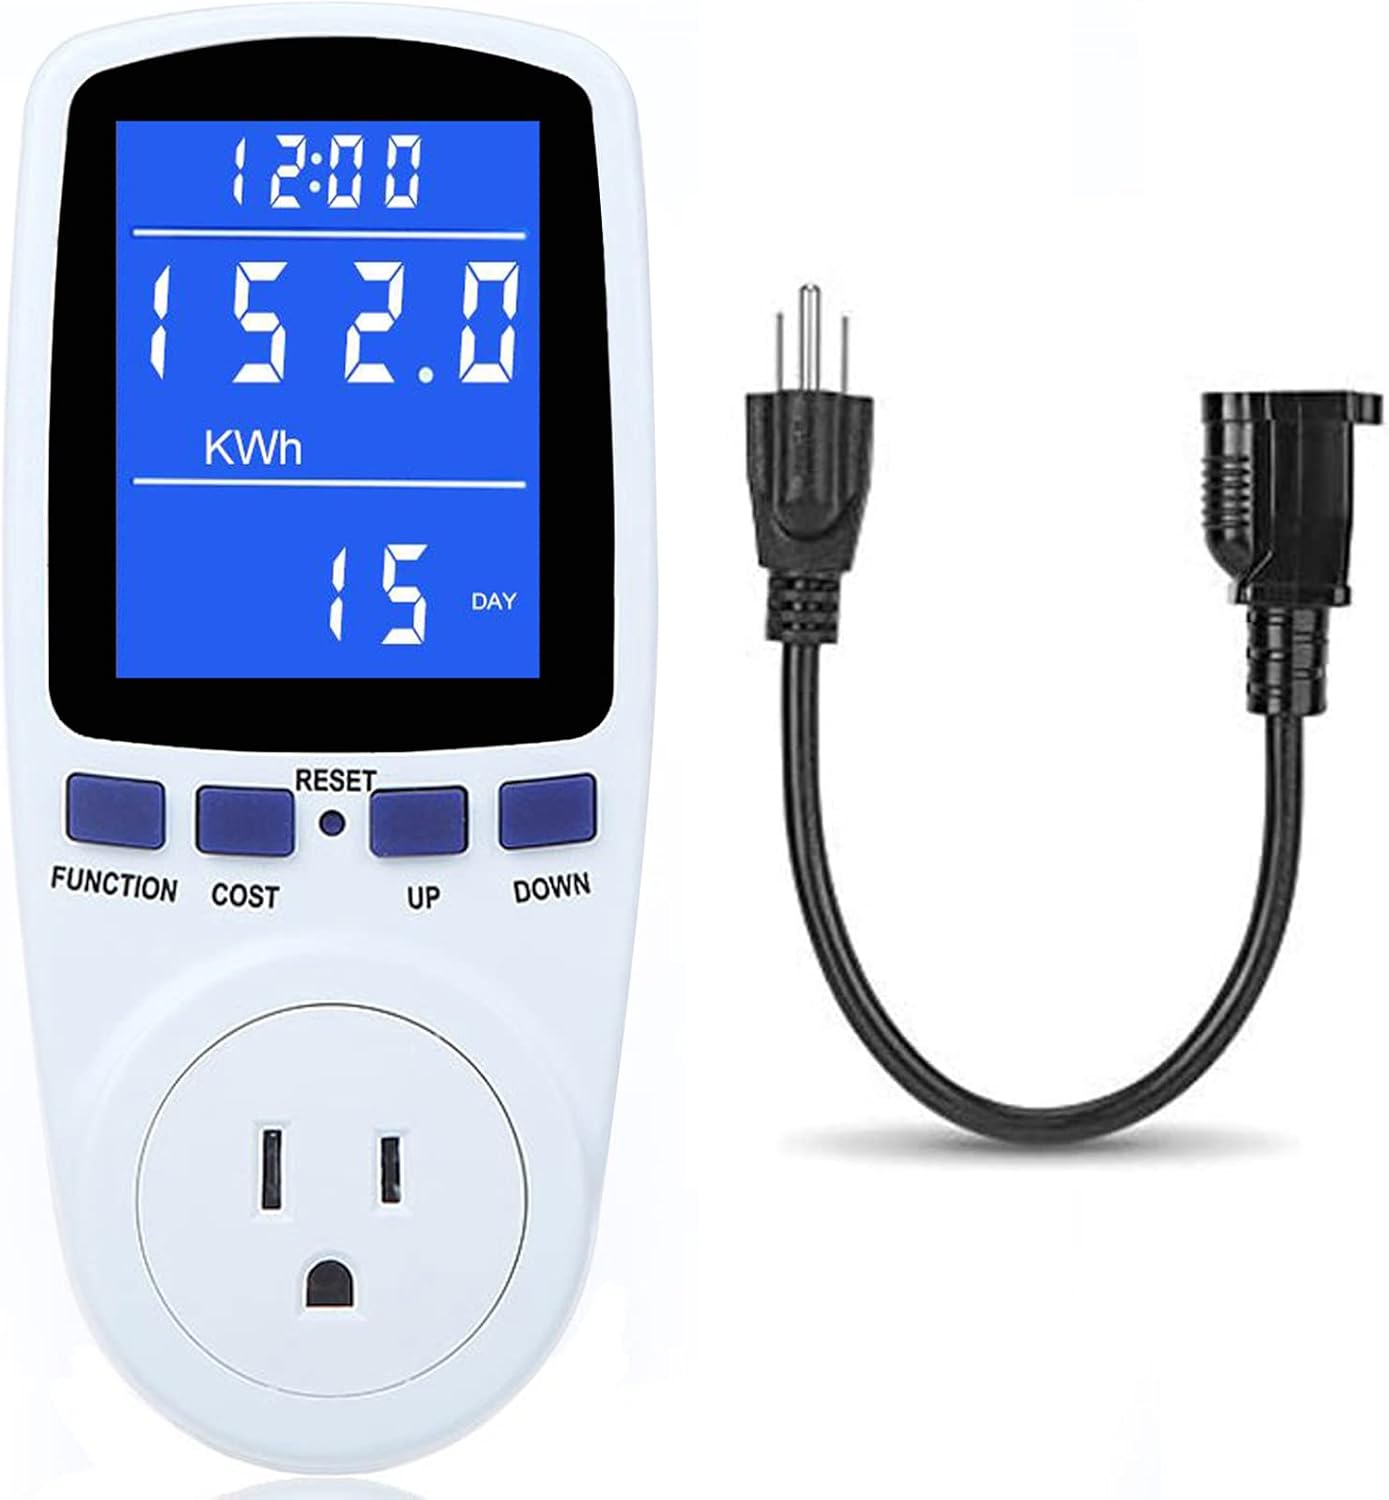
Figure 3.1: MECHEER Power Meter Plug with its integrated cord for flexible placement.
3.1. Komponentai
- Pagrindinis blokas: Houses the LCD display, control buttons, and internal circuitry.
- LCD ekranas: Large screen for clear viewing of various electrical parameters.
- Valdymo mygtukai: FUNCTION, COST, UP, DOWN, and a recessed RESET button.
- Maitinimo kištukas: Integrated plug for connecting to a standard wall outlet.
- Prietaiso lizdas: Standard outlet on the front for connecting the appliance to be monitored.
3.2. Ekrano funkcijos
The LCD display offers a 180° full wide viewing angle, ensuring clear and visible readings from various positions, day or night, thanks to its backlit feature.

Figure 3.2: The power meter's display offers a wide viewing angle for easy readability.
4. Sąranka
Setting up your MECHEER Power Meter Plug is straightforward. Follow these steps to begin monitoring your appliance's electricity usage.
4.1. Pradinis prisijungimas
- Plug the MECHEER Power Meter Plug into a standard wall outlet.
- The LCD display will illuminate, indicating the device is powered on.
- Connect the appliance you wish to monitor into the socket on the front of the power meter.

Figure 4.1: The power meter can be used directly or with an extension cord for convenience, preventing blockage of adjacent sockets.
4.2. Foninio apšvietimo įjungimas
The backlight automatically turns off after a set period. To wake up the backlight, press any button on the device.

Figure 4.2: The display before and after the backlight is activated, showing improved visibility.
5. Naudojimo instrukcijos
The MECHEER Power Meter Plug offers 7 display modes to monitor various electrical parameters. Use the FUNCTION and COST buttons to navigate through these modes and settings.
5.1. Ekrano režimai
Paspauskite FUNKCIJA button to cycle through the 7 display modes:

5.1 pav. Baigtaview of the 7 display modes available on the power meter.
- 1 režimas: laiko / vatų / sąnaudų ekranas - Shows cumulative time, current power consumption (Watts), and estimated cost.
- 2 režimas: laiko / kaupiamojo elektros kiekio ekranas - Shows cumulative time and total energy consumed (kWh).
- 3 režimas: Laikas / tūristage/Dažnio ekranas - Shows cumulative time, current voltage (Volts), and frequency (Hertz).
- 4 režimas: laiko / srovės / galios koeficiento ekranas - Shows cumulative time, current ampera (Amps), and power factor.
- 5 režimas: laiko / minimalios galios ekranas - Shows cumulative time and the minimum recorded power (Watts).
- 6 režimas: laiko / didžiausios galios ekranas - Shows cumulative time and the maximum recorded power (Watts).
- 7 režimas: laiko/kainos rodymas - Shows cumulative time and allows setting the electricity price. You can access Mode 7 directly by pressing the KAINA mygtuką.
5.2. Setting Electricity Price (Mode 7)
To calculate the cost of electricity, you need to set the price per kilowatt-hour (kWh).
- Paspauskite KAINA button to enter Mode 7.
- Naudokite UP ir ŽEMYN buttons to adjust the electricity price per kWh.
- Paspauskite KAINA mygtuką dar kartą, kad išsaugotumėte nustatymą.
5.3. Adjustable Backlight Time
The backlight duration can be customized to suit your needs.

Figure 5.2: Backlight setting options for the power meter.
- Paspauskite ir palaikykite UP ir ŽEMYN buttons simultaneously for a few seconds to enter the backlight time setting. The display will show "bL-0" and flash.
- Paspauskite UP or ŽEMYN to select the desired backlight time option:
- bL-0 = 10 minutes (default)
- bL-1 = 1 hour
- bL-2 = 4 hours
- bL-3 = 8 hours
- bL-4 = Always on
- Paspauskite KAINA mygtuką, kad išsaugotumėte foninio apšvietimo laiko nustatymą.
- To manually turn off the backlight, press the ŽEMYN mygtuką.
5.4. Apsauga nuo perkrovos
The device features overload protection to prevent damage. The default overload power is 3680W, but it is recommended to set it to 1800W for typical household use.
- To adjust the overload power, press the FUNKCIJA mygtuką ilgiau nei 3 sekundes.
- Naudokite UP ir ŽEMYN buttons to set the desired overload threshold (0 to 3680W).
- Paspauskite FUNKCIJA mygtuką dar kartą, kad išsaugotumėte nustatymą.
When the power of the connected appliance exceeds the set overload threshold, the LCD will display "OVERLOAD" to warn the user. All buttons will become unresponsive until the load power is reduced or removed.
5.5. Duomenų atminties funkcija
The power meter automatically saves cumulative data (electricity quantity, cumulative cost, cumulative time) even when removed from the socket or during a sudden power failure. This allows you to view the last recorded data when you use it again.

Figure 5.3: The power meter retains data even after being unplugged, thanks to its data memory function.
5.6. Operation Guide Video
For a visual guide on operating the MECHEER Power Meter Plug, please refer to the official operation video below:
Video 5.1: Official Operation Guide for MECHEER Power Meter Plug. This video demonstrates how to navigate through the different display modes and utilize the device's features.
6. Priežiūra
To ensure the longevity and accurate performance of your MECHEER Power Meter Plug, follow these simple maintenance guidelines:
- Valymas: Nuvalykite įrenginį minkštu, sausu skudurėliu. Nenaudokite abrazyvinių valiklių, tirpiklių ir nemerkite įrenginio į vandenį.
- Saugykla: Kai nenaudojate, laikykite prietaisą vėsioje, sausoje vietoje, toliau nuo tiesioginių saulės spindulių ir ekstremalių temperatūrų.
- Tvarkymas: Handle the device with care to avoid dropping or subjecting it to strong impacts, which could damage internal components.
7. Problemų sprendimas
If you encounter issues with your MECHEER Power Meter Plug, refer to the following common problems and their solutions:
| Problema | Galima priežastis | Sprendimas |
|---|---|---|
| Ekranas tuščias arba nereaguoja. | No power; device malfunction; backlight off. | Ensure the device is securely plugged into a live outlet. Press any button to activate backlight. If issue persists, perform a reset. |
| Rodomas pranešimas „PERKROVIMAS“. | Connected appliance exceeds set power limit. | Unplug the appliance or reduce its load. Ensure total power does not exceed 1800W. |
| Data not saving or resetting unexpectedly. | Incorrect reset procedure; very low consumption. | Ensure you are using the correct reset method (soft vs. hard reset). Data may not save if testing time is less than 1 hour or total kWh is less than 0.1 kWh. |
| Netikslūs rodmenys. | Įrenginio gedimas. | Perform a full reset. If the problem persists, contact customer support. |
7.1. Įrenginio nustatymas iš naujo
- Clear Cumulative Data (Keep Price Setting): Paspauskite ir palaikykite FUNKCIJA ir UP buttons simultaneously for over 3 seconds. This will clear electricity quantity, cumulative cost, and cumulative time.
- Full Reset (Clear All Settings): Use the provided reset tool (or a similar blunt object, avoid needles) to press the recessed RESET button. This will reset all settings to factory defaults.
8. Specifikacijos
| Parametras | Vertė |
|---|---|
| Prekės ženklas | MECHEER |
| Modelio numeris | PM1 |
| Maitinimo šaltinis | Elektra |
| Stilius | Skaitmeninis |
| Spalva | Mėlyna, Balta |
| Prekės svoris | 10 uncijos |
| Min. Veiklos ttage | 110 voltai (kintamoji srovė) |
| Matavimo tipas | Ammeter, Wattmeter, Voltmeter, Kilowatt-hour meter |
| Maksimali apkrova | 1800W (recommended setting) / 3680W (default max) |
| Ekrano dydis | 2.36 colių x 1.85 colio |
9. Garantija ir palaikymas
For any questions regarding your MECHEER Power Meter Plug or for technical assistance, please contact MECHEER customer support. Refer to your purchase documentation for specific warranty details and contact information.
You can also visit the official MECHEER store for more information and support resources: MECHEER Store on Amazon


