1. Įvadas
Thank you for choosing the IROAD X5 Dash Cam. This device is designed to record your driving journey in Full HD, providing crucial evidence in case of an incident. It features front and rear cameras, Wi-Fi connectivity for smartphone access, a G-Sensor for impact detection, and advanced driver assistance systems (ADAS). Please read this manual carefully before installation and operation to ensure proper use and optimal performance.

Figure 1: IROAD X5 Dash Cam (Front and Rear Units)
2. Produktas baigtasview
2.1 Pakuotės turinys
- Main Unit (Front Camera)
- Galinė kamera
- „Wi-Fi“ raktas
- IROAD Genuine 16GB MicroSD Card
- Mounting Bracket
- Constant Power Cable (3m)
- Rear Camera Connection Cable (6m)
- Instrukcijų vadovas (šis dokumentas)
- Spare Double-sided Tape
2.2 Pagrindinės savybės
- Dvigubas „Full HD“ įrašymas: Front and rear cameras record in 1920x1080P at 30fps.
- Platus Viewpakreipimo kampas: 140° laukas view for both front and rear cameras.
- G jutiklis: 3-axis acceleration sensor for automatic impact detection and event recording.
- „Wi-Fi“ ryšys: Connect to your smartphone via Wi-Fi for live view, playback, and settings adjustment.
- ADAS (Pažangi vairuotojo pagalbos sistema): Includes Lane Departure Warning, Front Vehicle Departure Warning, and Forward Collision Warning.
- Įvairūs įrašymo režimai: Continuous, Impact, Parking, and Motion Detection recording.
- Naktinis matymas: Pagerinta įrašymo kokybė esant prastam apšvietimui.
- Garso įrašymas: On/Off selectable.
3. Sąranka
3.1 „MicroSD“ kortelės įdėjimas
- Įsitikinkite, kad vaizdo registratorius yra išjungtas.
- Locate the MicroSD card slot on the main unit.
- Įkiškite pateiktą 16 GB „MicroSD“ kortelę į lizdą, kol ji spragtelės į vietą. Įsitikinkite, kad kortelė buvo tinkamai įstatyta.
3.2 Priekinės kameros įrengimas
- Nuvalykite priekinio stiklo vietą, kurioje ketinate montuoti kamerą.
- Attach the mounting bracket to the front camera.
- Peel off the protective film from the double-sided tape on the bracket.
- Mount the front camera on the windshield, ideally behind the rearview veidrodis, užtikrinantis skaidrumą view of the road. Press firmly for secure adhesion.

Figure 2: IROAD X5 Front Camera
3.3 Galinės kameros montavimas
- Clean the rear window area.
- Attach the rear camera to the rear window using the double-sided tape, ensuring a clear view.
- Connect the rear camera to the main unit using the provided 6m rear camera connection cable. Route the cable neatly along the vehicle's interior trim.
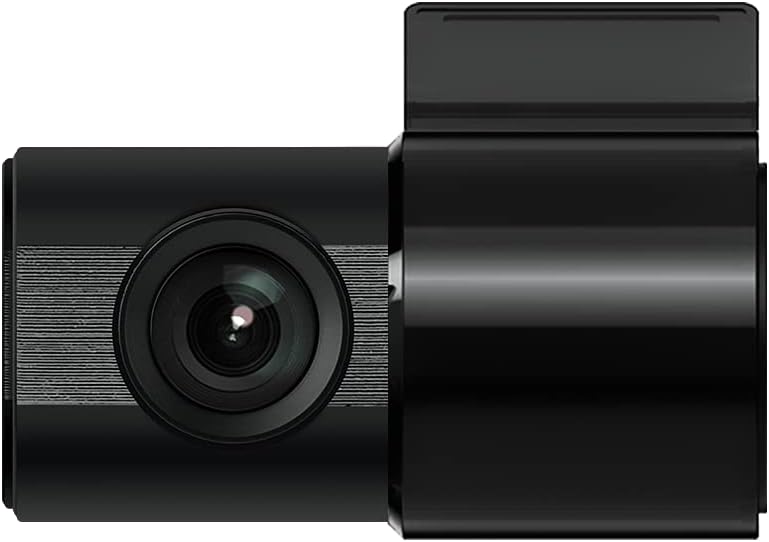
Figure 3: IROAD X5 Rear Camera
3.4 Maitinimo jungtis
- Connect the constant power cable to the main unit's power input port.
- Connect the other end of the power cable to your vehicle's power source (e.g., OBDII port for general and hybrid vehicles, if using the optional OBDII power cable, or fuse box for constant power). Consult a professional for hardwiring if unsure.
3.5 Wi-Fi Dongle Connection (Optional)
If your model requires an external Wi-Fi dongle, insert it into the designated USB port on the main unit. This enables Wi-Fi connectivity for smartphone app control.
4. Naudojimo instrukcijos
4.1 Automatic Power On/Off
The IROAD X5 Dash Cam will automatically power on and begin recording when your vehicle's ignition is turned on. It will power off automatically when the ignition is turned off.
4.2 Įrašymo režimai
- Nepertraukiamas įrašymas: The dash cam continuously records while driving. Older files are overwritten by new ones when the MicroSD card is full.
- Poveikio įrašymas: When the G-Sensor detects a sudden impact or collision, the dash cam automatically saves the current recording segment as an event file, neleisdamas jam būti perrašytam.
- Parkavimo įrašas: When the vehicle is parked and the ignition is off, the dash cam enters parking mode. It records events triggered by motion detection or impacts.
- Judesio aptikimo įrašymas: In parking mode, the camera records when motion is detected in its field of view.
4.3 ADAS funkcijos
The IROAD X5 includes Advanced Driver Assistance Systems to enhance driving safety:
- Lane Departure Warning (LDWS): Įspėja, jei jūsų automobilis išvažiuoja iš savo eismo juostos.
- Front Vehicle Departure Warning (FVDW): Praneša, kai priekyje važiuojanti transporto priemonė pradeda judėti iš sustojimo.
- Forward Collision Warning (FCWS): Įspėja apie galimą susidūrimą su priekyje važiuojančia transporto priemone.
These features can be configured via the IROAD smartphone application.
4.4 Garso įrašymas
Audio recording is enabled by default. You can toggle this feature on or off through the IROAD smartphone application settings.
4.5 Using the IROAD App (Wi-Fi)
- Download the "IROAD" app from your smartphone's app store.
- Įjunkite prietaisų skydelį.
- On your smartphone, go to Wi-Fi settings and connect to the IROAD dash cam's Wi-Fi network (SSID and password can be found in the app or on the device label).
- Open the IROAD app to access live view, recorded videos, and adjust settings.
5. Priežiūra
5.1 „MicroSD“ kortelių valdymas
It is recommended to format the MicroSD card regularly (e.g., once a month) to maintain optimal recording performance and prevent data corruption. This can be done through the IROAD smartphone app or by removing the card and formatting it on a computer.
5.2 Lęšių valymas
Periodically clean the front and rear camera lenses with a soft, dry cloth to ensure clear video quality. Avoid using abrasive cleaners.
5.3 Firmware atnaujinimai
Check the official IROAD website or the IROAD app for available firmware updates. Keeping your dash cam's firmware up-to-date ensures the latest features and bug fixes.
6. Problemų sprendimas
| Problema | Galima priežastis / sprendimas |
|---|---|
| Vaizdo registratorius neįsijungia. | Check power cable connection. Ensure vehicle ignition is on. Verify fuse in power cable or vehicle's fuse box. |
| Nėra įrašo arba įrašymas nesustoja. | MicroSD card may be full or corrupted. Format the MicroSD card. Ensure the card is inserted correctly. |
| „Wi-Fi“ ryšio problemos. | Ensure Wi-Fi dongle is properly connected (if applicable). Restart the dash cam and your smartphone. Check Wi-Fi settings on your phone. |
| Prasta vaizdo kokybė. | Clean camera lenses. Ensure protective film is removed from lenses. Check recording resolution settings in the app. |
| ADAS warnings are inaccurate. | Ensure the camera is properly calibrated and mounted centrally. Environmental factors (heavy rain, fog) can affect performance. |
7. Specifikacijos
| Funkcija | Specifikacija |
|---|---|
| Laukas View (Priekyje / gale) | 140° |
| Resolution (Front/Rear) | Full HD 1920x1080P |
| Frame Rate (Front/Rear) | 30 kadrų per sekundę |
| Įrašymo režimai | Continuous, Impact, Parking, Motion Detection |
| ADAS funkcijos | Lane Departure Warning, Front Vehicle Departure Warning, Forward Collision Warning |
| G jutiklis | 3 ašių pagreičio jutiklis |
| Garso įrašymas | On/Off selectable |
| Energijos suvartojimas | 2.6W |
| Darbinė temperatūra | -30°C iki 75°C |
| Įrašymo laikmena | „MicroSD“ kortelė (16 GB komplekte) |
| Pagrindinio įrenginio matmenys | 90 x 40 x 30 mm |
| Pagrindinio vieneto svoris | 60g |
| Ryšys | Wi-Fi |
| Ekrano tipas | LCD (4 inch, if applicable, though product description implies no screen on main unit) |
| Montavimo būdas | Klijai |
8. Garantija ir palaikymas
For warranty information, technical support, or service inquiries, please refer to the warranty card included with your product or visit the official IROAD websvetainėje. Išsaugokite pirkimo kvitą kaip pirkimo įrodymą garantiniams reikalavimams.


