1. Įvadas
Thank you for choosing the ORSKEY S950 Dash Cam. This manual provides detailed instructions for the proper installation, operation, and maintenance of your new dash camera system. Please read this manual thoroughly before use to ensure optimal performance and longevity of the device.

Image: The ORSKEY S950 Dash Cam, showing the main front unit with a 3-inch IPS screen and the separate rear camera.
2. Produktas baigtasview
2.1 Pakuotės turinys
The ORSKEY S950 Dash Cam package includes the following items:
- ORSKEY S950 Front Dash Camera
- Galinė kamera
- Automobilinis įkroviklis
- Mounting Bracket (Dashboard Mount)
- Galinės kameros kabelis
- Vartotojo vadovas
- Memory Card (Included components: Memory Card)
2.2 Pagrindinės savybės
The ORSKEY S950 Dash Cam is equipped with advanced features for comprehensive vehicle surveillance:
- 4K Ultra HD Front Recording: Captures clear, detailed footage.
- 1080P Rear Recording: Suteikia platų view transporto priemonės galo.
- Sony Starvis Sensor: Enhances low-light performance for superior night vision.
- 3 colių IPS ekranas: Offers a clear and wide viewing angle for playback and settings.
- 170-Degree Wide Field of View: Both front and rear cameras cover multiple lanes.
- Ciklo įrašymas: Automatiškai perrašo seniausią „foo“tage kai atminties kortelė pilna.
- G-Sensor (Emergency Accident Lock): Detects sudden impacts and locks the current video to prevent overwriting.
- Parkavimo stebėjimas: Provides surveillance when the vehicle is parked (requires continuous power supply).
- Support for up to 128GB MicroSD Card: Allows for extended recording times.

Image: Visual representation of the ORSKEY S950's powerful functions, including 4K+1080P recording, Sony Sensor, 3" IPS screen, dual 170° FOV, G-Sensor, Loop Recording, Parking Monitoring, Emergency Recording, and Max 128GB support.
3. Sąranka ir diegimas
3.1 „MicroSD“ kortelės įdėjimas
- Įsitikinkite, kad vaizdo registratorius yra išjungtas.
- Locate the MicroSD card slot on the side of the main unit.
- Insert the MicroSD card (Class 10 or higher, up to 128GB) into the slot until it clicks into place.
- Svarbu: Format the MicroSD card within the dash cam's settings menu before first use and periodically thereafter to ensure stable recording.
3.2 Priekinės kameros montavimas
- Nuvalykite priekinio stiklo vietą, kurioje ketinate montuoti kamerą.
- Attach the suction cup mount or adhesive mount to the windshield, ensuring it does not obstruct your view.
- Slide the main dash cam unit onto the mounting bracket until it locks securely.
- Adjust the camera lens angle to ensure it captures the road ahead clearly.
3.3 Galinės kameros montavimas
- Determine the optimal mounting location for the rear camera, typically on the rear windshield or near the license plate.
- Kruopščiai nuvalykite montavimo paviršių.
- Secure the rear camera using the provided adhesive or screws.
- Route the rear camera cable from the rear of the vehicle to the front dash cam unit. Ensure the cable is tucked away neatly to avoid interference with driving.
- Prijunkite galinio vaizdo kameros laidą prie tam skirto prievado pagrindiniame vaizdo registratoriaus bloke.

Image: Illustration of the dual lens dash camera's wide 170° viewing angles for both front and rear, providing comprehensive coverage.
3.4 Maitinimo jungtis
- Connect the car charger to the dash cam's power input port.
- Kitą automobilio įkroviklio galą prijunkite prie savo automobilio cigarečių degiklio lizdo.
- Vaizdo registratorius automatiškai įsijungs ir pradės įrašinėti, kai įjungsite automobilio degimą.
4. Naudojimo instrukcijos
4.1 Pagrindinės operacijos
- Maitinimo įjungimas/išjungimas: The camera powers on/off automatically with the vehicle's ignition. You can also manually power on/off by pressing and holding the power button.
- Įrašas: Once powered on and with a formatted MicroSD card, the camera will automatically start loop recording. A flashing indicator light usually signifies active recording.
- Ekrano įjungimas/išjungimas: The screen can be set to turn off automatically after a set period to avoid distraction while driving. Recording continues in the background.
4.2 Ciklo įrašymas
Loop recording ensures continuous recording by overwriting the oldest unlocked video files when the MicroSD card reaches its capacity. This feature prevents the card from filling up and stopping recording.
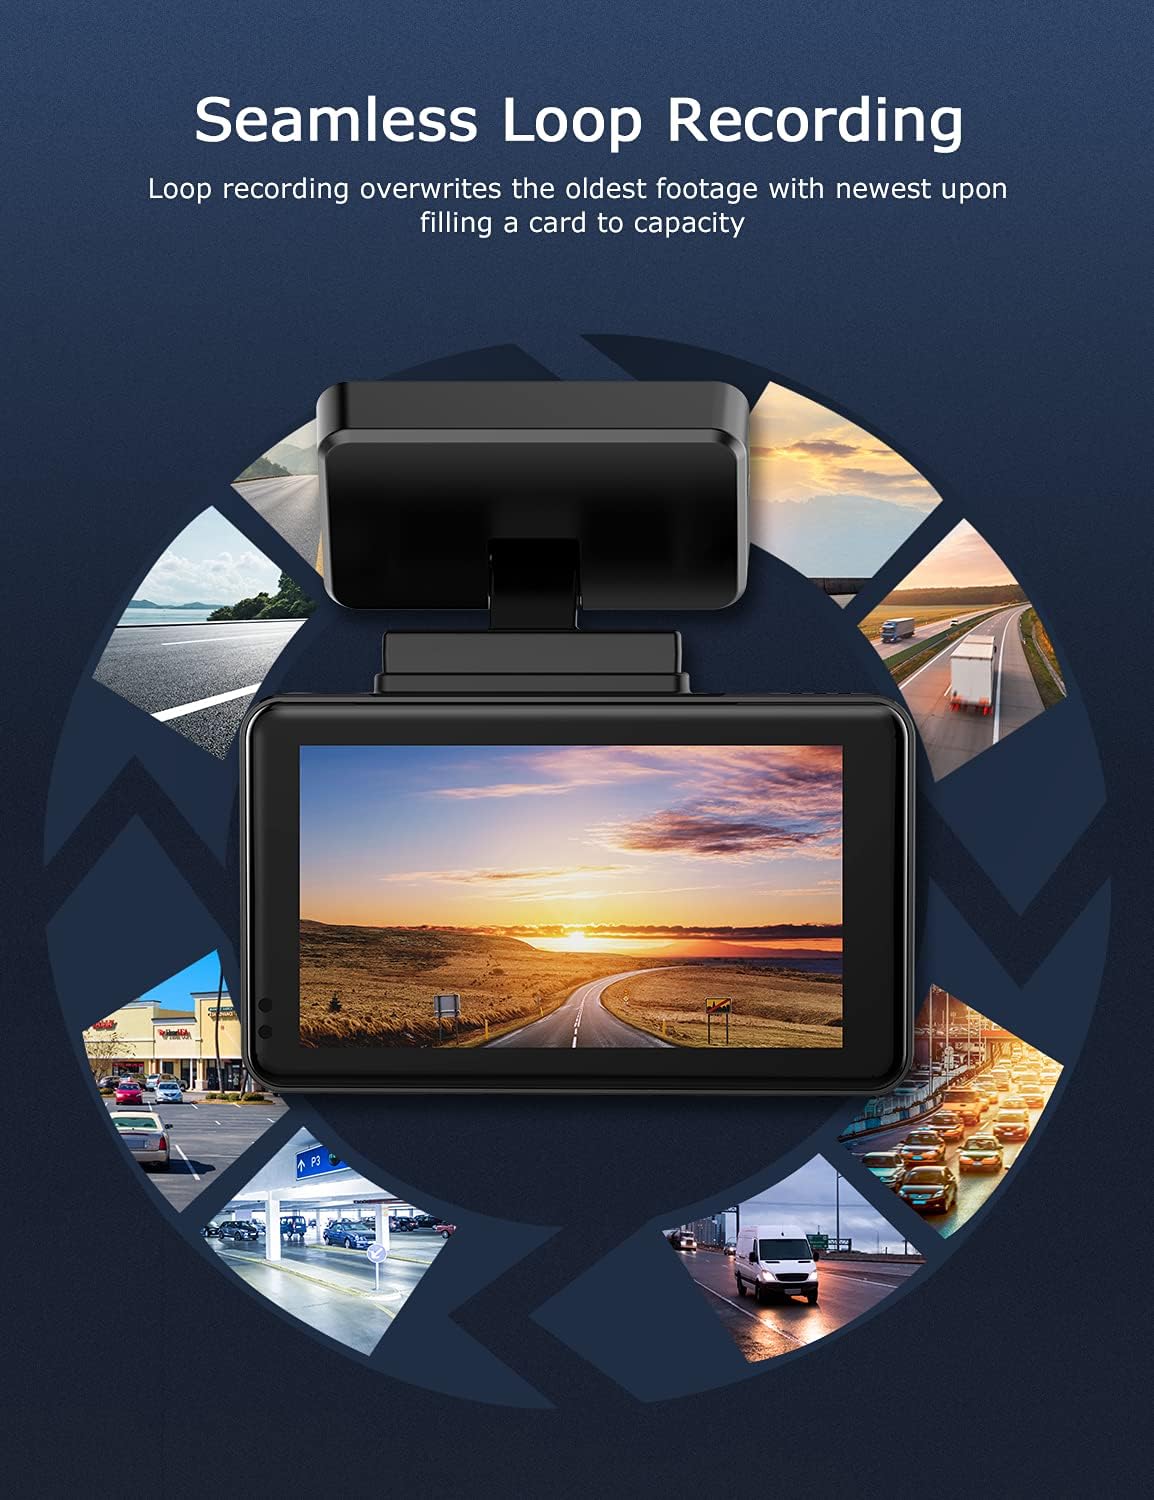
Image: Visual explanation of seamless loop recording, where the dash cam continuously records and overwrites the oldest footage once the memory card is full.
4.3 G-Sensor and Emergency Lock
The built-in G-sensor detects sudden acceleration, braking, or collisions. When triggered, it automatically locks the current video segment, protecting it from being overwritten by loop recording. These locked fileyra saugomi atskirame aplanke „MicroSD“ kortelėje.

Image: Depiction of the Emergency Accident Lock feature, where the G-sensor detects an impact and automatically locks the video footage as important evidence.
4.4 Parkavimo stebėjimas
When enabled, parking monitoring allows the dash cam to automatically record if it detects a collision or vibration while the vehicle is parked. This feature typically requires a hardwire kit (sold separately) for continuous power supply.
4.5 Naktinis matymas
Equipped with a Sony Starvis Sensor, the ORSKEY S950 provides enhanced night vision capabilities, capturing clear video footage net esant prastam apšvietimui.
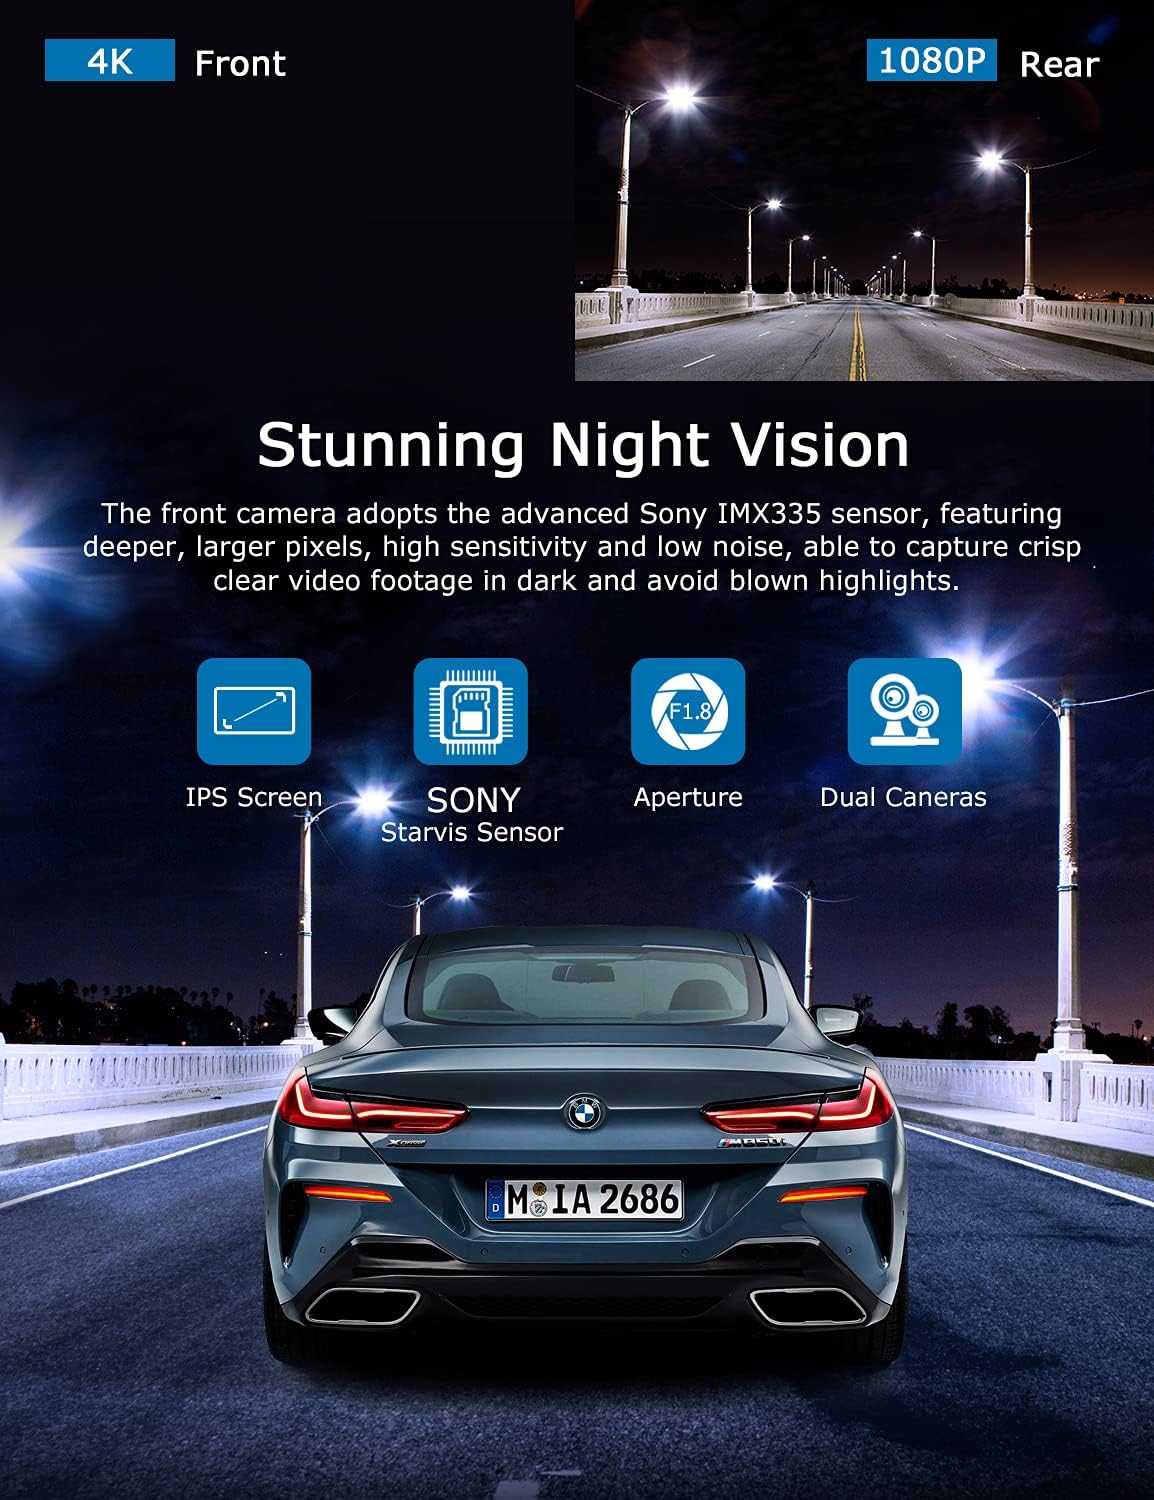
Image: Illustration highlighting the stunning night vision capability of the ORSKEY S950, showing clear footage tamsioje aplinkoje.
4.6 Atkūrimas
Norėdami iš naujoview įrašytas footage:
- Įrašymą sustabdykite paspausdami mygtuką Gerai (jei šiuo metu įrašinėjama).
- Enter playback mode via the menu options.
- Navigate through video files using the up/down buttons.
- Pasirinkite a file ir paspauskite OK, kad paleistumėte.
- You can also remove the MicroSD card and view files on a computer using a compatible media player.
5. Priežiūra
- „MicroSD“ kortelės formatavimas: Regularly format the MicroSD card (at least once a month) to prevent data corruption and ensure optimal performance. Back up important files prieš formatavimą.
- Valymas: Kameros objektyvą ir ekraną valykite minkštu, sausu skudurėliu. Venkite naudoti abrazyvinius valiklius ar tirpiklius.
- Temperatūra: Venkite vaizdo registratoriaus ilgalaikio laikymo itin aukštoje temperatūroje, nes tai gali paveikti akumuliatoriaus veikimo laiką ir komponentų vientisumą.
6. Problemų sprendimas
| Problema | Galima priežastis | Sprendimas |
|---|---|---|
| Kamera neįsijungia. | No power supply; faulty charger; dead battery. | Check car charger connection and vehicle's cigarette lighter. Ensure the camera's internal battery is charged. |
| "Card Error" or recording stops. | MicroSD card not formatted, incompatible, or corrupted. | Format the MicroSD card in the camera. Use a high-quality Class 10 (U3 recommended) MicroSD card from a reputable brand. Try a different card. |
| Video playback is laggy or corrupted. | Slow MicroSD card; file system issues; incompatible player. | Ensure you are using a high-speed MicroSD card (V30/U3). Format the card. Try playing videos with a different media player on your computer. |
| Rear camera image is reversed. | Default setting for mirror view. | Check camera settings for a 'Mirror Image' or 'Flip' option for the rear camera. If not available, this may be intended for reverse assistance rather than recording. |
| G jutiklis per jautrus / nepakankamai jautrus. | G jutiklio jautrumo nustatymas. | Adjust the G-Sensor sensitivity level in the camera's settings menu. |
7. Specifikacijos
| Funkcija | Specifikacija |
|---|---|
| Modelio numeris | S950 |
| Vaizdo įrašymo raiška | 4K (priekinis), 1080P (galinis) |
| Ekrano dydis | 3 colių IPS ekranas |
| Laukas View | 170 laipsnių (priekyje ir gale) |
| Ypatingos savybės | Loop Recording, Night Vision, G-Sensor, Parking Monitoring |
| Saugojimo palaikymas | Up to 128GB MicroSD Card (Class 10/U3 recommended) |
| Kontrolės metodas | Palieskite |
| Maitinimo šaltinis | Car Charger (1 Lithium Polymer battery included) |
| Gaminio matmenys | 21 x 15.5 x 4.5 cm; 505 g |
8. Garantija ir palaikymas
ORSKEY products are designed for reliability and performance. For warranty information, technical support, or any inquiries regarding your ORSKEY S950 Dash Cam, please refer to the contact details provided on the official ORSKEY websvetainėje arba gaminio pakuotėje. Išsaugokite pirkimo kvitą kaip pirkimo įrodymą garantijos pretenzijoms.
For further assistance, you may visit the ORSKEY Store on Amazon: ORSKEY Store


