1. Įvadas
This manual provides detailed instructions for the setup, operation, and maintenance of your Bytech BYMCWC101BLK PC Web Camera. Please read this manual thoroughly before using the product to ensure proper functionality and longevity.
2. Pakuotės turinys
Patikrinkite, ar jūsų gaminio pakuotėje yra visi toliau išvardyti daiktai:
- Bytech BYMCWC101BLK kompiuteris Web Fotoaparatas
- Vartotojo vadovas (šis dokumentas)
- Integruotas USB laidas
3. Sąranka
Follow these steps to set up your Bytech BYMCWC101BLK PC Web Kamera:
- Vieta: Padėkite vietą webcam on top of your computer monitor, laptop screen, or a flat surface. The adjustable clip allows for secure attachment.
- Prisijunkite prie kompiuterio: Prijunkite integruotą USB laidą nuo webkamerą į laisvą kompiuterio USB prievadą.
- Tvarkyklės diegimas: The webcam is typically plug-and-play. Your operating system (Windows, macOS, Linux) should automatically detect and install the necessary drivers. Wait for the installation to complete.
- Patvirtinimas: Open a video conferencing application (e.g., Zoom, Skype, Microsoft Teams) or your computer's camera application to confirm the webKamera atpažįstama ir rodo vaizdo įrašą.
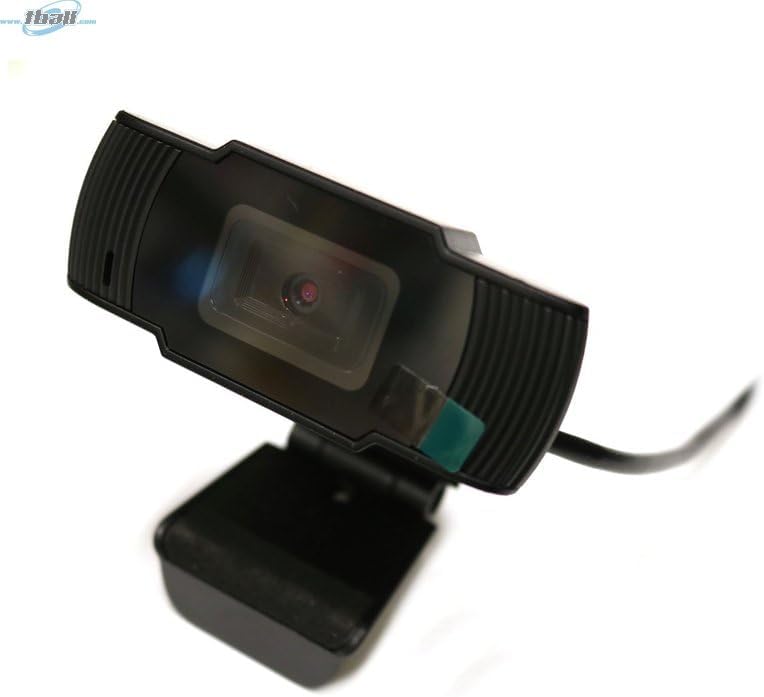
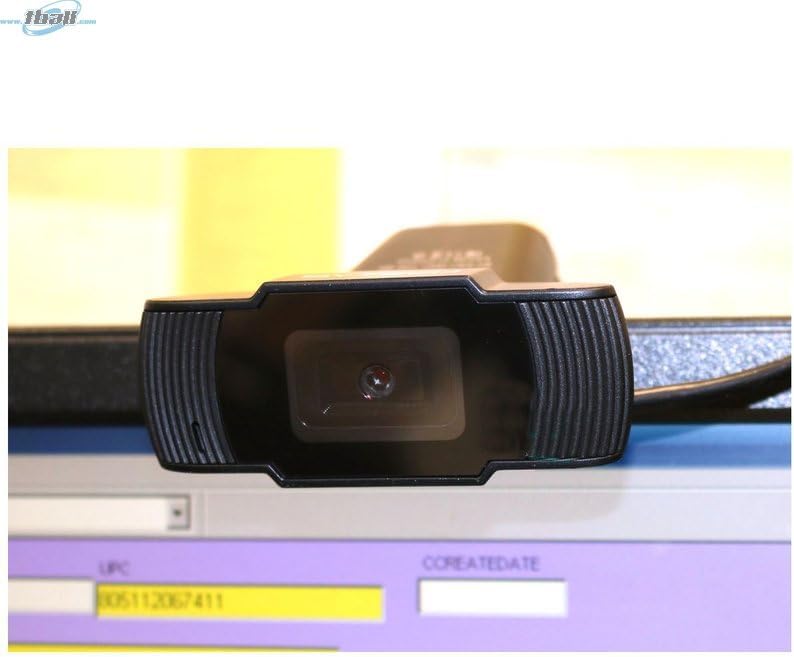
Image: The Bytech BYMCWC101BLK PC Web Camera securely mounted on top of a computer monitor, demonstrating its adjustable clip design.
4. Naudojimo instrukcijos
Once installed, the Bytech BYMCWC101BLK PC Web Camera can be used with various applications:
- Vaizdo konferencijos: Select the Bytech webcam as your video input device within your preferred video conferencing software (e.g., Zoom, Skype, Google Meet).
- Srautas: For live streaming platforms, configure the webcam as your primary video source in your streaming software (e.g., OBS Studio).
- Įrašas: Use your computer's built-in camera application or third-party software to record video.
- Esant silpnam apšvietimui: The webcam features BSI CMOS photo sensor technology and is designed to perform effectively in low-light conditions, providing clear video even with limited ambient lighting.
Vaizdas: Stambus planas view of the Bytech BYMCWC101BLK PC Web Camera's lens, highlighting its design and integrated privacy cover (if applicable, otherwise just lens).
5. Priežiūra
To ensure optimal performance and extend the lifespan of your webkumštelis:
- Valymas: Švelniai nuvalykite objektyvą minkštu, nepūkuotu skudurėliu. Venkite naudoti stiprias chemines medžiagas ar abrazyvines medžiagas.
- Saugykla: Kai nenaudojate, laikykite webcam in a clean, dry environment away from direct sunlight and extreme temperatures.
- Kabelio priežiūra: Nelenkite ir nespauskite USB kabelio per daug.
6. Problemų sprendimas
Jei kyla problemų dėl jūsų webkamera, žr. šias dažniausiai pasitaikančias problemas ir sprendimus:
- Nėra vaizdo / vaizdo įrašo:
- Įsitikinkite, kad USB laidas yra tvirtai prijungtas prie abiejų webkamera ir jūsų kompiuteris.
- Pabandykite prijungti webkamerą į kitą USB prievadą.
- Iš naujo paleiskite kompiuterį.
- Check your application settings to ensure the Bytech webkamera pasirinkta kaip vaizdo įvesties įrenginys.
- Prasta vaizdo kokybė:
- Užtikrinkite tinkamą apšvietimą savo aplinkoje.
- Išvalykite webkameros objektyvą minkštu skudurėliu.
- Check your application's video settings for resolution and frame rate.
- Microphone Not Working (if applicable):
- Patikrinkite, ar webcam's microphone is selected as the audio input device in your computer's sound settings and within your application.
- Ensure the microphone is not muted in your system or application.
7. Specifikacijos
| Funkcija | Detalė |
|---|---|
| Modelio pavadinimas | BYMCWC101BLK |
| Prekės ženklas | Bytech |
| Ryšio technologija | USB |
| Nuotraukų jutiklių technologija | BSI CMOS |
| Vaizdo įrašymo formatas | MP4 |
| Ypatinga funkcija | Silpnas apšvietimas |
| Spalva | Juoda |
| Prekės svoris | 4.9 uncijos |
| Pakuotės matmenys | 7.76 x 4.65 x 2.44 colio |
8. Garantija ir palaikymas
For warranty information or technical support, please refer to the documentation included with your purchase or contact your retailer. Keep your proof of purchase for warranty claims.


