1. Įvadas
This manual provides comprehensive instructions for the setup, operation, maintenance, and troubleshooting of your BOMAKER Mini WiFi Projector 10''. Please read this manual thoroughly before using the projector to ensure proper operation and to maximize its lifespan. Keep this manual for future reference.
The BOMAKER Mini WiFi Projector 10'' is a portable 720P HD LCD projector designed for home cinema, gaming, and various multimedia applications. It features WiFi connectivity for smartphone mirroring, multiple input options including HDMI, USB, and AV, and supports projection sizes up to 300 inches.
2. Svarbi saugos informacija
Kad išvengtumėte gaisro, elektros smūgio ar sužalojimų, visada laikykitės šių saugos priemonių:
- Neužblokuokite ventiliacijos angų. Užtikrinkite pakankamą oro srautą aplink projektorių.
- Nežiūrėkite tiesiai į projektoriaus objektyvą, kai lamp įjungtas. Ryški šviesa gali pažeisti akis.
- Saugokite projektorių nuo lietaus ar drėgmės, kad išvengtumėte elektros smūgio.
- Naudokite tik prie projektorijaus pridėtą maitinimo adapterį.
- Padėkite projektorių ant stabilaus, lygaus paviršiaus.
- Atjunkite projektorių nuo maitinimo lizdo žaibuojant arba kai jis ilgą laiką nenaudojamas.
- Nebandykite patys taisyti šio gaminio. Visus techninės priežiūros darbus patikėkite kvalifikuotiems techninės priežiūros darbuotojams.
3. Pakuotės turinys
Patikrinkite, ar pakuotėje yra visi toliau išvardyti daiktai:
- 1 x BOMAKER Mini WiFi Projector
- 1x nuotolinio valdymo pultas
- 1x maitinimo adapteris
- 1x HDMI laidas
- 1 x AV kabelis
- 1 x Vartotojo vadovas
4. Produktas baigtasview
Familiarize yourself with the various parts and connections of your projector.

4.1 paveikslas: Priekyje view of the BOMAKER Mini WiFi Projector. This image shows the projector's lens, focus ring, and keystone correction dial, with a smartphone wirelessly connected and displaying content on its screen, illustrating the WiFi mirroring capability.
4.1. Įvesties / išvesties prievadai
The projector features a variety of ports for connecting different devices.

4.2 paveikslas: Galinis view of the projector displaying its connectivity options. From left to right, the ports include AV, USB, Audio Out, VGA, HDMI, and Micro SD card slot, allowing for versatile device connections.
- AV prievadas: Prijunkite prie senesnių įrenginių naudodami pridedamą AV kabelį.
- USB prievadas: Skirta USB atmintinėms prijungti medijos atkūrimui files.
- Garso išvestis: Prijunkite išorinius garsiakalbius arba ausines.
- VGA prievadas: Connect to computers or laptops with a VGA output.
- HDMI prievadas: Connect to devices like laptops, gaming consoles (PS4), TV sticks, etc.
- „Micro SD“ kortelės lizdas: Įdėkite „Micro SD“ kortelę, kad galėtumėte leisti mediją files.
5. Sąranka
5.1. Įdėjimas
Choose a suitable location for your projector. For optimal viewing, place the projector on a flat, stable surface or mount it. The optimal projection distance is between 8.2 and 11.2 feet (2.5 to 3.4 meters) for a screen size of 30 to 300 inches.
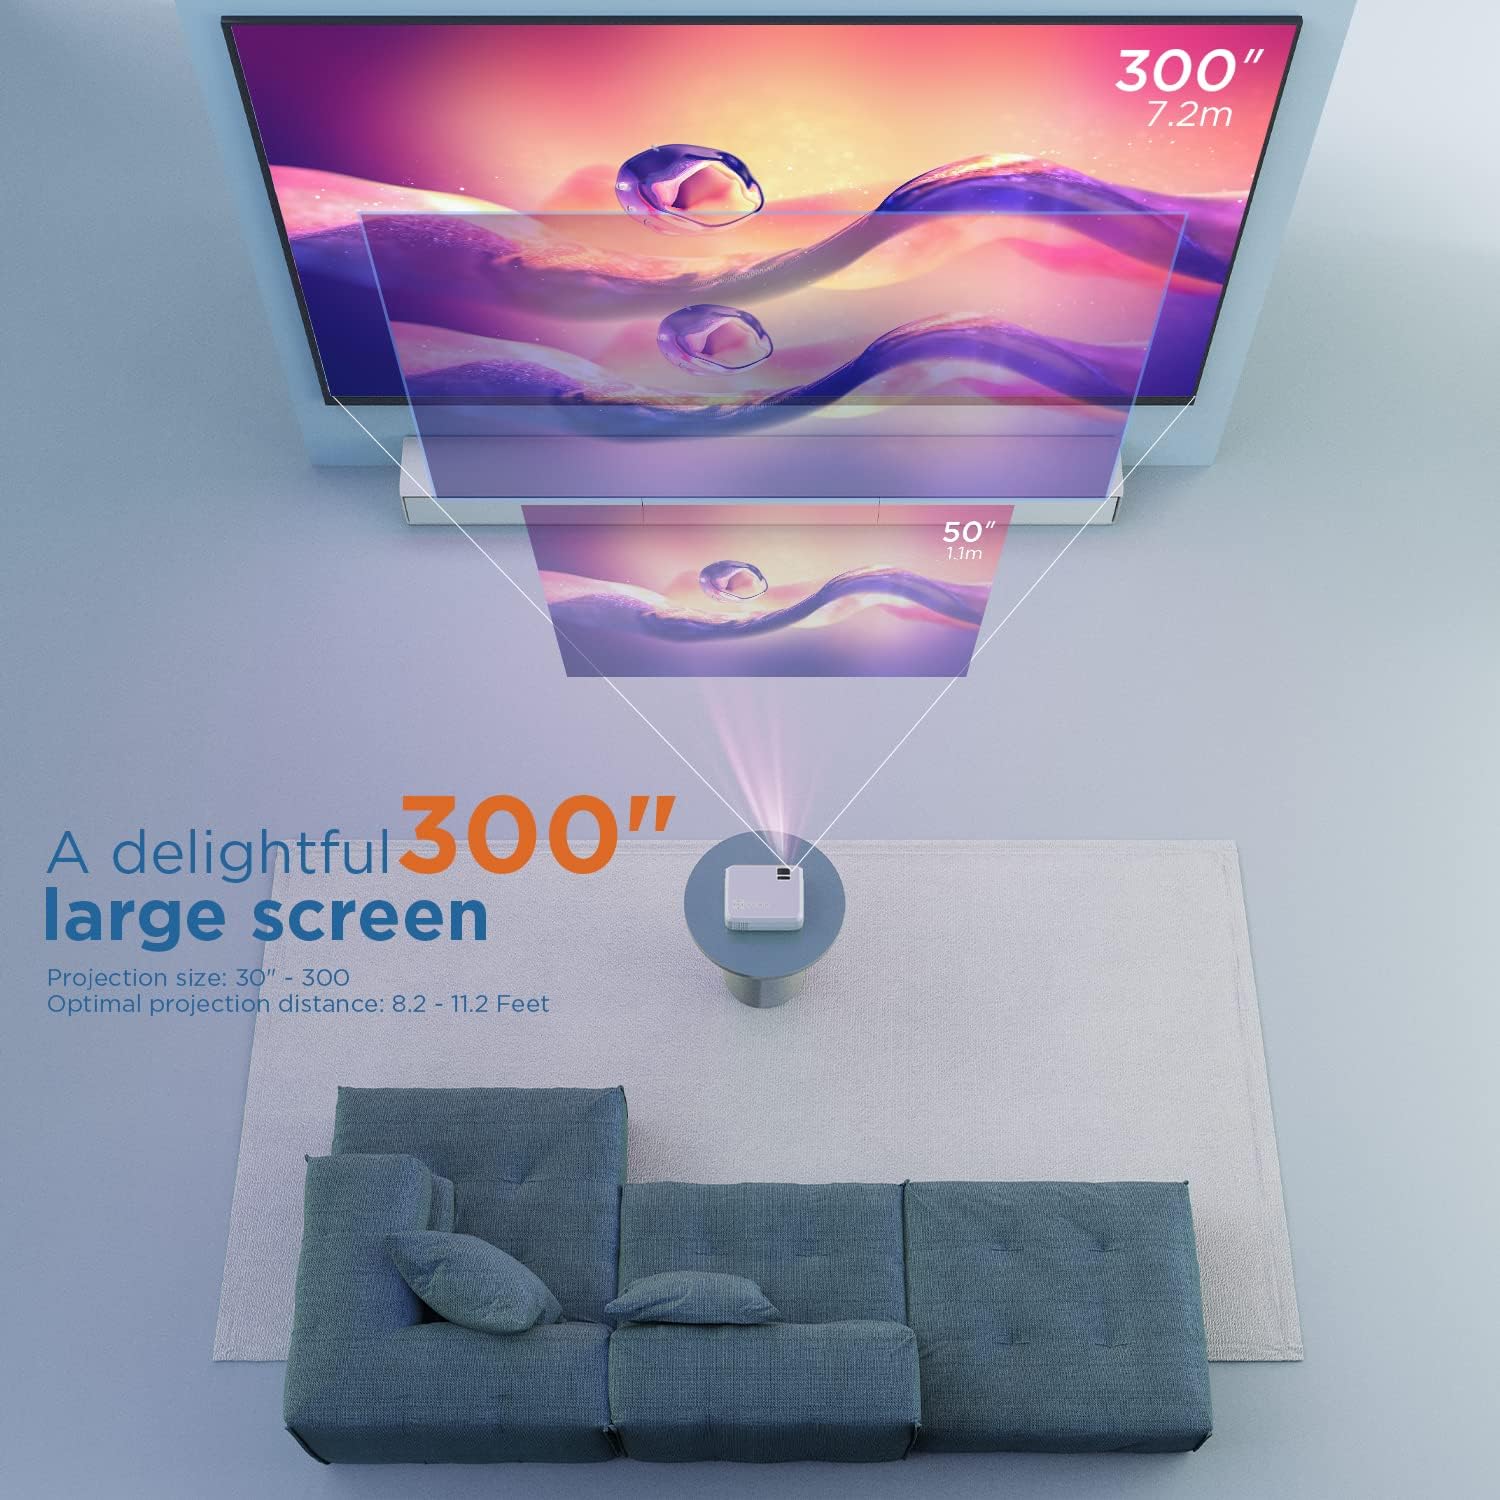
5.1 paveikslas: Illustration of projection distances and corresponding screen sizes. The image demonstrates how varying the distance between the projector and the screen affects the projected image size, from 50 inches (1.1m) to 300 inches (7.2m).
5.2. Maitinimo prijungimas
- Prijunkite maitinimo adapterį prie projektoriaus maitinimo įvesties prievado.
- Įkiškite maitinimo adapterį į sieninį lizdą.
- Paspauskite projektoriaus arba nuotolinio valdymo pulto maitinimo mygtuką, kad jį įjungtumėte.
5.3. Fokusavimas ir trapecijos korekcija
- Fokusas: Rotate the focus ring on the projector lens until the image is clear and sharp.
- Pagrindinis akmuo: If the projected image appears trapezoidal, adjust the keystone correction dial (usually located near the lens) until the image is rectangular.
6. Naudojimo instrukcijos
6.1. Pagrindinė operacija
- Maitinimo įjungimas/išjungimas: Paspauskite projektoriaus arba nuotolinio valdymo pulto maitinimo mygtuką.
- Įvesties šaltinio pasirinkimas: Use the "Source" button on the remote or projector to select the desired input (HDMI, AV, USB, Micro SD, WiFi).
- Garso reguliavimas: Use the volume buttons on the remote control.
6.2. Prietaisų prijungimas
Projektorius palaiko įvairius prijungimo būdus:
6.2.1. HDMI jungtis
Connect your laptop, gaming console (PS4), TV stick (e.g., Roku, Fire TV), or other HDMI-enabled devices using an HDMI cable. Select "HDMI" as the input source.
6.2.2. USB/Micro SD Connection
Insert a USB drive or Micro SD card into the respective port. Select "USB" or "Micro SD" as the input source. The projector will display a menu to browse and play media files (photos, videos, music, text).
6.2.3. AV Connection
Use the included AV cable to connect to devices with AV output. Select "AV" as the input source.
6.2.4. WiFi Mirroring (Smartphone Connection)
The projector supports wireless screen mirroring from smartphones (iOS and Android).
- Select "WiFi" as the input source on the projector.
- Follow the on-screen instructions to connect your smartphone to the projector's WiFi network.
- Once connected, enable screen mirroring/casting feature on your smartphone (e.g., "Screen Mirroring" for iOS, "Smart View" or "Cast" for Android).
- Pasirinkite projektorių iš galimų įrenginių sąrašo.
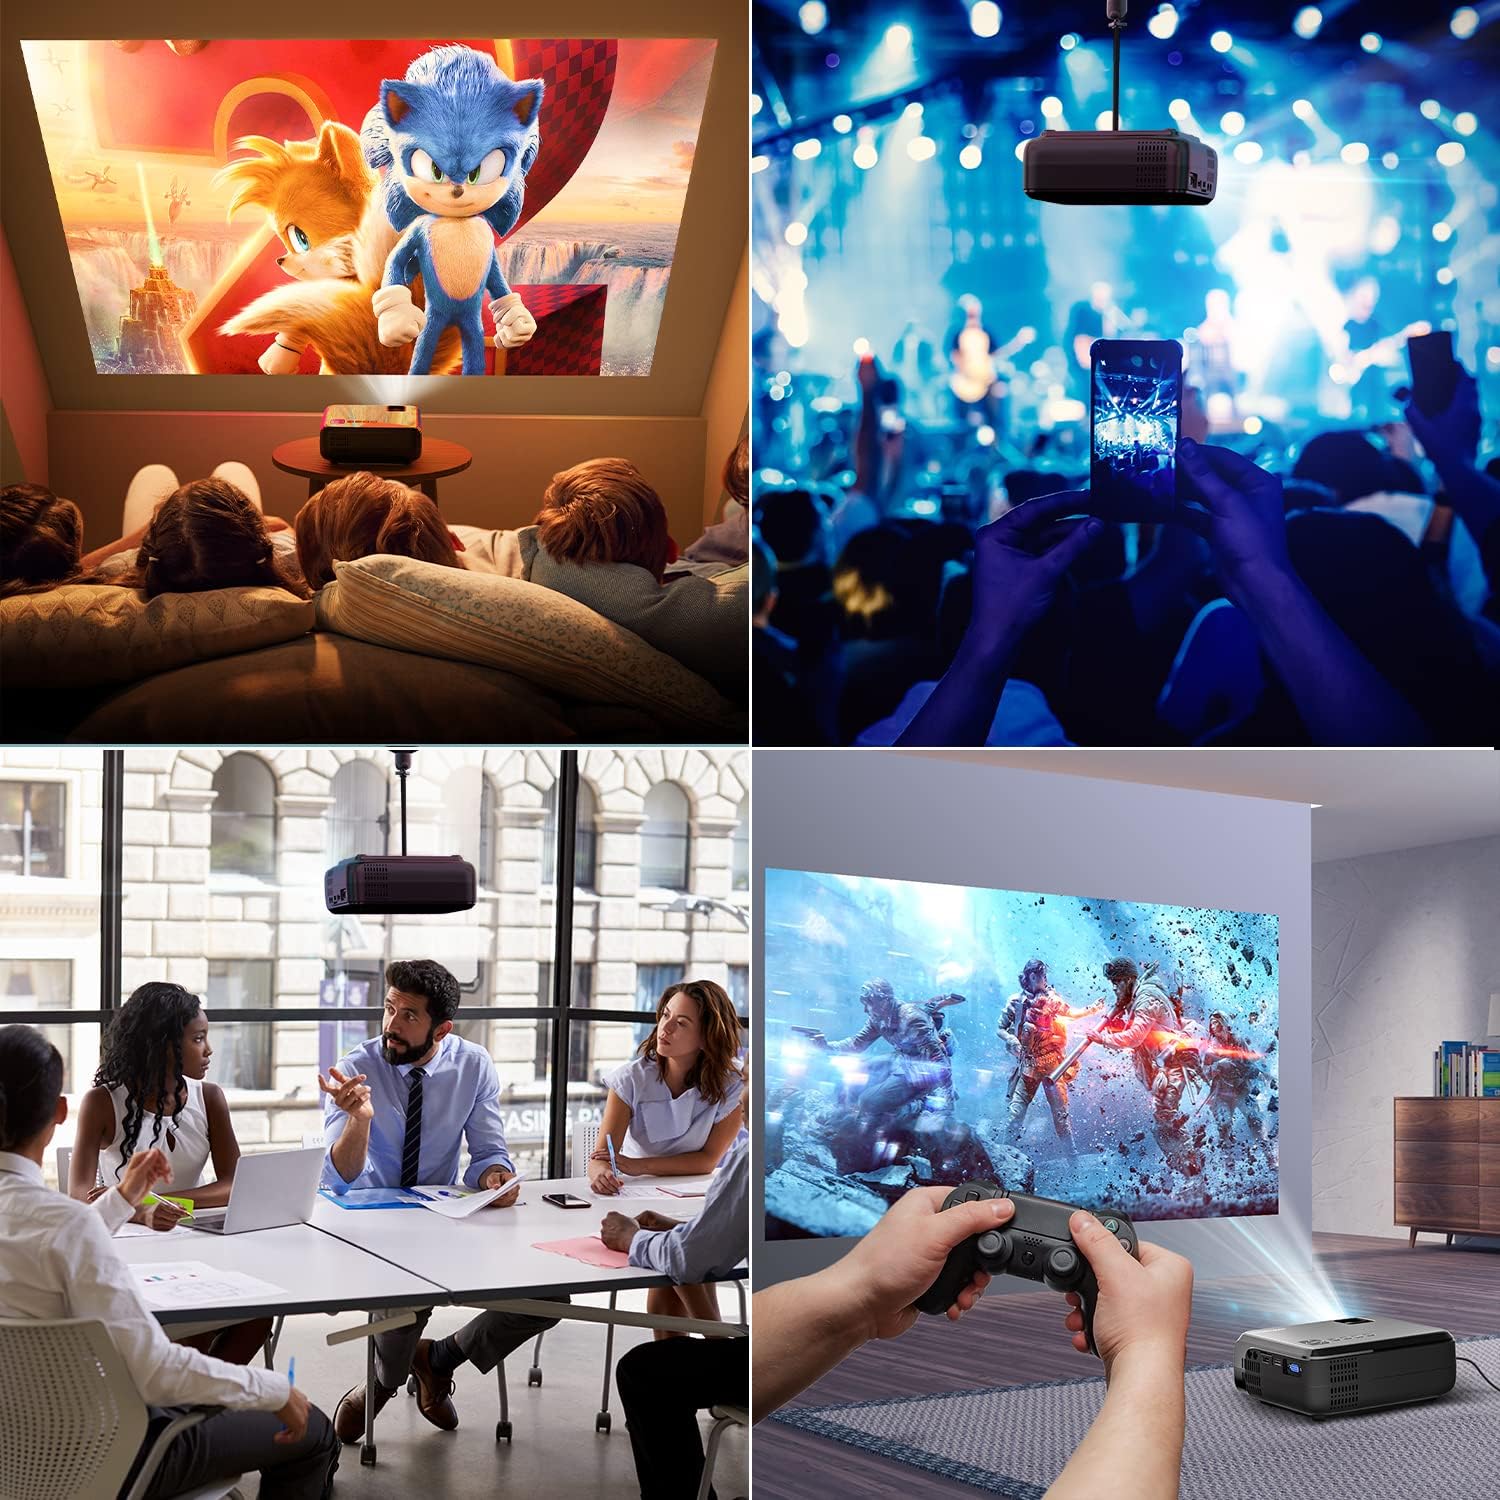
6.1 paveikslas: This image displays a collage of the projector in different environments: a family watching a movie, a person using a smartphone to control the projector at a concert, a business meeting with a presentation, and a person playing video games. It highlights the versatility of the BOMAKER Mini WiFi Projector for entertainment and professional use.
6.3. Visual Experience
The projector delivers a native 720P HD resolution, ensuring clear and detailed images. It supports 1080P decoding and features a high brightness output for vibrant visuals.
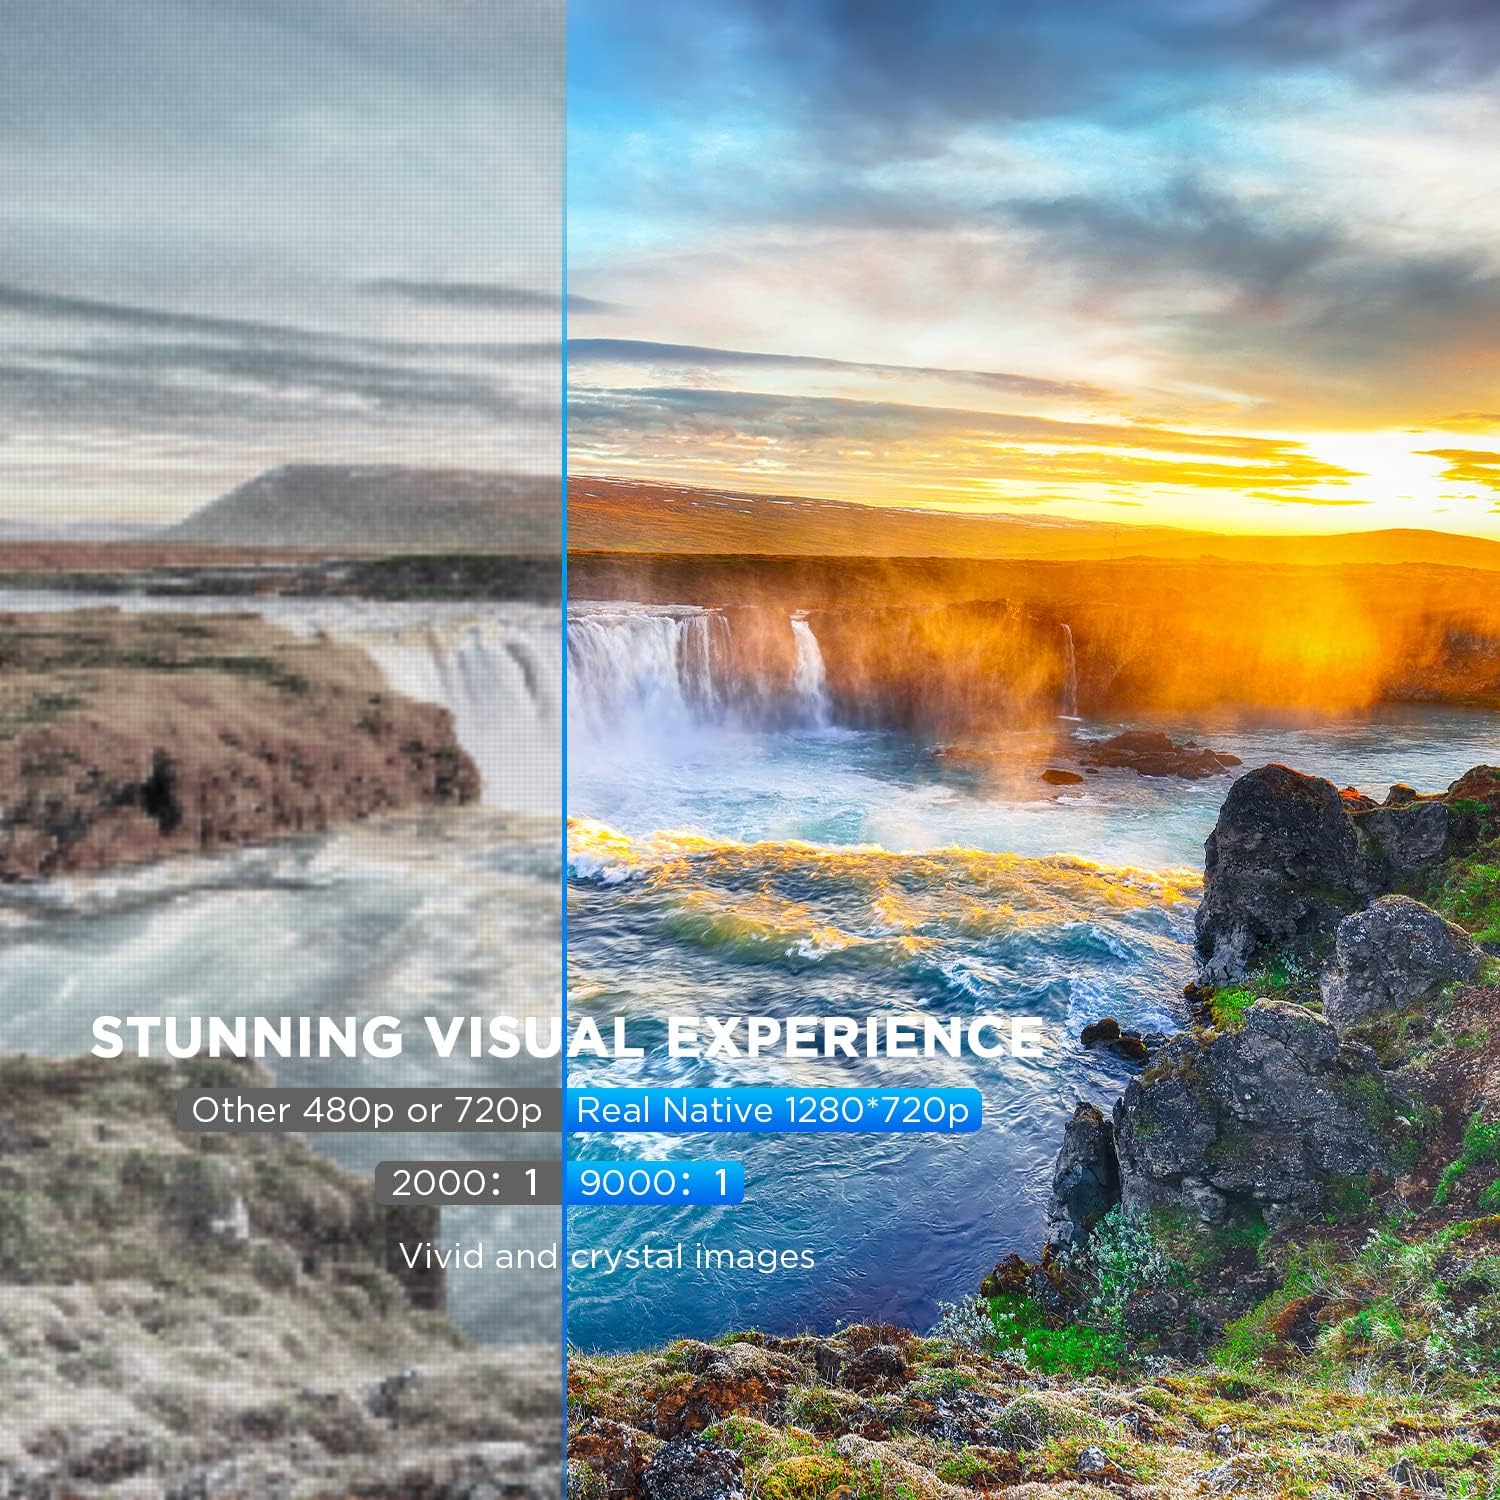
6.2 paveikslas: A side-by-side comparison demonstrating the difference between standard 480p/720p projection and the projector's real native 1280x720p resolution. The native resolution side shows significantly sharper details and richer colors in a landscape image, emphasizing the "Stunning Visual Experience" and "Vivid and crystal images".

6.3 paveikslas: This image illustrates the projector's "Crystal Clear Picture with Ultra-low Latency" feature, showing a vibrant, high-definition projection of a car racing scene on a large screen in a living room setting. The text highlights upgraded lens settings for a new visual experience with latency less than 30ms.
7. Priežiūra
7.1. Objektyvo valymas
Use a soft, lint-free cloth specifically designed for cleaning optical lenses. Do not use abrasive cleaners or solvents. Gently wipe the lens to remove dust or smudges.
7.2. Projektoriaus korpuso valymas
Wipe the projector's exterior with a soft, dry cloth. For stubborn dirt, a slightly damp galima naudoti sausą šluostę, o po to – sausą. Įsitikinkite, kad į ventiliacijos angas nepatenka skysčio.
7.3. Sandėliavimas
When not in use, store the projector in a cool, dry place, away from direct sunlight and extreme temperatures. Cover the lens with its cap to protect it from dust.
8. Problemų sprendimas
Jei kyla problemų dėl projektoriaus, žr. šias dažniausiai pasitaikančias problemas ir sprendimus:
| Problema | Galima priežastis | Sprendimas |
|---|---|---|
| Ekrane nėra vaizdo | Power cable not connected; incorrect input source; device not powered on. | Check power connection; select correct input source; ensure connected device is on. |
| Vaizdas neryškus | Nenustatytas fokusavimas; projektorius per arti/per toli nuo ekrano. | Sureguliuokite fokusavimo žiedą; pakeiskite projektoriaus padėtį. |
| Vaizdas yra trapecijos formos | Trapecijos korekcija nepakoreguota. | Sureguliuokite trapecijos korekcijos ratuką. |
| Nėra garso | Volume too low; external speakers not connected; audio settings on source device. | Increase volume; connect external speakers if needed; check audio output settings on source device. |
| WiFi mirroring issues | Incorrect WiFi connection; smartphone mirroring feature not activated. | Ensure correct WiFi network is selected; activate screen mirroring on your smartphone. |
9. Specifikacijos
| Funkcija | Detalė |
|---|---|
| Prekės ženklas | BOMAKER |
| Modelio numeris | Mini WiFi Projector 10'' |
| Ekrano raiška | Native 1280 x 720 (Supports 1080P decoding) |
| Ekrano tipas | LCD |
| Ryšio technologija | HDMI, Wi-Fi |
| Suderinami įrenginiai | Smartphone, TV Stick, PS4, Laptop, USB Drive, Micro SD Card |
| Gaminio matmenys | 22L x 17l x 9H centimeters |
| Formos faktorius | Nešiojami |
| Rekomenduojami naudojimo būdai | Namų kinas, žaidimai |
| Spalva | Baltas |
10. Garantija ir palaikymas
For warranty information or technical support, please refer to the documentation included with your purchase or contact BOMAKER customer service. Details regarding specific warranty periods and support channels are typically provided on the manufacturer's official websvetainėje arba produkto pakuotėje.


