1. Įvadas
The Keychron Q7 is a 70% layout, all-metal custom mechanical keyboard designed for versatility and performance. It features a CNC machined aluminum body, double-gasket design, and supports QMK/VIA for extensive customization. This manual provides essential information for setting up, operating, maintaining, and troubleshooting your Keychron Q7 keyboard.

Image 1.1: Keychron Q7 Wired Custom Mechanical Keyboard with Gateron G Pro Blue Switches.
2. Pakuotės turinys
Before proceeding, please verify that all items are present in your Keychron Q7 package:

Image 2.1: Diagram illustrating the contents included with the Keychron Q7 keyboard.
- 1x Fully Assembled Keyboard (including Aluminum Case, PCB, Steel Plate, Sound Absorbing Foam, Case Foam, 10 Gaskets)
- 5 komplektai x stabilizatoriai
- 1 set x Keycaps (Double-Shot PBT)
- 1 rinkinys x jungikliai („Gateron G Pro“)
- 1x C tipo–C tipo kabelis
- 1x A tipo–C tipo adapteris
- 1x jungiklio traukiklis
- 1x raktų dangtelio traukiklis
- 1x Atsuktuvas
- 1x šešiabriaunis raktas
Note: All tools are typically located at the bottom of the packaging.
3. Sąranka
3.1 Klaviatūros prijungimas
- Locate the USB-C port on the back of the Keychron Q7 keyboard.
- Connect the provided Type-C to Type-C cable to the keyboard and your computer. If your computer only has USB-A ports, use the included Type-A to Type-C adapter.
- Klaviatūra yra „plug-and-play“ tipo ir jūsų operacinė sistema turėtų ją atpažinti automatiškai.
3.1 vaizdas: galinis view of the Keychron Q7 showing the USB-C port and the Mac/Windows toggle switch.
3.2 Operacinės sistemos perjungimas
The Keychron Q7 features a physical switch to toggle between Windows and macOS layouts. This switch is located on the back edge of the keyboard, near the USB-C port.
- Slide the switch to "Win" for Windows and Linux operating systems.
- Slide the switch to "Mac" for macOS.
Ensure the switch is set to your operating system for correct key functionality.
4. Operacija
4.1 QMK/VIA pritaikymas
The Keychron Q7 is fully compatible with QMK and VIA firmware, allowing for extensive customization of key assignments, macros, and lighting effects. VIA is a graphical user interface that simplifies the customization process without requiring firmware flashing.
- Atsisiųskite VIA programinę įrangą iš oficialios „Keychron“ svetainės website or the VIA GitHub repository.
- Connect your Keychron Q7 keyboard to your computer.
- Launch the VIA application. The software should automatically detect your keyboard.
- Use the intuitive interface to remap keys, create macros, and adjust RGB lighting settings across multiple layers.

Image 4.1: Screenshot of the VIA software interface demonstrating key remapping and macro programming for the Keychron Q7.
4.2 Karštuoju būdu keičiami jungikliai
The Keychron Q7 features hot-swappable sockets, allowing you to change mechanical switches without soldering. This supports most 3-pin and 5-pin MX-style mechanical switches.
- Jungiklio nuėmimas: Naudokite pateiktą jungiklio traukiklį. Švelniai suimkite jungiklį už viršutinių ir apatinių spaustukų ir patraukite tiesiai aukštyn.
- Jungiklio diegimas: Align the pins of the new switch with the holes on the PCB. Ensure the pins are straight. Press the switch firmly until it clicks into place. Do not force it if resistance is met; check pin alignment.

4.2 paveikslėlis: Stambus planas view of the Keychron Q7's hot-swappable switch sockets with various Gateron switches.
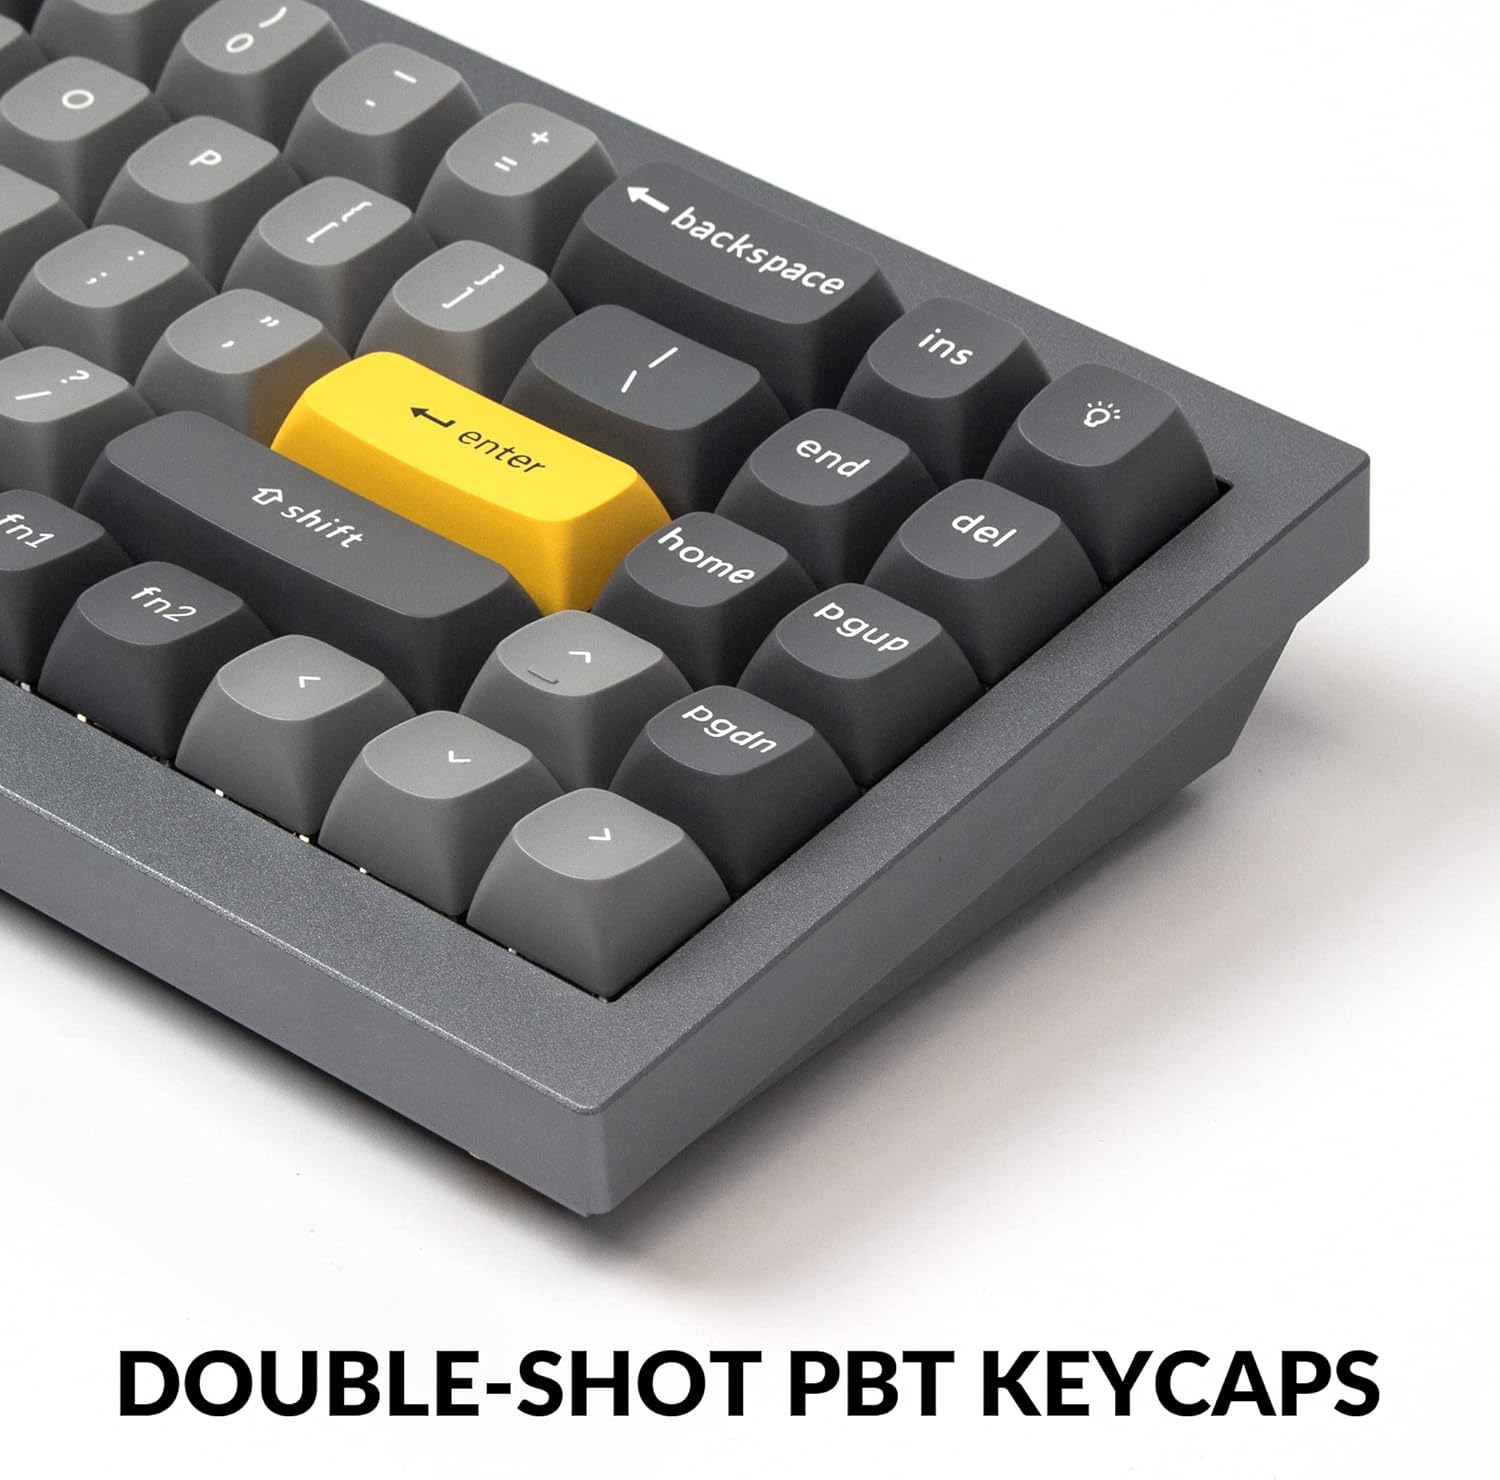
4.3 Double-Shot PBT Keycaps
The Q7 comes equipped with durable double-shot PBT keycaps in an OSA profile. These keycaps offer enhanced comfort, excellent oil resistance, and long-term legibility due to their manufacturing process where two plastics are molded together.

Image 4.3: Close-up of the Keychron Q7's double-shot PBT keycaps, highlighting their texture and profile.
4.4 South-Facing RGB Backlight
The keyboard features south-facing RGB LEDs. This design ensures that the backlight illuminates the key legends effectively from the typist's perspective and prevents interference with Cherry-profile keycaps, should you choose to install them.

Image 4.4: Illuminated south-facing RGB LEDs beneath the keycaps of the Keychron Q7.
5. Priežiūra
5.1 Bendras valymas
- Dulkių šalinimas: Dulkėms ir šiukšlėms tarp klaviatūros dangtelių nupūsti naudokite suslėgto oro balionėlį.
- Paviršiaus valymas: Wipe the keyboard's aluminum case and keycaps with a soft, slightly damp, nepūkuota šluoste. Venkite stiprių cheminių medžiagų ar abrazyvinių medžiagų.
- Gilus valymas (klaviatūros dangteliai): For thorough cleaning, keycaps can be removed using the provided keycap puller and washed with mild soap and water. Ensure they are completely dry before reattaching.
5.2 Komponentų išardymas ir surinkimas
The Keychron Q7 is designed for easy disassembly and assembly, facilitating modifications and maintenance. Refer to the exploded view diagrama komponentų identifikavimui.

5.1 paveikslas: Išsklaidytas view of the Keychron Q7, showing individual components like keycaps, switches, top case, plate, gaskets, sound absorbing foam, PCB, case foam, silicone gaskets, and bottom case.
When disassembling, use the provided screwdriver and hex key. Exercise caution to avoid damaging internal components or stripping screws. Reassemble components in reverse order, ensuring all connections are secure.
6. Problemų sprendimas
- Klaviatūra nereaguoja:
- Įsitikinkite, kad USB-C laidas yra tvirtai prijungtas prie klaviatūros ir kompiuterio.
- Išbandykite kitą kompiuterio USB prievadą.
- Verify the Mac/Windows switch on the back of the keyboard is set to the correct operating system.
- Jei yra, išbandykite su kitu USB-C laidu.
- Neveikia tam tikri klavišai:
- Due to the hot-swappable design, a switch might not be fully seated. Gently remove the keycap and then the switch using the puller, then reinsert the switch firmly.
- If the issue persists, try swapping the problematic switch with a known working switch from another key to determine if the switch itself is faulty.
- Check VIA software to ensure the key has not been accidentally remapped or disabled.
- Foninio apšvietimo problemos:
- Ensure the backlight is enabled via the keyboard's function keys or through the VIA software.
- Sureguliuokite ryškumo nustatymus.
- If only certain LEDs are not working, it might indicate a faulty LED or switch.
- QMK/VIA Software Not Detecting Keyboard:
- Ensure the VIA software is the latest version.
- Try restarting your computer and the VIA application.
- Ensure the keyboard is connected directly to your computer, not through a USB hub.
For further assistance, please refer to the Keychron official support resources.
7. Specifikacijos
| Funkcija | Detalė |
|---|---|
| Modelis | Keychron Q7 |
| Išdėstymas | 70 % (72 klavišai) |
| Korpuso Medžiaga | Full CNC Machined Aluminum |
| Jungiklio tipas | Gateron G Pro Blue (Hot-swappable) |
| Klaviatūros | Dvigubo šūvio PBT, OSA Profile |
| Ryšys | Laidinis (USB-C) |
| Foninis apšvietimas | Į pietus nukreiptas RGB |
| Firmware | QMK/VIA Programmable |
| Tarpiklių dizainas | Double-Gasket Structure |
| Suderinama OS | „Mac“, „Windows“, „Linux“ |
| Gaminio matmenys | 13.44 x 4.76 x 1.33 colio |
| Prekės svoris | 5.17 svaro |

Image 7.1: Detailed specifications for the Gateron G Pro Blue Switch, including operating force, pre-travel, travel distance, and sound level.
8. Garantija ir palaikymas
8.1 Gaminio garantija
Keychron products are covered by a manufacturer's warranty against defects in materials and workmanship. The specific terms and duration of the warranty may vary by region and product. Please retain your proof of purchase for warranty claims.
8.2 Pagalba klientams
For technical support, warranty inquiries, or additional information, please visit the official Keychron websvetainėje arba susisiekite su klientų aptarnavimo skyriumi.


